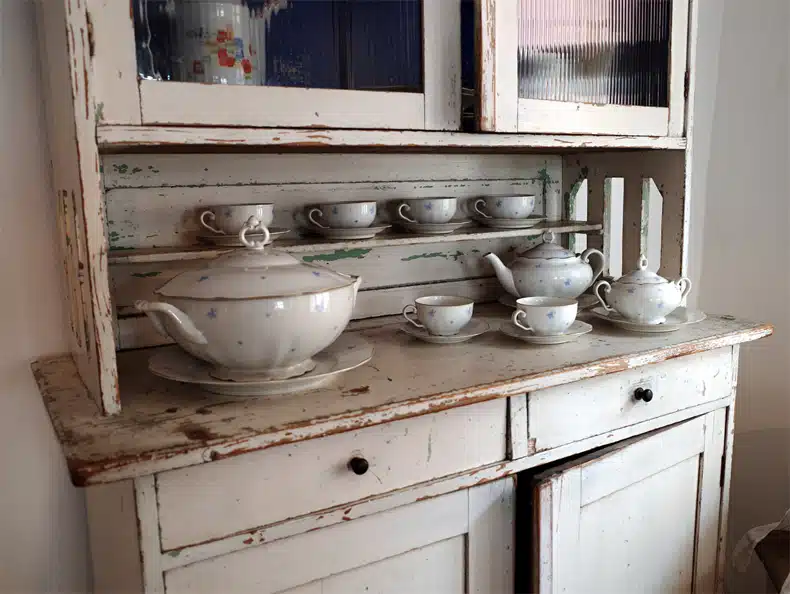
Do you wish to give your kitchen a timeless and iconic look? Vintage kitchen cabinets can help you achieve this goal. But restoring vintage kitchen cabinets is a challenging task.
It takes time, effort, patience, and the right tools. This guide will help you restore vintage kitchen cabinets. It is comprehensive and easy to understand.
From prepping the cabinets to refinishing them and adding decorative accents. We’ll also provide advice on how to find high-quality vintage materials that are in good condition.
After reading this article, you can restore your vintage kitchen cabinets!
Ready to give your kitchen an upgrade? Let’s start making a retro-style kitchen! This simple guide will show you how to restore vintage kitchen cabinets.
Assessing The Condition Of Your Cabinet
Before beginning to restore your old kitchen cabinets, check their current condition. This will aid you in deciding what type of restoration is necessary and if you can save the cabinets.
To better understand the work you need to do, check for any signs of water damage, rot, rust, mold, and other types of damage. Look inside the cabinet as well.
Once you’ve identified any problem areas, it’s time to start planning out your restoration project. Take accurate measurements to know what supplies and tools you’ll need for the job.
Research different options for restoring your cabinets, such as painting or staining them.
Before the restoration work, prepare your workspace by clearing away any furniture. And ensuring you have plenty of light to work in.
Make sure to use protective gear like gloves and a mask when sanding or working with hazardous materials. These steps will help ensure your vintage kitchen cabinet restoration project goes successfully!
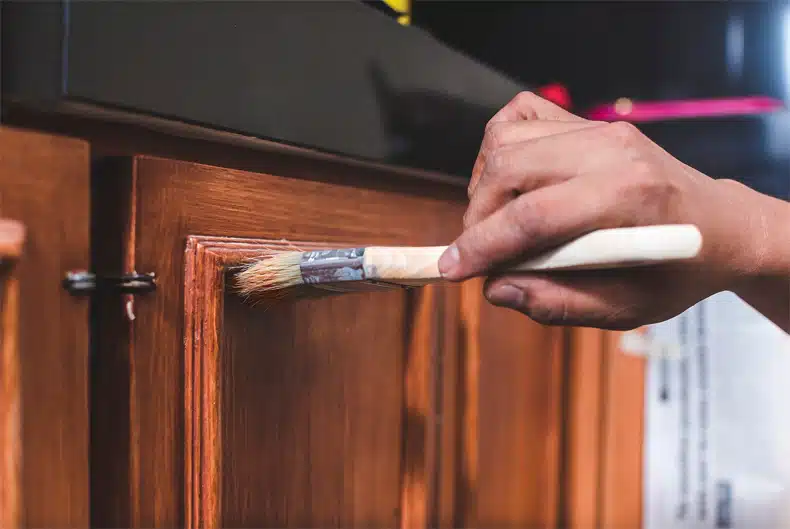
Removing Old Paint Or Varnish
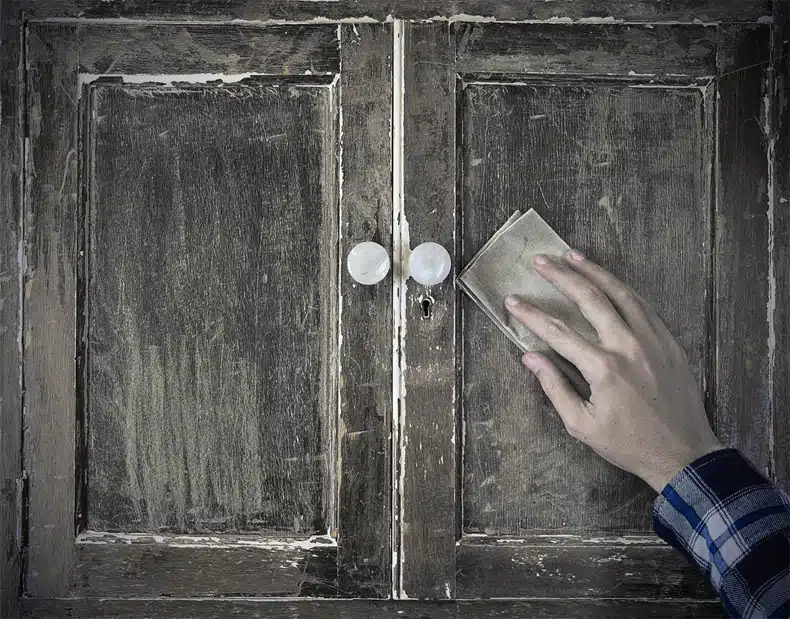
Removing old paint or varnish is the next step in restoring vintage kitchen cabinets. It can be tricky, so it’s important to take your time and follow all safety precautions.
Before you start, ensure you have the items you need, like a chemical stripper, gloves to protect your hands, safety glasses, and good airflow.
Start by applying a thick coat of chemical stripper to your cabinets with a brush. Make sure you cover all cabinet parts and don’t let them dry before wiping them off with a rag or steel wool.
Once the finish has been stripped, use a moist towel to erase any remnants. Then use sandpaper to smooth out any rough patches or chips in the wood.
Now your cabinets are ready for priming and painting! Take care to clean them before you begin so that any dirt or dust doesn’t interfere with the paint job.
For best results, apply several coats of primer before finishing with two coats of paint. With these steps, your vintage kitchen cabinets should look as good as new!
Repairing Damaged Areas
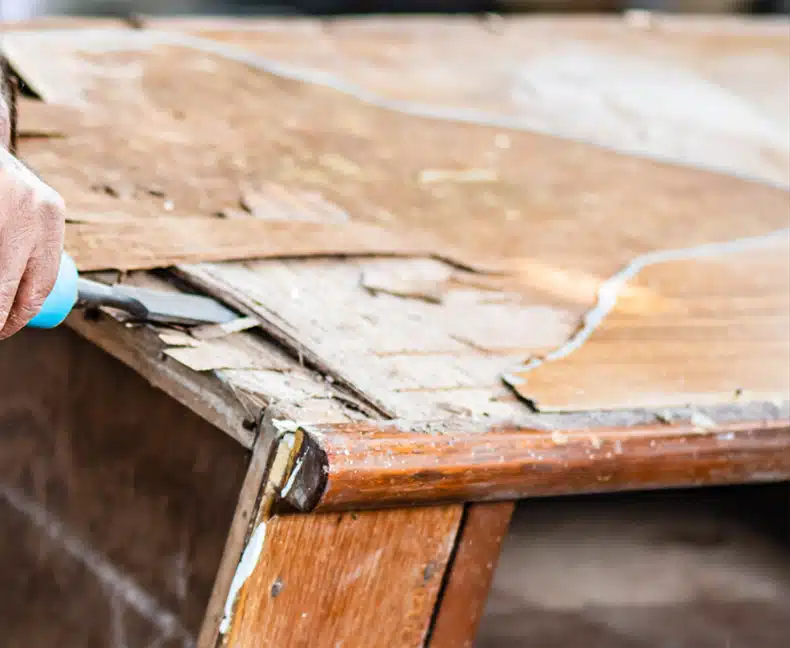
Repairing damaged areas is an essential part of restoring vintage kitchen cabinets. Assess the damage to your furniture. Can you repair it yourself, or do you need to hire a professional carpenter?
First, use sandpaper to smooth out any rough edges in the area that needs repair. Then, fill in any holes or cracks with wood putty. Let the putty dry completely before continuing with your project.
You may need to fix any missing parts or strengthen the cabinet door or drawer front.
When you are ready to complete your repairs, you can choose to paint, stain, or varnish. It depends on the style you want. All these will help bring back life and beauty to your cabinets and protect them from further damage.
Sanding And Priming The Surface
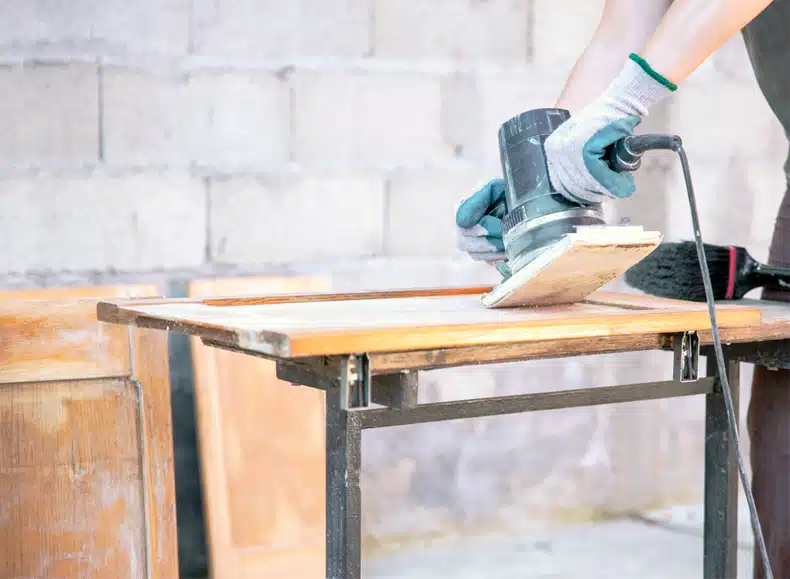
Now that the damaged areas of your kitchen cabinets have been taken care of, it’s time to get to sanding and priming. Sanding is an important step in preparing the surface for a fresh coat of paint or stain. It helps create a smooth finish and helps the new finish adhere better.
When sanding, you’ll want to use medium-grit sandpaper to start. This will help remove any imperfections on the surface, like dents or scratches. Check all parts of the cabinet, including corners and small spaces that are hard to get to.
Once you finish the coarse sandpaper, switch to a fine-grit one for a more polished look.
Once you’ve finished sanding, it’s time to prime the cabinet. Primer protects surfaces from moisture, making it easier for paint or stain to stick.
When applying primer, use even strokes and cover all areas of the cabinet. Give the primer a few hours to dry before you move on with your project. The time it takes to dry varies according to the kind of primer you use.
Choosing The Right Paint Or Stain
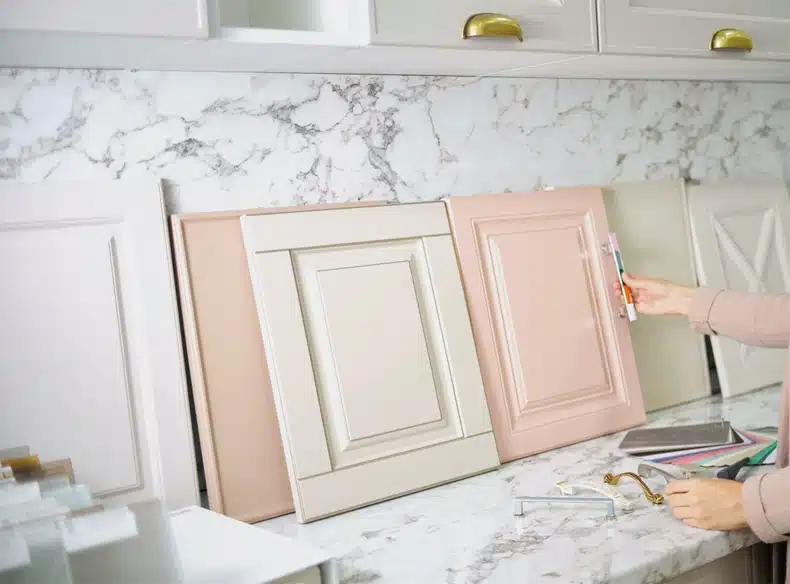
Once the sanding is done, it’s time to pick the perfect paint or stain for the antique kitchen cabinets. This step is vital to ensure their new look lasts many years.
When choosing a paint or stain, there are several factors to consider. For example, oil-based paint is the way to go if you want a glossy finish.
Yet, water-based products may be better suited for those looking for a matte finish. Additionally, stains can enhance the natural wood grain patterns of the cabinets. This will create a unique look.
No matter what paint or stain you choose, make sure it’s suitable for use on cabinets. Test it on a small area of the cabinet beforehand to ensure it will look great with your desired outcome.
Applying The Paint Or Stain
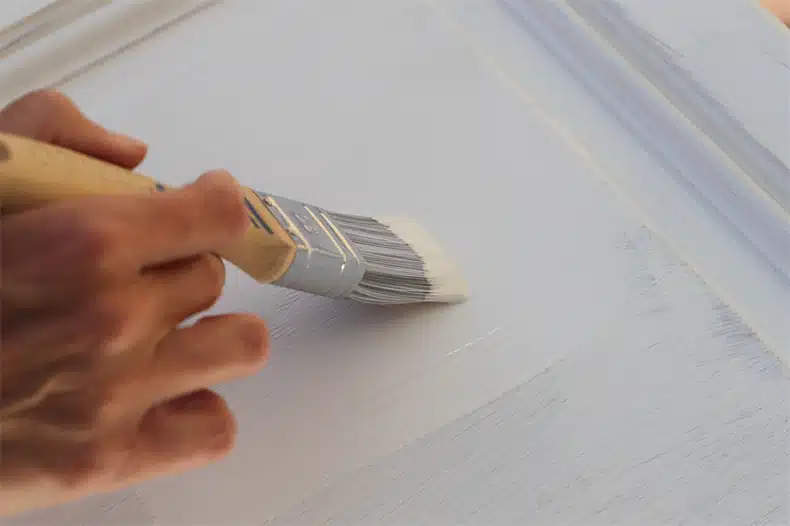
Once you have chosen the right paint or stain for your vintage kitchen cabinets, it’s time to apply it. Remember to consider the importance of this step. How you apply the paint or stain will determine how good your finished product looks.
The first step you need to do is to make sure your surface is clean and free of any dirt or grease. If there are any dents, scratches, or other imperfections, fill them in with wood putty and sand them down.
Using a quality brush, apply the paint/stain across the entire surface of your cabinets once you are done.
It’s essential to take your time with this process and cover every area well. Use slow, even strokes, and remember to wipe off any excess paint/stain that accumulates on the edges or corners.
Once you finish, ensure the paint/stain is dry before restoring the vintage kitchen cabinets.
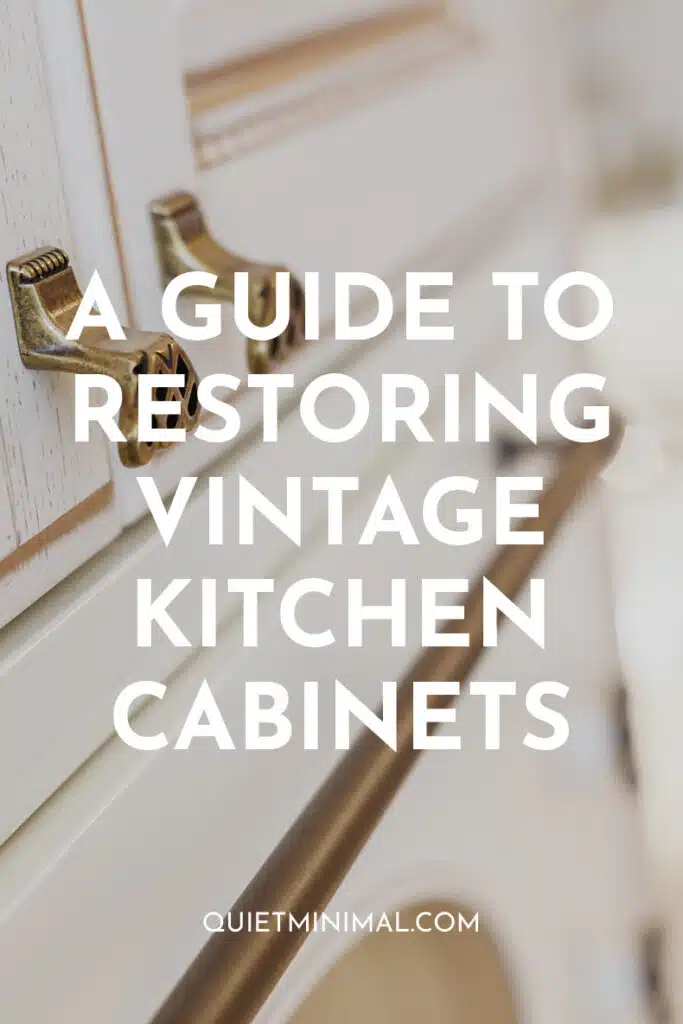
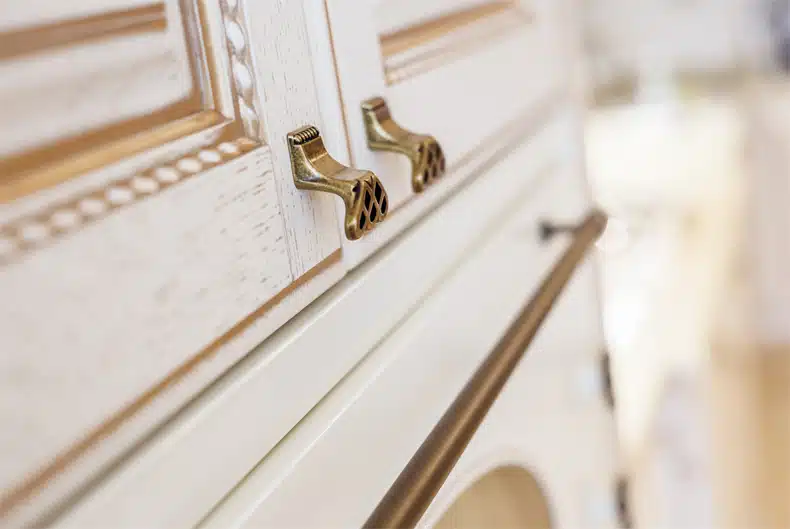
Replacing Hardware And Fixtures
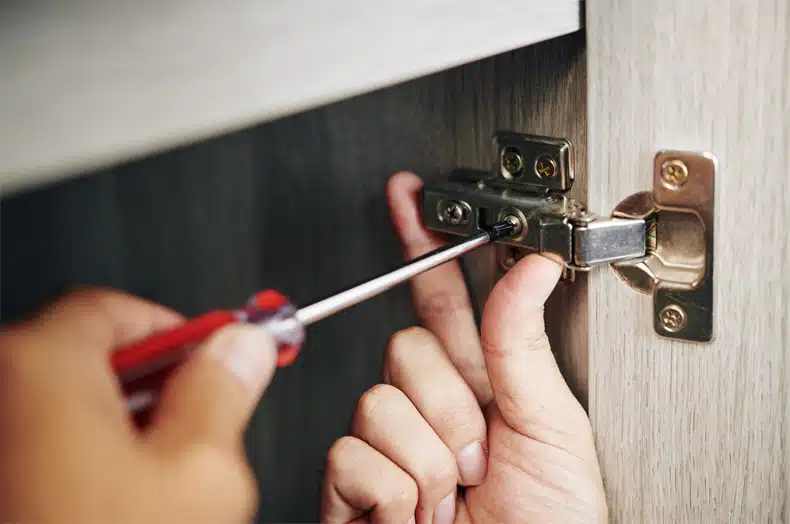
Now that you’ve applied the paint or stain, it’s time to move on to replacing hardware and fixtures. This step is essential to ensuring your vintage kitchen cabinets look as good as new.
You can Replace the hardware with a screwdriver. Start by removing the old screws and then fit the new hardware in place. Ensure the screws are tight and don’t come loose over time. Consider replacing any hinges or handles, too.
Finally, you can add extra fixtures once the new hardware is in place. This could include anything from a fresh coat of paint on cabinet doors. Or drawers to add extra shelves for storage.
These details will help make your vintage kitchen cabinets look complete and polished.
Restoring Doors And Drawers
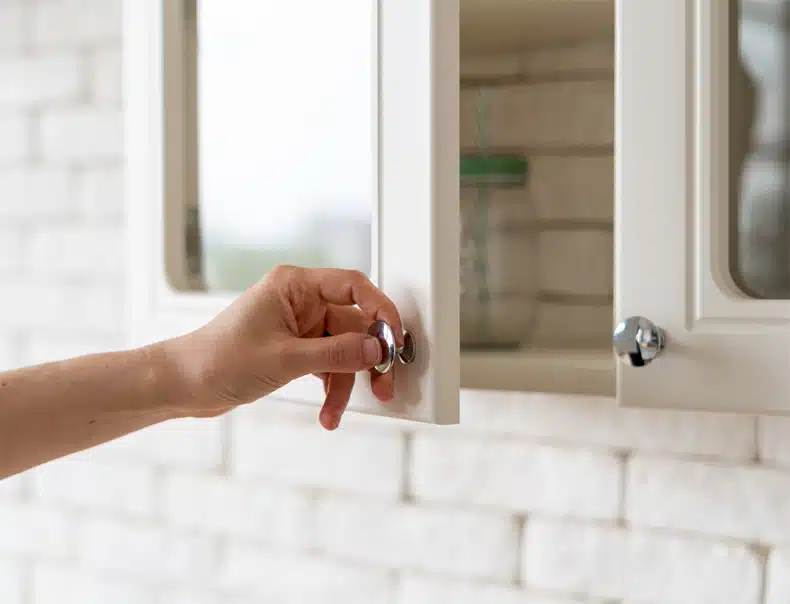
The eighth step in restoring vintage kitchen cabinets is to restore the doors and drawers. This can involve sanding, staining, and refinishing them to make them look new.
Depending on the condition of the cabinets, it may be necessary to replace damaged pieces that have been damaged or worn down over time.
When restoring doors and drawers, paying close attention to detail is important. Before using a sander and sandpaper, do a deep clean. This will help get rid of any old paint or varnish layers.
Once this has been done, you can apply fresh paint or stain in the desired color.
Finally, make sure you have attached all fixtures and hardware, so they don’t come loose over time. When complete, you should have a set of cabinets that look like new!
Adding A Protective Finish
Now that you’ve restored the doors and drawers of your cabinets, it’s time to add a protective finish. This step is crucial as it will help protect the cabinets from wear and tear over time. A protective finish can come in many forms, such as clear lacquer or sealant.
When picking a finish for your cabinets, ensure it works with your existing materials. You’ll also want to ensure that whatever product you choose will not discolor or damage the wood.
Read all instructions before you start. Some finishes may need many layers or special techniques.
Decide on a protective finish, read the instructions, and apply it. Take a clean cloth or brush and put the finish on the whole surface of each cabinet door and drawer in even motions.
Allow plenty of time for each layer to dry before applying more coats if necessary.
Bringing Out The Character Of Your Cabinet
Character is essential when it comes to restoring vintage kitchen cabinets. It’s what makes the piece unique and stands out from the rest. In this step, we’ll explore how to bring out the character of your cabinet.
First, try to identify any existing flaws or imperfections in the cabinet. These could be anything from cracks, chips, or dents in the wood to faded paint or dark stains.
While these may seem like they need fixing, they can add charm and personality to your piece.
Next, determine what kind of finish you’d like for your cabinet. You can choose between an oil- or water-based finish, depending on the look you’re going for.
Both types of finishes will protect against wear and tear. While also bringing out the beauty of your piece.
When restoring an antique kitchen cupboard, make sure to apply many coats of finish. You can create a beautiful piece with plenty of character with patience and effort!
Conclusion
In conclusion, restoring vintage kitchen cabinets can be a rewarding experience. With the right tools and materials, you can bring back the old-world charm of your kitchen.
After examining the cabinet, get rid of any existing paint or varnish. Fix any damaged parts and use sandpaper and primer to prepare the surface. Now you can choose the right paint or stain to give your cabinet a new look.
Remember to replace any hardware or fixtures that are missing or broken. Restore any doors and drawers. And add a protective layer to your restored cabinet to ensure it can handle wear and tear for a long time.
The cabinets will look when you finish! The character they now have is something no store-bought cabinet will ever have.
Restoring vintage kitchen cabinets gives them a second chance at life. And preserving their beauty for generations. I’m sure you’ll agree it’s worth every minute spent restoring these timeless pieces!
Follow Quiet Minimal on Pinterest for more home inspiration and ideas.