 Georgia
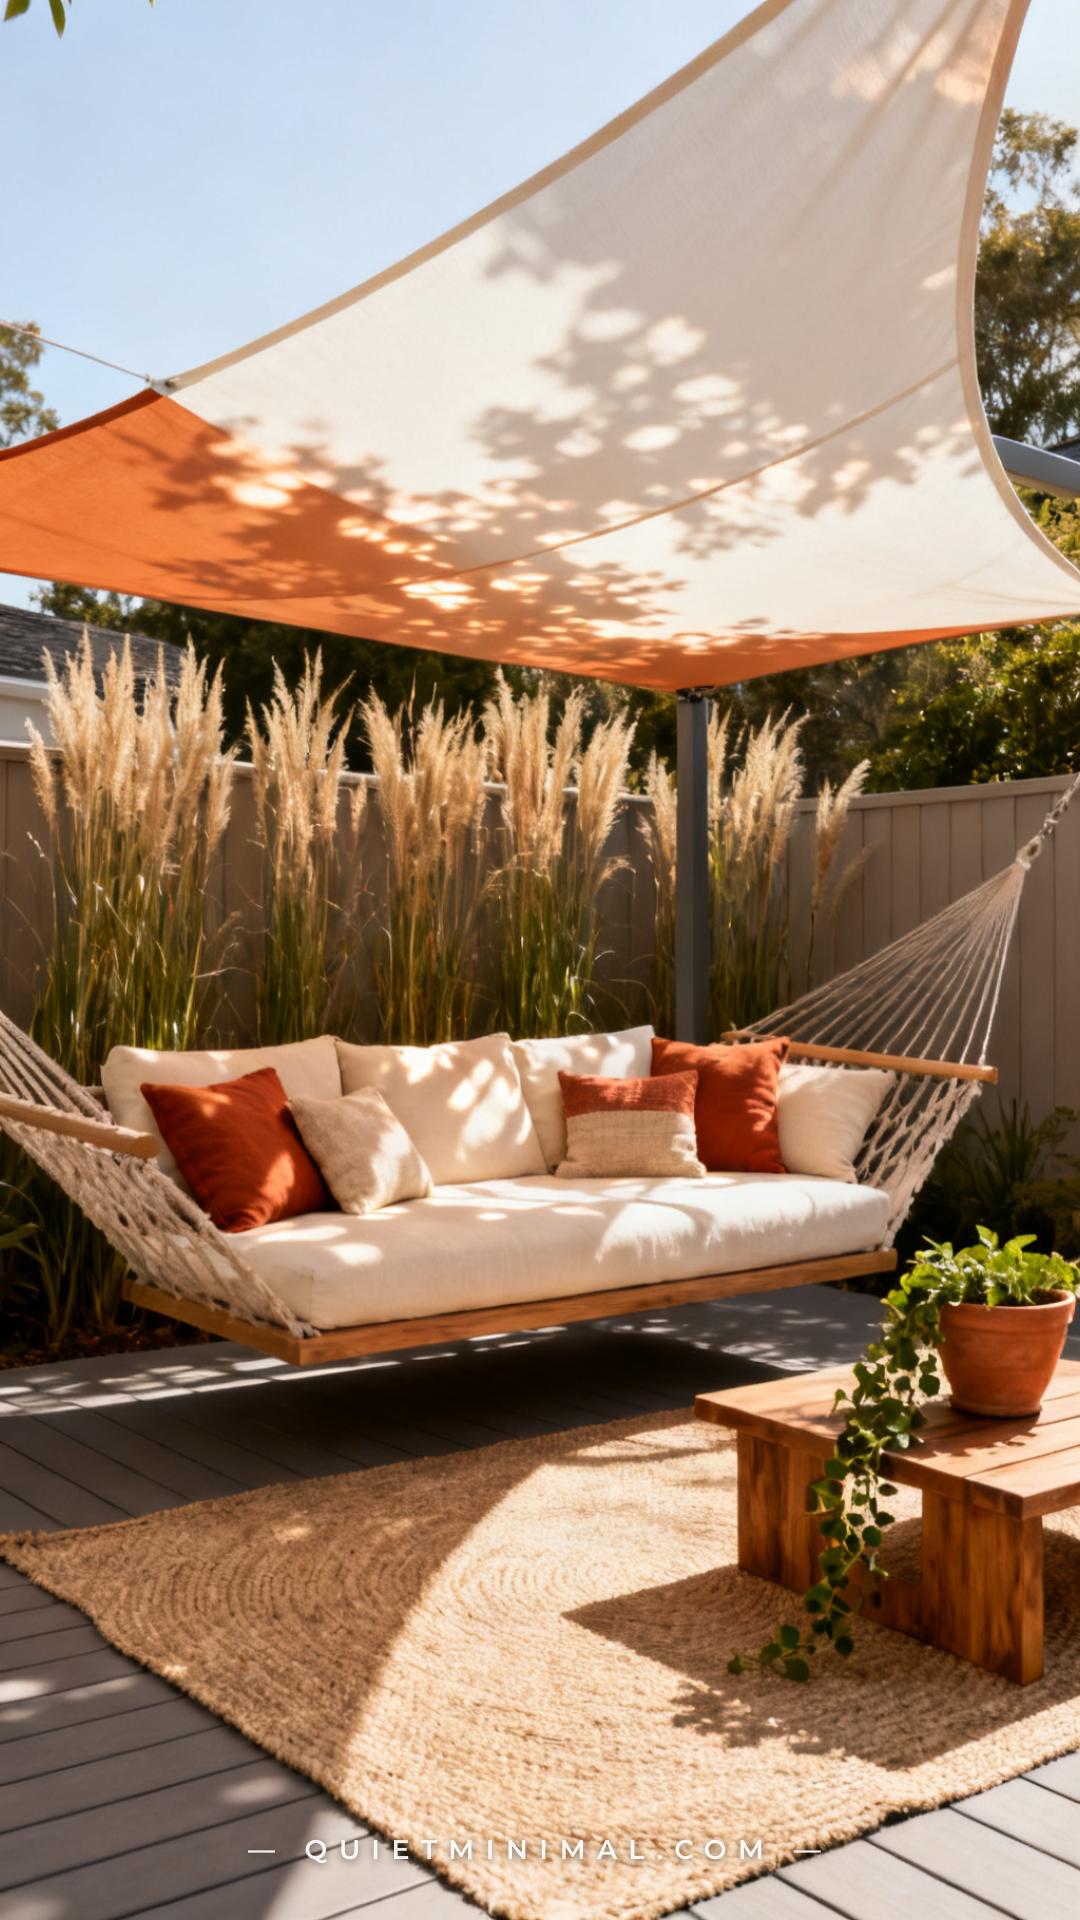
If your backyard has a corner you keep meaning to “do something with,” this is the article. A hammock daybed paired with a proper shade structure is the fastest way to turn an empty patch of grass or patio into a space that actually gets used — something that looks designed, not improvised. The difference between a backyard that photographs beautifully and one that just exists comes down to layers: an anchor piece, overhead coverage, a ground plane, comfort, and a few finishing details that make the whole thing feel like a room instead of a furniture dump. These 15 ideas work through each layer of the outdoor lounge zone, with specific products for every step.
1. Choose a Freestanding Hammock Daybed as Your Anchor Piece
 Save
The freestanding hammock daybed is the single most important decision in this build because it sets the scale and style for everything else. A steel arc-frame model (sometimes called a hanging daybed or swing daybed) offers the swing motion of a hammock with the surface area of a proper lounger — large enough for two people or one person fully stretched out with a book. Look for powder-coated steel frames in matte black or antique bronze, which weather better than raw metal and anchor the aesthetic cleanly against natural materials. The cushion thickness matters more than most buyers expect: a 4-inch or thicker cushion with a removable, washable cover is worth the price premium because thin cushions compress within a season.
Key Takeaway: A freestanding arc-frame hammock daybed with a 4-inch weatherproof cushion is the investment that makes every other element of the zone worth having.
From the guides
You've saved it, wanted it. Here's the how: codes, measurements, order. Your choices make it yours.
 The Japandi Honest PlaybookThe honest version of the style: what to keep, what to skip, and the order to do it in.See inside →
 The Room Refresh PlaybookA repeatable four-step method, room by room, in ten minutes, thirty minutes, or one weekend.See inside →
 Make Any Room Feel Cozy on PurposeWhy some rooms hold people and others empty out, and the moves that change it.See inside →

2. Install a Shade Sail for Clean, Modern Overhead Coverage
 Save
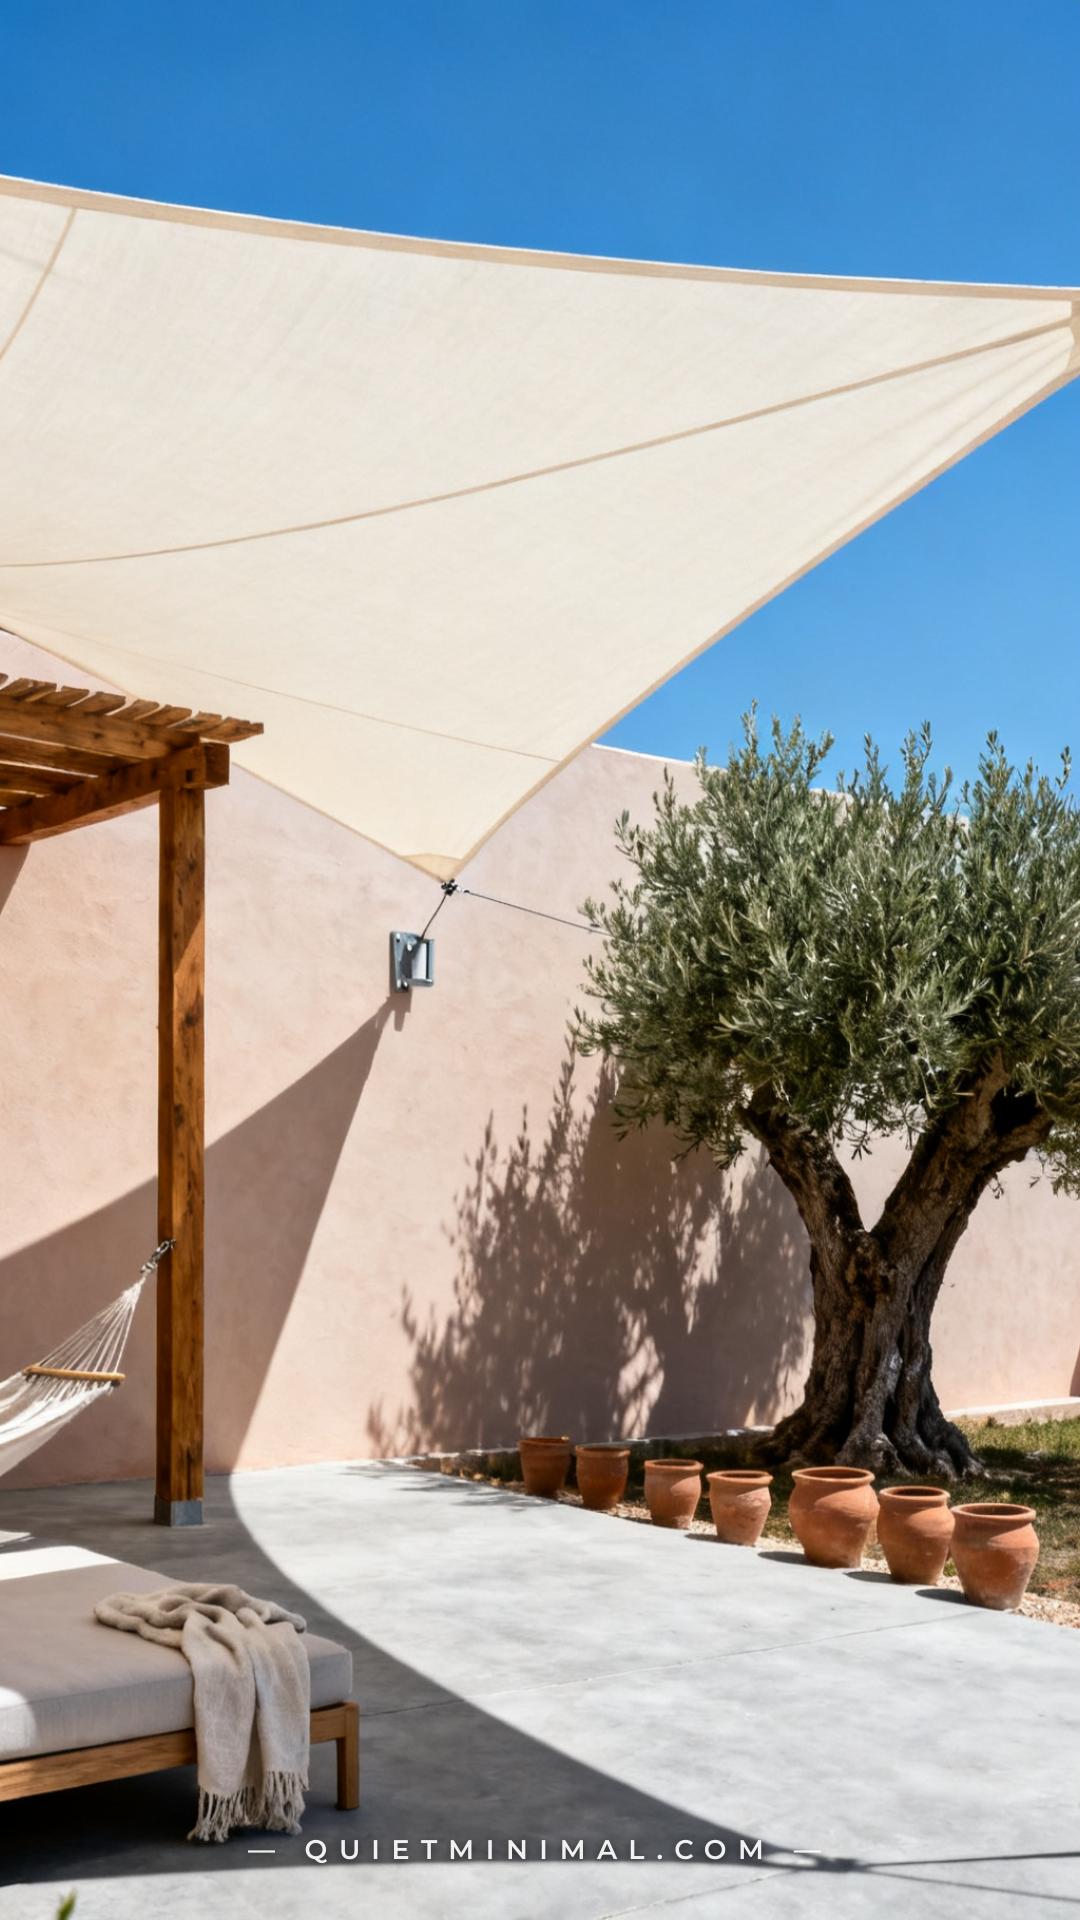
A shade sail is the most popular overhead solution for hammock daybed zones because it’s lightweight, relatively affordable, and has a modern geometric look that reads as intentional rather than improvised. Triangular and square sails both work — triangles layer better if you want to overlap two or three for more coverage, while a single large square sail (between 12×12 and 16×16 feet) covers most standard daybed setups on its own. The attachment hardware matters as much as the sail itself: use stainless steel D-ring hardware anchored into masonry, a wood post, or a dedicated steel pole — flimsy attachments are the leading cause of sails failing in wind. Choose HDPE fabric with UV block ratings of 90% or higher for real shade, not just decoration.
Key Takeaway: A 12×12 or larger HDPE shade sail with proper stainless steel anchor hardware gives you clean modern shade that survives wind and stays looking sharp season after season.

3. Build a Pergola Frame for a More Permanent Shade Zone
 Save
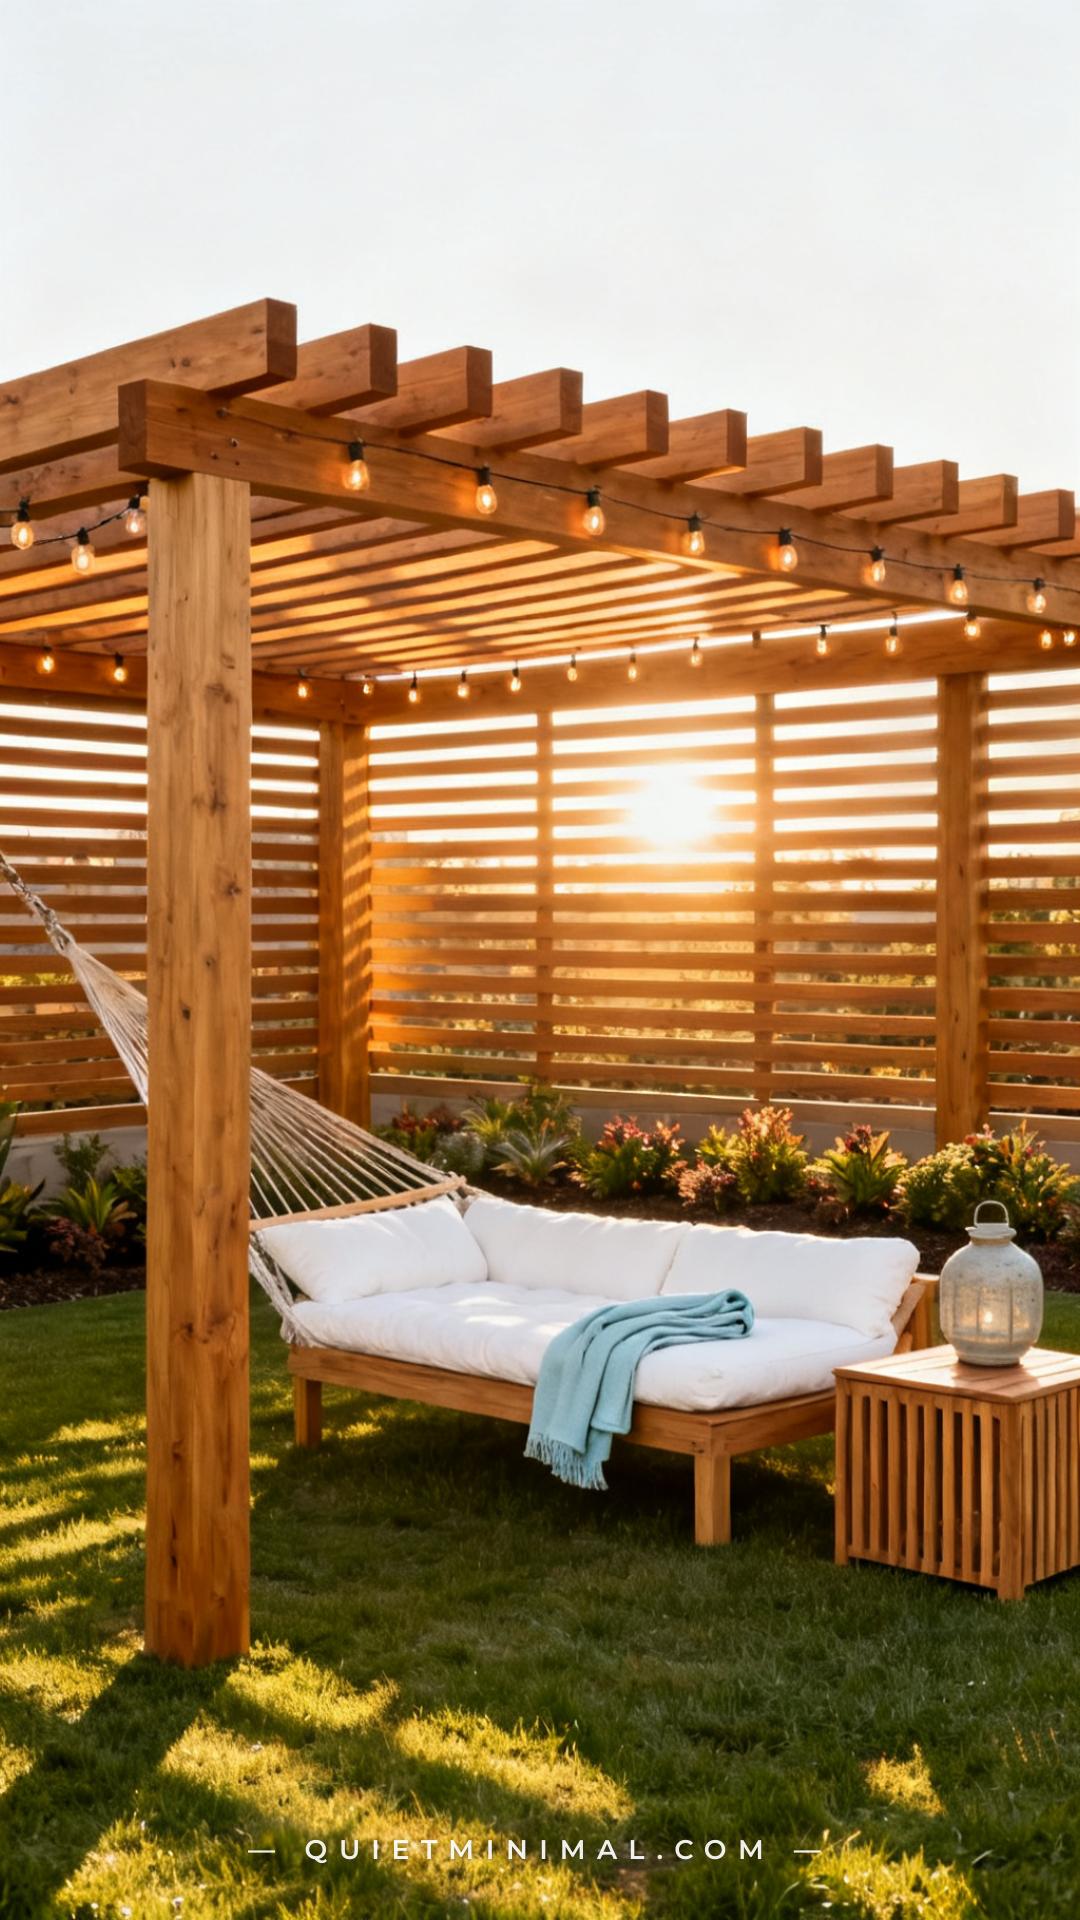
If you want the lounge zone to feel like a permanent outdoor room rather than a seasonal setup, a freestanding pergola frame gives you the structure to build around. Modern pergola kits in powder-coated aluminum or natural cedar can be installed without a contractor and come with adjustable louver systems that let you dial in the shade angle throughout the day. The key design move is to size the pergola at least two feet wider and deeper than the footprint of the daybed — this gives you breathing room to add a side table, a planter, or a small outdoor rug without everything feeling cramped inside the frame. A pergola also gives you anchoring points for string lights, outdoor curtains, and hanging planters.
Key Takeaway: Size your pergola at least two feet larger than the daybed footprint on every side so the shade zone has room to breathe and layer.

4. Define the Ground Plane with an Outdoor Rug
 Save
An outdoor rug does for a backyard lounge zone what a rug does in a living room — it defines the space and makes the furniture arrangement feel intentional rather than just placed. Flat-weave polypropylene rugs are the right material for outdoor use: they resist UV fade, drain quickly after rain, and don’t trap dirt the way high-pile rugs do. Size up: most buyers purchase a rug that’s too small. For a hammock daybed with a side table, you want the rug to extend at least 18 inches beyond the front edge of the daybed frame and 12 inches on either side. A 9×12 is a good starting point for a standard freestanding arc-frame model. Stripe and geometric patterns age better than floral in outdoor sun.
Key Takeaway: Choose a flat-weave polypropylene rug sized at least 9×12 and let it extend well beyond the daybed frame so the zone reads as a defined outdoor room.

5. Layer Outdoor Throw Pillows for Comfort and Color
 Save
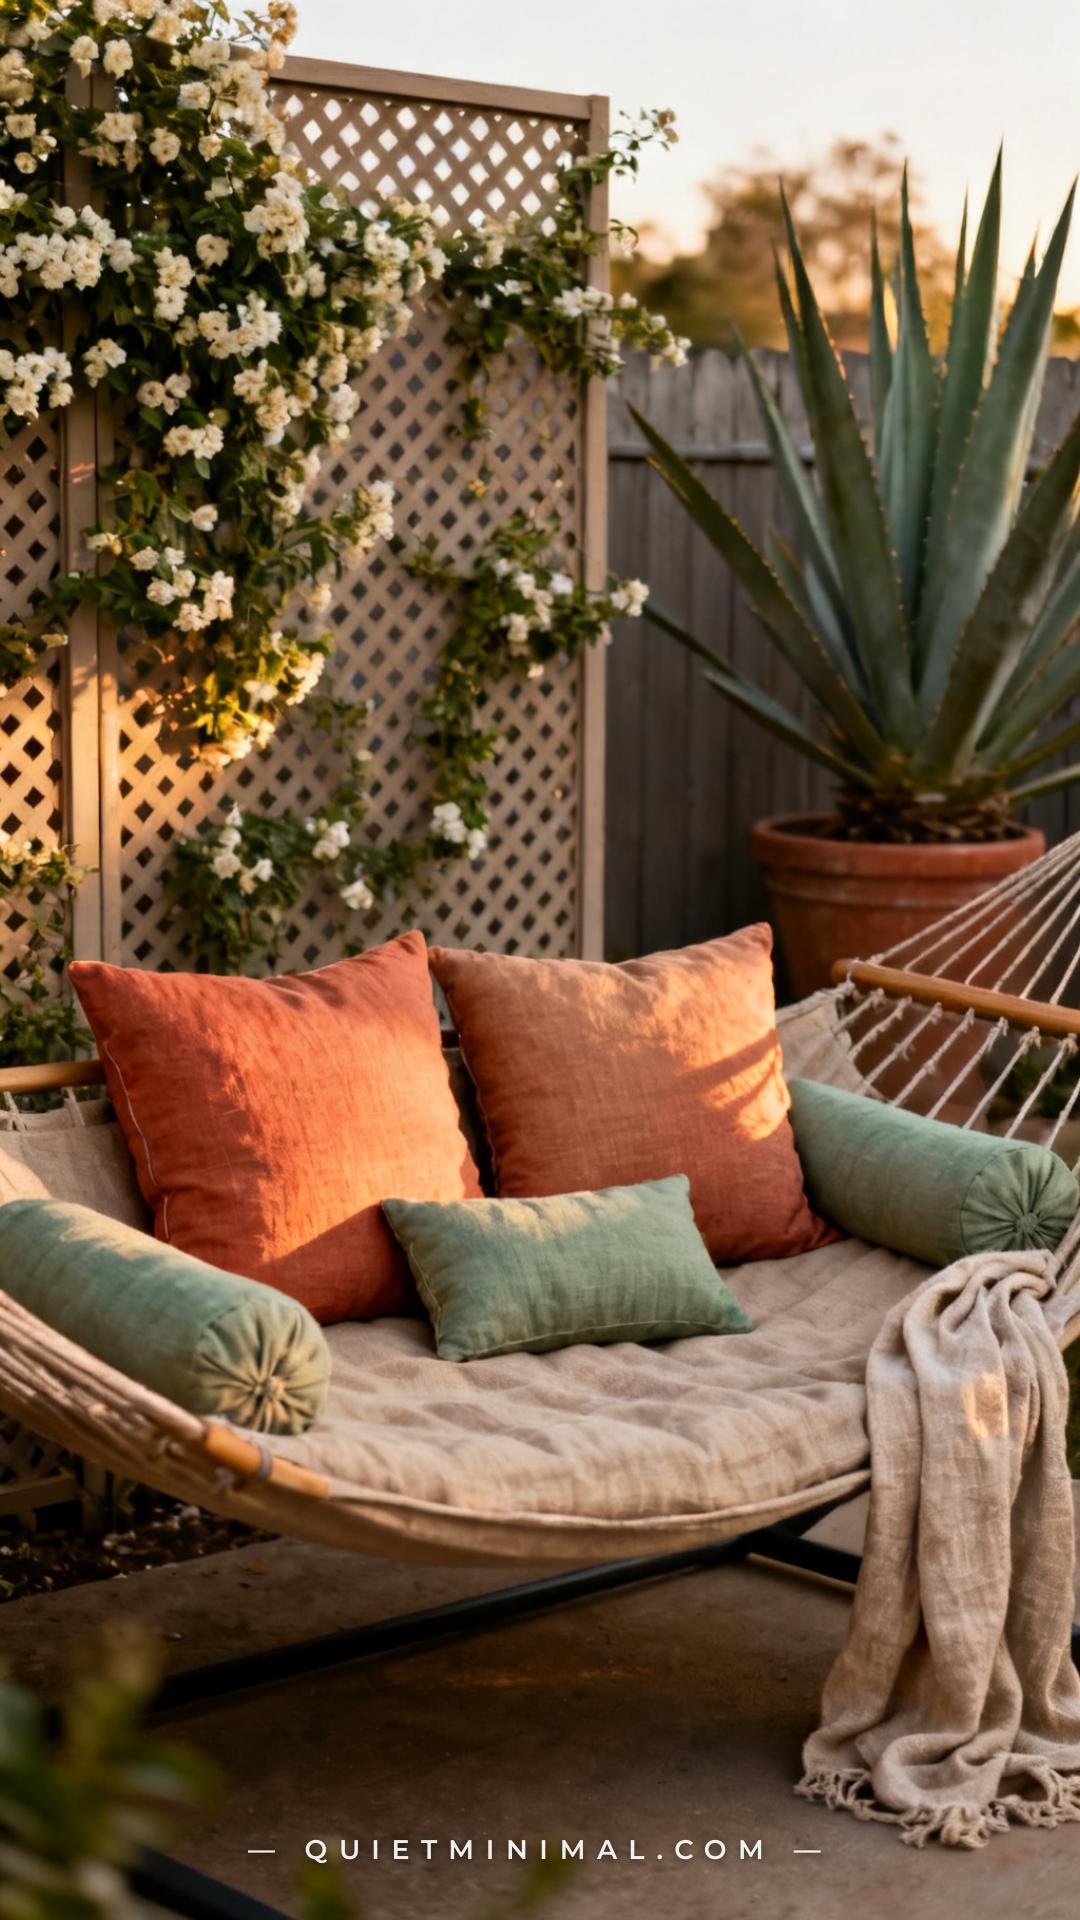
Outdoor throw pillows are where the lounge zone shifts from a product arrangement to something that actually looks styled. The formula that works consistently: two large square pillows (22×22) at the back for support, two medium bolsters along the sides, and one lumbar pillow in front as the accent. Keep your palette to three tones — one neutral (warm white, sand, oatmeal), one warm earthy mid-tone (terracotta, dusty clay, rust), and one muted accent (sage green, dusty blue, warm olive). All outdoor pillows should be filled with polyester fiberfill and covered in solution-dyed acrylic or polyester — these resist fade and dry fast after rain. Avoid foam inserts outdoors; they retain moisture and mold.
Key Takeaway: Use a three-tone pillow palette with two large squares, two bolsters, and one lumbar accent — all solution-dyed and polyester-filled for outdoor durability.

6. Add a Low Side Table Within Arm’s Reach
 Save
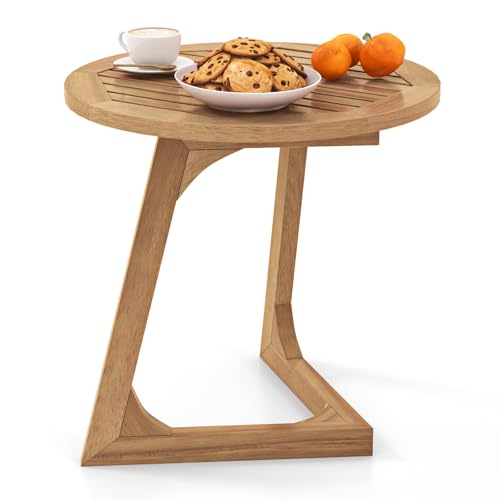
A low side table at the right height is the most practical detail in the backyard lounge zone and the one most people skip or underbuy. The target height is 16–20 inches — slightly below the height of the hammock daybed cushion when it’s occupied, so you can reach a drink or phone without sitting up. Teak is the best outdoor wood for this application because it weathers naturally to a silver-grey without rotting, or you can oil it annually to keep the warm honey tone. Round tables work better than rectangular beside hammock daybeds because the daybed swings and a hard corner becomes a shin hazard. Look for a solid-top teak round table — slatted or grid tops let small items fall through.
Key Takeaway: Position a solid-top round teak table at 16–20 inches height within 8 inches of the daybed edge — low enough to reach from a reclining position, round enough to avoid swing-collision corners.
7. Hang String Lights for Evening Atmosphere
 Save
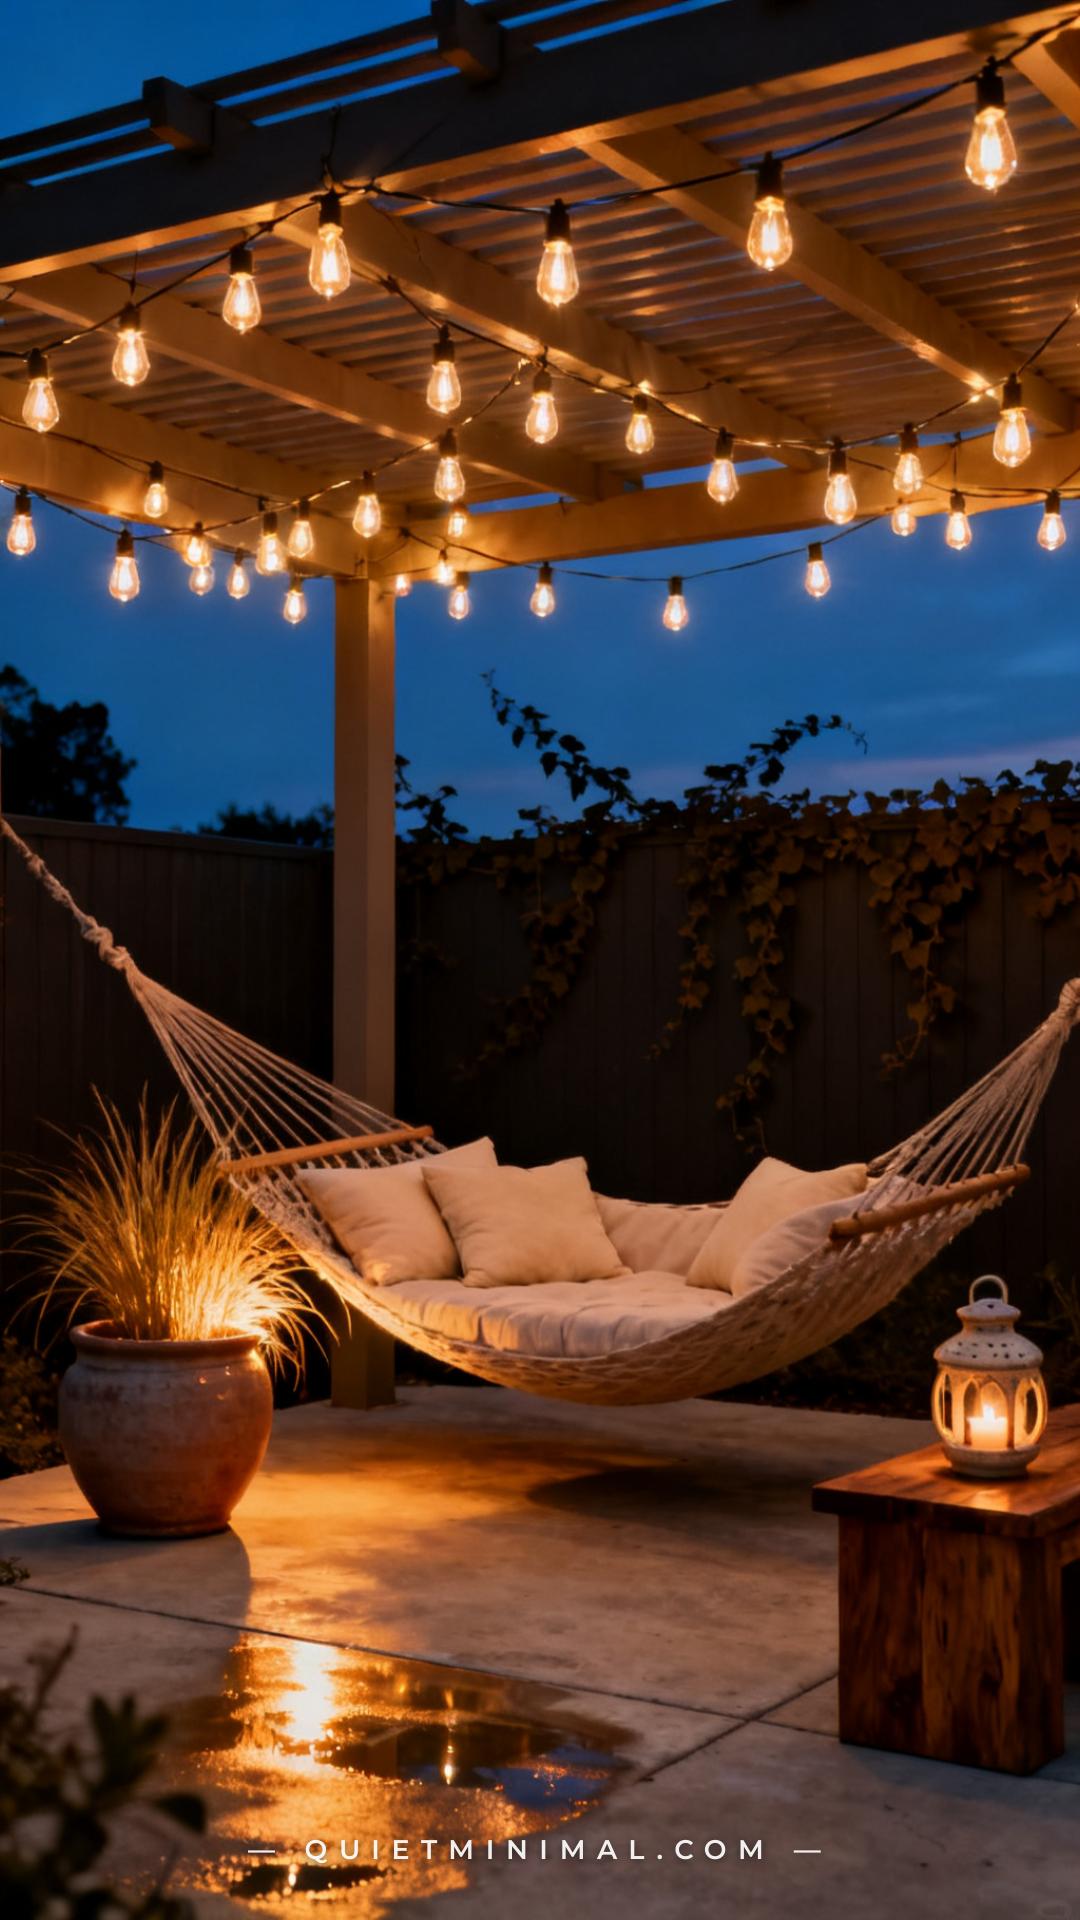
String lights are the single detail that extends the backyard lounge zone from a daytime feature to an evening destination. The key is in the mounting — draping them loosely across a pergola or shade structure in a canopy pattern rather than stringing them in a straight perimeter line creates a more enveloping atmosphere. For outdoor use, look for string lights with commercial-grade wire (not the thin consumer-grade wire that cracks after one winter), E26 base bulbs, and a waterproof rating of IP44 or higher. Warm white at 2200–2700K is the right color temperature for this application — it reads as candlelight-warm without the harshness of cool white. Avoid battery-powered string lights for a permanent zone; solar or plugin are more reliable.
Key Takeaway: Use commercial-grade IP44-rated string lights at 2200–2700K in a loose canopy drape pattern — warm, enveloping, and reliable enough to leave up season-long.

8. Create Privacy with Outdoor Curtain Panels
 Save
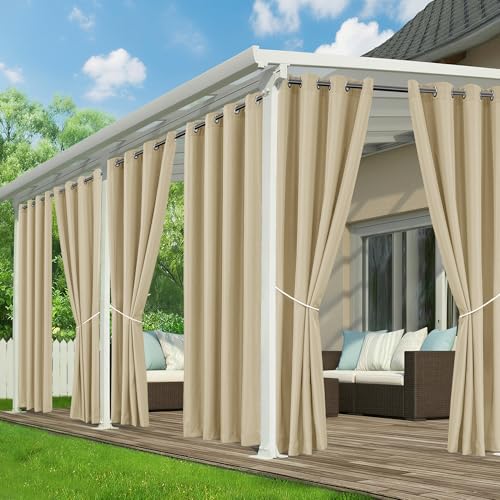
Outdoor curtain panels hung from the pergola or shade structure posts transform the lounge zone from an open patio into a sheltered retreat — they add privacy from neighbors, block afternoon sun from the west, and create the sense of enclosure that makes the space feel like an actual room rather than furniture on concrete. Look for curtains made from solution-dyed acrylic or outdoor polyester in a linen-look weave: these materials resist fade and moisture without becoming stiff. Grommeted tops thread directly onto curtain rods or tension wire — avoid tab-top styles outdoors because the tabs degrade faster than the fabric. For a 10-foot pergola height, 108-inch panels allow a slight floor puddle that reads as intentional and luxurious.
Key Takeaway: Hang 108-inch solution-dyed outdoor curtain panels from your pergola posts to create enclosure, manage afternoon sun, and turn an open patio into a sheltered lounge room.
9. Use Planters and Greenery as Natural Walls
 Save
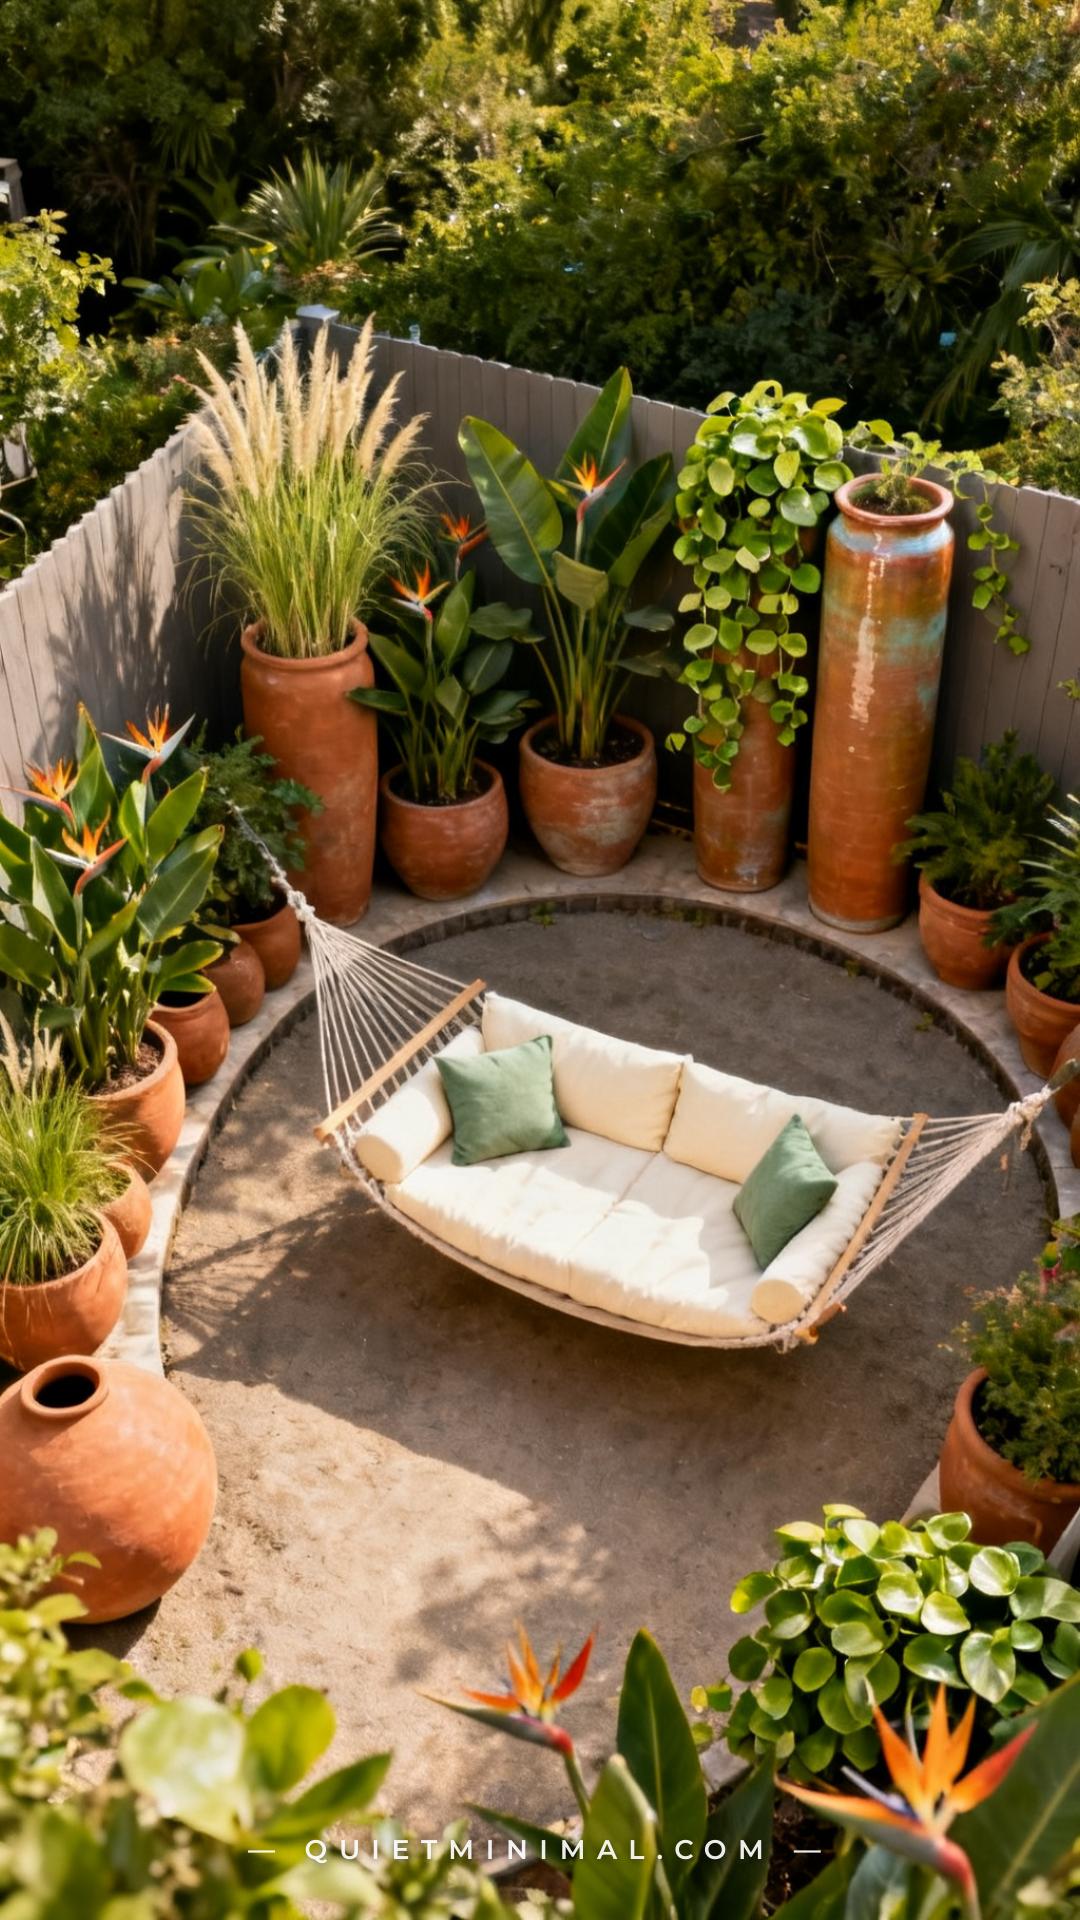
Planters used strategically around the hammock daybed zone create a sense of enclosure without requiring permanent walls or fencing. The approach that reads as intentional rather than accidental is to vary the planter heights in three tiers: low round pots (12–16 inches) at ground level with trailing or mounding plants, mid-height pots (24–32 inches) with upright plants like ornamental grasses or rosemary, and tall statement pots (36 inches and up) with structural plants like bird of paradise or phormium. Group planters in odd numbers (3 or 5) for a natural, non-symmetrical look. Terracotta and matte-glazed ceramic are the right materials — they read as permanent and intentional where plastic reads as temporary.
Key Takeaway: Arrange planters in three height tiers with odd-number groupings to create a soft, living enclosure around the lounge zone that obscures the fence without adding permanent structure.

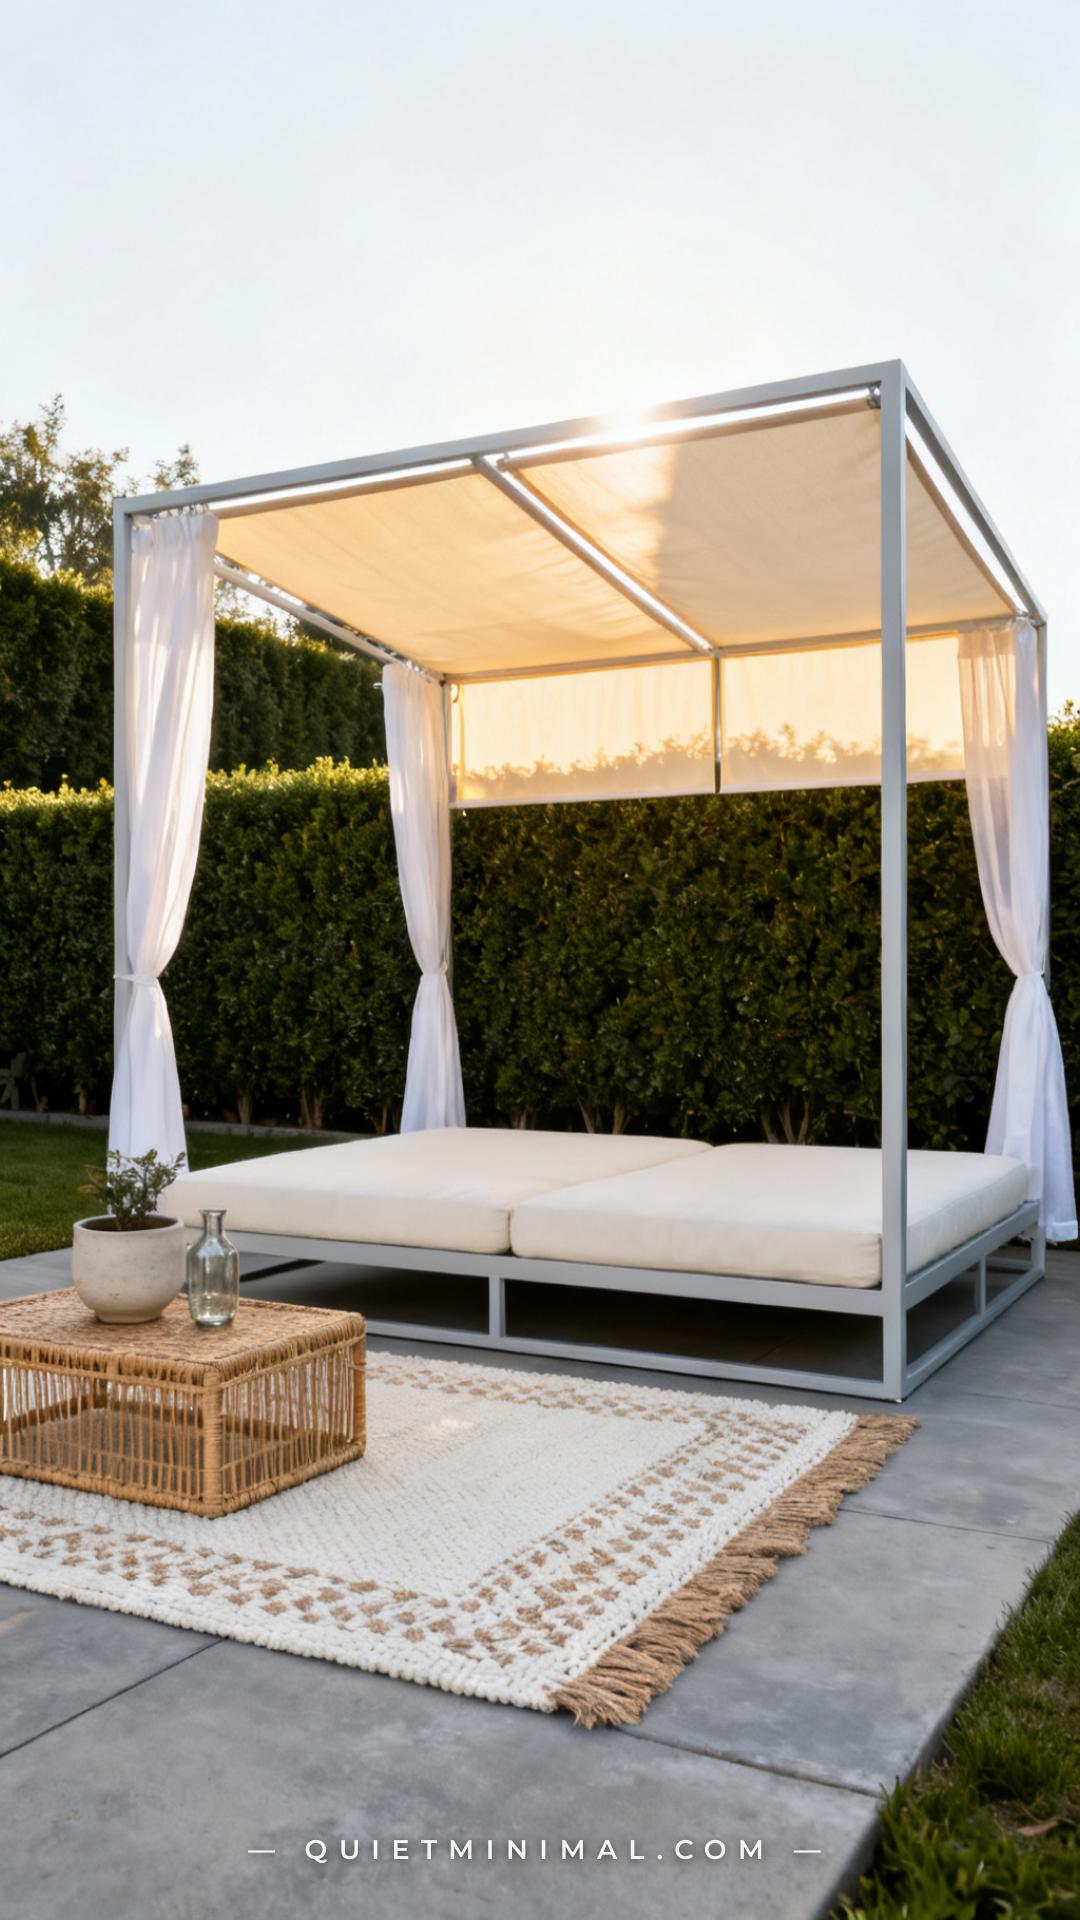
10. Install a Canopy Daybed for All-in-One Shade and Comfort
 Save
From the guides
You've saved it, wanted it. Here's the how: codes, measurements, order. Your choices make it yours.
The Japandi Honest PlaybookThe honest version of the style: what to keep, what to skip, and the order to do it in.See inside →The Room Refresh PlaybookA repeatable four-step method, room by room, in ten minutes, thirty minutes, or one weekend.See inside →Make Any Room Feel Cozy on PurposeWhy some rooms hold people and others empty out, and the moves that change it.See inside →A canopy daybed — a hammock daybed frame with its own attached overhead canopy — is the right choice when you want the shade structure and the lounge piece to function as one cohesive unit rather than assembling them separately. These are particularly useful on properties where anchoring a separate shade sail or pergola is difficult (rental properties, urban balconies, or yards with no suitable attachment points). Modern canopy daybeds come with retractable two-panel canopy systems that let you control how much sun you’re blocking. Look for models with a steel powder-coated frame rather than aluminum (more resistant to swing-motion stress) and a canopy fabric rated for outdoor UV exposure. Curtains on the side rails are a worthwhile upgrade — they add privacy and wind protection without additional purchases.
Key Takeaway: A steel-framed canopy daybed with a retractable canopy is the most cohesive single-unit solution for yards where separate anchor points for a shade sail or pergola aren’t available.

11. Set Up Solar Lanterns for Ambient Ground-Level Light
 Save
Ground-level and surface-level lighting at the lounge zone fills the gap that string lights leave — they light the space from above, but you want warm pools of light at floor level too, particularly for evening use when overhead light alone feels flat and harsh. Solar lanterns have matured significantly: current-generation woven rattan-style solar lanterns charge during the day and run for 6–8 hours on a full charge with a realistic warm amber LED. Position them at the three or four corners of the lounge zone to define the perimeter with light, and add one to the side table as an accent. Look for lanterns with an on/off switch (not just a light sensor) so you can control the look rather than having them activate automatically at dusk.
Key Takeaway: Position solar lanterns at the corners of the lounge zone and on the side table to create warm ground-level light pools that define the zone perimeter at night.

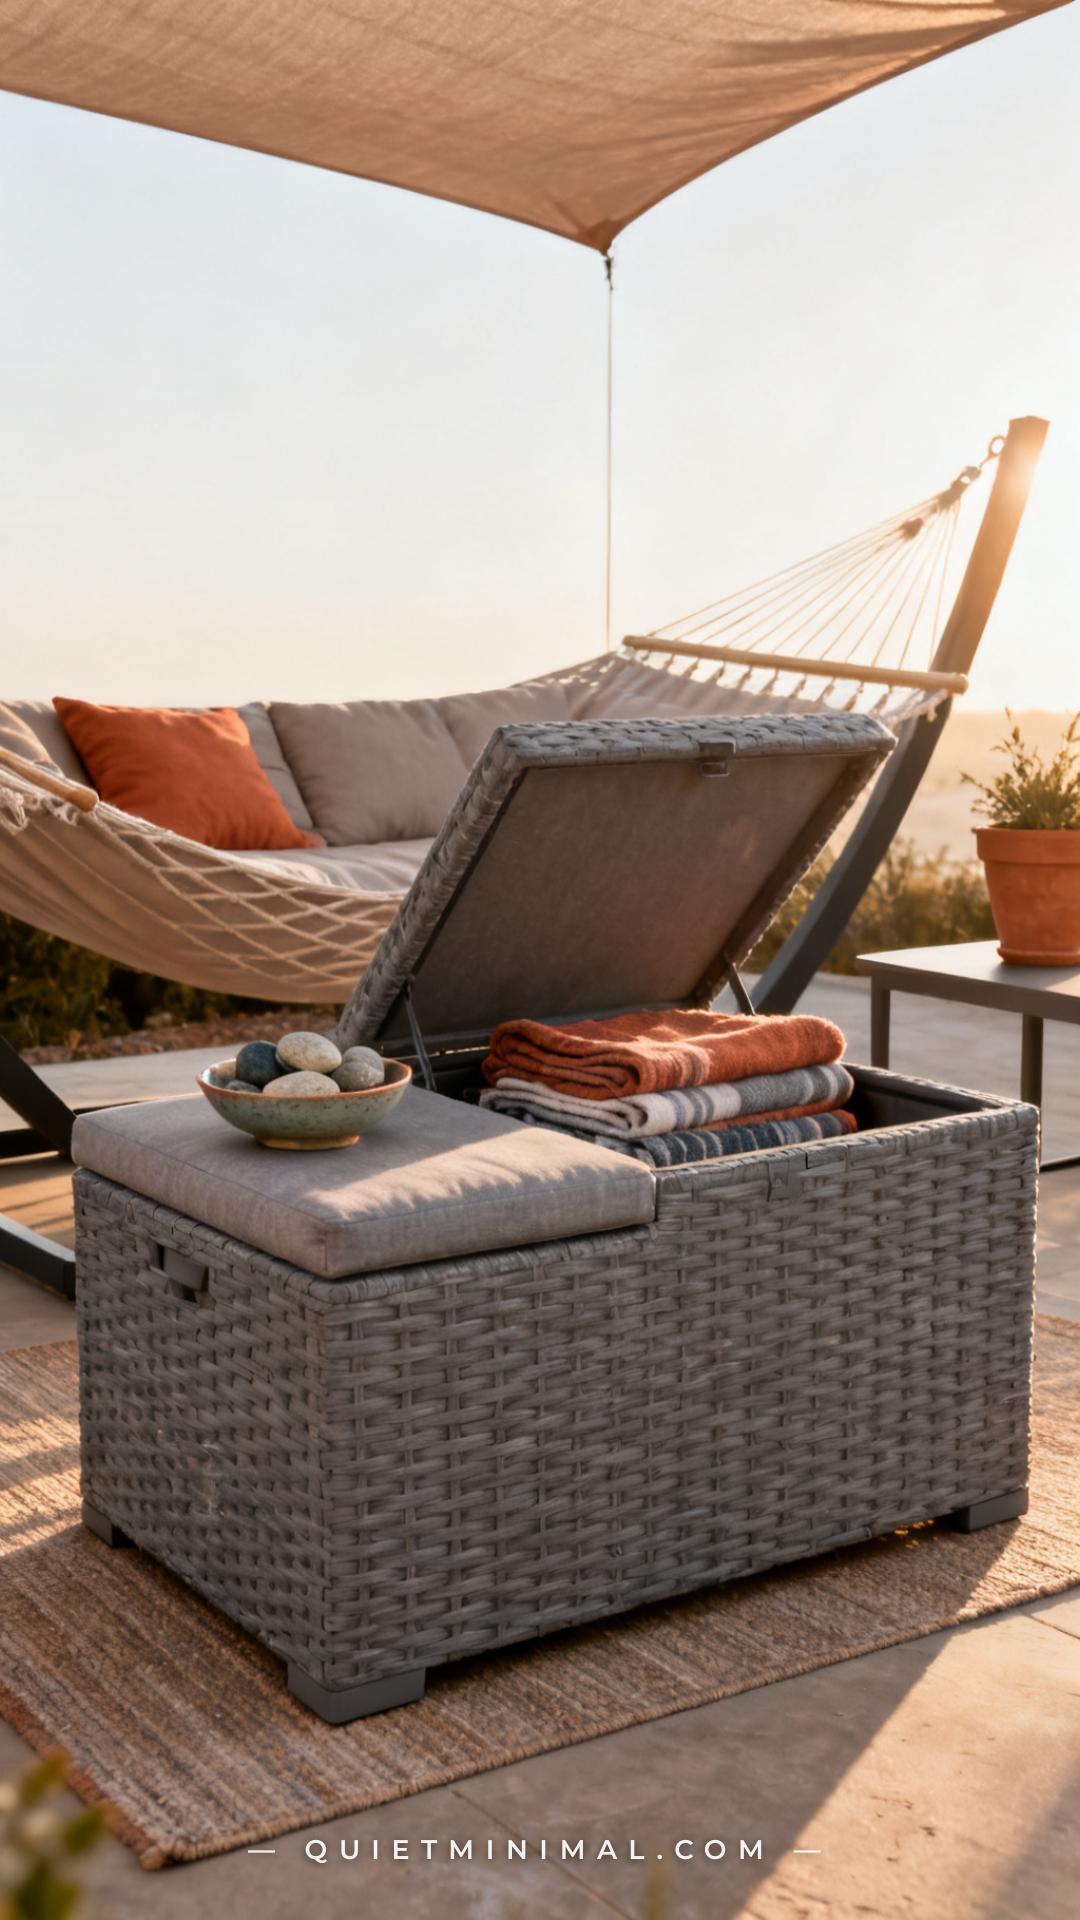
12. Anchor the Zone with a Weatherproof Storage Ottoman
 Save
A storage ottoman at the foot of the hammock daybed solves a real problem in an outdoor lounge zone: where do the extra pillows, throws, and sunscreen go when the zone isn’t in use? Weatherproof storage ottomans double as extra seating when you have guests, a footrest when you’re lounging, and a coffee table surface with a tray on top. Look for models with high-density resin wicker over a steel frame, a hydraulic-hinge lid (this matters — spring hinges fail quickly in humidity), and a sealed interior that keeps contents dry during light rain. Size-wise, a 50-gallon capacity model can hold four throws, six throw pillow covers, and a season’s worth of outdoor accessories without being overpacked.
Key Takeaway: A 50-gallon hydraulic-hinge weatherproof storage ottoman at the foot of the daybed solves the clutter problem while adding a functional surface and extra seating.

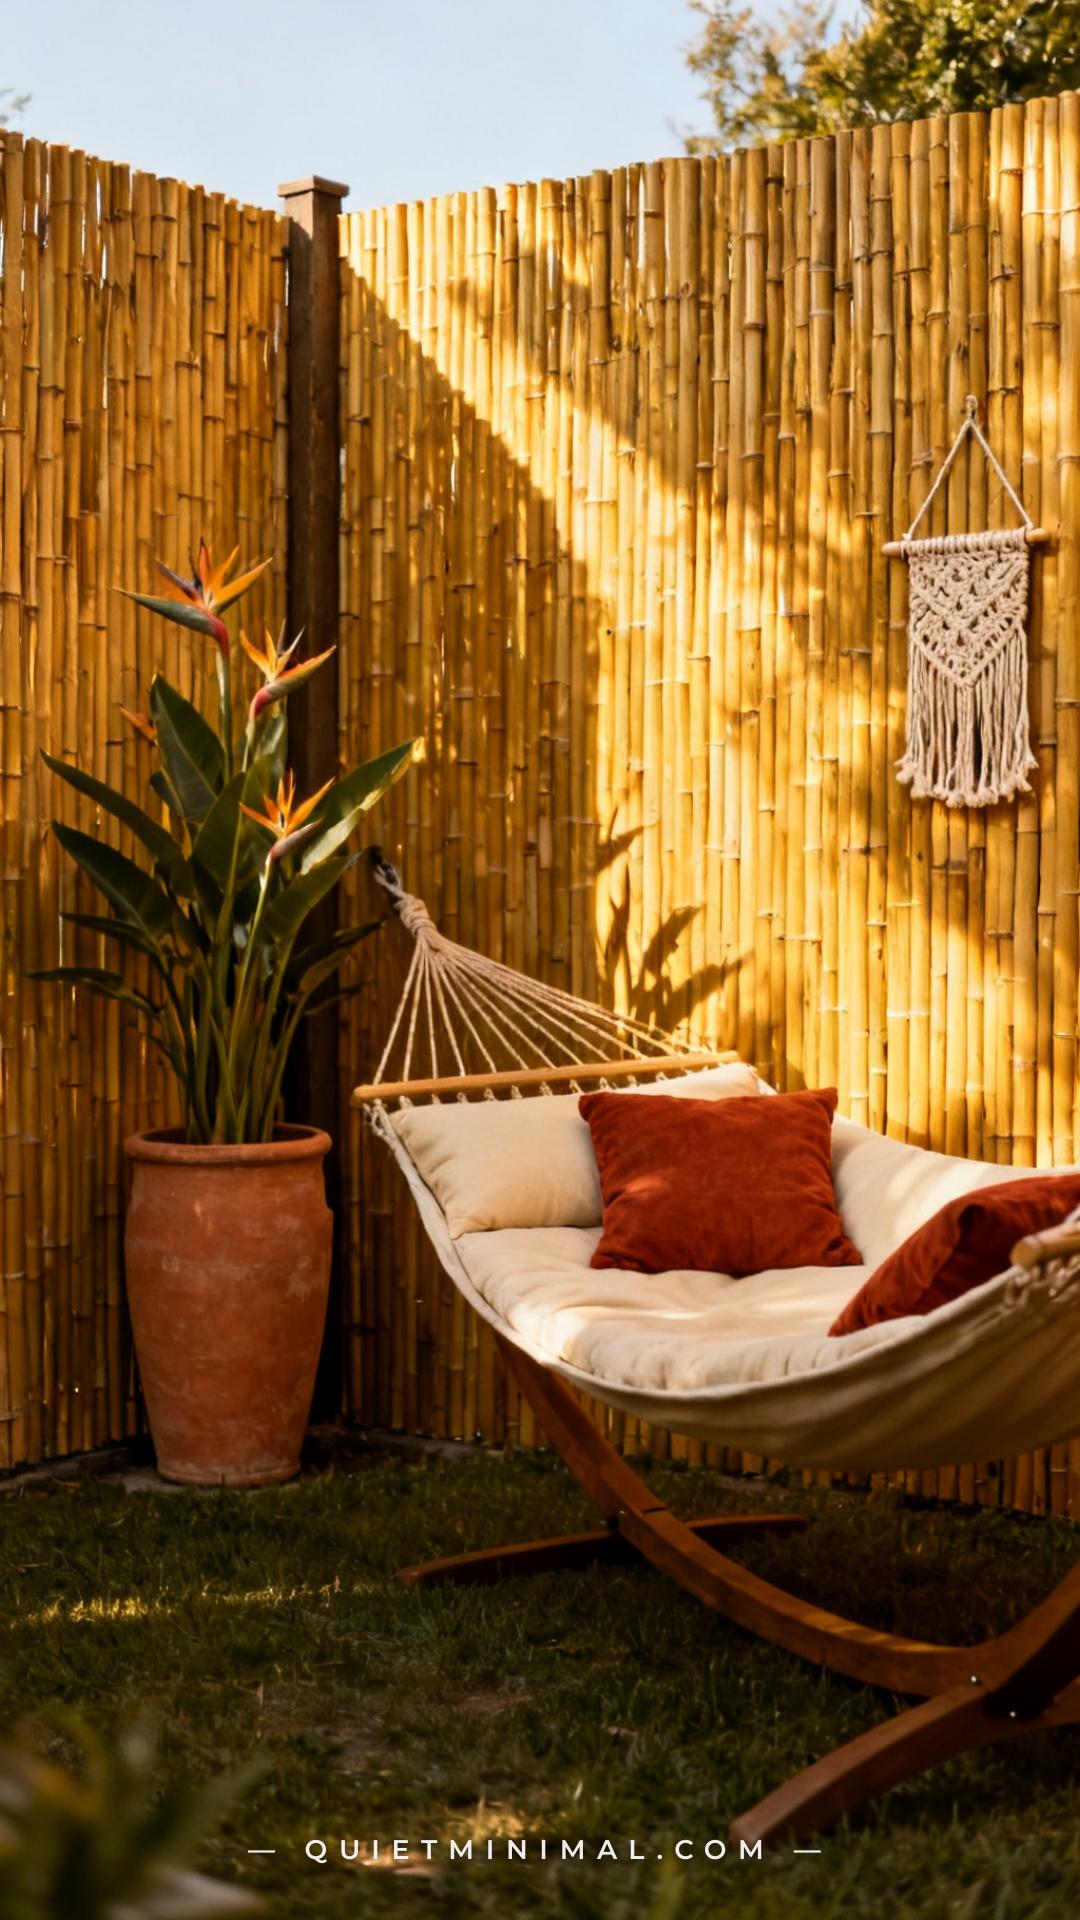
13. Use a Bamboo or Reed Privacy Screen as a Backdrop
 Save
A bamboo or natural reed privacy screen behind the hammock daybed serves two purposes: it blocks the visual noise of a wood or vinyl fence, and it creates a warm textured backdrop that reads on camera the way a good feature wall reads in a bedroom — it anchors the furniture and makes the whole zone feel composed rather than floating in open space. Bamboo roll fencing attaches directly to an existing fence with zip ties or hook screws and installs in under 30 minutes. Natural reed is slightly softer in tone and more flexible for curved applications; bamboo is stiffer and reads as more architectural. Either material ages gracefully when left untreated — they silver slightly over time in the same way teak does.
Key Takeaway: Mount a bamboo or natural reed privacy screen flush against your existing fence as a backdrop — it anchors the lounge zone visually and reads as a designed feature wall rather than a fence cover-up.

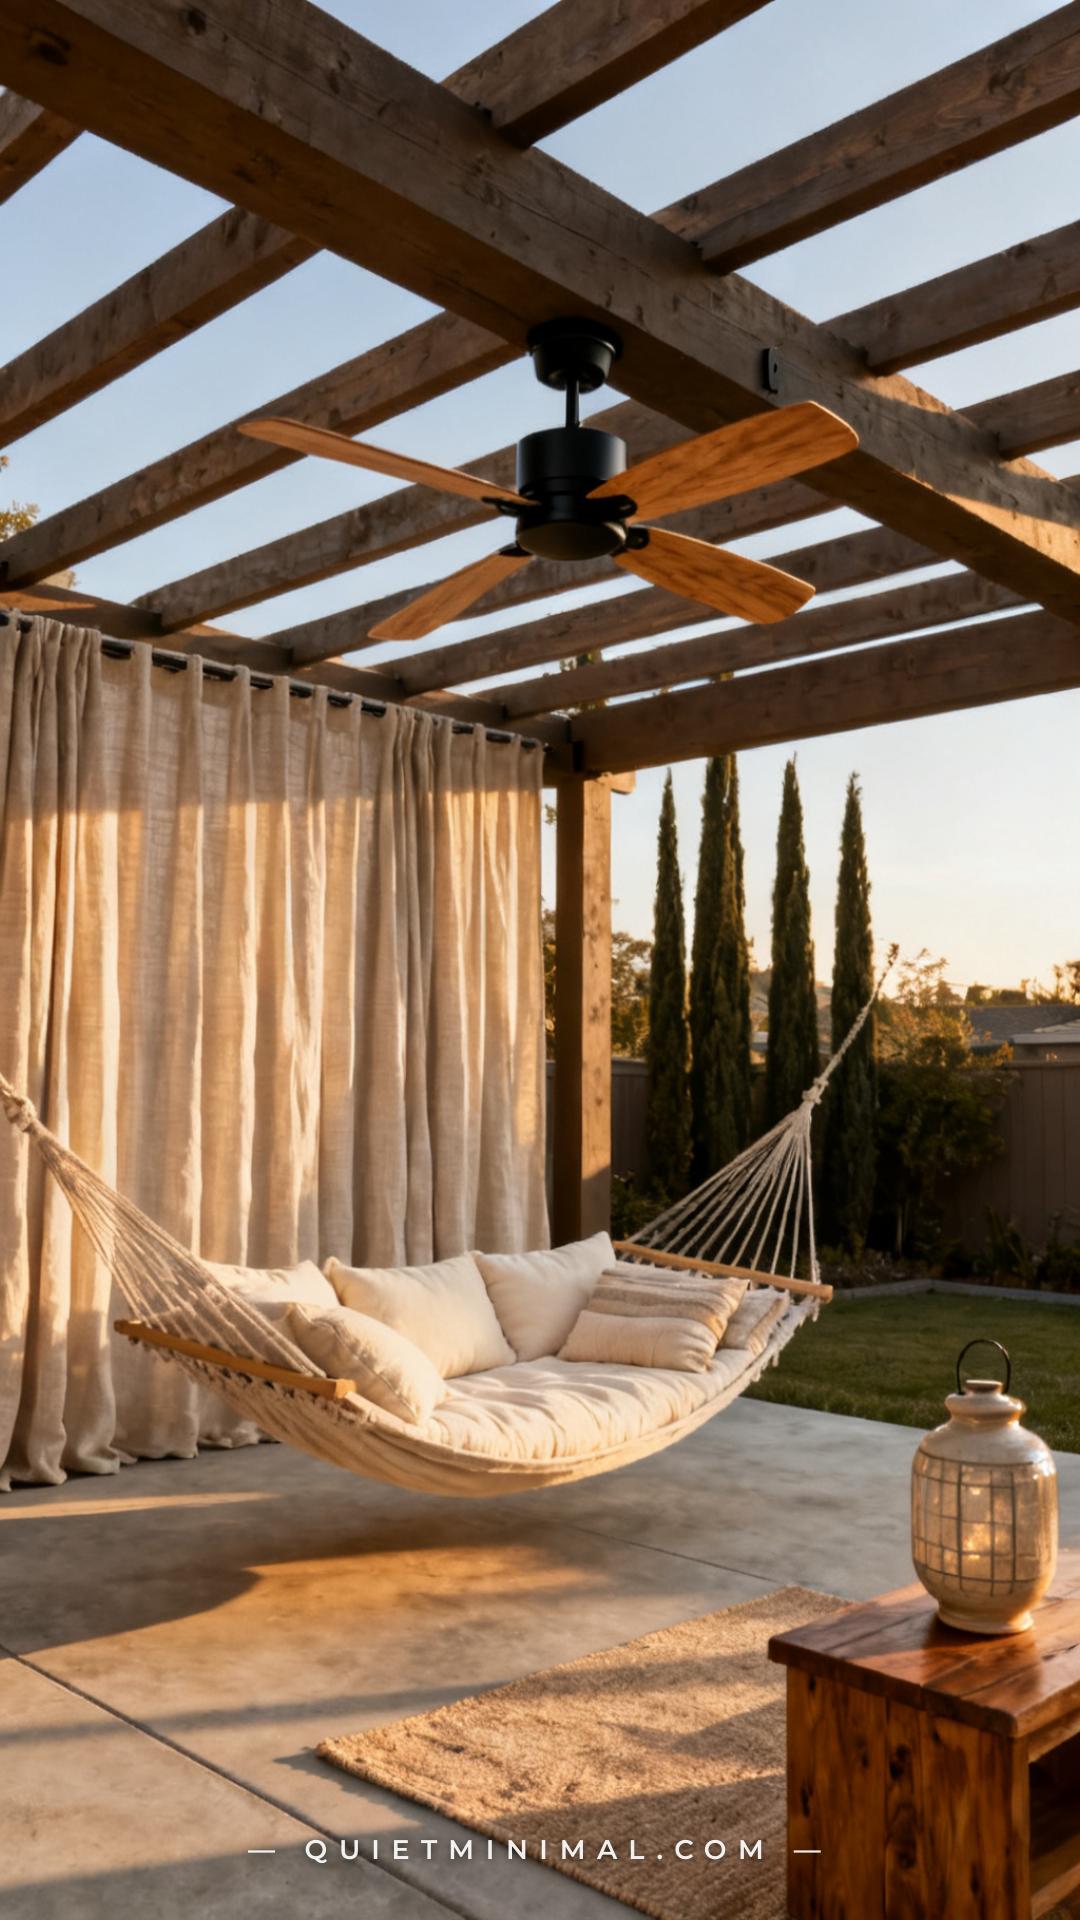
14. Add an Outdoor Fan for Heat and Bug Management
 Save
Heat and mosquitoes are the two reasons a beautiful backyard lounge zone doesn’t get used on summer evenings. An outdoor-rated ceiling fan solves both: it drops the perceived temperature by several degrees and its airflow is enough to discourage mosquitoes from landing. For a pergola-mounted application, look for fans rated for outdoor or wet-location use (not just “damp-rated” — wet-rated handles direct rain spray and is the right spec for any uncovered or partially covered outdoor beam). A DC motor fan is quieter and more energy-efficient than an AC motor fan. Matte black with natural wood-look blades is the finish that holds up best against the aesthetic of the lounge zone — it reads as architectural hardware, not a utilitarian appliance.
Key Takeaway: Install a wet-rated DC motor outdoor ceiling fan on your pergola beam in matte black — it extends the zone’s usability through peak summer heat and keeps the mosquito situation manageable without sprays.

15. Finish with a Scent Element — Citronella or Eucalyptus
 Save
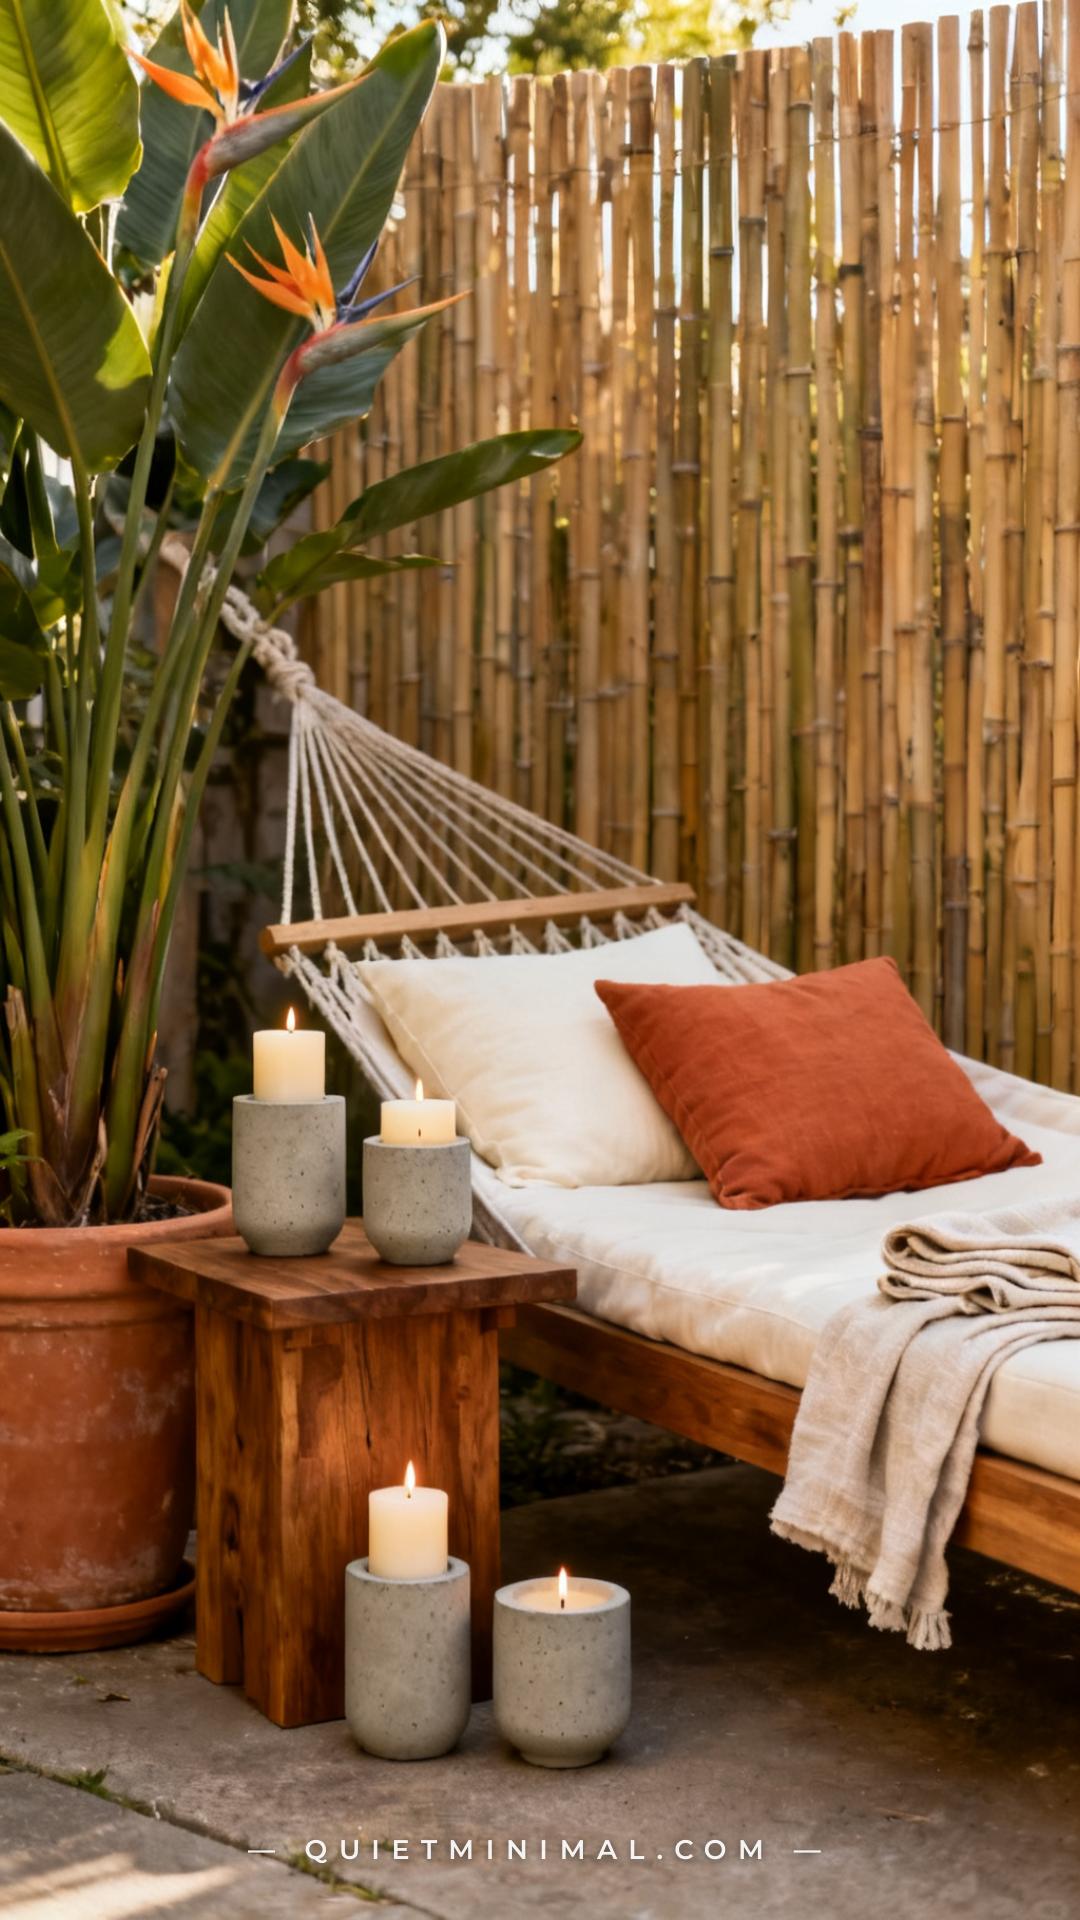
Scent is the finishing detail that turns a visually styled backyard zone into something that registers on every sense — and it’s the element most decor guides skip entirely. Citronella in heavy concrete or terracotta vessels (not the tin-can versions) burns cleanly, provides measurable mosquito deterrence in a contained zone, and adds a design element to the side table grouping. Eucalyptus in diffuser sticks or a small oil burner reads as spa-adjacent and layers well with the greenery already in the zone. Place scent elements low and near the seating — on the side table, on the ground at the base of a planter — rather than elevated on the pergola, where the scent dissipates before reaching the occupant. Three small grouped vessels outperform one large candle for coverage and look.
Key Takeaway: Group three citronella candles in matte concrete vessels at side-table and ground level — they work as mosquito deterrence, a scent element, and a finished styling detail all in one.

Build It in Layers, Not All at Once
The backyard lounge zone that looks effortless in photographs is almost always built in stages — anchor piece first, then shade structure, then ground plane, then comfort layers, then lighting and finishing details. Start with the freestanding hammock daybed and one shade solution, live with it for a few weeks, and layer in the rug, pillows, lanterns, and greenery over time. The zones that feel most designed are the ones where each element was chosen to work with what was already there, not ordered in a single impulse cart. Maya’s version of this space doesn’t have to look exactly like a mood board — it just has to be hers, and every item on this list can be added on its own timeline.
From the guides
You've saved it, wanted it. Here's the how: codes, measurements, order. Your choices make it yours.
The Japandi Honest PlaybookThe honest version of the style: what to keep, what to skip, and the order to do it in.See inside →The Room Refresh PlaybookA repeatable four-step method, room by room, in ten minutes, thirty minutes, or one weekend.See inside →Make Any Room Feel Cozy on PurposeWhy some rooms hold people and others empty out, and the moves that change it.See inside → Save


