Georgia
You want a rain barrel because the water bill keeps climbing and the hose never quite reaches the back beds. You want it decorative because a bare blue drum parked next to the foundation is not the look. Both goals are reasonable, and they are not in conflict, as long as you build the function first and let the decoration ride on top of it. Most decorative rain barrel ideas fail for boring reasons: the stand settles, the primer was skipped, the overflow had nowhere to go. This guide walks the whole project as one path, from picking the spot to painting the last coat to draining it before the first freeze. Each stage names what you do, what “done” looks like, and the mistake that quietly ruins it. Work through it in order and you end up with a barrel that waters the yard and earns its place in the border.
Stage One: Choose the Spot Before You Buy the Barrel
 Save
Siting decides almost everything downstream, so walk the yard before you spend a dollar. The right spot sits within 2 to 3 feet (61 to 91 cm) of a downspout, on ground that already slopes away from the foundation, and within a hose length of the beds you actually water. A barrel tucked behind the garage because it “looks better there” will collect dust instead of rain, because every extra foot of downspout extension is a place for the run to sag, clog, or leak.
Check three things at the candidate spot. First, drainage: pour a bucket of water where the overflow will discharge and watch where it goes. Overflow must travel at least 4 to 6 feet (1.2 to 1.8 m) away from the foundation, or you have built a basement dampener instead of a water saver. Second, sun: full southern exposure grows algae inside any barrel and fades paint on the outside, so a spot with afternoon shade, like the side of white clapboard that catches morning light only, keeps both water and finish in better shape. Third, scale. A standard 55-gallon polyethylene barrel runs about 24 inches across and 35 inches tall (61 by 89 cm), and on a 12-inch (30 cm) stacked stone stand it reads as a substantial garden object, roughly waist height. Hold a cardboard box of that footprint against the wall and look at it from the patio. If it crowds the path or blocks a window view, move it now, not after it is full.
Done looks like this: the barrel sits close enough to the downspout for a short, slightly downhill connection, the overflow has a clear path to a bed or a gravel strip, and a watering can slides under the brass 3/4-inch spigot without tilting. The failure mode is falling in love with a pretty corner that cannot drain. A sand-beige barrel on rough fieldstone blocks with a terracotta bowl on the lid and trailing herbs at the base works because the setting is practical first and charming second.
Key Takeaway: Pick the spot by downspout distance, drainage, and sun exposure, then confirm the 24 by 35 inch (61 by 89 cm) footprint looks right from where you actually stand in the yard.
From the guides
You've saved it, wanted it. Here's the how: codes, measurements, order. Your choices make it yours.
 The Japandi Honest PlaybookThe honest version of the style: what to keep, what to skip, and the order to do it in.See inside →
 The Room Refresh PlaybookA repeatable four-step method, room by room, in ten minutes, thirty minutes, or one weekend.See inside →
 Make Any Room Feel Cozy on PurposeWhy some rooms hold people and others empty out, and the moves that change it.See inside →

Stage Two: Do the Roof Math and Size Your Storage
 Save
One number drives this whole project: 1 inch (2.5 cm) of rain on 1,000 sq ft (93 sq m) of roof yields about 620 gallons (2,350 L) of runoff. Your roof is probably not 1,000 sq ft per downspout, so measure the section that feeds the downspout you chose in stage one. A rough way is to pace off the roof’s footprint: a 20 by 25 foot (6.1 by 7.6 m) section, 500 sq ft (46 sq m), sends about 310 gallons (1,170 L) down one spout in a single 1-inch storm. That is nearly six standard 55-gallon barrels filled in one afternoon of weather.
Now compare supply to demand. A 10 by 10 foot (3 by 3 m) vegetable bed in summer wants roughly 60 to 100 gallons (227 to 379 L) a week. So a modest catchment outproduces one barrel by a wide margin, and the practical question is not “how much can I catch” but “how much can I store between storms and still use.” That is where a bank of matched containers comes in: four clear jugs of about 13 gallons (49 L) each, set side by side on cinder blocks and tied together with a white 1/2-inch PVC manifold overhead, give you 52 gallons (197 L) of modular storage that fills evenly from one downspout diverter. Modular beats monolithic for a first build, because you can add or remove a vessel without replumbing.
Here is the sizing rule worth writing on tape and sticking inside the shed door: storage capacity should equal about one week of watering demand, capped by what your roof can actually deliver in an average month. For most suburban lots that lands between 50 and 150 gallons (190 and 570 L). Oversizing wastes money and invites stagnant water; undersizing means the overflow does all the work. The failure mode is buying the barrel first and discovering your roof laughs at it.
Key Takeaway: Measure the roof area feeding your downspout, multiply by 0.62 gallons per square foot per inch of rain, and size storage to one week of watering demand, usually 50 to 150 gallons (190 to 570 L).

Stage Three: Pick a Barrel Material You Can Live With
 Save
Three materials cover nearly every decorative rain barrel you will see, and each has a personality. Food-grade HDPE plastic is the workhorse: light when empty, cheap, easy to drill for spigots and fittings, and the best surface for paint once it is prepped. Molded resin urns arrive pre-decorated and need no finishing, but their shapes limit fittings and their thin walls split if they freeze full. Cedar or oak stave barrels look the most like furniture and the least like plumbing, and they demand the most upkeep, since wood that dries out between storms leaks until the staves swell again.
One honest warning about clear vessels: transparent drums in a black steel frame photograph beautifully against weathered cedar siding and climbing roses, but any barrel that lets light in will grow algae within a couple of weeks in warm weather. Clear containers make sense for short-term holding, for a greenhouse where you actually want to see the level, or for a bank you drain weekly. For a barrel that sits full through a hot July, opaque wins every time. If you love the glass-like look, plan on an opaque inner liner or accept a monthly scrub.
Structure matters as much as material. Three 50-gallon (190 L) drums in a welded frame about 6 feet tall and 2.5 feet wide (180 by 76 cm) hold over 1,200 pounds (545 kg) of water, so the frame and the ground under it must be rated for that load, not merely for the empty weight. Set the frame on a flagstone or poured pad, keep the stone-slab path beside it clear for hose traffic, and coil the green hose at the base where gravity can drain it. The failure mode here is romance: a lush cottage border with delphiniums and foxglove pressing against a frame nobody checked for rust or racking. Pretty is fine. Pretty and plumb is better.
Key Takeaway: Choose HDPE for paint projects, resin for no-prep looks, and wood for furniture-grade presence, and only choose clear vessels if you will drain or clean them regularly.

Stage Four: Check Local Rules Before You Install Anything
 Save
Rain barrels feel so harmless that the legal side surprises people, but water law in the western states is old and serious. Colorado is the famous case: under HB16-1005, a single-family home (or a building with four or fewer units) may use up to two rain barrels with a combined capacity of 110 gallons (416 L), the water must come from the rooftop, and it can only be used outdoors on the same property. Utah allows small collection but requires registration once a container exceeds 100 gallons (379 L). Most other states impose no volume limit at all, and many cities in Texas, California, and the Midwest actually offer rebates. The point is not to scare you; it is that “check first” takes one phone call to your county extension office or a look at your state water agency’s website.
Then run this short checklist before the barrel leaves the cart. One, state rules: any cap on count, size, or use. Two, city or county code: some municipalities require screened lids and sealed overflow to control mosquitoes, and a few historic districts have opinions about visible barrels on the street-facing side. Three, your HOA, if you have one: read the section on exterior structures and ask for written approval if the barrel is visible from the street. Four, your water bill: some utilities credit stormwater diversion, which makes the project cheaper than it looks. None of this is hard; all of it is easier before a 55-gallon HDPE barrel, about 23 inches across and 35 inches tall (58 by 89 cm), is sitting on a 48 by 40 inch (122 by 102 cm) pallet base against your pale yellow siding.
The decorative angle matters here too. A hand-painted barrel covered in monarch butterflies, black-eyed Susans, and coneflowers reads as garden art, which softens objections from neighbors and boards alike; a bare industrial drum invites complaints. The failure mode is installing first and negotiating later. Get the permissions, then paint the masterpiece.
Key Takeaway: Confirm state limits, municipal screening rules, and HOA terms in one afternoon of calls, and remember that a barrel painted like a folk-art garden scene gets a friendlier reading than a bare drum.

Stage Five: Build a Base That Carries the Weight
 Save
Water is heavy in a way people underestimate: 8.34 pounds per gallon, so a full 55-gallon barrel weighs about 460 pounds (209 kg), and a horizontal 25-gallon (95 L) cylinder like the one going into a tall wall cabinet still weighs over 200 pounds (91 kg). Whatever you build under it is furniture holding a small car engine. That is the mindset.
For a wooden cabinet frame, cedar or pressure-treated pine handles weather; a footprint around 3 feet wide by 2 feet deep (91 by 61 cm) with posts that rise 7 feet (213 cm) to catch a downspout gives you room for a barrel bay plus shelf storage. Build it like a deck, not a bookshelf: 4×4 posts for the legs, 2×4 rails with half-lap or structural screw joints, diagonal bracing on the back and one side so it cannot rack, and every joint screwed, never just nailed. Stain all pieces before assembly, a warm walnut tone against gray weathered shingles reads intentional, and restaining a finished cabinet around a full barrel is misery. Anchor the cabinet to the wall with two masonry or stud-rated brackets at the top rail; a tall narrow cabinet holding water high is a tip hazard if the ground settles.
Set the whole structure on a level pad of compacted gravel or pavers, not bare soil, and check level in both directions with the barrel bay empty and then again with it full. A full barrel that leans even 2 degrees puts hundreds of pounds of side load on fittings that were designed for straight-down weight. Done looks like this: the barrel slides into its bay without forcing, the white PVC downspout with its offset fitting lands squarely over the inlet, and nothing shifts when you push the top of the frame. The failure mode is building for the empty barrel and meeting the full one at midnight during a thunderstorm.
Key Takeaway: Build the base for 8.34 pounds per gallon (1 kg per liter): 4×4 legs, screwed joints, diagonal bracing, wall anchors, and a level gravel pad checked twice.

Stage Six: Decide What the Water Is For Before You Plumb Anything
 Save
The prettiest barrel in the world is still a plumbing fixture, and plumbing starts with one question: what will this water do? For nearly every decorative barrel build, the answer is irrigation, which means the water needs to be free of leaves and grit, nothing more. A simple mesh screen at the inlet and a brass 3/4-inch spigot at the base covers garden duty completely. You can stop reading at “screen” if irrigation is the goal.
The layered filter concept, the one with visible bands of river pebbles, coarse sand, fine sand, activated charcoal, and gravel stacked inside a cobalt blue drum, belongs to emergency-preparedness thinking, and it comes with a hard warning. Even water that runs through all five strata in the right order, pebbles first, then coarse sand, fine sand, charcoal, and gravel at the bottom, is not safe to drink without boiling or chemical disinfection. Roof runoff picks up bird droppings, pollen, and shingle grit. A garden center will tell you the same thing: filtered roof water is for plants, period. If you build a demonstration filter barrel as a teaching piece, label it non-potable and keep the stainless bowl under the spigot for rinsing tools, not filling cups.
Use this decision to set your fittings. Irrigation only: screen, spigot, overflow, done. Hand-watering plus tool rinsing: add a second spigot at standing height or a short hose bib extension. Drip line: plan a pressure-reducing connection, because a barrel’s gravity feed runs around 1 to 2 psi at best. The failure mode is building the elaborate version when you needed the simple one, then maintaining a charcoal bed nobody asked for. Match the plumbing to the job and the whole system stays clean, including the water.
Key Takeaway: For garden use you need only an inlet screen and a spigot; layered sand-and-charcoal filtration is a demonstration project, and its output still is not drinking water.

Stage Seven: Fit the Downspout Diverter the Right Way
 Save
The diverter is the small fitting that decides whether your barrel fills or your downspout just stains the siding, and this is where most first builds go sideways. There are three common styles. A flex-hose diverter cuts into the downspout and siphons water through a side hose into the barrel, then stops diverting when the barrel is full. An in-spout diverter inserts into the downspout itself and routes flow internally. An open-top feed simply aims the downspout, sometimes through a black metal fitting at the rim, straight into the barrel, which is the approach a tall Talavera-painted drum uses when it stands under the eave in a brick courtyard.
Installation order matters. Set the barrel on its finished stand first, at final height, then mark the downspout cut line so the diverter inlet sits just above the barrel’s rim or lid port. Cut the downspout with tin snips or a hacksaw, fit the diverter per its template, and keep every run of hose or pipe slightly downhill. The detail nobody mentions: a diverter that sits too high relative to the barrel rim will backflow and spit water out of the barrel vent during hard rain. Level beats looks.
If you are painting the barrel in bold Mediterranean style, bands of teal, cream, crimson, and ochre medallions over the full surface, plan the fittings before the artwork. A spigot or diverter hose that crosses the face of the barrel will interrupt the pattern, so route hardware through the lid and keep the visible body clean for the tile-motif bands. Wet brick underfoot is a reminder: overflow will go somewhere, so aim it across the pavers toward a planted strip, not against the warm house wall. Done means the barrel fills in rain, the diverter stops when it is full, and the painted medallions stay the star.
Key Takeaway: Set the barrel at final height before cutting the downspout, keep the diverter inlet just above the rim, and route fittings through the lid so painted motifs stay uninterrupted.

Stage Eight: Set the Stand Height for Real Watering
 Save
Gravity is your only pump, and it pays by the foot. Water pressure rises about 0.43 psi for every foot of elevation, or flipped around, every 2.31 feet (70 cm) of height buys you 1 psi. A 55-gallon barrel about 24 inches across and 36 inches tall (61 by 91 cm) sitting on a low 2×4 platform 6 inches (15 cm) off the ground delivers roughly 1.5 psi at the spigot when full, and less as it drains. That fills a watering can comfortably and pushes a short hose to a nearby bed. It will not run a sprinkler, and it will not reliably feed a long soaker hose, which typically wants 8 to 10 psi at minimum.
So choose the stand height by the job. Watering cans and short hoses: 6 to 12 inches (15 to 30 cm) of lift is plenty, and it keeps the center of gravity low, which matters for stability. Drip lines on a timer: raise the barrel 24 to 36 inches (61 to 91 cm), keep runs short, and accept a slow, patient flow. Anything more ambitious needs a pump, and at that point you are building a different project. The low wooden platform under a matte olive-green barrel against light gray siding is the honest sweet spot: high enough to slide a can under the spigot, low enough that 460 pounds (209 kg) of water never towers over the terracotta pot of creeping herbs beside it.
The white PVC diverter tee with its orange cap on the metal K-style downspout shows the other half of the equation: whatever height you choose, the diverter must sit higher than the barrel’s inlet, and the overflow must exit lower than the lid. Sketch the vertical stack, diverter, lid, spigot, platform, ground, before you cut a single board. The failure mode is a beautiful stand that puts the spigot 3 inches (7.6 cm) off the mulch, where nothing fits under it.
Key Takeaway: Every 2.31 feet (70 cm) of stand height earns about 1 psi; 6 to 12 inches (15 to 30 cm) suits cans and short hoses, and drip lines need 24 to 36 inches (61 to 91 cm) plus short runs.

Stage Nine: Level and Secure the Stand So It Never Settles
 Save
A barrel stand fails slowly, then all at once. Two stacked cinder blocks, each about 8 by 8 by 16 inches (20 by 20 by 41 cm), are a perfectly good riser for a 55-gallon barrel roughly 23 by 36 inches (58 by 91 cm), but only if the ground under them cannot shift. Bare soil settles unevenly after the first heavy rain, and 460 pounds (209 kg) on a leaning stack becomes a tip hazard, especially in a yard with kids or a dog that treats the fence line as a racetrack.
Build the footing in four steps. First, excavate the sod about 4 inches (10 cm) deep and twice the block footprint. Second, fill with compacted pea gravel, the same round river gravel that reads as a design choice at the base, tamped in two passes. Third, set the blocks side by side with their cores vertical, and lay a 2-foot (61 cm) level across them in both directions, tapping in shims of flat stone until the bubble centers. Fourth, set the barrel, fill it a quarter full with a hose, and check level again. Weight reveals what eyes miss. If anything rocks, pull it down and redo the pad; a wobble never improves on its own.
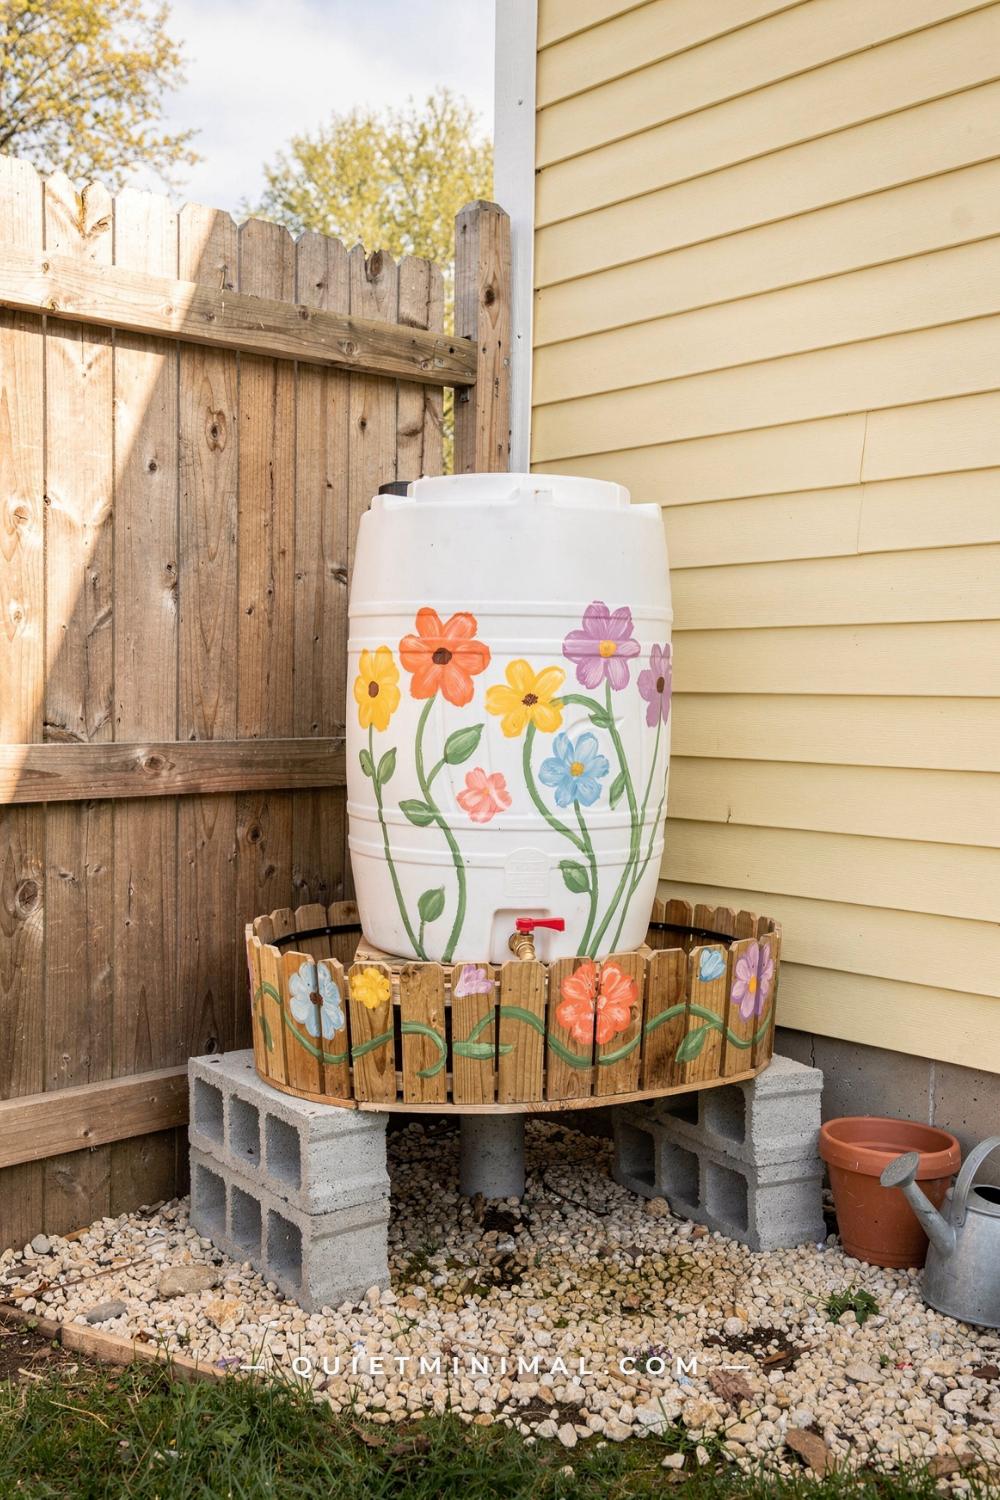
Two safety details belong in this stage, not later. The lid must close and latch, because an open barrel is a drowning risk for toddlers and small pets and a maternity ward for mosquitoes; a locking or snap-tight lid solves both. And the red-handled gate valve on the brass spigot should sit high enough off the gravel that you can get a wrench on it in December with gloves on, when you will need to drain the system. The playful painted vines climbing the white barrel, tangerine, lilac, sky blue, coral, deserve a base that is every bit as deliberate as the artwork. Done means: level in both directions, locked lid, working valve, no rocking under load.
Key Takeaway: Put cinder blocks on a 4-inch (10 cm) compacted gravel pad, level them in both directions, test with a quarter-full barrel, and lock the lid for kids, pets, and mosquitoes.

Stage Ten: Prep and Prime Plastic So Paint Actually Sticks
 Save
Here is where most painted rain barrels are quietly doomed. HDPE plastic is chemically slick, mold-release residue included, and paint rolled straight onto it will look great for a month and then peel off in sheets the first time a hot day follows a cold rain. The fix is boring and non-negotiable: surface prep. Budget one full afternoon for it before any color touches the barrel.
The sequence is five steps. One, wash the barrel with a degreasing cleaner or a TSP substitute, inside the rim especially, and rinse until the water sheets instead of beading; beading means oils remain. Two, scuff the entire surface with 220-grit sandpaper or a fine sanding sponge, working the curve vertically, until the gloss is gone everywhere. Three, wipe down with a tack cloth or a rag dampened with rubbing alcohol to lift the dust. Four, spray or roll one coat of plastic-bonding primer, the kind labeled for plastic adhesion, and let it cure the full time on the can, not the time that feels right. Five, only then apply your exterior acrylic base colors. A glossy novelty finish, like a giant pop-art soup can with a vivid red upper third, a clean white lower two-thirds, and an illustrated label of painted vegetables, depends on that primer doing its invisible work under the wit.
Two field notes. Paint in shade between 50 and 85 degrees Fahrenheit (10 to 29 Celsius); the harsh midday sun that makes the colors pop in photos flashes the paint dry before it levels. And remove the snap-lock lid and its white push-button lugs before priming, then paint them separately. The failure mode is impatience at step one. Everything after prep is the fun part, and the fun part only lasts if the dull gray primer nobody sees is underneath it.
Key Takeaway: Degrease, scuff with 220-grit, tack off the dust, then one coat of plastic-bonding primer cured fully, and only then color; paint between 50 and 85 F (10 to 29 C) in shade.

Stage Eleven: Start With Stencils and Simple Line Art
 Save
If a full mural feels like a leap, black line art on a white barrel is the strongest first design you can choose. Two colors, no blending, no perspective, and the result reads as intentional and graphic from across the yard, especially against warm red brick and dark mulch. Dandelion seed heads, daisies, a single butterfly, a few slender stems scattered rather than arranged: the restraint is the design.
The technique that keeps stencil lines crisp is pouncing, not brushing. Spray the back of the stencil lightly with repositionable adhesive and let it tack for a minute, press it to the curve, then load a stencil brush or foam pouncer with paint and offload most of it onto a paper towel until it is nearly dry. Dab straight down, building the black in two thin passes instead of one wet one. Wet paint is what bleeds under stencil edges; dry paint is what gives you those thin, elegant lines. Peel the stencil while the paint is still slightly tacky, straight up, no sliding. For freehand line art, an acrylic paint pen with a medium nib behaves like a marker and forgives a slow hand.
Plan the scatter before you start: snap a chalk line or wrap a strip of painter’s tape around the barrel as a horizon guide, then place the largest motifs first, dandelions at roughly the 10, 2, and 6 o’clock positions of the visible face, and fill gaps with the small stems last. A white PVC downspout about 4 inches (10 cm) wide entering the lid stays out of the artwork’s way if you keep the top quarter of the barrel quiet. A variegated ornamental cabbage in green and cream at the base repeats the two-tone discipline in the planting. The failure mode is enthusiasm: every inch covered in motifs reads as noise. Leave white space; the white is the design.
Key Takeaway: Two-color stencil or paint-pen line art with nearly dry paint, dabbed in thin layers, is the most forgiving first barrel design, and restraint is what makes it read as elegant.

Stage Twelve: Choose a Tight Palette for a Full-Wrap Scene
 Save
A full-wrap scene fails or succeeds on palette discipline, and the tool to borrow from interior work is the 60-30-10 rule. Sixty percent of the surface is your field color, the pale aqua-blue wash that covers the whole body and sets the scene’s mood. Thirty percent is your subject color family, the orange-and-red goldfish that carry the eye. Ten percent is accent, the green-and-orange striped band at the lid edge and the orange pebble band at the base. Three buckets, and everything you mix must live inside one of them. The moment you add a fourth family, a purple coral here, a yellow treasure chest there, the barrel tips from whimsical into cluttered.
Mix enough of the field color before you start. A 55-gallon barrel about 23 inches across and 36 inches tall (58 by 91 cm) has roughly 18 square feet (1.7 sq m) of surface, and one quart (0.95 L) of exterior acrylic covers about 90 square feet (8.4 sq m) per coat, so a quart handles two coats with margin for touch-ups. But matching a custom aqua six months later, after a scratch, is nearly impossible, so store a labeled jar of every color you mix, including the field.
Working order on a wrap: field color first, full coverage, two coats. Then the base band and rim band, taped off with painter’s tape pressed hard along the edges. Then the large subjects, sketched in chalk or white pencil, filled flat, details after drying. The narrow horizontal brass spigot at the lower right tells you where the scene must yield: mark hardware zones before sketching so no fish loses its head to a fitting. The failure mode is improvising color as you go. Decide the palette on paper, and the barrel will look like one idea instead of five.
Key Takeaway: Hold a wrap scene to the 60-30-10 rule, mix and store a labeled jar of every color, and paint in this order: field, bands, subjects, details.
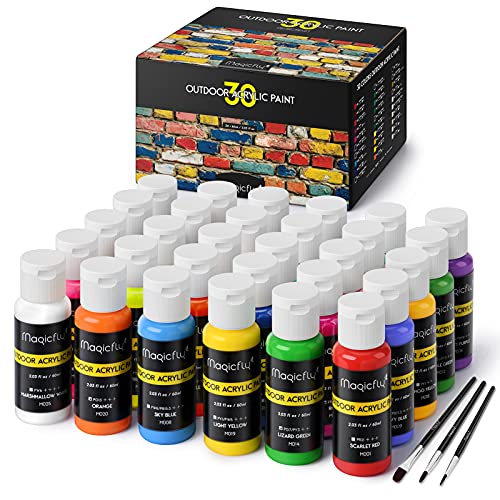
Stage Thirteen: Paint a Pollinator Meadow That Reads From a Distance
 Save
A meadow mural lives or dies at thirty paces. Up close, a watercolor-style pollinator scene is all detail: the streaked petals on pink coneflowers, the barred wings of a tiger swallowtail, the segmented body of a blue dragonfly. From the patio, all of that disappears, and what remains is silhouette and color block. So design for the far view first and the near view second. Limit yourself to four or five flower types, sunflowers, coneflowers, lavender spikes, white daisies, and repeat each at least three times around the circumference. Repetition is what makes a wrap read as a meadow instead of a botany quiz.
The cream or ivory base, on a barrel about 23 by 36 inches (58 by 91 cm), does heavy design work: it is warm enough to sit comfortably against light gray clapboard and rough sawn pallet wood, and pale enough that yellows and pinks keep their value without an underpainting. Paint the stems and foliage in sage green first, as the connective tissue of the scene, then block in flower heads as flat shapes, then add detail only to the two or three blooms facing the main viewing angle. Trying to render every flower to the same finish is how a weekend project becomes a month.
Practical notes for this stage: the flat pallet platform, about 6 inches (15 cm) tall, is fine as a base if you add leveling feet or a gravel pad beneath it, and the white PVC downspout with its offset adapter should connect before the top band of flowers gets painted, so drips during fitting land on unfinished surface. A blue soaker hose coiled at the base is the right companion: the mural promises pollinators, and the hose delivers the water that keeps their real counterparts blooming. The failure mode is painting for the camera instead of the yard.
Key Takeaway: Design the meadow for the far view: four or five flower types repeated around the barrel, foliage first, detail reserved for the blooms facing the main sightline.

Stage Fourteen: Wrap a Scene Around a Curved Surface Without Distortion
 Save
A barrel is a cylinder, and cylinders punish artists who think in rectangles. Anything painted on the curved face compresses visually at the edges, and a design that looked balanced on paper ends up with its best elements hiding around the sides. The fix is to plan the wrap as a band, not a picture. Take the circumference, for a 23-inch (58 cm) diameter barrel that is about 72 inches (183 cm), and sketch the scene on a paper strip exactly that long and as tall as the barrel body. What fits on the strip fits on the barrel.
Work in this order. First, snap a level horizon line around the full circumference; a laser level or a taut string at mid-height keeps the painted picket fence from sloping downhill around the barrel. Second, lay out repeating elements by division: for pickets at 2 inches wide with 2-inch gaps (5 cm each), mark every 4 inches (10 cm) around the string, and you will get 18 evenly spaced pickets with no awkward partial picket at the seam. Third, paint the background field, then the structural motif, the fence, then the climbing elements, the pink roses and purple lavender, and finally the small animated details, bumble bees in flight and the black-eyed Susans at the base. Background to foreground, always, so overlaps stay clean.
Decide in advance where the seam goes: the least-visible point is usually the side facing the house wall or the downspout, which is also where a white vinyl or PVC connection already interrupts the eye. Start and end the scene there, and let the leafy tree branch or another soft element disguise the join. A royal blue lid against the crisp white body frames the whole scene like a hat brim, and the brass spigot at lower front anchors the viewing angle. The failure mode is starting at the front and discovering at the back that the last two pickets do not fit.
Key Takeaway: Sketch the wrap on a paper strip of the true circumference, snap a level horizon line, divide repeating elements evenly, and bury the seam on the house side.
From the guides
You've saved it, wanted it. Here's the how: codes, measurements, order. Your choices make it yours.
The Japandi Honest PlaybookThe honest version of the style: what to keep, what to skip, and the order to do it in.See inside →The Room Refresh PlaybookA repeatable four-step method, room by room, in ten minutes, thirty minutes, or one weekend.See inside →Make Any Room Feel Cozy on PurposeWhy some rooms hold people and others empty out, and the moves that change it.See inside →
Stage Fifteen: Gather References Before You Commit to a Design
 Save
Before any paint touches plastic, spend an evening building a reference board, because the difference between barrel art that charms and barrel art that clutters is usually decided before the first coat. Look at a wide range of finished barrels: the community-painted ones with bold single motifs, the folk florals, the wraparound landscapes like a golden-amber dusk sky over a still pond with dragonfly and cattail silhouettes, the graphic two-color designs. You will notice a pattern quickly. The barrels that work pick one mood and commit: serene dusk, playful garden, graphic minimal. The ones that fail try to include every idea the painter ever had.
Translate what you love into constraints. For a dusk landscape, that might mean: a two-color sky gradient from amber to muted teal, black silhouettes only in the middle band, and painted green reed grasses wrapping the base, with natural stone gravel at the foot echoing the tones. Write those rules on an index card and tape it to your worktable. When the painting session runs long and you are tempted to add a red barn or a flock of birds, the card talks you down.
Two practical habits pay off here. Test the palette on a scrap of primed plastic or an offcut of HDPE, because acrylics dry a half-step darker on plastic than they look on the palette. And photograph your sketch from 20 feet (6 m) away, phone at arm’s length, squint view: if the design still reads at thumbnail size, it will read in the yard. The gravel-and-straw-grass setting around a landscape barrel is a reminder that the ground treatment is part of the composition too. The failure mode is skipping this stage entirely and designing with a wet brush in hand. An hour with references saves a weekend of sanding.
Key Takeaway: Build a reference board, distill it into three or four written design rules, and test colors on primed plastic before committing to the barrel.

Stage Sixteen: Skip the Paint With a Pre-Formed Sculptural Urn
 Save
Painting is not the only path to a barrel that belongs in the border. Molded resin urns arrive pre-decorated, with an amphora silhouette, faux terracotta surface detailing, and often a plantable top, and they solve several problems at once: no primer, no sealing, no annual touch-ups, and a shape that reads as pottery rather than plumbing. A typical urn-style barrel holds around 40 gallons (150 L) and stands about 20 inches across and 48 inches tall (51 by 122 cm), so it sits comfortably at a structural corner where a gray fieldstone wall meets a weathered cedar fence, tapering to a narrow base that keeps the footprint small.
Weigh the trade honestly. A resin urn costs more upfront than a bare drum and paint, holds less water than a 55-gallon barrel, and gives you fewer options for fittings: the brass 3/4-inch ball-valve spigot comes where the factory put it, and the thin walls do not love aftermarket drilling. In exchange you get zero finishing labor and a surface that shrugs off UV for years. The painted HDPE route wins on capacity, customization, and cost; the resin route wins on effort and uniformity. If your honest assessment is that you will never finish a mural, buy the urn and spend the saved hours on the garden.
Style it as sculpture, not storage. Trailing ivy draped over the wide mouth and spaced down the shoulder softens the transition from resin to planting, and the narrow base wants a tidy surround: short trimmed lawn or a tight gravel ring rather than a crowded bed. Keep the spigot accessible from the lawn side. The failure mode with urns is ignoring winter: thin-walled resin splits if it freezes full, and a 48-inch urn is awkward to move, so a drain-down routine in fall is part of owning one.
Key Takeaway: A pre-formed resin urn trades capacity and fitting flexibility for zero finishing work; choose it if you will never paint, and plan to drain it before every freeze.

Stage Seventeen: Link Two Barrels and Carry the Design Across Both
 Save
Once one barrel fills reliably, the second is pure logic: another 55 gallons (208 L) of storage at the cost of a short hose. Two methods link barrels. An overflow link, a hose from the top of barrel one to the top of barrel two, fills them in series: simple, but barrel two only gets water after barrel one is full, and barrel two’s spigot only delivers what gravity gives it from its own level. A bottom link, a hose connecting bulkhead fittings near the base of both, makes them behave as one vessel: both fill and drain together, levels stay equal, and any spigot serves the full 110 gallons (416 L). Bottom linking is more plumbing but a much better system, and it suits a pair standing side by side on a shared stone base.
The rubble-stone platform, about 12 inches (30 cm) of irregular slate and fieldstone, is doing quiet structural work: wide footprint, free-draining, immovable. Wherever you put a linked pair, remember the combined full weight is over 900 pounds (408 kg), so a compacted, level base is not optional. A red gate valve between the barrels lets you isolate one for cleaning, and a small water meter at the base turns “we saved some water” into a number you can watch climb through the season.
Now the design opportunity: two barrels are one canvas twice as wide. A meadow that starts with pink phlox on the left barrel and finishes with white daisies on the right, with green stems bridging the gap, reads as a single garden scene about 46 inches (117 cm) across. Sketch the pair as one paper strip, lay the barrels side by side before painting, and match the horizon line across both at once with a taut string. The failure mode is painting them separately and discovering a two-inch mismatch in the stem line where they meet.
Key Takeaway: Bottom-link two barrels so they fill as one vessel, isolate them with a valve, and paint the pair as a single continuous scene with the horizon matched while they stand side by side.

Stage Eighteen: Blend Sky Gradients and Silhouettes on a Barrel Canvas
 Save
The forest twilight wrap, blue-violet overhead deepening through violet to warm orange and citrus yellow at the horizon, with black tree silhouettes standing against the glow, is the most forgiving “advanced” design on this list, because gradients hide brushwork and silhouettes need no detail. It only asks that you work in the right order and keep the paint wet.
That order is five passes. First, a dark charcoal or black undercoat over the whole primed barrel, which gives the twilight its depth and makes the silhouette pass nearly foolproof. Second, the horizon band: a wide stripe of warm yellow-orange, rolled or brushed on around the full circumference at the height where the sun has just dropped. Third and fourth, the sky blend, working wet on wet: orange blending up into violet, violet into periwinkle blue, with a wide soft brush and long horizontal strokes, keeping each band damp enough to marry the one below. If a band starts to tack up, mist it lightly with water and keep moving; on a cylinder, work around the barrel in one continuous circuit rather than finishing one face at a time. Fifth, the silhouettes: tall deciduous trees and conifer spires painted in pure black over the dried gradient with a flat brush, plus a painted grass band at the base.
Indoor conditions make this easier, even light, no wind, no dust, which is why a neutral workshop is the right studio even though the barrel will live outdoors. Let the gradients cure fully, a day minimum, before silhouettes, or the black will drag color up from below. The small brass tap at the lower front should be masked during the gradient passes and hand-painted around last. The failure mode is letting the sky dry before the blend is done; a hard band line in a sunset cannot be unseen.
Key Takeaway: Undercoat dark, then blend the sky wet on wet in horizontal circuits around the barrel, and paint crisp black silhouettes only after the gradient has cured for a full day.

Stage Nineteen: Seal the Artwork Against Sun and Standing Water
 Save
Everything you have painted so far, the meadow, the twilight, the wildlife scenes with coneflowers filling the lower two-thirds and birds perched at the shoulders, is water-based acrylic sitting on plastic outdoors. Unsealed, UV bleaches the reds and purples first, and rain driven under edges lifts them within a season or two. Sealing is the stage that converts a summer project into a five-year fixture, and it is an afternoon of work.
Choose the sealer by finish and chemistry. A water-based exterior acrylic clear coat, in satin, is the safest choice over acrylic art: it will not yellow, it flexes with the plastic, and it applies without much odor. Spar urethane is tougher and glossier and stands up better to abrasion around the spigot, but oil-modified versions add an amber cast that will warm a sage green or shift a careful pink-purple, so test it on your color jar scrap first. Whichever you choose, three thin coats beat one heavy one. Apply the first coat thinned slightly so it wets into the brushwork, then sand very lightly with 320-grit between coats one and two, wiping the dust before recoating.
Three field notes that save murals. Wait at least 48 hours after the last paint layer before sealing; acrylics that feel dry are still curing underneath, and sealing over them traps moisture as cloudy patches. Spray application gives the flattest finish over detailed brushwork; a brush can drag soft edges. And carry the sealer over the top rim and an inch inside the lid opening, because that lip is where water creeps under the art. The black snap-lock lid with its carry handles and the brass spigot should be masked and coated separately. The failure mode is skipping the wait: impatience here fogs the artwork permanently.
Key Takeaway: Seal cured acrylic art with three thin coats of water-based exterior clear coat, light sanding between coats one and two, and wait a full 48 hours after painting before you start.

Stage Twenty: Use Outdoor Decals for Detail Without Brushwork
 Save
Not everyone wants to hold a brush, and you do not have to. A vivid red barrel scattered with butterfly decals, an orange monarch, a yellow swallowtail, a blue morpho, and small teal and pink varieties drifting across the body, gets its detail from a printer instead of a paintbox, and the result holds its own from the curb. The critical choice is material: you want outdoor-rated vinyl with UV-stable inks, the kind sold for vehicles and exterior signs, not paper craft decals, which dissolve in the first hard rain. Paper belongs on indoor pots only.
Application on a curve is a five-step routine. One, degrease the painted surface and let it dry fully; any wax or silicone residue rejects adhesive. Two, position each decal with a strip of painter’s tape across its top, a hinge, and step back to check the scatter: five to eight butterflies on a 55-gallon barrel about 23 by 36 inches (58 by 91 cm) is the right density, odd numbers and varied angles reading as flight rather than wallpaper. Three, flip the decal up on its hinge, peel the backing, and lay it down working from the hinge outward with a felt-edged squeegee or a credit card wrapped in a microfiber cloth. Four, work from the center of the decal to the edges so air has an exit, and on the barrel’s curve, expect to make tiny relief snips in the backing of large decals so they can conform. Five, after 24 hours, seal the edges with a thin pass of clear exterior sealer so driven rain cannot lift a corner.
Mounting matters too: a gray-painted concrete block pedestal about 10 inches (25 cm) high raises the tapered drum so the lowest decal clears splash-back from the beds, and autumn leaf litter should be raked away from the base so moisture does not sit against the drum. The failure mode is bubbles: a decal laid down in one slap traps air that expands in sun and lifts the edge by August.
Key Takeaway: Choose outdoor UV-rated vinyl, hinge each decal with tape, squeegee from center outward, keep to five to eight motifs, and seal the edges after 24 hours.

Stage Twenty-One: Scale Up to a Multi-Barrel Bank
 Save
One barrel is a garden accessory; five is water infrastructure. A bank of five matching 55-gallon (208 L) drums on stacked concrete blocks holds 275 gallons (1,041 L), enough to carry a vegetable garden through a two-week dry spell, and the physics are identical to the single barrel, just multiplied. The discipline that makes a bank work is uniformity: same drums, same block height, same spigot position. Five drums about 24 inches across and 36 inches tall (61 by 91 cm), each on its own stack of 8 by 8 by 16 inch (20 by 20 by 41 cm) CMU blocks, must sit at exactly the same level or the linking pipe between them becomes a one-way street.
Plumb the bank with bottom links so the row fills and drains as one vessel. Use bulkhead fittings, not improvised bulkhead substitutes: a rubber-gasketed bulkhead through each drum wall about 3 inches (7.6 cm) above the base, joined by white Schedule 40 PVC with elbows, seals watertight and survives a nudge from the mower. Put a brass garden spigot on every drum anyway; the redundancy means you can isolate and service one drum without draining the bank. Feed the row from a single gray ribbed downspout with a funnel diverter at the first drum, and route the last drum’s overflow to daylight away from the red-brown brick wall. Full, this row holds over 2,290 pounds (1,040 kg) of water, so the block stacks go on compacted gravel, and the row goes where nothing behind it minds damp.
The aesthetic play with identical cobalt drums is rhythm: five matching forms against warm brick read as deliberate design rather than clutter, and a single lime-green watering can at the far end is the accent note. The failure mode is the level problem: one drum set an inch low becomes the one that never fills, and the bank quietly underperforms forever.
Key Takeaway: A multi-barrel bank works only with identical drums at identical heights, bottom-linked through gasketed bulkhead fittings, on compacted gravel under every block stack.

Stage Twenty-Two: Plant the Top Without Breeding Mosquitoes
 Save
A barrel with flowers spilling from the top, hot pink verbena, soft purple lobularia, white alyssum over the rim of a honey-brown cedar stave drum wrapped in three jute rope bands, is the single most photographed version of this project. It is also the version most likely to become a mosquito nursery, because the usual build mistake is planting directly into the barrel’s lid opening. Do that and you have standing water under wet soil, which is precisely what mosquitoes look for.
Build the planted top as a container on the barrel, never in it. The barrel keeps its own screened, sealed lid underneath; a shallow planter ring or an inset pot with drainage holes sits on top, holding 6 to 8 inches (15 to 20 cm) of potting mix. Water from the spigot with the galvanized can, and let excess drain to the mulched bed at the base, not back into the barrel. A cedar stave barrel about 24 inches across and 36 inches tall (61 by 91 cm) handles the look naturally, since the rope bands and rough-hewn staves already read as a planter; just confirm the downspout connection at the top feeds the barrel itself, through its own screened port, and not the planter soil.
Keep this short checklist taped inside the lid. Screen on every opening, intact and checked monthly from May through September. Water used or refreshed weekly; mosquitoes need roughly a week of still water to complete a cycle, so regular emptying breaks it. If water must sit, a Bti dunk, the biological larvicide sold at any garden center, keeps the barrel safe for people, pets, and pollinators. Edging the base mulch bed with small river stones keeps soil splash off the staves and the watering can parked neatly beside it. The failure mode is one gap in the screen discovered in August.
Key Takeaway: Plant in a container that sits on the sealed, screened lid, never into the barrel itself, and back it with weekly water turnover or a Bti dunk from May through September.

Stage Twenty-Three: Style the Corner So the Barrel Belongs
 Save
A finished mural barrel can still look like it landed from a truck if the ground around it is bare. The last styling pass is what makes the barrel read as part of the garden instead of an object in it, and the rule is repetition: whatever colors dominate the mural should reappear, in living form, within a few feet. A cream barrel painted with sunflowers, magenta-pink coneflowers, and lavender spikes, its colors fading from warm white at the top to painted grass at the base, wants real white daisies blooming in the mulch beside it and a clump of purple in the background bed. Paint promises, plants deliver, and the rhyme between them is the whole effect.
Get the base right first. A rough-sawn pallet platform, about 40 by 48 inches (102 by 122 cm), is a solid, free-draining stand if you pull any protruding nails, screw a plywood skin over the top slats so the barrel’s full weight cannot bow a single board, and check for the HT stamp, heat-treated, rather than chemically treated wood. The barrel itself, a large one at about 26 inches across and 40 inches tall (66 by 102 cm), then wants a soft surround: a mulch ring pulled back 3 inches (7.6 cm) from the barrel wall so moisture does not sit against the paint, and the white vinyl downspout from the gray siding connected last, after the pallet is settled.
Composition follows the odd-number instinct from any planting bed: the barrel plus two companions, a daisy clump and a low pot, reads better than barrel plus one. Keep the brass spigot and the twin hose fittings at the base clear of mulch and foliage so watering stays a pleasure rather than a dig. The failure mode is overdecorating: the mural is the loud element, and everything around it should be quieter.
Key Takeaway: Repeat the mural’s two strongest colors in living plants nearby, skin the pallet platform with plywood, and keep companions to two quiet elements so the artwork stays the star.

Stage Twenty-Four: Add Movement and Sound With a Rain Chain Feature
 Save
Once storage is solved, the most decorative thing water can do is move. A linked vessel feature, rain chain to tall urn to open bowl, converts every storm into a small performance, and the sequence is the whole engineering: the copper cup chain hangs from the eave where a downspout would be, guides water into the tall closed ovoid urn, and when the urn fills, a copper pour spout near its shoulder releases into the wide open bowl, which overflows into a basin bedded in tumbled aqua and clear sea glass. Each vessel only ever hands water downhill to the next.
Size the pieces to the rain, not the catalog. The tall urn, about 18 inches across and 30 inches tall (46 by 76 cm) in matte charcoal cast concrete or fiberglass, holds roughly 25 to 30 gallons (95 to 114 L) below its spout line; the bowl, about 24 inches across and 18 inches tall (61 by 46 cm), takes the surge. The sea glass bed, spread about 2 cubic feet (57 L) deep in a hidden liner, is not just jewelry: it is splash control, breaking the fall so a downpour murmurs instead of splatters. Anchor the chain at the eave with a proper gutter clip, and hang it so the last cup kisses the urn’s mouth, because a chain that swings free in wind lashes the vessel rim.
Two cautions belong to this feature. Open water means the mosquito and child-safety rules from the barrel apply doubly: the bowl needs moving water, a weekly tip-out, or a screened sump, and a shallow bowl on a pedestal is tip-able, so set it in the bed, not on it. And copper patinas, which is the charm; if you want it bright, that is a maintenance choice, not a default. The failure mode is a beautiful chain feeding an urn with nowhere planned for the overflow to go.
Key Takeaway: Build the feature as a fixed downhill sequence, chain, urn, spout, bowl, sea-glass basin, sized so each vessel hands water safely to the next, and give open water a mosquito plan.

Stage Twenty-Five: Winterize, Maintain, and Share the Project
 Save
The last stage repeats every year, and it is the one that decides whether your artwork is a one-season story. Freezing water expands about nine percent, and a barrel that goes into winter full will crack, split its fittings, or pop its lid, voiding every earlier stage in one cold snap. The fall routine, done before the first hard freeze in your zone, is five steps: disconnect the diverter and reconnect the downspout elbow so roof water bypasses the barrel; drain the barrel completely through the spigot; open the lid and tip out the last gallons; clean the inlet screen and the gutter above it; then either store the barrel upside down on blocks or leave it upright with the spigot open and the lid latched. Water left in the low spot of an “emptied” barrel is still enough to split a fitting.
Spring is the inspection pass. Look over the paint for lifted edges and the sealer for chalking, and touch up from your labeled jars before the season’s first fill. Check the stand for settling, the screen for tears, and the overflow path for winter debris. Ten minutes per barrel, once a year, is the entire maintenance budget.
Then the pleasant part: this is a project with a community. Many municipal water departments, conservation districts, and garden clubs run barrel-painting events where a drum, a pile of brushes, and a palette tray land in front of you alongside other participants turning out cobalt-to-emerald gradients and bright yellow stars of their own. A community event is the lowest-pressure place to try the techniques from this guide, because the barrels are pre-primed and the advice is free. Whether your barrel is a solo studio piece or a folding-table group effort, done looks the same: it holds water, sheds weather, and makes you glad every time you round the corner of the house.
Key Takeaway: Drain, disconnect, and dry-store before the first freeze, inspect paint and hardware each spring, and look to local conservation districts for community painting events.

That is the whole path: site by the downspout, size to the roof, build the base for real weight, plumb for the job, then paint, seal, and plant on top of a system that already works. The decorative barrel that lasts is never the one with the cleverest mural; it is the one whose overflow has somewhere to go and whose owner drains it in November. Start with the stage that matches your yard this season, and let the artwork grow from a barrel that already earns its keep.
From the guides
You've saved it, wanted it. Here's the how: codes, measurements, order. Your choices make it yours.
The Japandi Honest PlaybookThe honest version of the style: what to keep, what to skip, and the order to do it in.See inside →The Room Refresh PlaybookA repeatable four-step method, room by room, in ten minutes, thirty minutes, or one weekend.See inside →Make Any Room Feel Cozy on PurposeWhy some rooms hold people and others empty out, and the moves that change it.See inside → Save