 Georgia
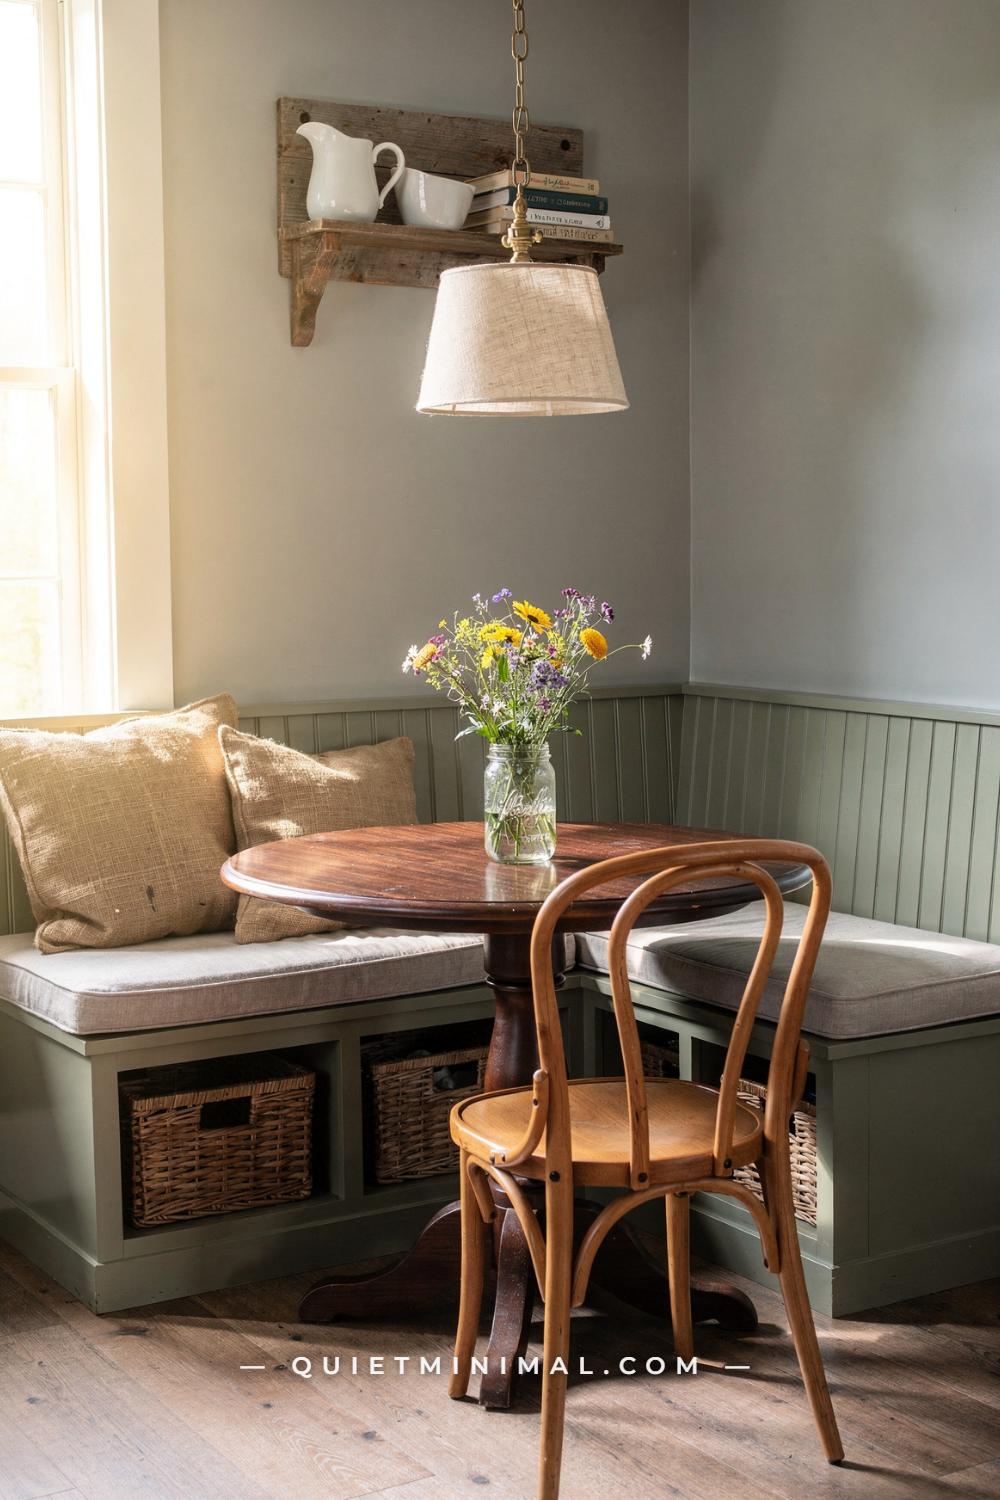
A DIY breakfast nook with a built-in bench and storage on a budget succeeds or fails on about six numbers, and most tutorials never print them. The eleven builds further down this page still hold: the KALLAX base, the piano-hinge lid, the pocket-hole drawers, the beadboard wall, the L-shaped corner, all of it. This block sits above them as the measurement-and-order layer: what to measure, in what order to build, and the plan, the cut list and the budget for a 5 ft, a 6 ft and a corner nook.
Measure the Corner and Tape the Footprint Before You Buy a Board
 Save
Measure before the lumber run, and measure each wall twice: at the floor and at 18 in (46 cm) up, because a corner 1/2 in (13 mm) out of square shows as a gap at seat height, not at the baseboard. Record the clear length of each wall to the nearest 1/8 in, the sill height of any window, every outlet, and the depth of a baseboard heater if there is one. An outlet inside the bench footprint cannot be buried behind a fixed panel: plan a cutout with a cover, or shift the bench 6 in (15 cm) along the wall.
Then put the plan on the floor in painter’s tape: one line 20 in (51 cm) off the wall for the bench face, a rectangle for the table, a band 18 to 24 in (46 to 61 cm) wide for the chair side, and a last line 36 in (91 cm) beyond it for the walkway. Set a dining chair on the bench line and sit there with a coffee. If your knees meet the table rectangle or your back meets the wall, move the tape now.
Key Takeaway: Measure each wall at the floor and at 18 in (46 cm), note sills, outlets and heaters, then tape the bench, table, chair zone and 36 in (91 cm) walkway and live with the lines for a day.

The Breakfast Nook Measurement Plate: Seat, Table and the Gap Between
 Save
Every number in the build traces back to this plate. The finished seat, cushion compressed under an adult, lands at 18 in (46 cm) off the floor. The seat runs 18 to 20 in (46 to 51 cm) deep from front edge to back cushion; with a 4 in (10 cm) back cushion the box itself is 22 to 24 in (56 to 61 cm) deep. The table top sits at 29 to 30 in (74 to 76 cm), leaving 10 to 12 in (25 to 30 cm) between seat top and table underside for knees, and its edge overhangs the seat edge by 3 to 4 in (8 to 10 cm).
From the guides
You've saved it, wanted it. Here's the how: codes, measurements, order. Your choices make it yours.
 The Japandi Honest PlaybookThe honest version of the style: what to keep, what to skip, and the order to do it in.See inside →
 The Room Refresh PlaybookA repeatable four-step method, room by room, in ten minutes, thirty minutes, or one weekend.See inside →
 Make Any Room Feel Cozy on PurposeWhy some rooms hold people and others empty out, and the moves that change it.See inside →
The rest is spacing. Allow 24 in (61 cm) of bench per adult, 30 in (76 cm) for elbows. A back panel or wall cushion rises 16 to 18 in (41 to 46 cm) above the seat. The toe kick is 3 in (8 cm) high and 3 in (8 cm) deep. Behind the table’s open side, hold 32 in (81 cm) if nobody passes, 36 in (91 cm) to edge past, 44 in (112 cm) to walk past. The navy bench in the photograph is a pair of 72 in (183 cm) runs at 18 in (46 cm) deep.
Key Takeaway: Seat 18 in (46 cm) high and 18 to 20 in (46 to 51 cm) deep, table 29 to 30 in (74 to 76 cm) with a 3 to 4 in (8 to 10 cm) overhang, 24 in (61 cm) per person, 36 in (91 cm) behind.

Choose the Footprint Your Room Gives You: Straight Run or Corner L
 Save
The room picks the footprint, not the pin. A straight run wants one clear wall of 48 to 72 in (122 to 183 cm) and 8 ft (244 cm) of room in front of it, so bench, table, chair and walkway line up. It is the cheapest bench per seat. The white bench in the photograph is a 48 in (122 cm) run: a 36 in (91 cm) round on a pedestal and two 17 in (43 cm) stools make it a table for four.
The corner L wants two walls of at least 60 in (152 cm) meeting at a true corner, and it pays with the inside seat, the 20 x 20 in (51 x 51 cm) square where the benches meet that nobody climbs into. It seats more per square foot than anything else and hides a deep storage well in that dead corner. The window-wall version is a straight run with one added number, the sill height, covered below. Write one word on the tape, straight or L, and do not change it once the lumber is cut.
Key Takeaway: Build a straight run on one clear wall of 48 to 72 in (122 to 183 cm) with 8 ft (244 cm) in front, and choose the corner L only when both walls give you 60 in (152 cm) and you will accept a dead inside seat.

Three Plans With Dimensions: the 5 ft Nook, the 6 ft Nook and the Corner
 Save
The 5 ft plan: a 60 in (152 cm) bench, 20 in (51 cm) deep, box top at 16 in (41 cm) under a 3 in (8 cm) cushion; two adults at 30 in (76 cm) each. A 30 x 48 in (76 x 122 cm) table or a 36 in (91 cm) round, its edge 3 in (8 cm) over the seat; two chairs opposite in an 18 to 24 in (46 to 61 cm) zone, then 36 in (91 cm) of walkway. Wall to walkway edge is about 107 in (272 cm), so the plan wants 9 ft (274 cm) of room depth, or 6 ft (183 cm) if the walkway runs past the end.
The 6 ft plan: a 72 in (183 cm) bench, same depth and height; three on the bench at 24 in (61 cm). A 36 x 60 in (91 x 152 cm) table with legs inset 12 in (30 cm) from each end, two or three chairs opposite, the same 36 in (91 cm) behind.
The corner plan: two 72 in (183 cm) runs, each 20 in (51 cm) deep, with a 20 x 20 in (51 x 51 cm) inside square and about 104 in (264 cm) of usable seat. A 42 in (107 cm) round pedestal centered about 38 in (97 cm) off each wall, so its edge overhangs each bench by 3 in (8 cm), seats four with one chair on the open side; hold 36 in (91 cm) beyond that chair. Footprint: roughly 9 x 10 ft (274 x 305 cm) with the walkway.
Key Takeaway: The 5 ft nook seats two on a 60 in (152 cm) bench with a 30 x 48 in (76 x 122 cm) table, the 6 ft nook seats three on 72 in (183 cm) with 36 x 60 in (91 x 152 cm), and the corner puts four around a 42 in (107 cm) round inside 9 x 10 ft (274 x 305 cm).
Frame the Base at 16 in With a Toe Kick and a Ledger Into the Studs
 Save
Frame with 2 x 4s laid flat as two ladders, bottom and top, joined by short uprights. Cut the uprights so the frame tops out at 15 1/4 in (39 cm); the 3/4 in (19 mm) plywood top brings the box to 16 in (41 cm), which lands a 3 in (8 cm) cushion at 18 in (46 cm) once it compresses. Set the bottom ladder back 3 in (8 cm) from the front of the top ladder and the toe kick appears on its own, 3 in (8 cm) high and deep. Uprights every 16 in (41 cm) along the front, one at each end.
Screw the back rail to the wall with 3 in (76 mm) screws into every stud; that ledger is what stops the bench rocking. On vinyl plank or tile, shim the bottom ladder level in both directions before driving a screw. Where two runs meet in a corner, butt one box against the other and screw through the uprights; never miter frames. Done is kneeling on the bare frame, shifting your weight, and feeling nothing move.
Key Takeaway: Two flat 2 x 4 ladders and 16 in (41 cm) uprights bring the box to 16 in (41 cm) with the plywood, the bottom ladder set back 3 in (8 cm) makes the toe kick, and 3 in (76 mm) screws into every stud make it a built-in.

The Cut List for a 6 ft Bench and What It Costs per Linear Foot
 Save
The 6 ft bench, 72 in (183 cm) long, 20 in (51 cm) deep, 16 in (41 cm) high, cuts from eight 2 x 4 x 8 boards and two sheets of 3/4 in (19 mm) sanded pine plywood. From the 2 x 4s: four rails at 72 in (183 cm), ten uprights at 12 1/4 in (31 cm), six cross ties at 17 in (43 cm), two toe-kick blocks at 12 in (30 cm). From the plywood: a top at 72 x 20 in (183 x 51 cm), a front at 72 x 15 in (183 x 38 cm), two ends at 20 x 15 1/4 in (51 x 39 cm), a floor at 70 1/2 x 17 in (179 x 43 cm), dividers or a lid from the rest. Face frame: three 1 x 4 x 8 pine boards. Fasteners: a box of 2 1/2 in (64 mm) screws and one of 1 1/4 in (32 mm) brads.
At current big-box prices the 2 x 4s run $4 to $8 each, $32 to $64; two sheets of 3/4 in sanded pine plywood, $70 to $110; three select 1 x 4s, $24 to $36. That is $126 to $210, or $21 to $35 per linear foot. The 5 ft bench uses the same board count with more cutoff, so $25 to $42 per foot. The corner needs fourteen 2 x 4s, three sheets and six 1 x 4s, $209 to $349, about $17 to $29 per foot of bench.
Key Takeaway: Eight 2 x 4s, two sheets of 3/4 in (19 mm) plywood and three 1 x 4s build the 6 ft bench for $126 to $210 in current lumber prices, $21 to $35 per linear foot, and the corner drops to $17 to $29 per foot because the runs share a corner.

Build the Box for the Storage You Will Actually Reach
 Save
Decide the storage before you skin the frame, because each type asks the frame for something different. A lift-top needs the seat to be a lid: a fixed 4 in (10 cm) rail at the back for the hinge, a stay on each side to hold the lid at 80 degrees, and a cushion fixed to the lid so it rises with it. Drawers need a flat, smooth box floor, 1 in (25 mm) of clearance each side for the slides and an opening 1/8 in (3 mm) larger than the drawer box all round. Open cubbies need 3/4 in (19 mm) dividers every 20 to 24 in (51 to 61 cm) and nothing else.
The honest test is reach. Anything under a lid is unreachable while someone sits on it, so a lift-top holds the monthly things: board games, the platter, the holiday linens, exactly what the open lid in the photograph holds. Drawers and cubbies open from the front with people seated, so they hold the daily things: napkins, coffee filters, the kids’ art supplies. List what goes in, sort it by how often it comes out, and the storage type chooses itself.
Key Takeaway: Sort what you will store by how often it comes out: monthly things live under a lift-top lid with stays, daily things live in drawers or 20 to 24 in (51 to 61 cm) cubbies you can reach with people seated.
Lift-Top, Drawers or Open Cubby: Cost, Reach and Capacity Compared
 Save
Measured on the 6 ft bench with a 72 x 17 x 14 in (183 x 43 x 36 cm) interior, the three types separate cleanly. The lift-top holds the most, about 8.8 cu ft (250 L) in one open well, adds one 72 in (183 cm) continuous hinge and two lid stays, and takes two extra hours. Reach while seated: none. Skill: low, though a 72 x 20 in (183 x 51 cm) lid in 3/4 in (19 mm) plywood is heavy enough that the stays are not optional.
Three drawers hold about 5.6 cu ft (160 L), since each box loses height to slides and front. They add three pairs of 16 in (41 cm) full-extension slides, half a sheet of 1/2 in (13 mm) plywood at $13 to $20 for the boxes, three fronts, three pulls and a full extra day. Reach while seated: full. Skill: the highest.
Three open cubbies hold about 7.8 cu ft (220 L), add half a sheet of 3/4 in (19 mm) plywood for dividers at $18 to $28 and three baskets, and take an extra hour. Reach: full. Skill: the lowest. Cubbies with baskets win the budget build, drawers win the daily-use build, the lift-top wins only for bulk.
Key Takeaway: A lift-top holds about 8.8 cu ft (250 L) you cannot reach while seated, three drawers hold 5.6 cu ft (160 L) with full reach at the highest cost and skill, and three basket cubbies hold 7.8 cu ft (220 L) for half a sheet of plywood.

Skin the Box and Hang the Face: Plywood, Beadboard and the Paint Line
 Save
Skin in this order: box floor, ends, front, top. Glue every panel to the frame and screw at 8 in (20 cm) centers, setting the front 1/4 in (6 mm) back from the end panels so the face material lands flush. The face is where a budget bench becomes millwork: 1/4 in (6 mm) beadboard nailed straight to the plywood front, or a 1 x 4 pine face frame with 1/4 in (6 mm) MDF set into the openings for a Shaker look. Either goes on with 1 1/4 in (32 mm) brads from an 18 gauge nailer, the tool resting on the bench top in the photograph, and either takes an afternoon.
Then the paint line. Caulk every seam where wood meets wood or wall, fill the brad holes, sand at 220 grit, prime, and paint bench, face and any wainscoting behind it in one color and one sheen, satin or semi-gloss. The eye reads one continuous painted plane from floor to seat edge as a built-in. Done is when you cannot find the seam between bench and beadboard from 6 ft (183 cm) away.
Key Takeaway: Glue and screw the plywood skin at 8 in (20 cm) centers, nail 1/4 in (6 mm) beadboard or a 1 x 4 face frame over it with 1 1/4 in (32 mm) brads, then caulk, fill and paint bench and wall in one color and one sheen.

The Cushion Foam Ladder: Thickness, Density and the Box Height Each Needs
 Save
Foam is a ladder of thickness and density, and each rung sets the box height. Rung one: 2 in (5 cm) regular high-density, for a back cushion only; it bottoms out under a daily breakfast, and the box would have to sit at 17 in (43 cm). Rung two: 3 in (8 cm) regular high-density, the everyday minimum, $31.99 for an 82 x 24 in (208 x 61 cm) third sheet on a foam supplier’s September price list; box at 16 in (41 cm). Rung three: 3 in (8 cm) high-quality 2.8 lb, 35 ILD foam, $40.99 for the same sheet, the rung to buy: the supplier rates it for a 16 year life and the extra $9 is the cheapest upgrade in the build; box at 16 in (41 cm). Rung four: 3 in (8 cm) firm Lux grade, $42.99, for a bench that is the only dining seat. Rung five: 4 in (10 cm) of the 2.8 lb foam, only if the box was framed at 15 in (38 cm).
One third sheet cuts a 72 x 20 in (183 x 51 cm) seat and leaves a 10 in (25 cm) strip. Wrap the foam in 1 in (25 mm) polyester batting, and sew or order a boxed cover with the zipper along the back; 2 yd (183 cm) of 54 in (137 cm) fabric covers the 6 ft cushion. The thick navy cushions in the photograph are the 3 in rung on an 18 in (46 cm) seat.
Key Takeaway: Buy the 3 in (8 cm) 2.8 lb, 35 ILD foam at $40.99 a third sheet over the $31.99 regular grade, frame the box at 16 in (41 cm) for it, and go to 4 in (10 cm) only on a 15 in (38 cm) box.

Fit the Table Last: Height, Overhang and Pedestal Versus Legs
 Save
The table comes last because the bench sets its numbers. Height 29 to 30 in (74 to 76 cm), never a 36 in (91 cm) counter-height top, which turns an 18 in (46 cm) bench into a child’s seat. Position: the edge 3 to 4 in (8 to 10 cm) over the front of the cushion, with 10 to 12 in (25 to 30 cm) between cushion top and apron. Measure to the apron, not the top; a 4 in (10 cm) apron on a 29 in (74 cm) table can leave 8 in (20 cm) and knock knees.
Base is the real decision. People enter a bench by sliding along it, and a table leg 6 in (15 cm) from the bench end blocks the slide. Legs sit at least 12 in (30 cm) in from each end, or the base is a single pedestal with a foot no wider than 24 in (61 cm). A 36 to 42 in (91 to 107 cm) round pedestal answers any corner L and most straight runs under 60 in (152 cm); a rectangle with inset legs suits the 72 in (183 cm) run. The 42 in (107 cm) two-tone pedestal in the photograph clears every seat on its 72 in (183 cm) bench.
Key Takeaway: Hold the table at 29 to 30 in (74 to 76 cm) with its edge 3 to 4 in (8 to 10 cm) over the cushion and 10 to 12 in (25 to 30 cm) below the apron, and choose a pedestal under 24 in (61 cm) wide or legs inset 12 in (30 cm) so nobody’s slide is blocked.

Which Table Fits Which Bench: Sizes, Seats and Base by Plan
 Save
A 48 in (122 cm) bench takes a 30 to 36 in (76 to 91 cm) round on a pedestal, two on the bench and two on stools, the table stopping 3 in (8 cm) short of each bench end; a rectangle here is 24 x 42 in (61 x 107 cm) at most, also on a pedestal.
A 60 in (152 cm) bench takes a 36 in (91 cm) round or a 30 x 48 in (76 x 122 cm) rectangle: two adults and a child on the bench, two chairs across. A 72 in (183 cm) bench takes a 36 x 60 in (91 x 152 cm) rectangle with legs inset 12 in (30 cm), leaving 36 in (91 cm) of clear slide at the middle, or a 42 in (107 cm) round: three on the bench, two or three across.
The corner L of two 72 in (183 cm) runs takes a 42 to 48 in (107 to 122 cm) round pedestal set 22 in (56 cm) off each wall, four seated plus one loose chair; a 36 x 48 in (91 x 122 cm) rectangle works only on a pedestal, since any leg lands in one of the two slide paths. Across all four the overhang is 3 to 4 in (8 to 10 cm) and the height 29 to 30 in (74 to 76 cm). The 36 in (91 cm) reclaimed-wood pedestal in the photograph is the shape that fits the most benches.
Key Takeaway: 48 in (122 cm) bench, 30 to 36 in (76 to 91 cm) round pedestal; 60 in (152 cm), 36 in (91 cm) round or 30 x 48 in (76 x 122 cm); 72 in (183 cm), 36 x 60 in (91 x 152 cm) with legs inset 12 in (30 cm); corner L, 42 to 48 in (107 to 122 cm) round pedestal.

Light the Nook From the Table Up, Not the Ceiling Down
 Save
Light is measured up from the table, not down from the ceiling. The bottom of the pendant hangs 30 to 36 in (76 to 91 cm) above the table top; on a 9 ft (274 cm) ceiling that is a 3 to 4 ft (91 to 122 cm) drop, so the stock 12 in (30 cm) chain on most fixtures is wrong. Size the shade at one third to one half of a round table’s diameter: 12 to 18 in (30 to 46 cm) over a 36 in (91 cm) round, 14 to 21 in (36 to 53 cm) over 42 in (107 cm). The 14 in (36 cm) black barn shade over the 36 in (91 cm) oak table in the photograph is that rule in metal.
Center the pendant on the table, never on the ceiling box the builder left mid-room. If the box is off by more than 6 in (15 cm), a swag hook and 3 ft (91 cm) of extra cord moves the light for less than a new fixture. Put it on a dimmer with a 2700 K bulb. A wall sconce at the bench end, 60 to 66 in (152 to 168 cm) to center, lights the seat the pendant leaves in shadow.
Key Takeaway: Hang the pendant 30 to 36 in (76 to 91 cm) above the table top, size the shade at one third to one half of the table’s width, center it on the table with a swag if the ceiling box is off, and dim a 2700 K bulb.

The Mistake List and the Measurement That Catches Each One
 Save
Each mistake has a number that catches it. Bench too deep: a 24 in (61 cm) seat with no back cushion makes you slide forward; hold 18 to 20 in (46 to 51 cm), or add a 4 in (10 cm) back cushion to a 24 in (61 cm) box. Table too far: an overhang under 2 in (5 cm) leaves the plate a reach away; slide the table to 3 to 4 in (8 to 10 cm) over the cushion. No toe kick: heels scuff the face panel within a season; the 3 x 3 in (8 x 8 cm) kick is set at framing.
Seat too high: an 18 in (46 cm) box plus 3 in (8 cm) of foam is a 21 in (53 cm) seat and dangling feet; frame at 16 in (41 cm). Knee gap wrong: under 10 in (25 cm) from cushion to apron knocks knees, over 13 in (33 cm) puts the table at chest height. Leg in the slide path: any leg within 12 in (30 cm) of a bench end blocks the way in; inset it or go pedestal. Pendant at ceiling height: a fixture 48 in (122 cm) above the table lights the ceiling; drop it to 30 to 36 in (76 to 91 cm). Walkway under 32 in (81 cm): tape 36 in (91 cm) before framing. Sill below the cushion line: a 20 in (51 cm) sill behind an 18 in (46 cm) seat is a wall you cannot lean on.
Key Takeaway: Check nine numbers before anyone sits: seat depth, overhang, toe kick, box height, knee gap, leg inset, pendant height, walkway and sill, each against the figure above.

The Window-Wall Nook: Sill Height, Backrest and Heat
 Save
A bench under a window is the straight run with one number added, the sill height, and that number decides the backrest. Most sills sit 24 to 36 in (61 to 91 cm) off the floor. With the seat at 18 in (46 cm), a 30 in (76 cm) sill leaves 12 in (30 cm) of wall, enough for a 16 in (41 cm) back cushion against the wall. A 24 in (61 cm) sill leaves 6 in (15 cm), so switch to a 4 in (10 cm) loose back cushion and let the pillows do the rest, as the sage-green seat in the photograph does. A sill under 20 in (51 cm) means the box top sits 1/2 in (13 mm) below the window stool, the stool becomes the back edge of the seat, and a row of pillows is the backrest.
Two more checks. Casement cranks and sash locks need 3 in (8 cm) of clear air above the cushion, so the seat may have to stop short of the wall. A baseboard heater or floor register under the window cannot be boxed in: end the bench 6 in (15 cm) short of it, or leave the back of the box open with a 2 in (5 cm) gap at the floor and cut a slotted grille into the toe kick so warm air still rises.
Key Takeaway: Measure the sill first: 30 in (76 cm) takes a 16 in (41 cm) back cushion, 24 in (61 cm) takes a 4 in (10 cm) loose cushion, under 20 in (51 cm) makes the stool the seat back, and leave a 6 in (15 cm) end gap or a vented toe kick over any heat.

The One-Chart Budget: What Each Plan Costs in Materials
 Save
Priced at current big-box lumber rates and one foam supplier’s September list, before fabric, paint, hardware and the table. The 5 ft straight bench: eight 2 x 4s at $32 to $64, two sheets of 3/4 in (19 mm) sanded pine plywood at $70 to $110, three 1 x 4s at $24 to $36, one 82 x 24 in (208 x 61 cm) third sheet of 3 in (8 cm) 2.8 lb foam at $40.99: $167 to $251.
The 6 ft straight bench: the same eight 2 x 4s, two sheets, three 1 x 4s and one third sheet of foam, the same $167 to $251 spent with less waste, since 72 in (183 cm) is the most efficient length an 8 ft board and an 82 in (208 cm) foam sheet give you. Add half a sheet of 1/2 in (13 mm) plywood, $13 to $20, if it gets drawers.
The corner L of two 72 in (183 cm) runs: fourteen 2 x 4s at $56 to $112, three sheets of 3/4 in (19 mm) plywood at $105 to $165, six 1 x 4s at $48 to $72, two third sheets of the same foam at $82, one per run: $291 to $431. Read across: the corner costs about 70 percent more than a straight run and seats twice as many, and the upgrade from regular to 2.8 lb foam is $9 on a straight bench and $18 on the corner, the smallest line on the chart.
Key Takeaway: Materials run $167 to $251 for the 5 ft or 6 ft straight bench and $291 to $431 for the corner L in current lumber prices and foam, and the 6 ft length wastes the least of an 8 ft board and an 82 in (208 cm) foam sheet.

The original ideas from this article continue below.
If your kitchen corner has been collecting grocery bags and ignored chairs for the last two years, you already know a breakfast nook would fix it — you just haven’t been able to justify the cost of a contractor or a custom millworker. Here’s the thing: you don’t need either. The most convincing built-in breakfast nooks being built right now aren’t actually “built in” at all. They’re flat-pack units, a little trim work, and a coat of paint that tricks the eye into seeing something custom. This article walks you through 11 specific DIY approaches — from the easiest no-cut weekend build to a full corner L-bench with drawers — with a real budget framework and the sequencing that most guides leave out entirely. Every idea includes what to buy, what order to do it in, and what not to skip if you want it to look finished rather than just assembled.
From the guides
You've saved it, wanted it. Here's the how: codes, measurements, order. Your choices make it yours.
The Japandi Honest PlaybookThe honest version of the style: what to keep, what to skip, and the order to do it in.See inside →The Room Refresh PlaybookA repeatable four-step method, room by room, in ten minutes, thirty minutes, or one weekend.See inside →Make Any Room Feel Cozy on PurposeWhy some rooms hold people and others empty out, and the moves that change it.See inside →The IKEA KALLAX Base Bench (The Easiest Start)
 Save
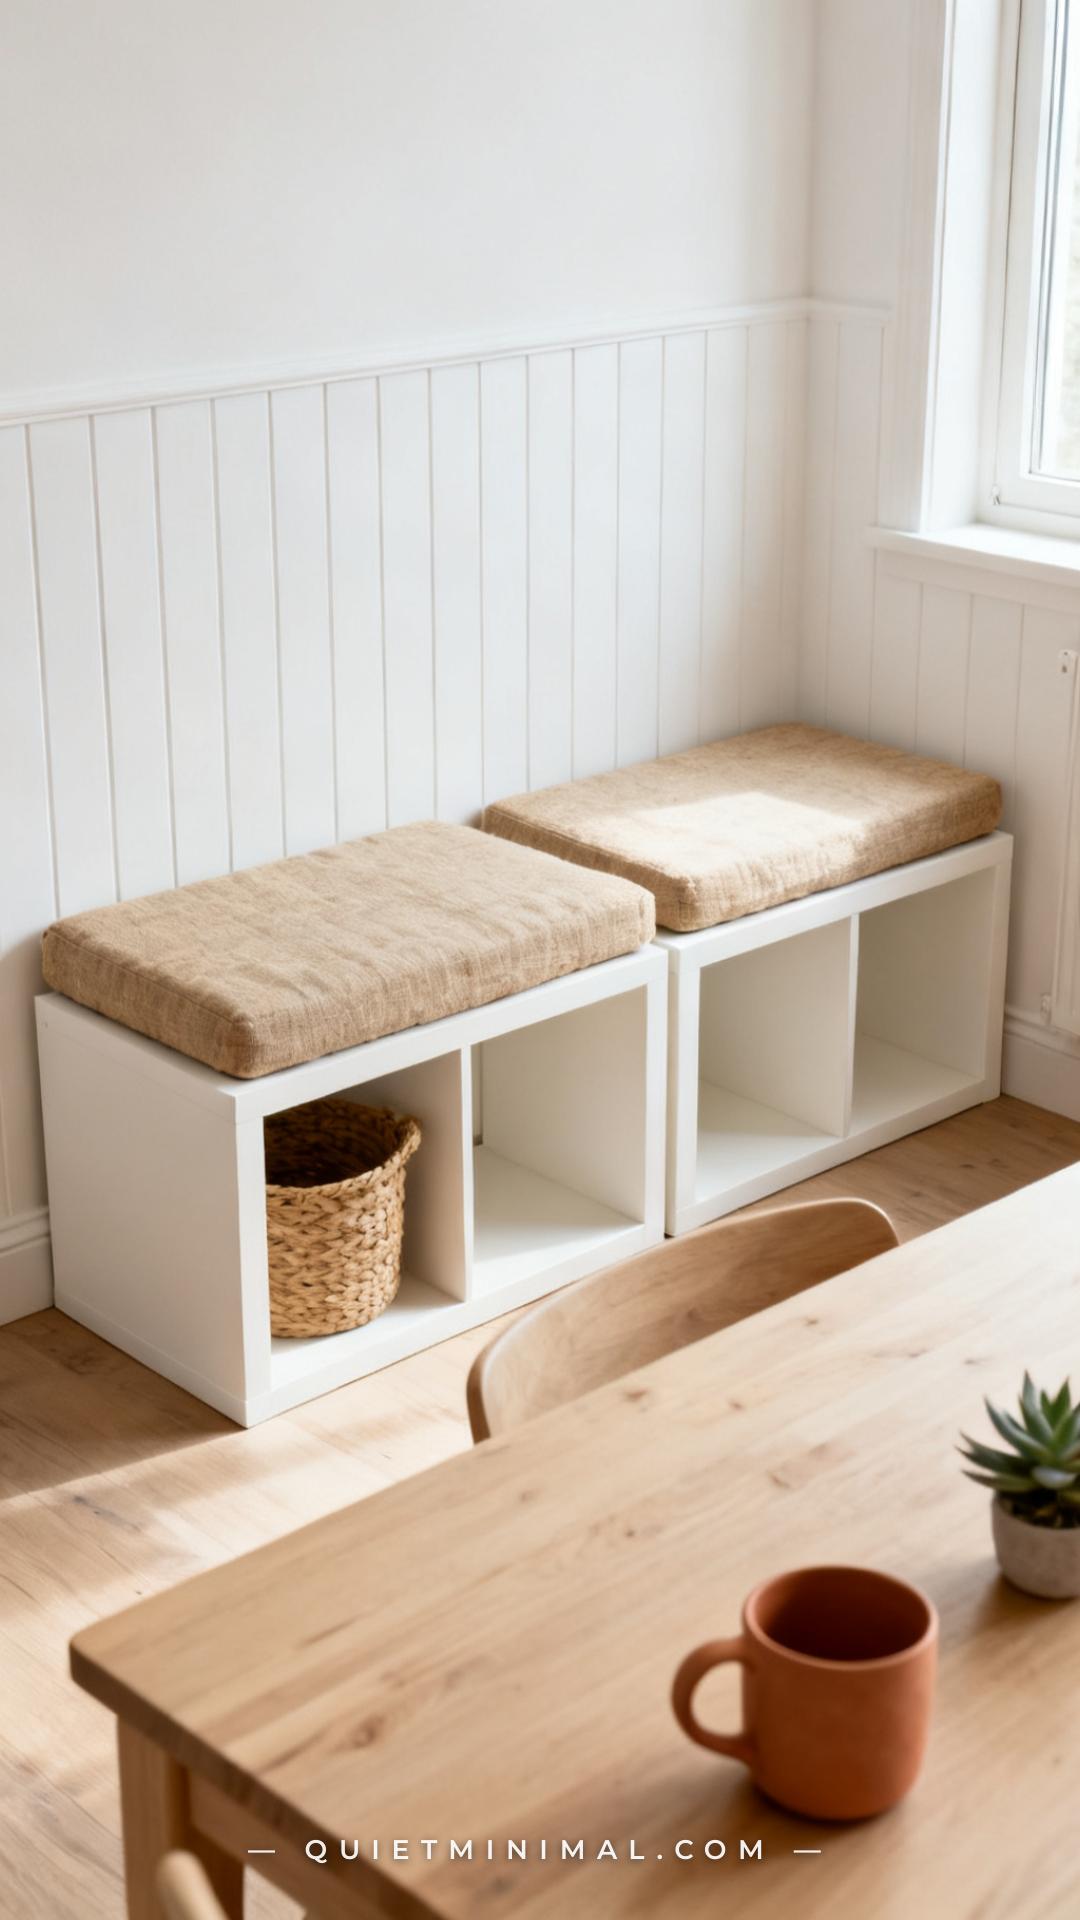
The KALLAX is the unsung hero of the DIY breakfast nook world. Placed on its side with the cubbies facing out or down, two KALLAX 2×2 units pushed together create an instant bench base that’s roughly 30 inches deep and the right seat height when you add a cushion. The storage is already built in — you get four compartments per unit that fit woven baskets, kids’ supplies, or extra linens without any additional work.
To make it look genuinely built-in, paint it the same color as your walls or trim, add a 1×4 pine board as a top cap (secured with construction adhesive), and run a piece of base molding along the front bottom edge. That’s it. From across the room, it reads as custom millwork. The total material cost for this approach — two KALLAX units, cushion foam, fabric, trim, paint, and baskets — lands well within a budget build for most kitchens.
Key Takeaway: Two KALLAX units on their sides, painted and trimmed, produce the most convincing faux built-in result with the least cutting and the most accessible storage.

The Lift-Top Bench with Piano Hinge Storage
 Save
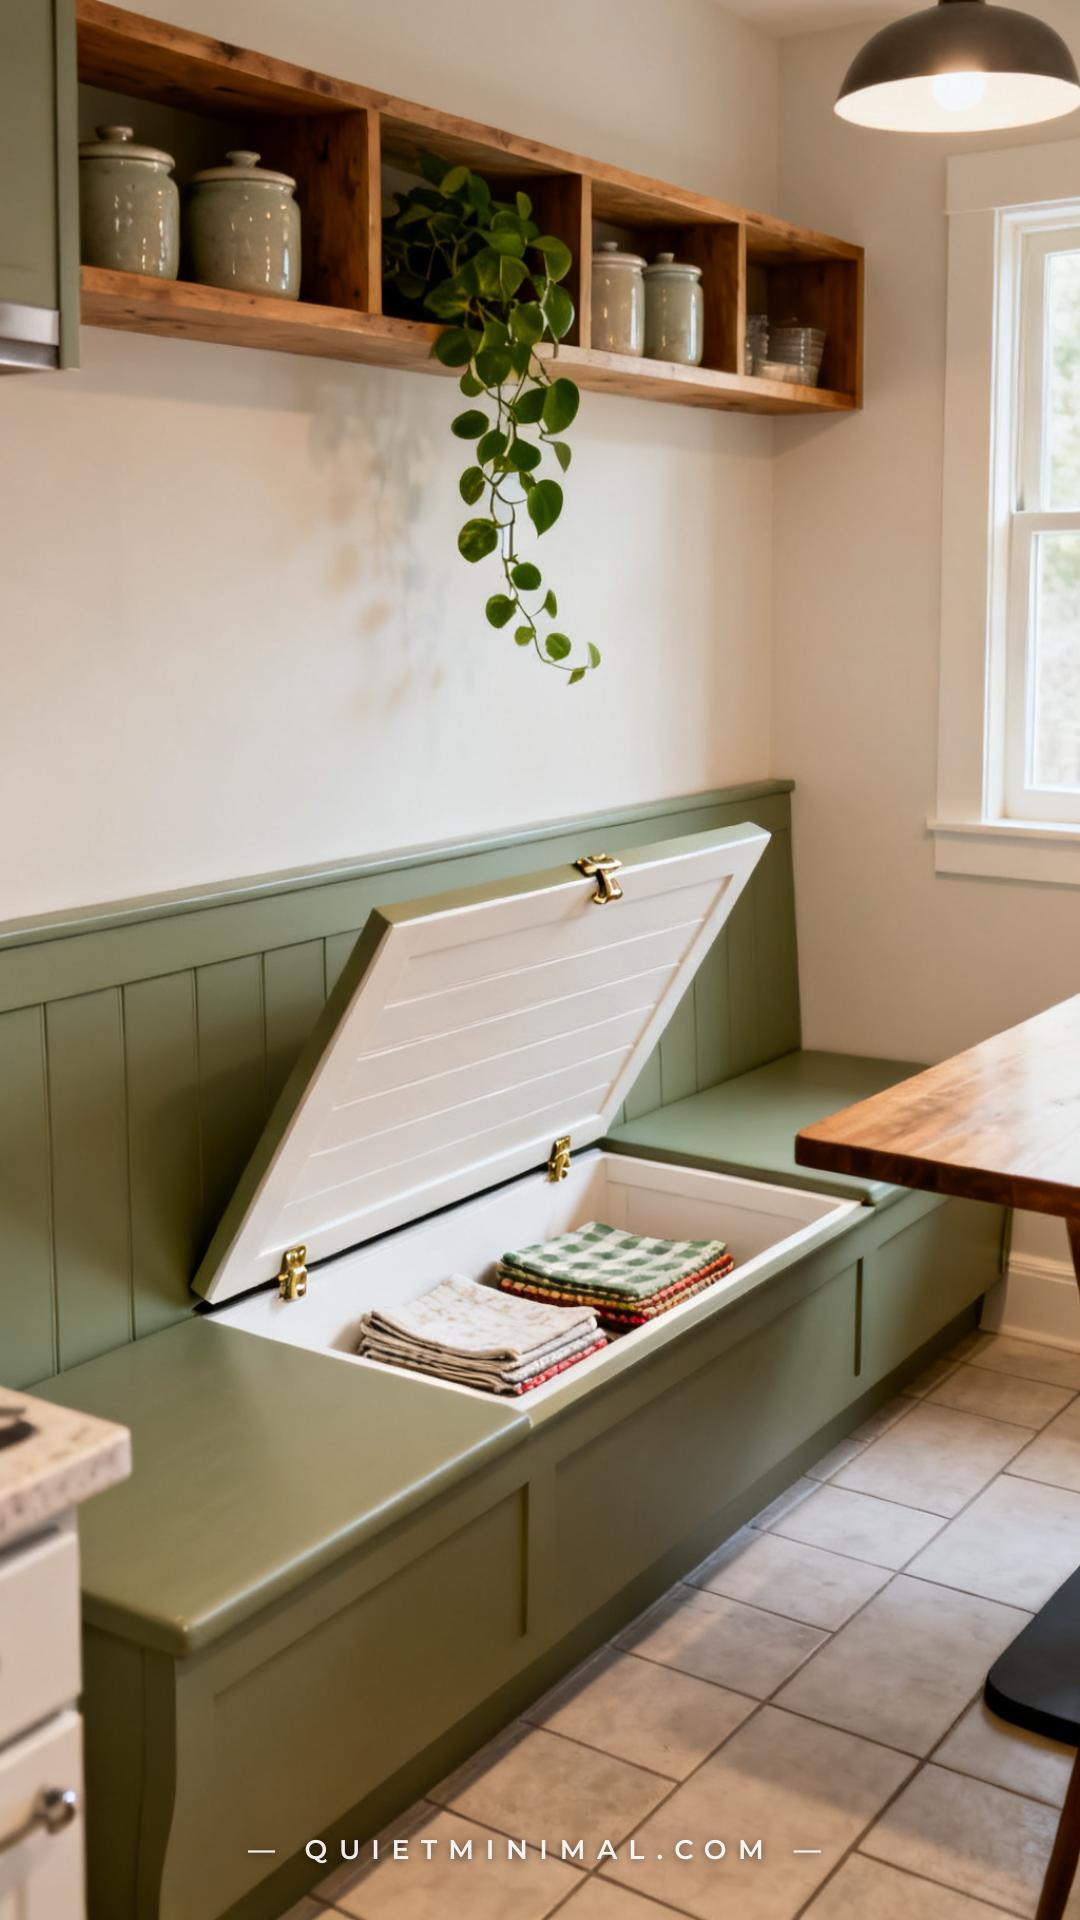
The lift-top bench is the most requested storage solution in DIY nook builds — and the most frequently abandoned because people don’t know which hinge to use. The answer is simple: a full-length piano hinge, also called a continuous hinge, secured to the back edge of the lid and the top of the bench back rail. It distributes weight evenly, prevents the lid from warping over time, and won’t pull out of soft pine the way a standard cabinet hinge can.
Build the bench box first from 3/4-inch plywood — a basic rectangular frame with a plywood bottom and four sides. Cut the lid from the same sheet so the grain matches. Install the piano hinge last, after painting. Add a lid-support chain or soft-close lid stay on each side so the lid doesn’t slam down. The interior depth with a standard 18-inch seat height gives you roughly 14–15 inches of usable storage — enough for throws, table linens, and board games.
Key Takeaway: A full-length piano hinge on a plywood bench box is the most durable, warp-resistant lift-top storage solution and is the one detail that separates a professional-looking result from a flimsy one.

The Beadboard Back Wall Upgrade
 Save
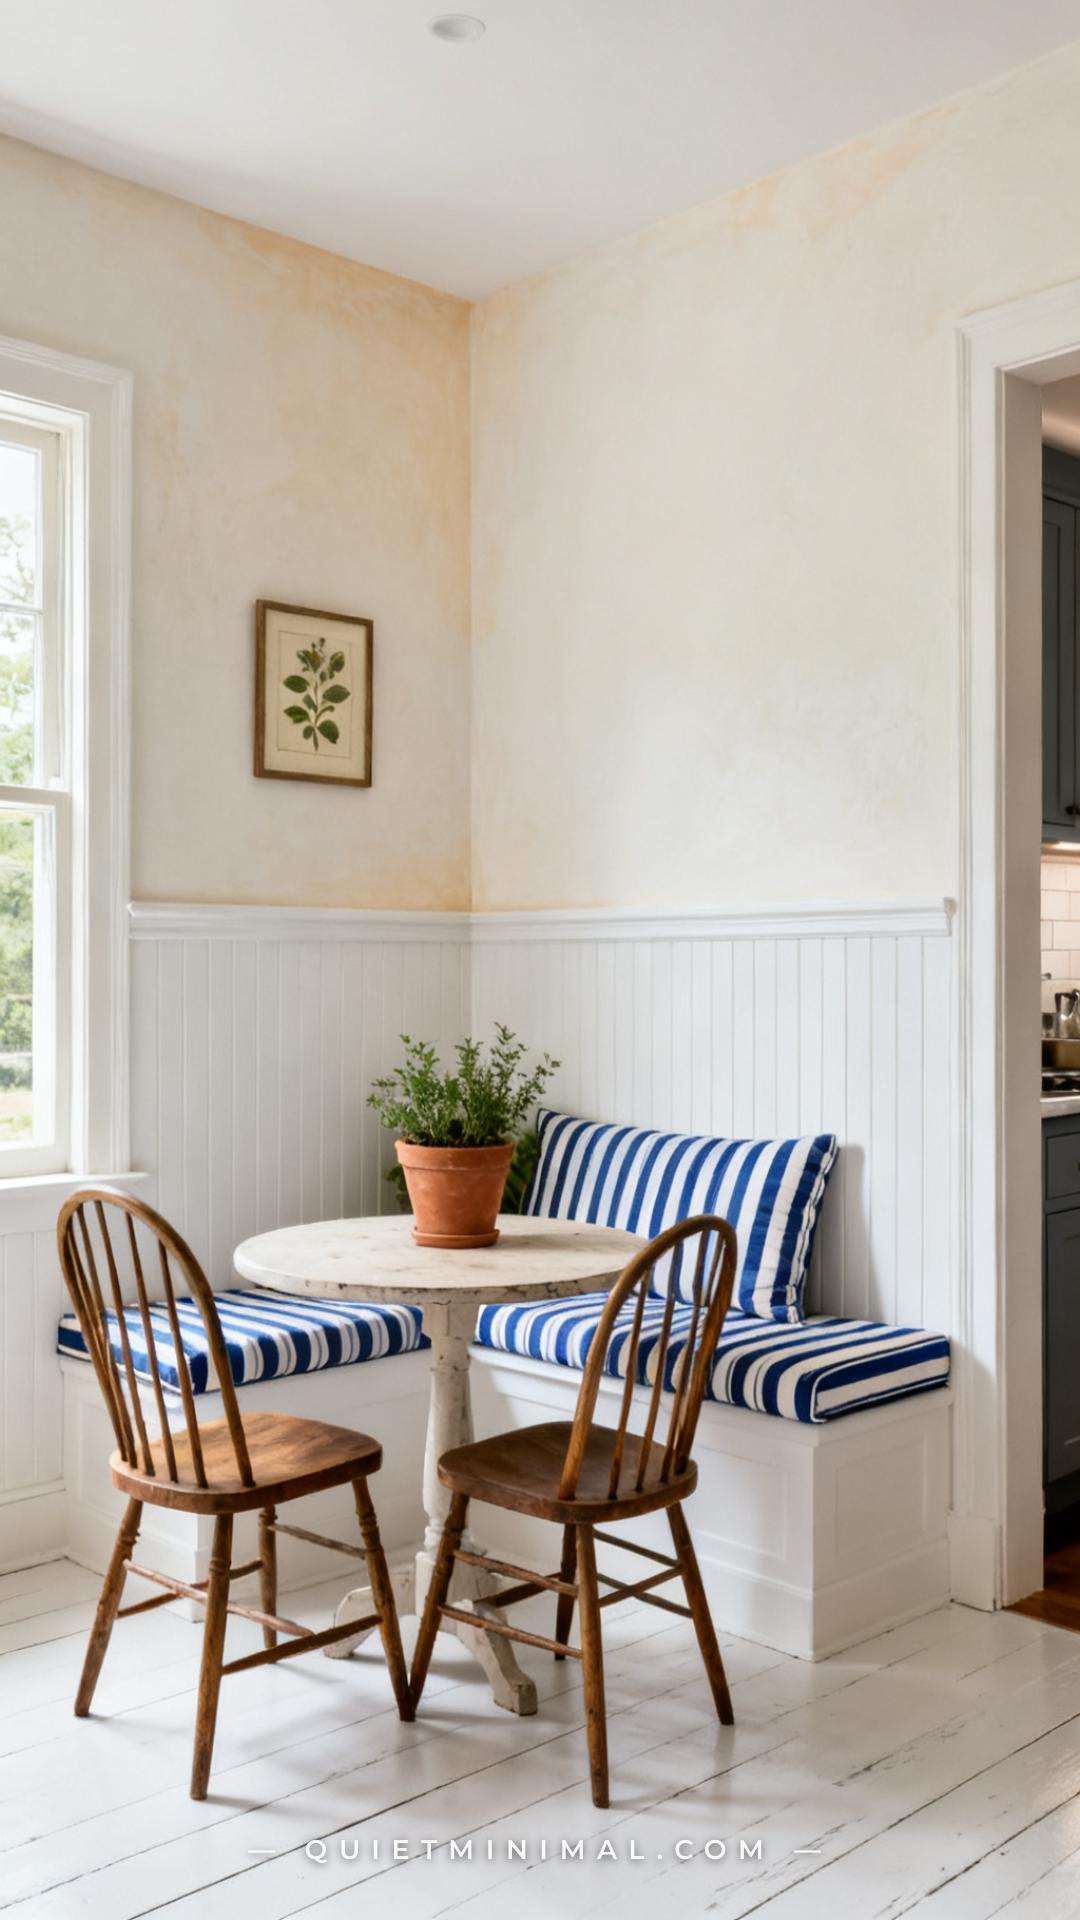
Beadboard paneling is the single fastest visual upgrade you can make to a breakfast nook wall, and it’s the detail that makes a DIY bench look like it was always part of the house. PVC beadboard panels (sold in 4×8 sheets at most home improvement stores) cost a fraction of wood, paint perfectly, and resist moisture — important in a kitchen environment.
Install panels from the floor up to 36 inches (standard wainscoting height) or from bench-seat level up to the ceiling if you want a more dramatic look. Secure them with construction adhesive and finish nails. Cap the top edge with a 1×3 or 1×4 pine board painted to match, which doubles as a ledge shelf. This one material swap — blank wall to beadboard — changes the entire character of the space and takes most DIYers a half-day to complete.
Key Takeaway: PVC beadboard panels installed from bench height to ceiling on nook walls cost under $80 in materials and are the most efficient way to make a DIY bench read as a genuine built-in design feature.

The Pocket-Hole Drawer Build
 Save
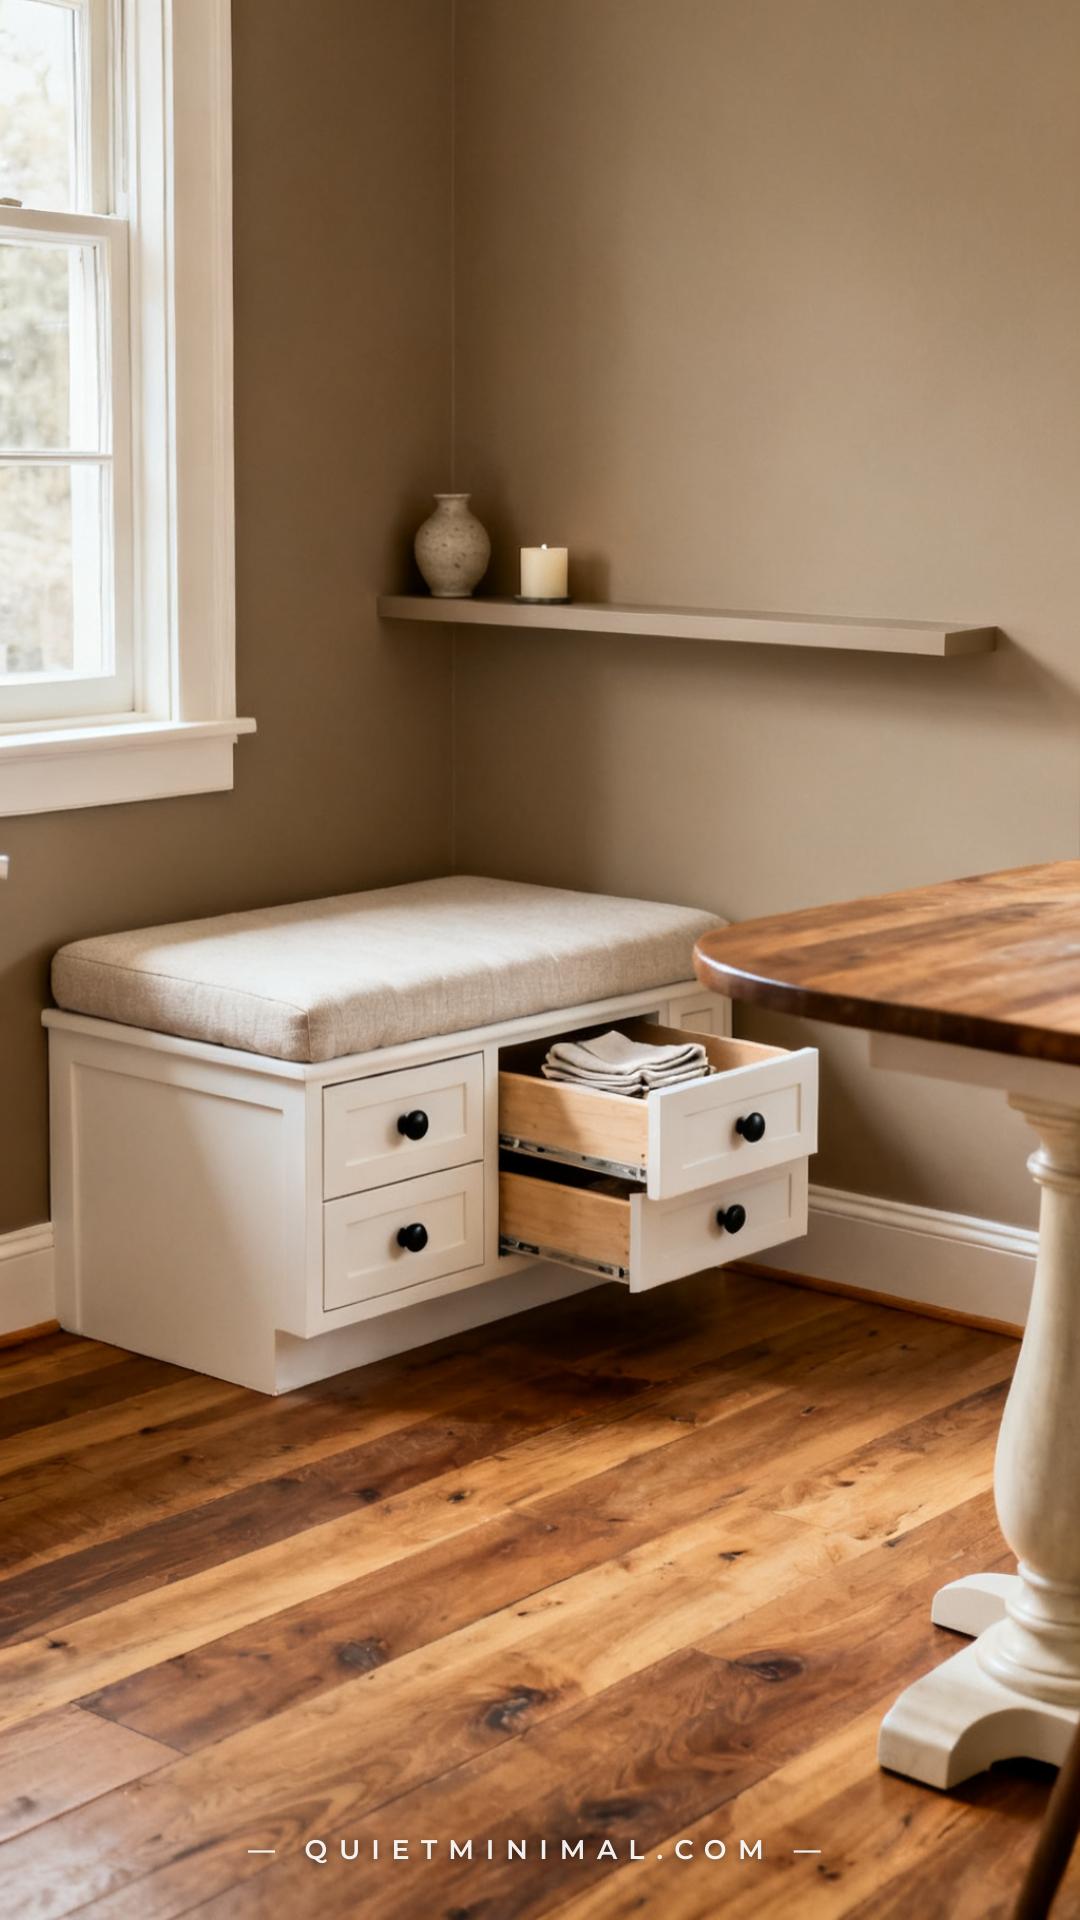
Pull-out drawers in a breakfast nook bench look high-end but are genuinely achievable for a beginner woodworker using pocket-hole joinery. The Kreg Pocket-Hole Jig is the tool that makes this possible without advanced carpentry skills — it drills angled pilot holes that let you join boards with screws at clean right angles, no dado cuts or dovetails required.
Build each drawer box from 1/2-inch plywood, using pocket screws at every corner joint. Install simple undermount drawer slides — soft-close slides add a premium feel and cost only marginally more than standard slides. The drawer face (the visible front panel) gets attached after installation and can be adjusted for a flush, even reveal. Three drawers under a 60-inch bench give you excellent accessible storage for table linens, kid supplies, or kitchen overflow without the top access limitations of a lift-lid design.
Key Takeaway: Pocket-hole joinery paired with soft-close undermount drawer slides is the most beginner-accessible path to real pull-out drawers in a nook bench, and the finished result is indistinguishable from custom cabinetry.

The L-Shaped Corner Build Layout
 Save
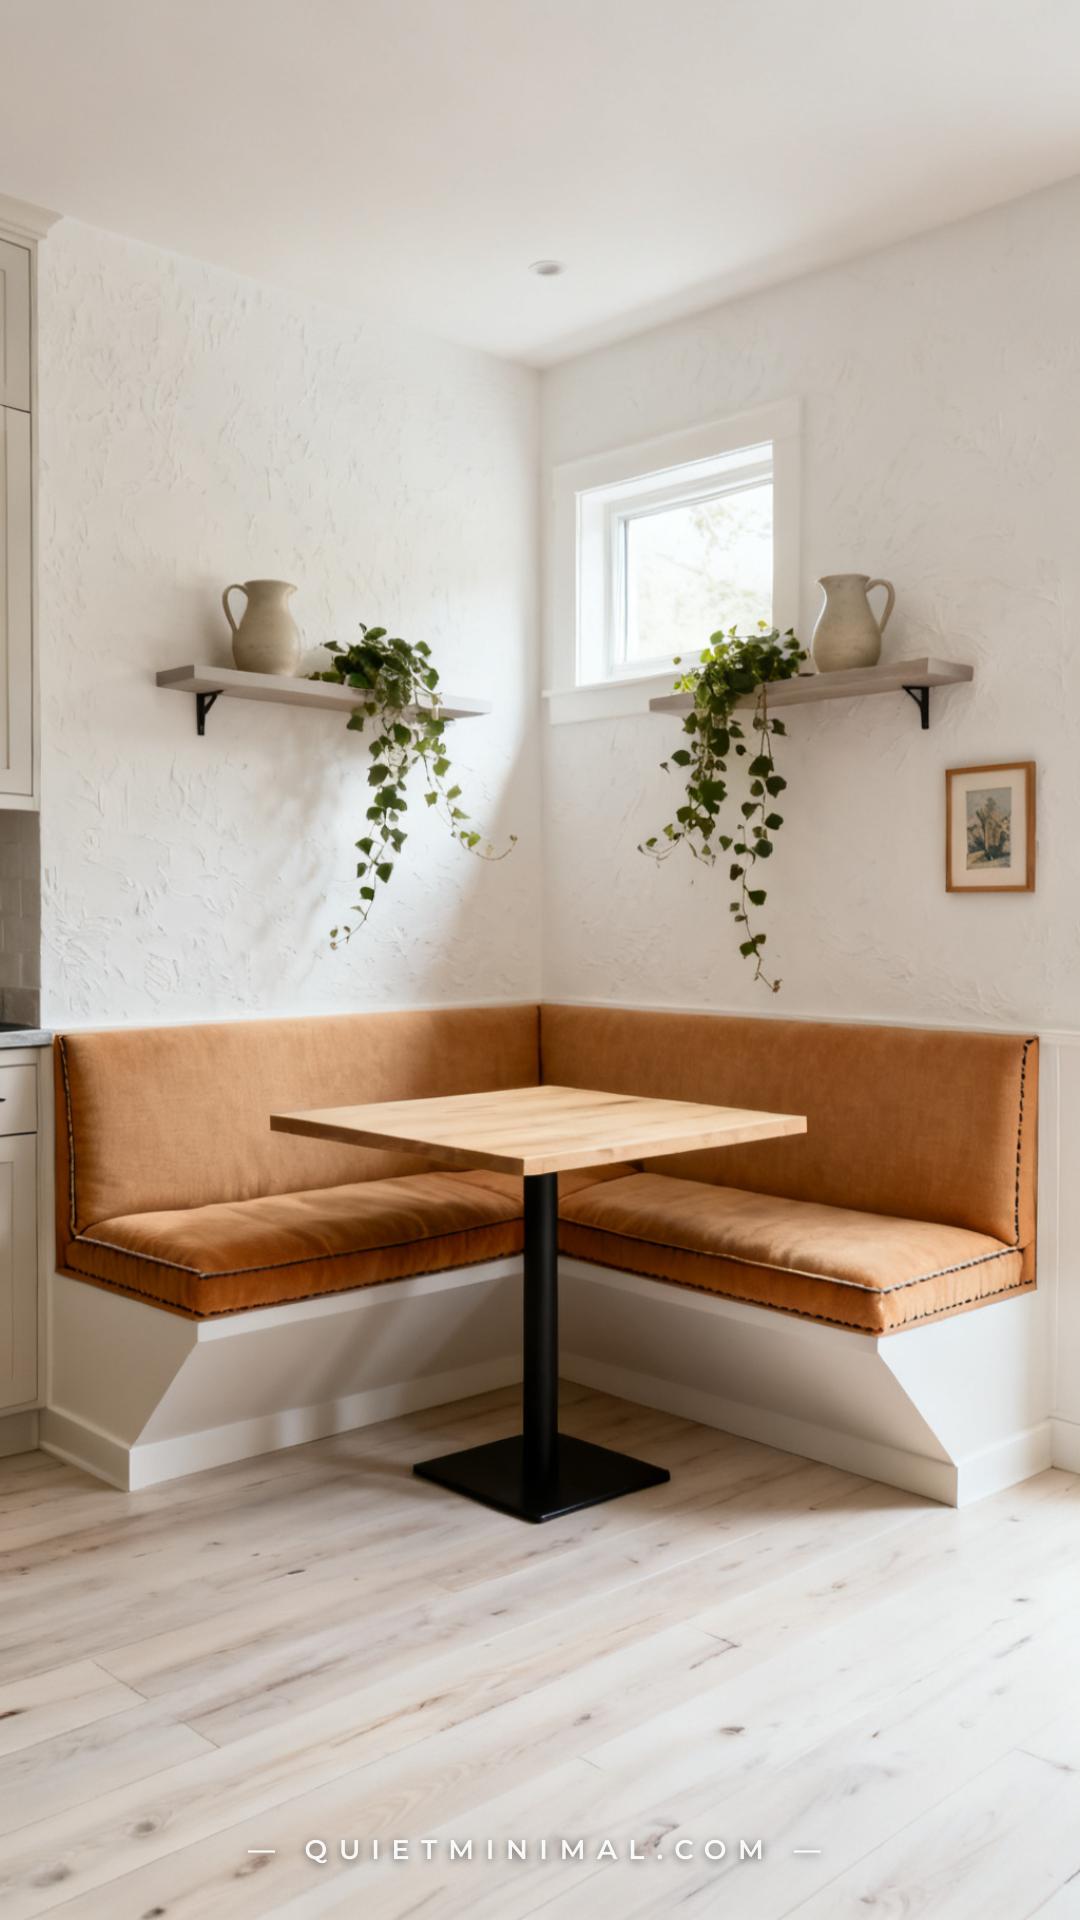
The L-shaped corner nook is the layout that makes the best use of dead kitchen corner space, but it intimidates most DIYers because of the corner junction. The easiest solution: build two separate straight benches — one for each wall — and simply butt them together at the corner. Finish the junction with a 45-degree angled trim piece or a corner block. You don’t need to miter the bench boxes themselves.
Each bench section is built as its own plywood box, given independent storage (lift-top or drawers), and installed flush against its respective wall. The corner seat area — the triangular wedge where the two benches meet — can be left as a fixed cushion platform over a small fixed-lid storage box. Size the table to fit: a 36×36-inch square table or a 42-inch round pedestal table works for most standard L-nook footprints without crowding.
Key Takeaway: Building an L-nook as two independent straight bench boxes joined at the corner is structurally simpler, easier to transport through doorways during assembly, and allows each section to have its own storage system.

The Custom Bench Cushion (Without Custom Pricing)
 Save
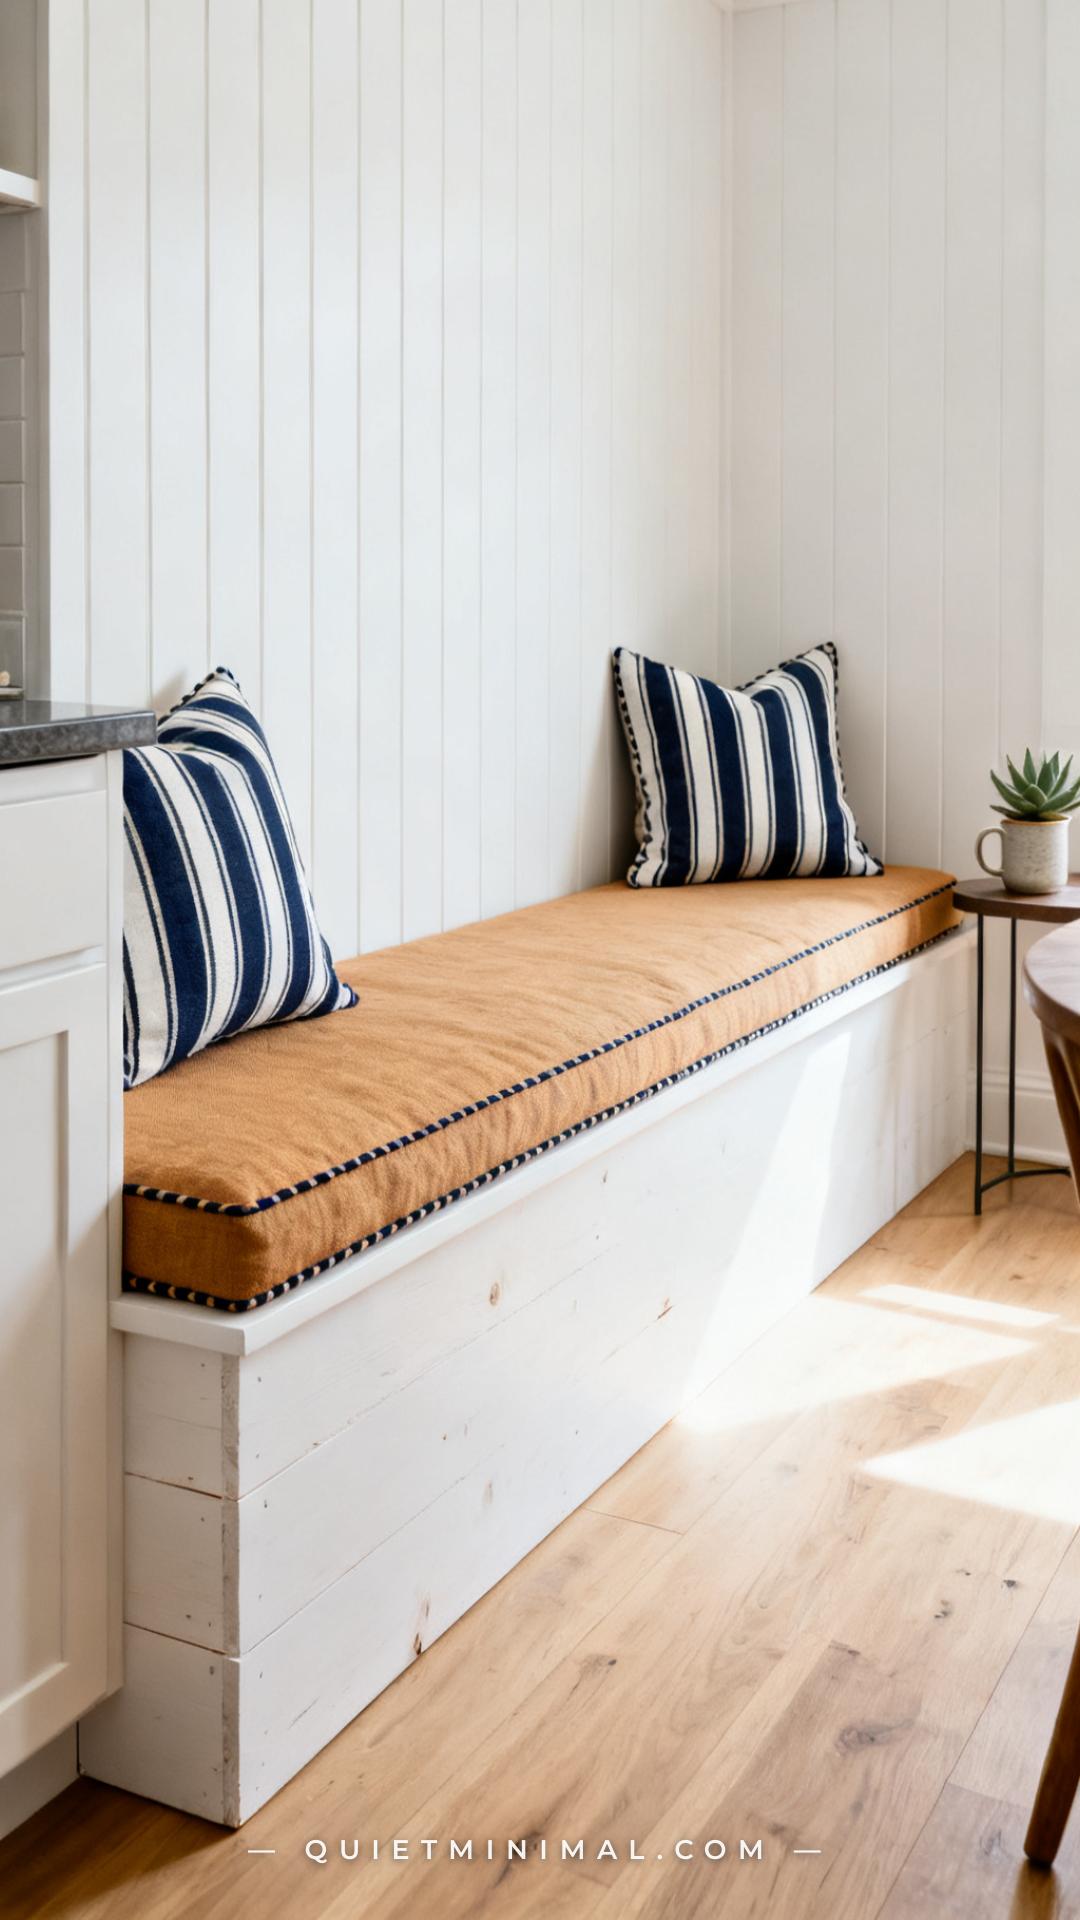
The cushion is where most DIY nooks visually succeed or fail — and it’s the single component people most often cheap out on in a way that shows. A flat, undersized, or poorly fitted cushion makes even an excellent bench look unfinished. The goal is a minimum 3-inch foam thickness in a medium-firm density (the 1.8 lb/cubic-foot density rating is the sweet spot for seating), covered in an upholstery-weight fabric that can be removed and washed.
Rather than ordering a fully custom cushion (which can cost significantly more than the bench materials themselves), the smarter approach is to buy cut-to-size upholstery foam from a foam supplier and a bench cushion cover made for non-standard sizes. Several Amazon sellers offer made-to-order bench cushion covers in linen, canvas, and performance fabric at a fraction of custom upholstery pricing. Measure your bench depth (aim for 18–20 inches for comfortable seating) and order accordingly. A cover with a hidden zipper makes washing possible.
Key Takeaway: Pairing cut-to-size upholstery foam with a made-to-order bench cushion cover costs a fraction of full custom upholstery and produces a professional result as long as you don’t compromise on foam thickness or density.

The Shiplap Accent Back Wall
 Save
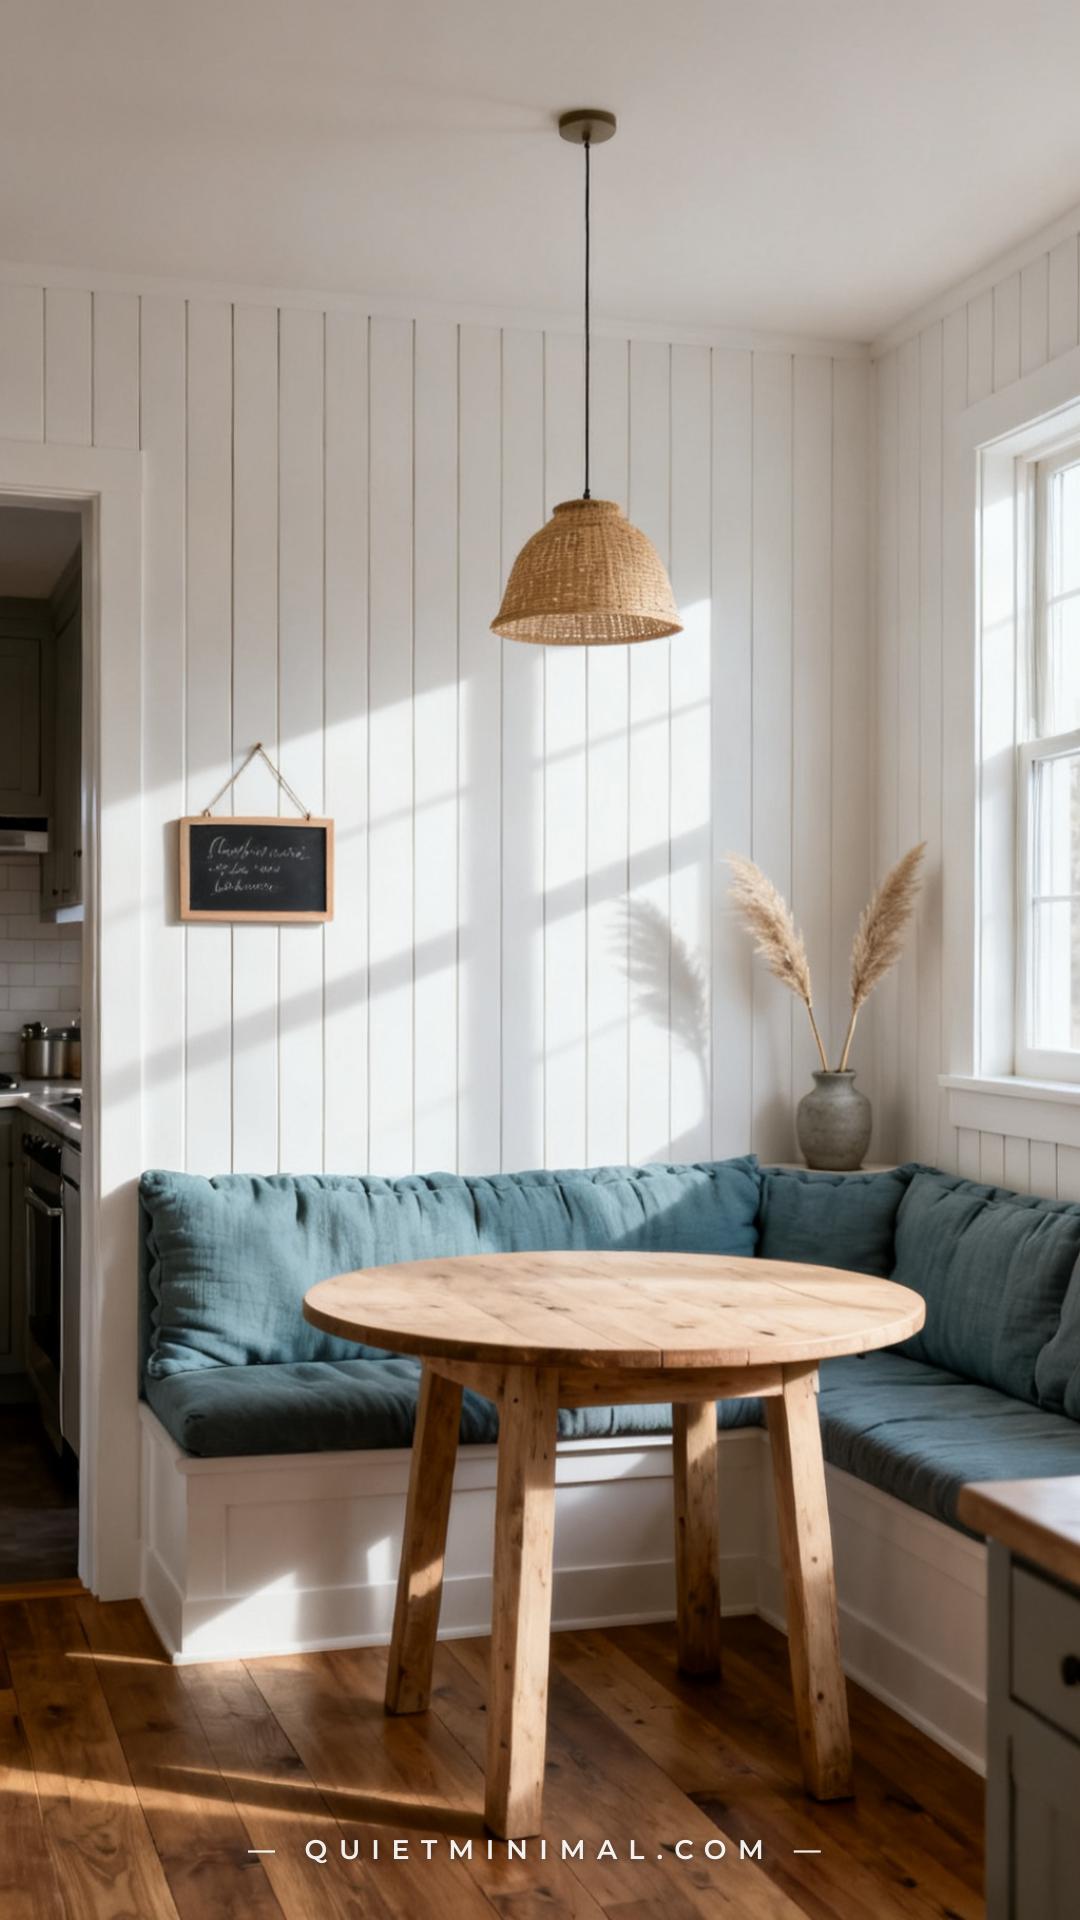
Shiplap behind a breakfast nook bench does two things at once: it creates a defined “room within a room” that frames the nook as an intentional space, and it adds enough visual texture that the bench itself can be simple and painted without looking underdesigned. Real shiplap (1×6 pine boards with a 1/8-inch gap between each) is the most authentic version, but MDF shiplap panels that install in full sheets are faster and nearly as convincing when painted.
Install shiplap horizontally, securing each board with finish nails into the wall studs. The shadow gap — the small dark line between each board — is what creates the texture effect, so don’t caulk the gaps. Paint the entire wall including the boards in one color (a warm white or soft greige works for almost every adjacent cabinet color) so it reads as a continuous textured surface rather than individual boards. The result is the kind of backdrop that makes every meal feel intentional.
Key Takeaway: Shiplap installed on the nook back wall, painted in a single unified color without caulking the gaps, creates the textural backdrop that makes a DIY bench look like it was part of the original architecture.

The Budget-Friendly Floating Shelf Overhead Storage
 Save
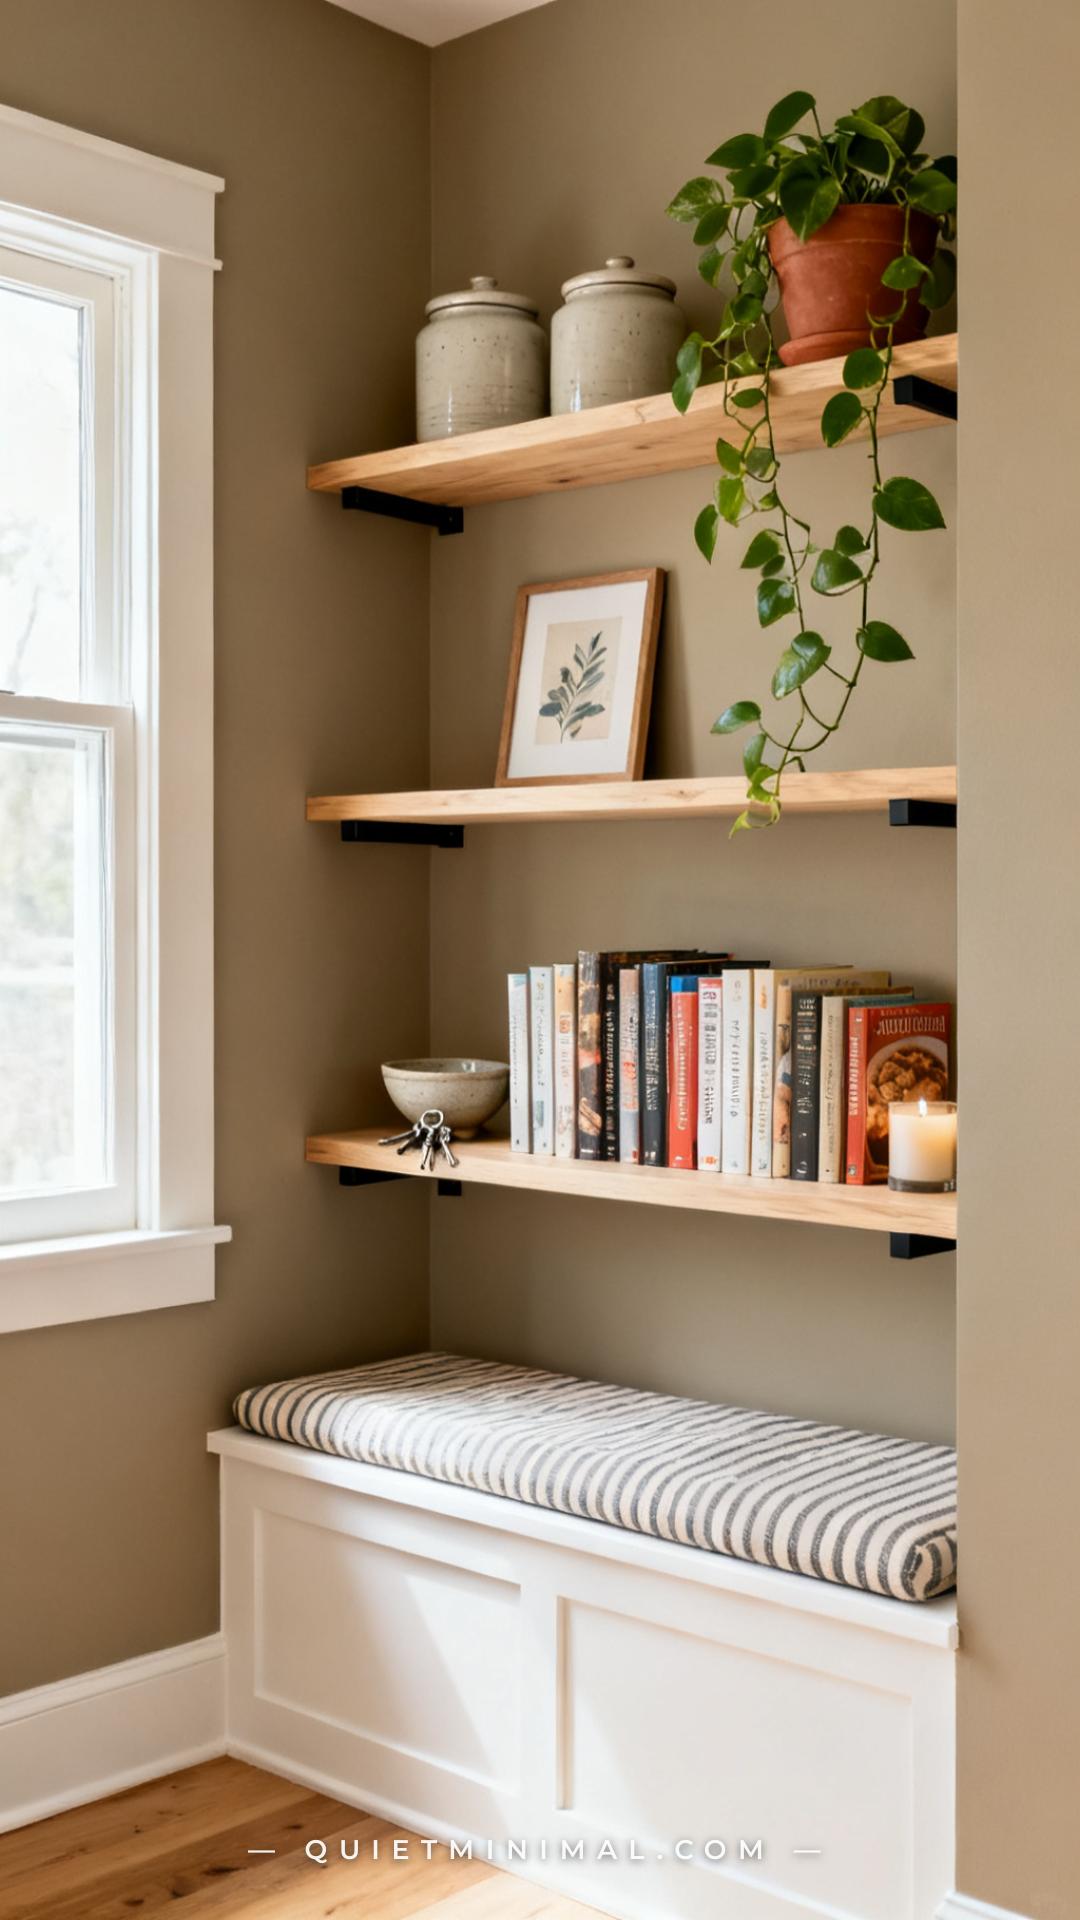
Overhead floating shelves above a breakfast nook bench solve a specific storage problem: where do you put things you need at the table but don’t want to excavate from inside the bench? Books, napkins, a fruit bowl, your coffee supplies — these are all better served by open shelf access. Two shelves at 18 and 36 inches above the bench seat create a proportional display-and-storage moment without crowding the space.
The key spec to get right: shelf depth. For a nook wall where you need to sit comfortably and not bump your head, 8–10 inches of shelf depth is the usable maximum. Anything deeper starts to feel like it’s encroaching on the seating space, especially on a lower shelf. Use hidden bracket hardware (floating shelf brackets that insert into the shelf from behind) for the cleanest look. Anchor into studs — or use toggle bolts rated for the shelf load if studs aren’t accessible at your desired location.
Key Takeaway: Two floating shelves at 8–10 inches deep mounted at 18 and 36 inches above the bench seat give you open storage at the exact reach zone for daily-use items without compromising the sitting clearance or the visual lightness of the nook.

The Painted-In-Place Faux Built-In Finish
 Save
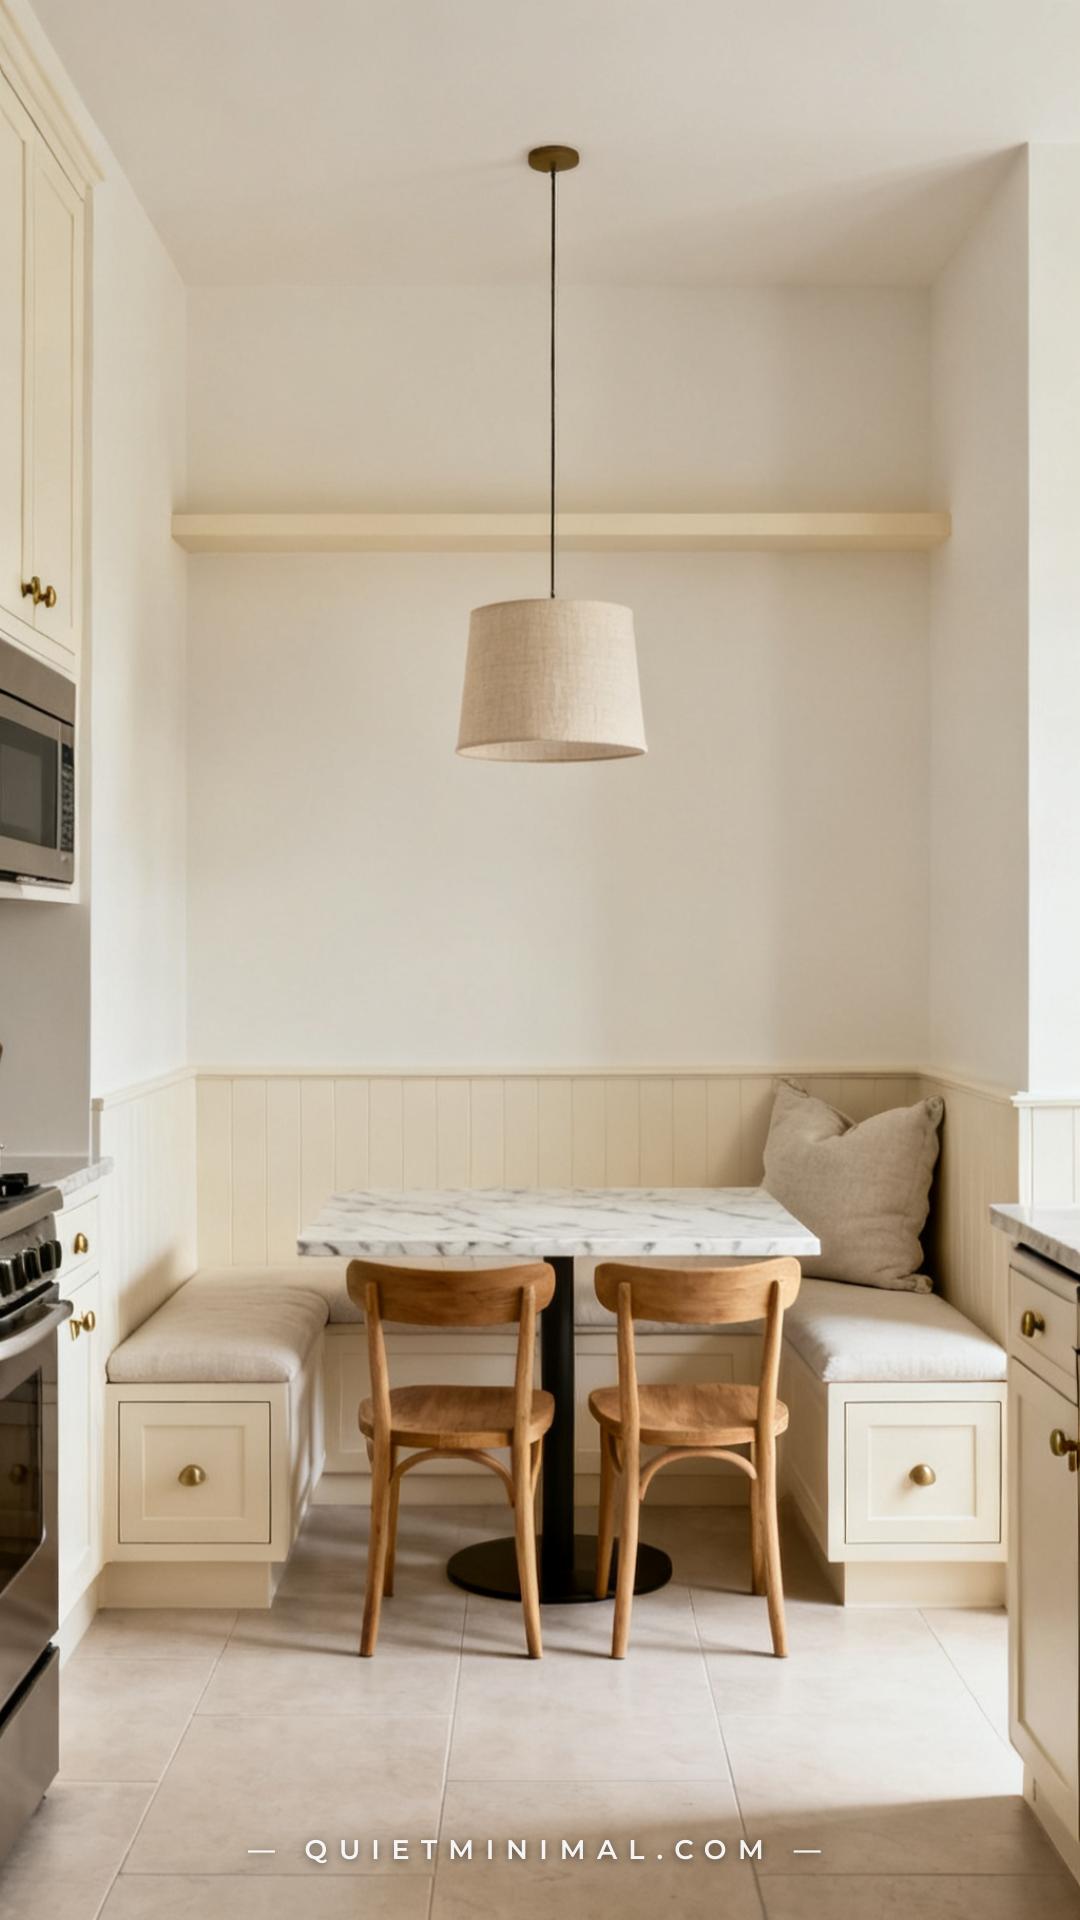
The single most powerful finishing trick for a DIY breakfast nook — one that professional kitchen designers use constantly — is painting the bench the exact same color as the surrounding cabinetry and walls. This paint-everything-the-same technique erases the visual gap between your built unit and the existing space, making a freestanding or freshly built bench disappear into the room as though it grew there.
This works because the eye reads color continuity as structural continuity. When the bench, the adjacent lower cabinets, and the wall above share the same hue and sheen level (matte or eggshell throughout), the brain fills in the gaps and perceives a single unified installation. Pick your wall and cabinet color first, then match your bench exactly — same brand, same batch if possible. Use a consistent sheen: flat or matte for walls, eggshell for the bench faces and doors for washability.
Key Takeaway: Painting the bench the identical color and sheen level as the adjacent cabinetry is the highest-ROI finishing step in any DIY nook build — it costs nothing extra and visually converts a built-and-placed piece into a true built-in.

The Wainscoting Side Panel Detail
 Save
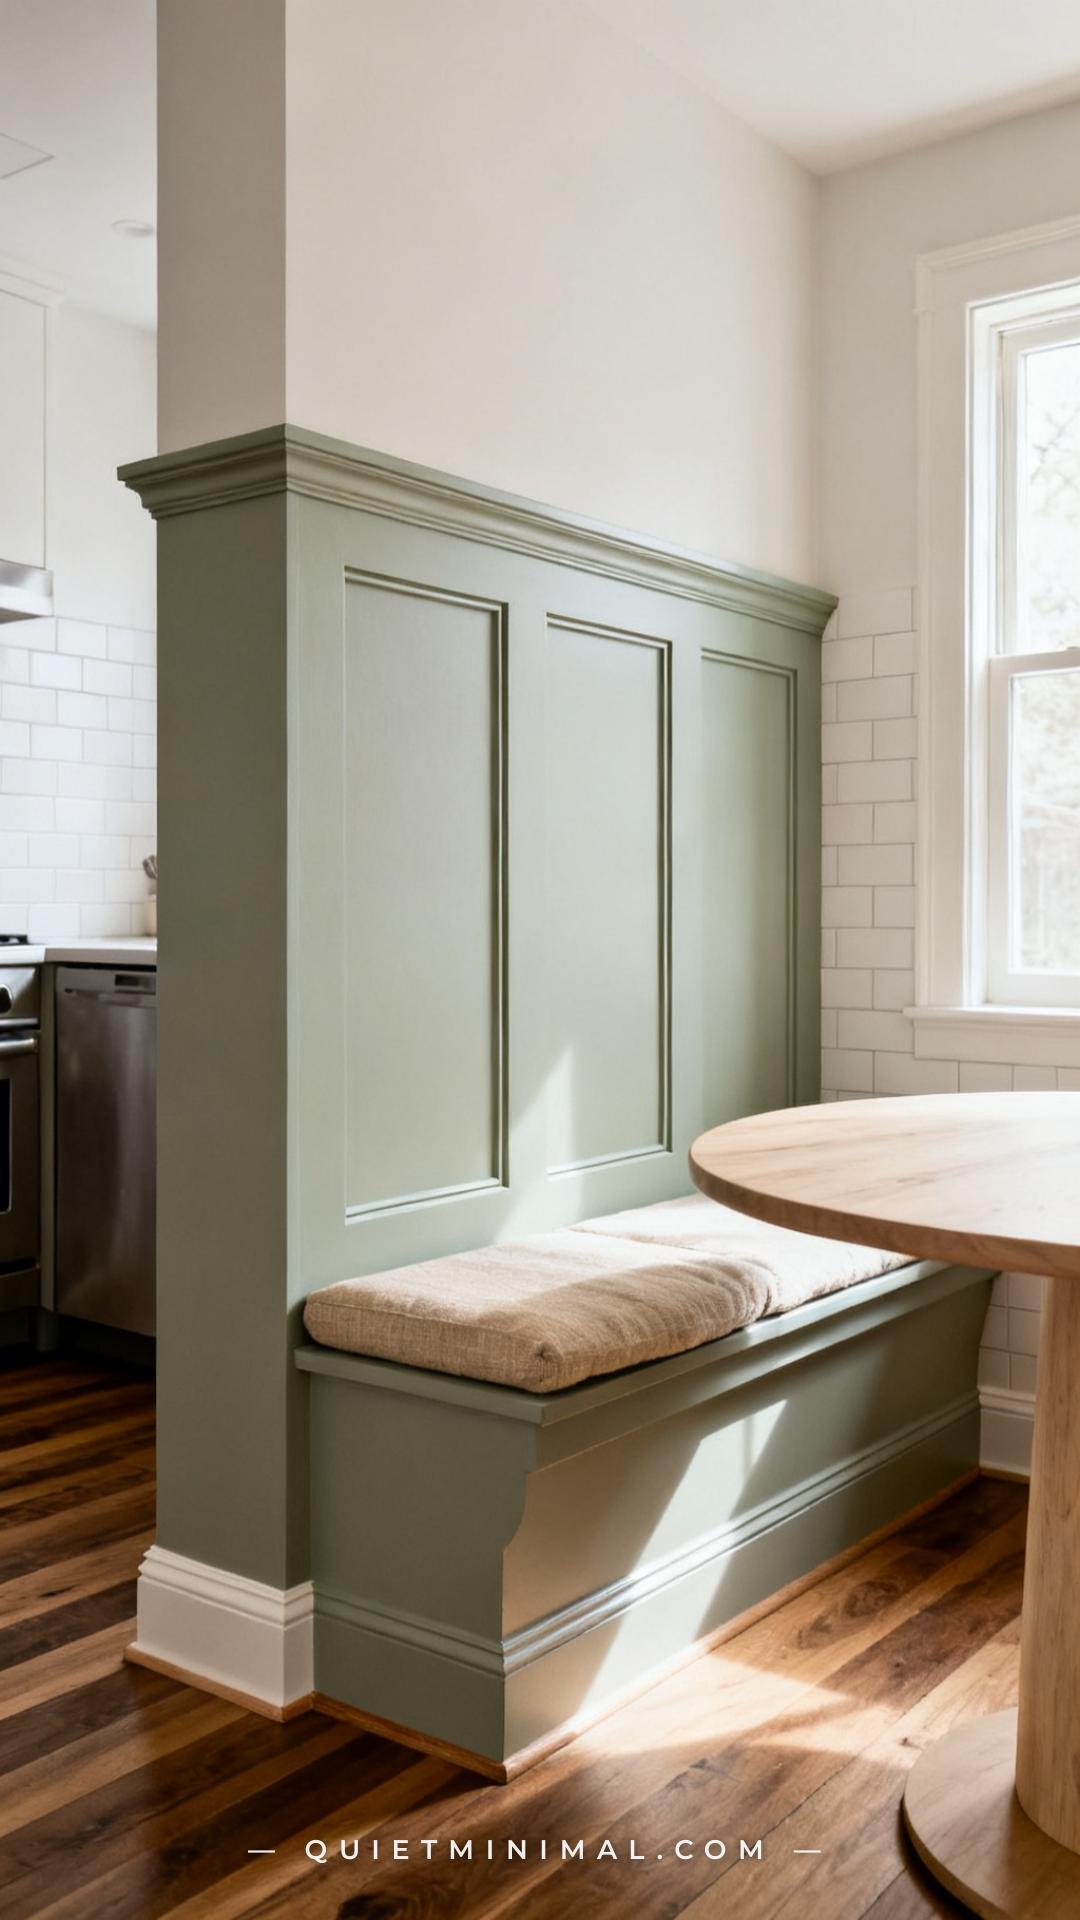
The side panels of a breakfast nook bench — the two end-cap faces — are where most DIY builds show their handmade origin most visibly. A flat plywood panel painted a solid color looks exactly like what it is: a flat plywood panel. The fix is applied panel molding, which creates the look of raised or recessed wainscoting panels for very little added cost.
Cut strips of 3/8-inch MDF screen molding or lattice into rectangular frames and glue them directly onto the flat plywood face, spacing them evenly in a three-panel layout. Fill the nail holes and seams with caulk, sand smooth, and paint. The shadow line created by the molding edge reads from across the room as authentic millwork. This technique — sometimes called “false panels” or “applied molding” — is the same method used to make flat-pack IKEA cabinet doors look like shaker-style doors and adds negligible cost.
Key Takeaway: Applied panel molding strips glued onto flat plywood bench end caps create the appearance of custom millwork wainscoting panels and are the detail most likely to draw “did you hire someone?” comments.

The Full Budget Breakdown (What to Actually Spend Where)
 Save
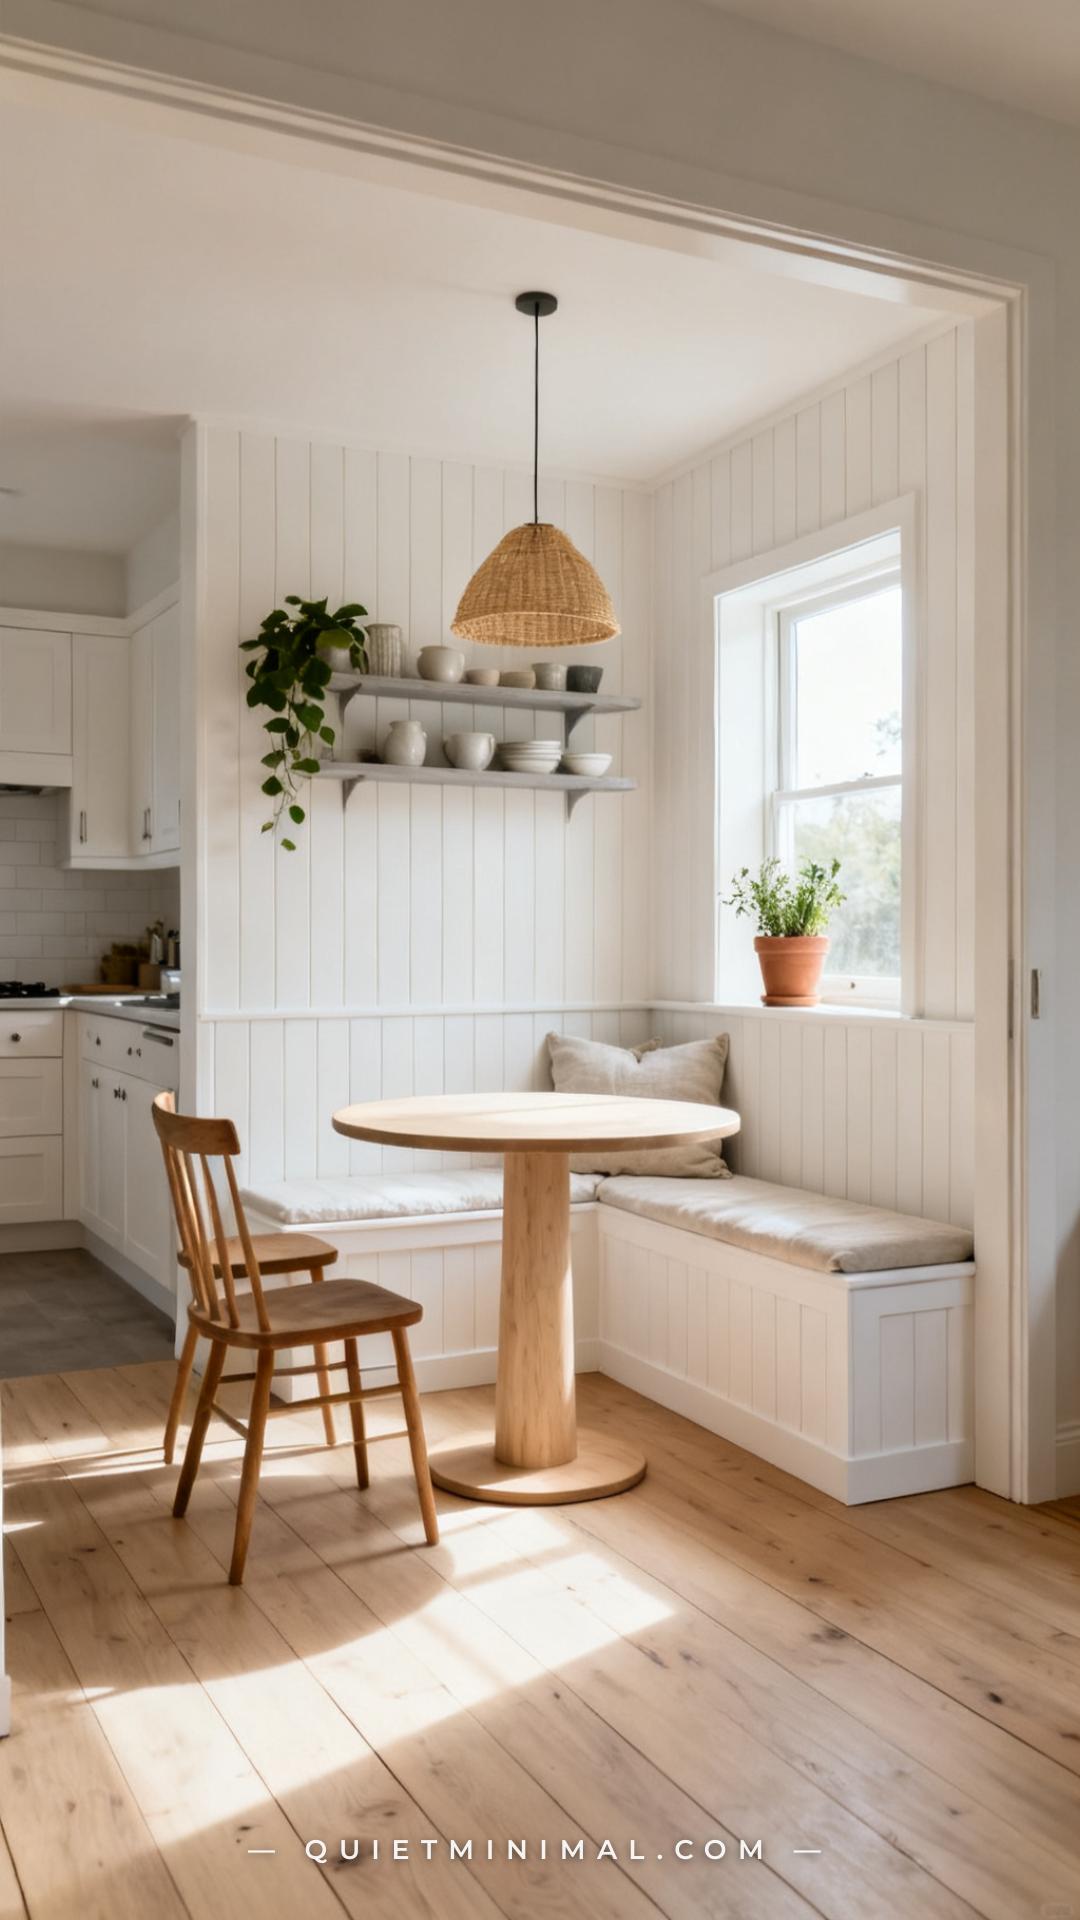
Before starting any nook build, the single most useful thing you can do is create a tiered budget framework — not just a parts list. There are three spend zones in a DIY breakfast nook: structure (bench boxes, plywood, lumber), surface (paint, trim, cushion), and finish (hardware, shelves, lighting). Most budget overruns happen because people allocate all their money to structure and then compromise on surface and finish, which is exactly where the visual quality of the nook is determined.
A practical starting point for a straight single-wall bench: structure materials (plywood, lumber, screws, glue) run lean for a 60-inch bench. Surface materials (paint, trim, beadboard panel, cushion foam and cover) represent the second spend tier and are where the biggest visual payoff lives per dollar. Finish materials (drawer pulls, floating shelves, pendant light, plants) are the final layer. Allocate at least 35–40% of your total project budget to surface and finish — that’s the counterintuitive part of nook budgeting that separates results that look custom from results that look DIY.
Key Takeaway: Allocating at least 35–40% of your total nook budget to surface finish and finish details — paint, cushion quality, hardware, and lighting — is the decision that most determines whether the result looks custom-built or hand-assembled.
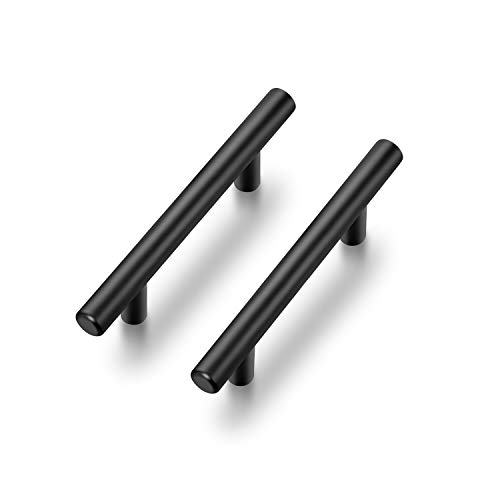
Building a breakfast nook with a built-in bench and storage isn’t about having advanced carpentry skills — it’s about sequencing your decisions correctly and spending your budget in the right order. Start with the structural box, lock in your storage method (lift-top or drawers) before you build the lid, and then commit the rest of your budget to surface finish: the beadboard or shiplap behind it, the paint that unifies it with the room, the cushion that makes it actually comfortable, and the hardware that makes it feel considered. Those layers — not the lumber — are what make the difference between a bench that looks placed and one that looks designed. Pick the one idea on this list that solves your specific gap, whether that’s the corner L-layout, the pocket-hole drawers, or just the paint-everything trick, and use it as your entry point. The rest follows from there.
From the guides
You've saved it, wanted it. Here's the how: codes, measurements, order. Your choices make it yours.
The Japandi Honest PlaybookThe honest version of the style: what to keep, what to skip, and the order to do it in.See inside →The Room Refresh PlaybookA repeatable four-step method, room by room, in ten minutes, thirty minutes, or one weekend.See inside →Make Any Room Feel Cozy on PurposeWhy some rooms hold people and others empty out, and the moves that change it.See inside → Save


