Georgia
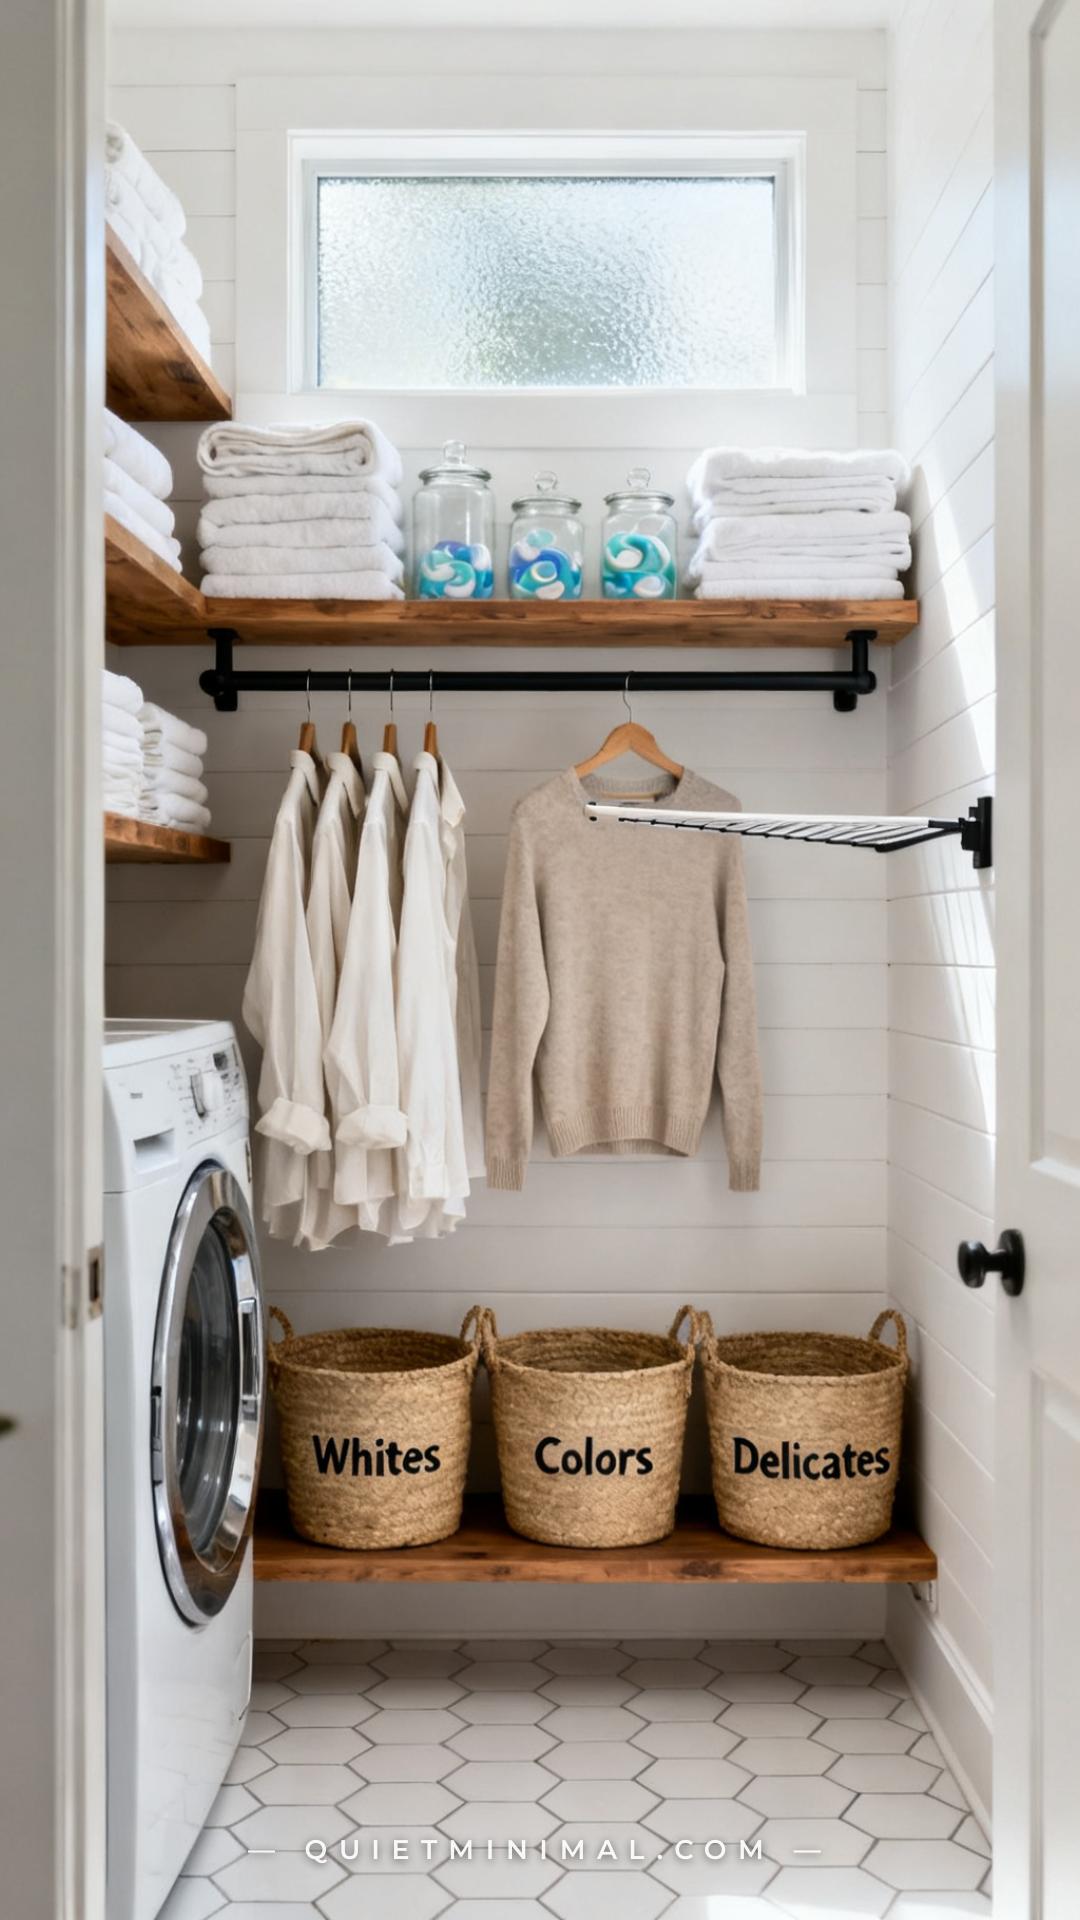
Most laundry rooms don’t fail because of bad taste — they fail because the pieces were added one at a time with no plan. A shelf went up when the wire rack got full. A rod got installed because shirts were piling up. A drying rack appeared after one too many ruined sweaters. The result is a room that technically contains everything you need and still somehow feels like it’s working against you.
This article takes a different approach. Instead of a loose collection of ideas, these 11 laundry room concepts are built around four functional zones: hanging, drying, sorting, and storing. Whether you’re starting from scratch or reorganizing what you already have, the goal is the same — a laundry room where open shelving, a hanging rod, a drying rack, and sorting bins all have a defined role, a defined location, and a reason for being exactly where they are.
Zone 1: Plan Your Four Zones Before You Buy a Single Thing
 Save
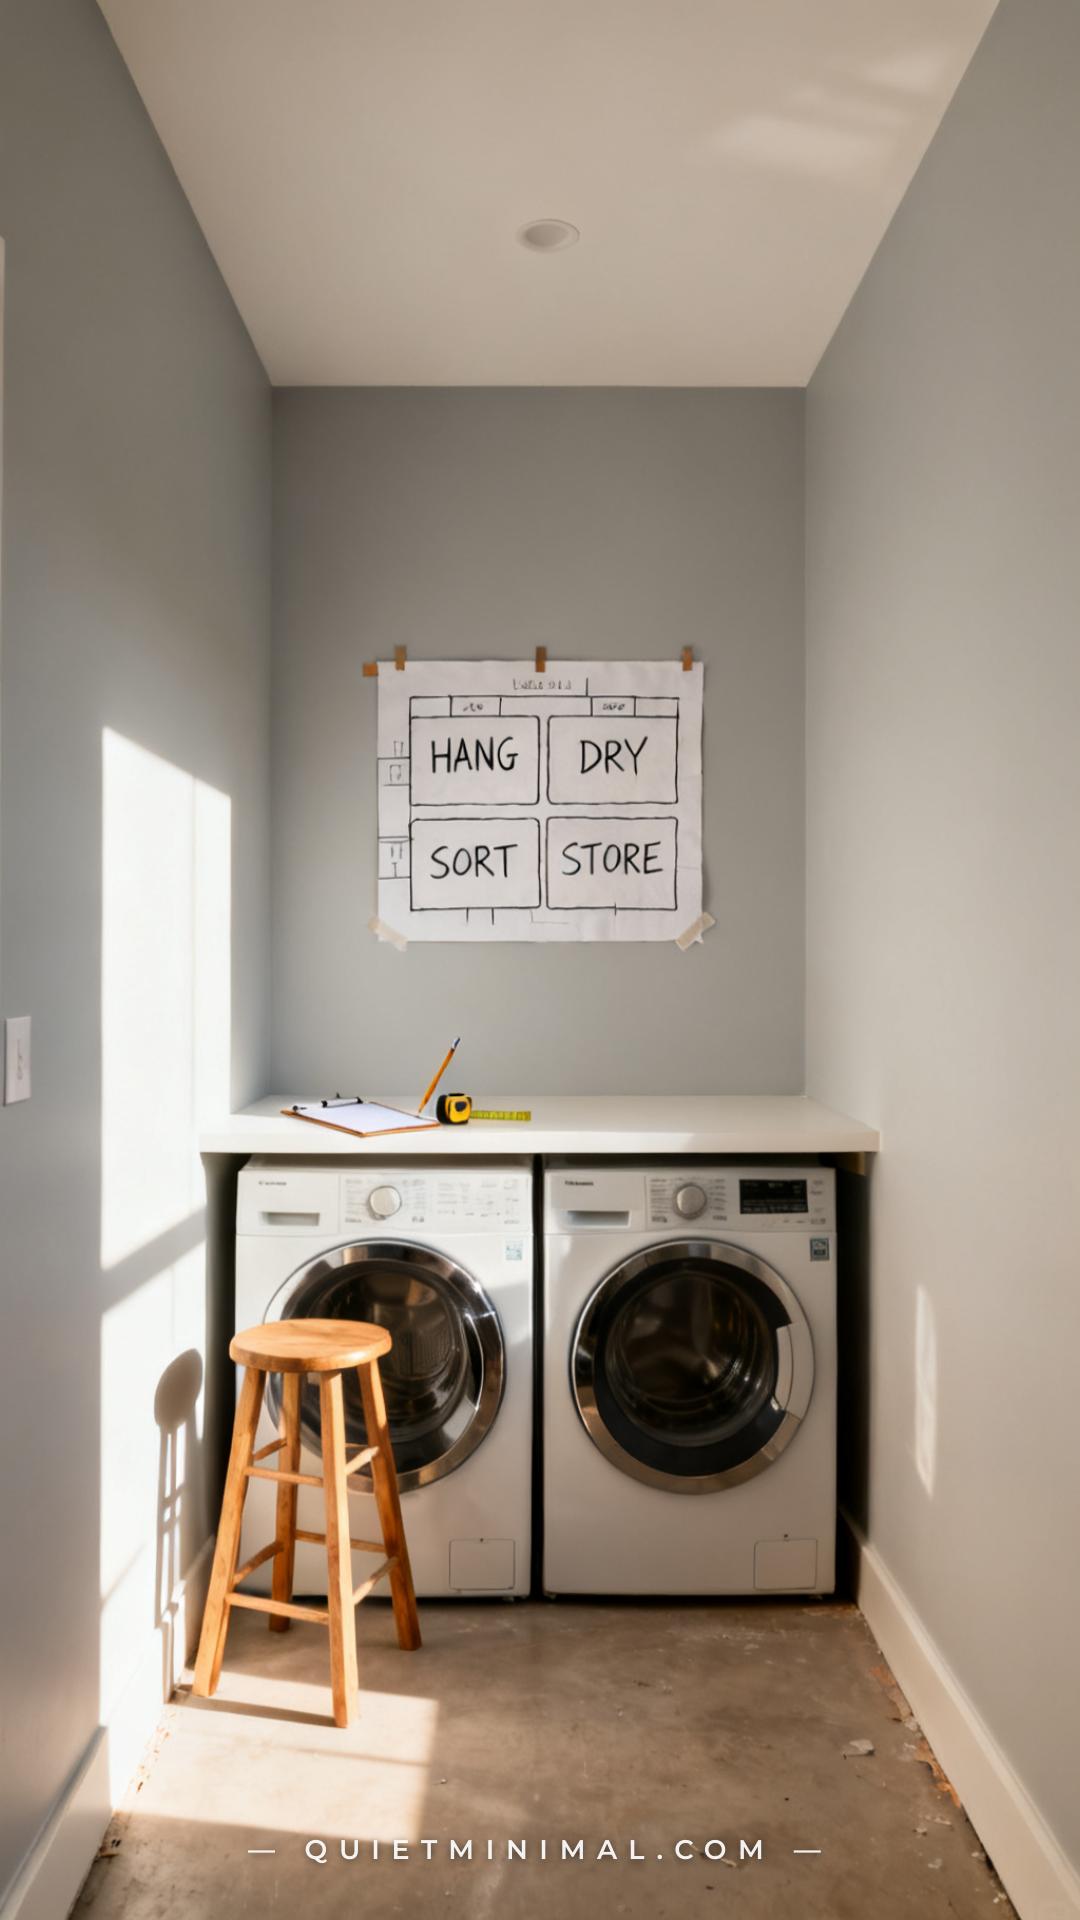
The most expensive laundry room mistake is buying products before you’ve mapped the space. Before any shelving goes up, measure your wall width, ceiling height, and the distance between the washer-dryer stack and the nearest wall or door swing. Then sketch four zones: a hang zone (directly above or beside the appliances, for items coming off the wash cycle), a dry zone (flat or rack-based, away from the hang zone so air circulates), a sort zone (accessible before loading the machine, not tucked behind a door), and a store zone (detergent, supplies, extras — shelf-based).
From the guides
You've saved it, wanted it. Here's the how: codes, measurements, order. Your choices make it yours.
 The Japandi Honest PlaybookThe honest version of the style: what to keep, what to skip, and the order to do it in.See inside →
 The Room Refresh PlaybookA repeatable four-step method, room by room, in ten minutes, thirty minutes, or one weekend.See inside →
 Make Any Room Feel Cozy on PurposeWhy some rooms hold people and others empty out, and the moves that change it.See inside →
Once those four zones are sketched, every product you evaluate has a job title. You’re not buying “a shelf” — you’re buying a sort-zone shelf that needs to hold three bins and clear 18 inches of vertical space. That clarity eliminates impulse purchases and the “I bought this but have nowhere to put it” cycle that most laundry rooms are stuck in.
Key Takeaway: Sketch the four zones on paper before purchasing anything — every product decision becomes more intentional and less wasteful.

Zone 2: Mount the Hanging Rod in the Right Spot — Not Just Any Open Wall
 Save
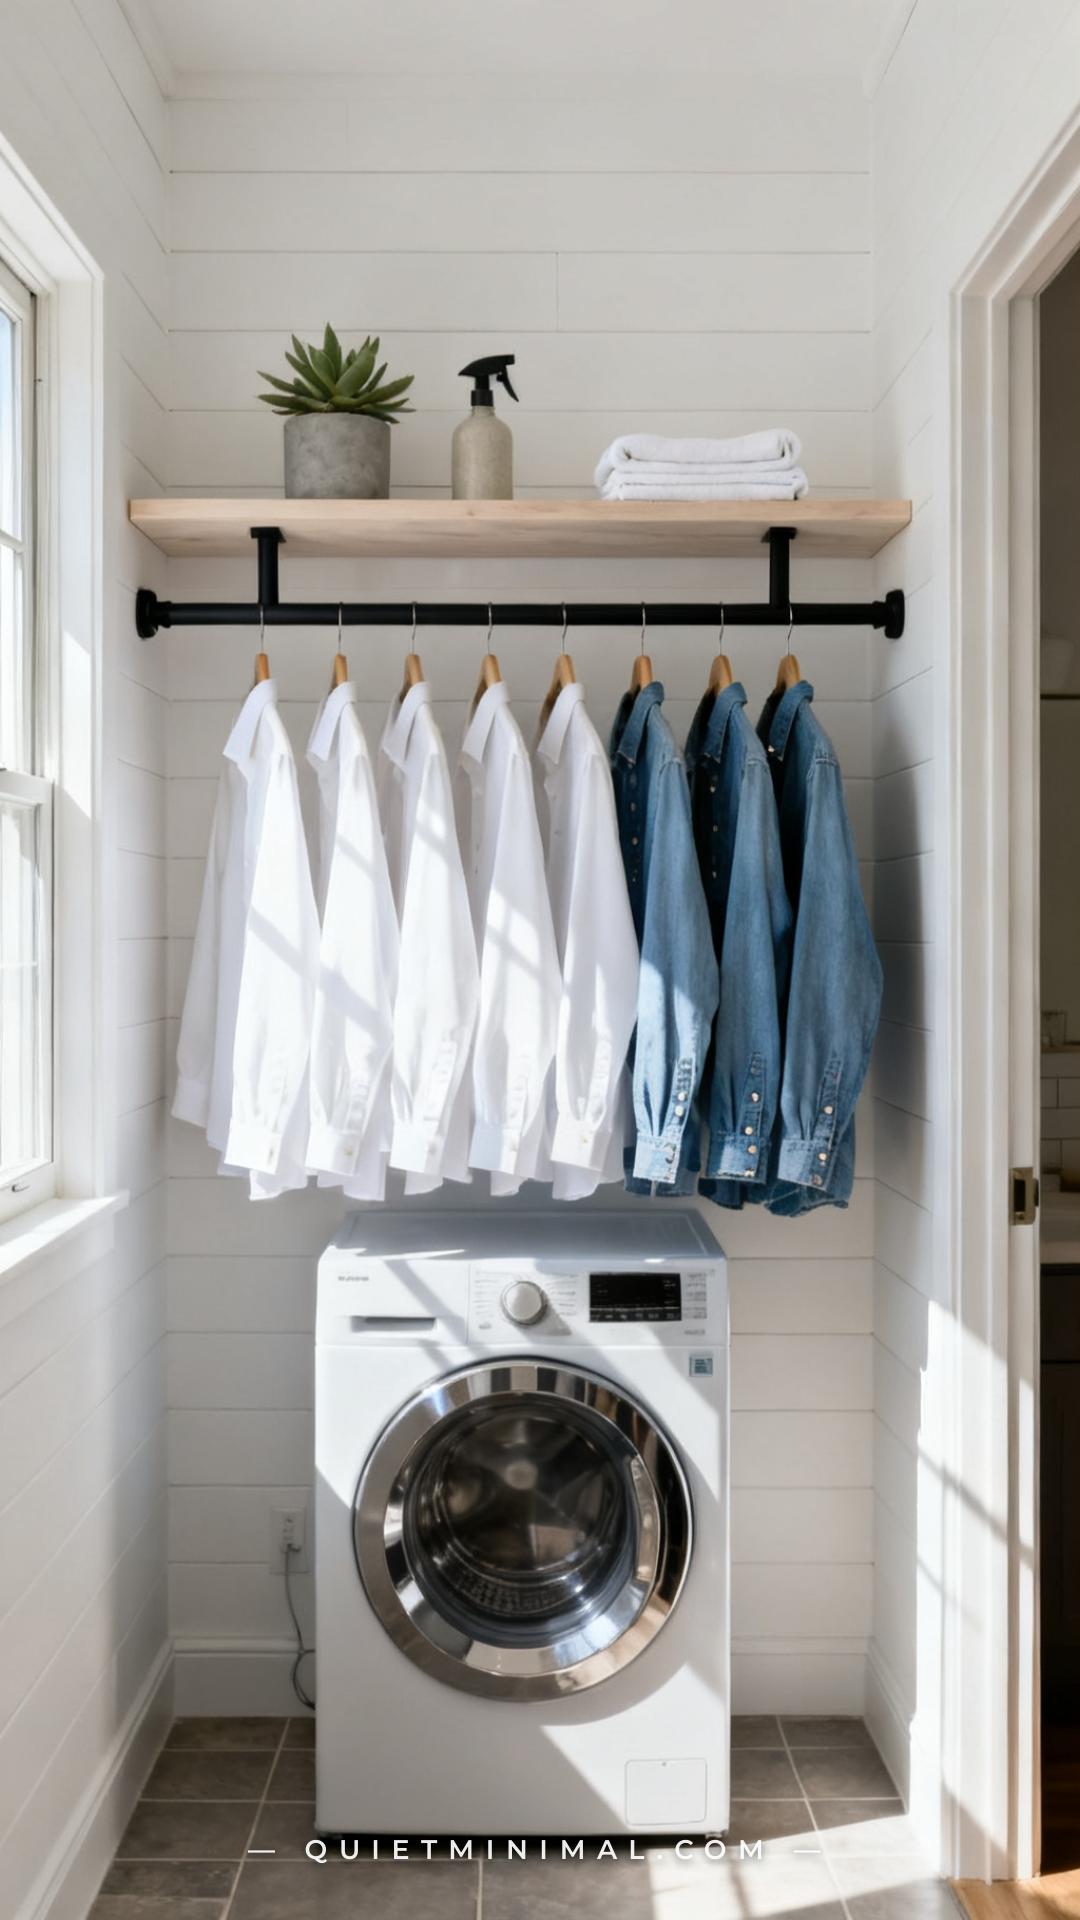
A hanging rod placed anywhere technically works. A hanging rod placed in the right spot works while your clothes dry, stay wrinkle-free, and stay out of the way. The right spot is always directly above the dryer — you pull a shirt out, shake it once, and hang it immediately. That 12-second window between warm-from-the-dryer and wrinkled-on-a-chair is exactly what a well-placed rod protects.
Mount at a height that clears your tallest garment by two inches and allows you to reach comfortably without a step stool. Wall-mounted double-bar systems are worth the investment over single-bar versions — the second bar doubles your hanging capacity without adding any floor footprint. For rental or no-drill situations, tension-mounted ceiling-to-floor rods (the same style used in closets) are a legitimate alternative as long as the ceiling is low enough to create real tension.
Key Takeaway: Position the hanging rod directly above the dryer to create a zero-friction “pull and hang” habit that keeps clothes wrinkle-free before you ever reach for an iron.

Zone 3: Choose Open Shelving Over Cabinets (and Here’s Why That’s Actually Practical)
 Save
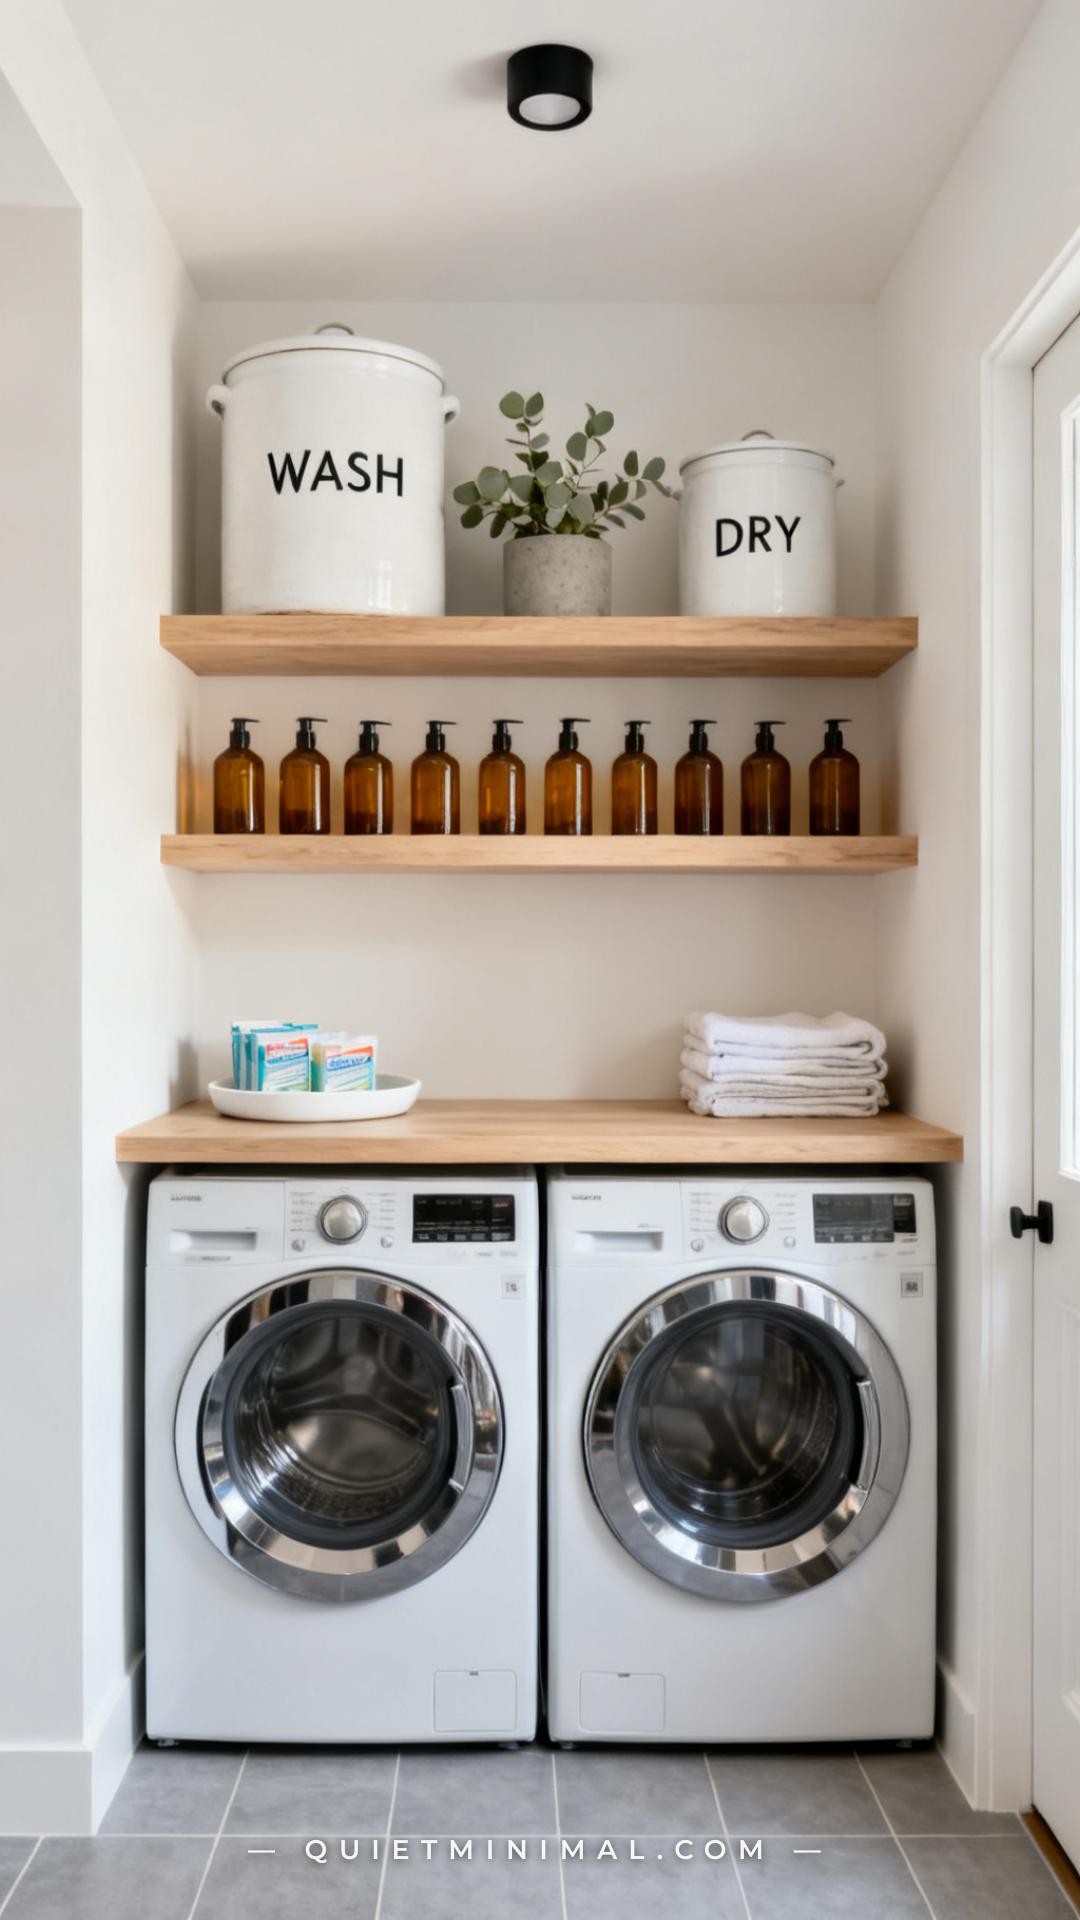
The instinct to close everything behind cabinet doors in a laundry room is understandable — but in a small space, closed storage creates a visual wall that makes the room feel smaller and means you can’t see when you’re running low on detergent until you’re already out of it. Open shelving solves both problems. Visually, it keeps the room airy and dimensional. Practically, it means your restocking system is passive — you see what you have, you use what’s lowest, you replenish before it’s a crisis.
The trade-off is visual discipline. Open shelves require decanting (detergent into a pump bottle, dryer sheets into a small tray), matching containers, and a consistent palette. This takes about twenty minutes to set up and almost no time to maintain. Floating shelves in pale wood or painted white are the most versatile for a clean aesthetic; wall-mounted bracket systems like IKEA’s BOAXEL or similar adjustable standards are better if you anticipate needing to reconfigure over time.
Key Takeaway: Open shelving makes a small laundry room feel larger and keeps your supply inventory visible — the discipline it requires is setup once, not ongoing.

Zone 4: Build the Sort Station Before the Washer, Not Behind It
 Save
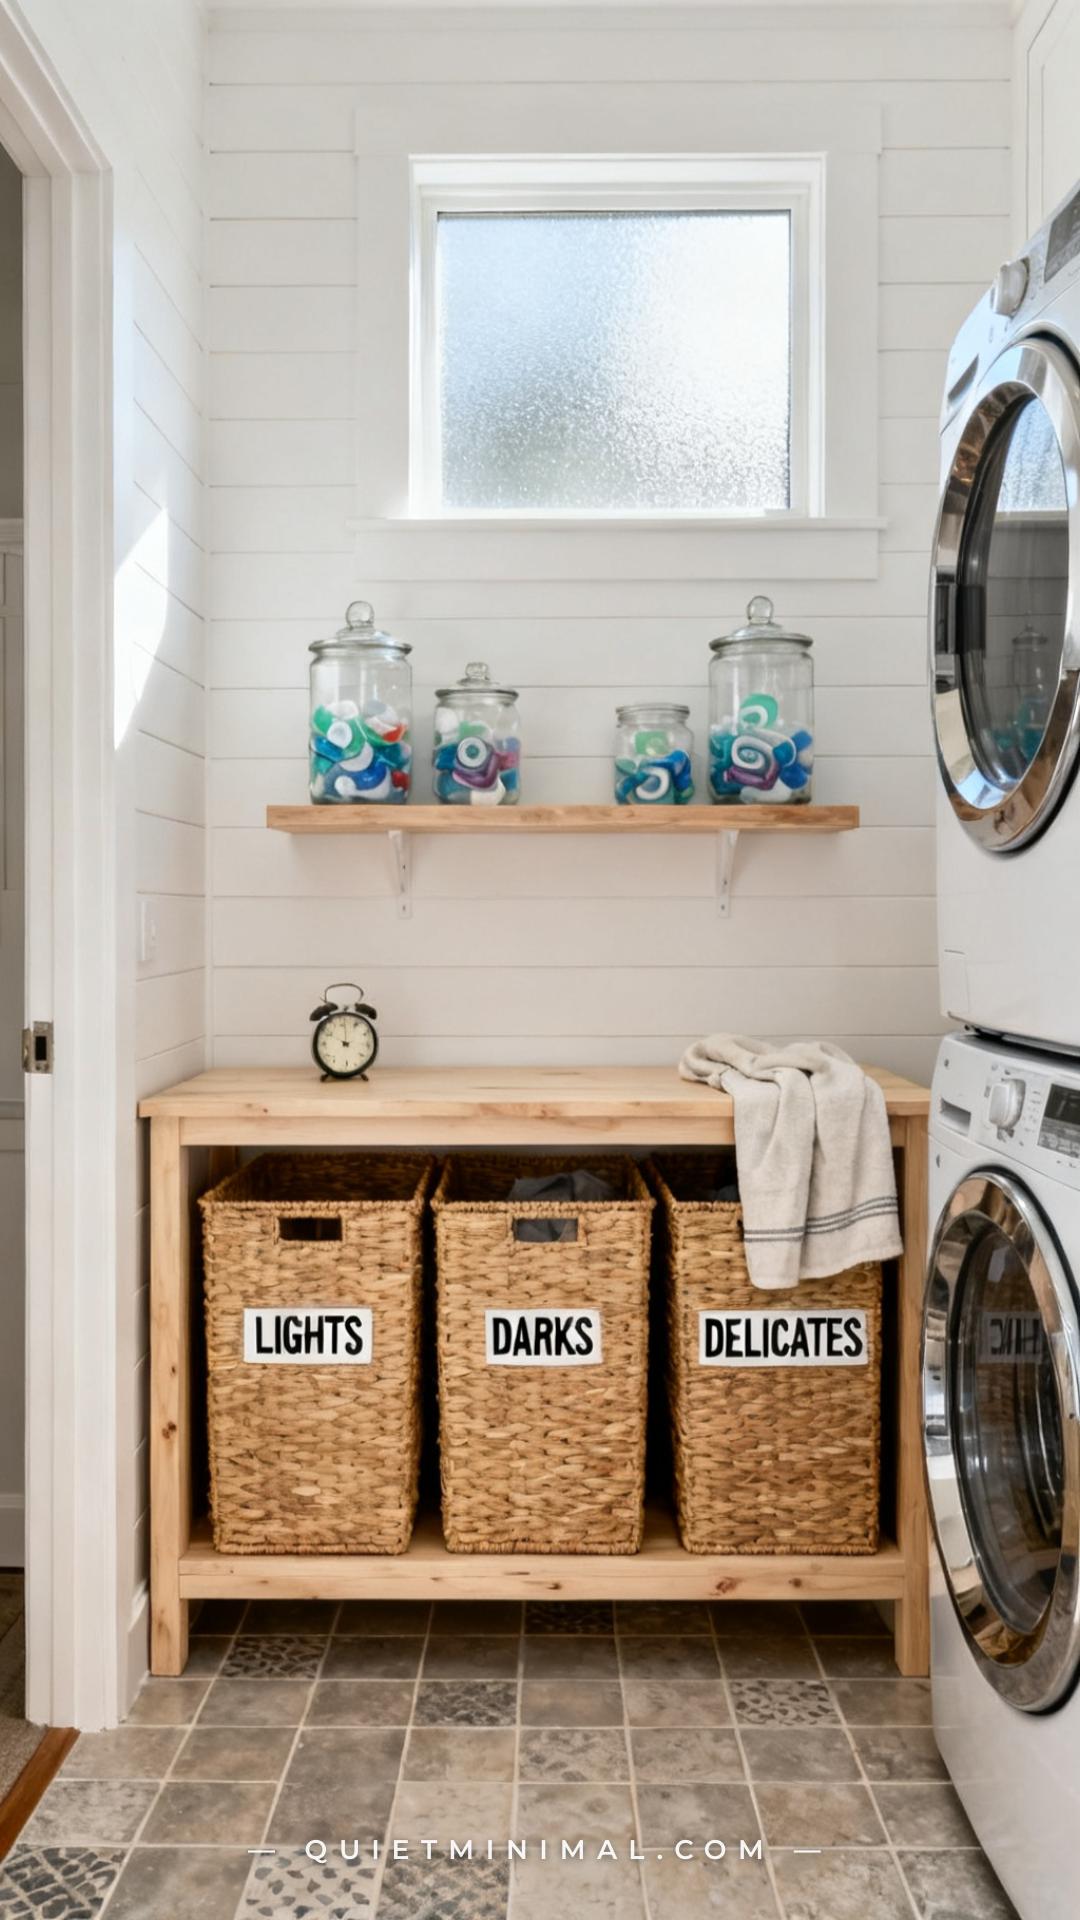
Sort stations fail in one specific way: they get placed on the opposite side of the room from where you enter. You walk in carrying laundry, and the sorting bins are twelve steps away. The clothes land on the floor. The floor becomes the sort station. The actual bins become decorative.
Fix this with one rule — the sort station must be the first thing you pass when you enter the laundry room with a load. Ideally, it’s at the doorway or just inside it, before the washer. Three bins is the functional minimum for most households: lights, darks, and delicates (or a household-specific third category like “towels only” or “cold-only”). The bins themselves should be large enough to hold a full load each, made of material that doesn’t trap moisture (woven seagrass, canvas, or wire all breathe well), and labeled clearly so everyone in the household sorts without asking.
Key Takeaway: The sort station only works if it’s placed at the entry point of the room — location determines whether it becomes a habit or gets ignored entirely.

Zone 5: Pick a Drying Rack That Folds Flat (Your Future Self Will Thank You)
 Save
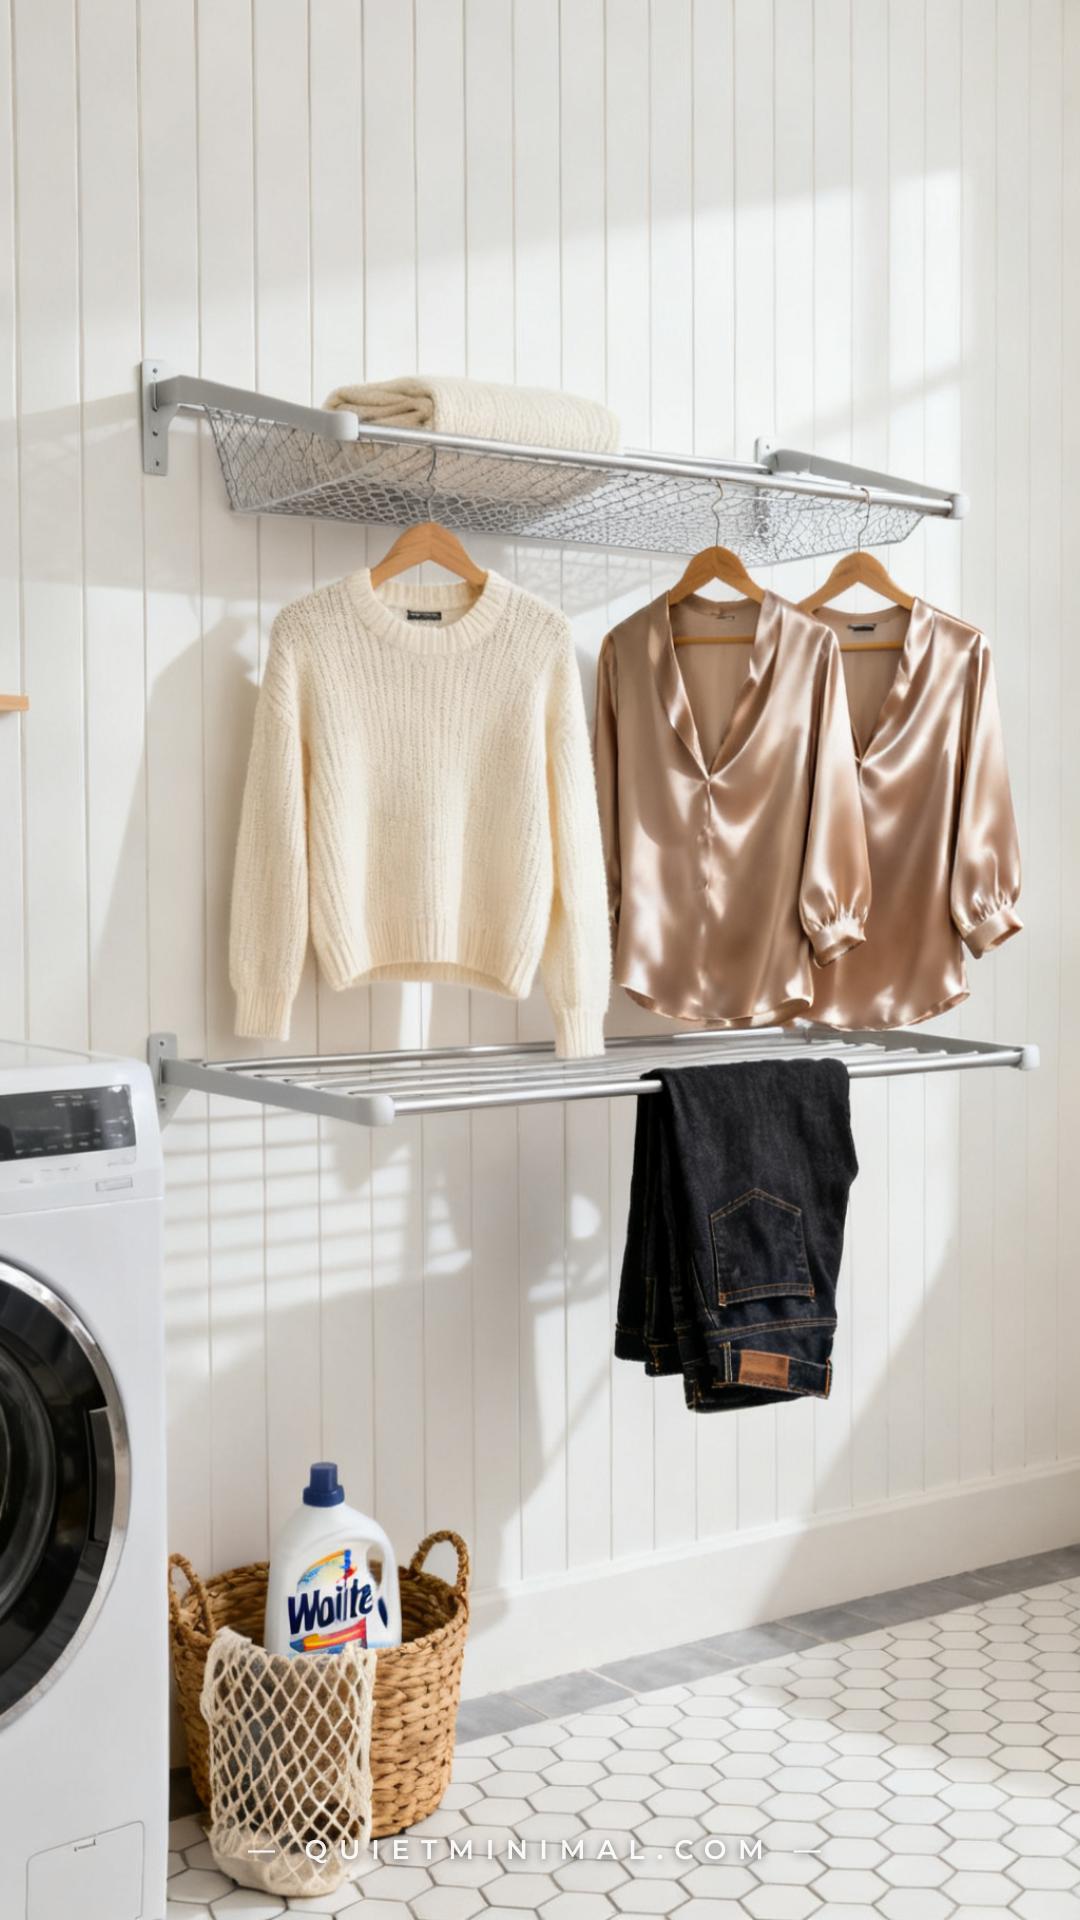
Freestanding accordion drying racks are cheap, widely available, and a consistent source of laundry room frustration. They take up floor space when extended, they tip over, they never quite fold flat enough to fit where you hoped, and they become a permanent obstacle rather than an occasional tool. Wall-mounted fold-flat drying racks solve every one of those problems.
A wall-mounted rack folds completely flat when not in use — two to three inches off the wall — and extends on a hinge arm when you need it. Models with multiple tiers of wooden dowels or telescoping bars hold a full delicates load. Mount it on the wall beside (not in front of) the washer so it doesn’t block the door, at a height between waist and shoulder so you can load it without bending or reaching uncomfortably. Pair it with a small fan mounted nearby to accelerate air circulation — this cuts flat-dry time roughly in half and keeps the room from developing a damp smell.
Key Takeaway: A wall-mounted fold-flat drying rack takes the same wall space as a framed print when closed and replaces the floor-hogging accordion rack permanently.

Zone 6: Use the Space Above the Washer and Dryer More Strategically
 Save
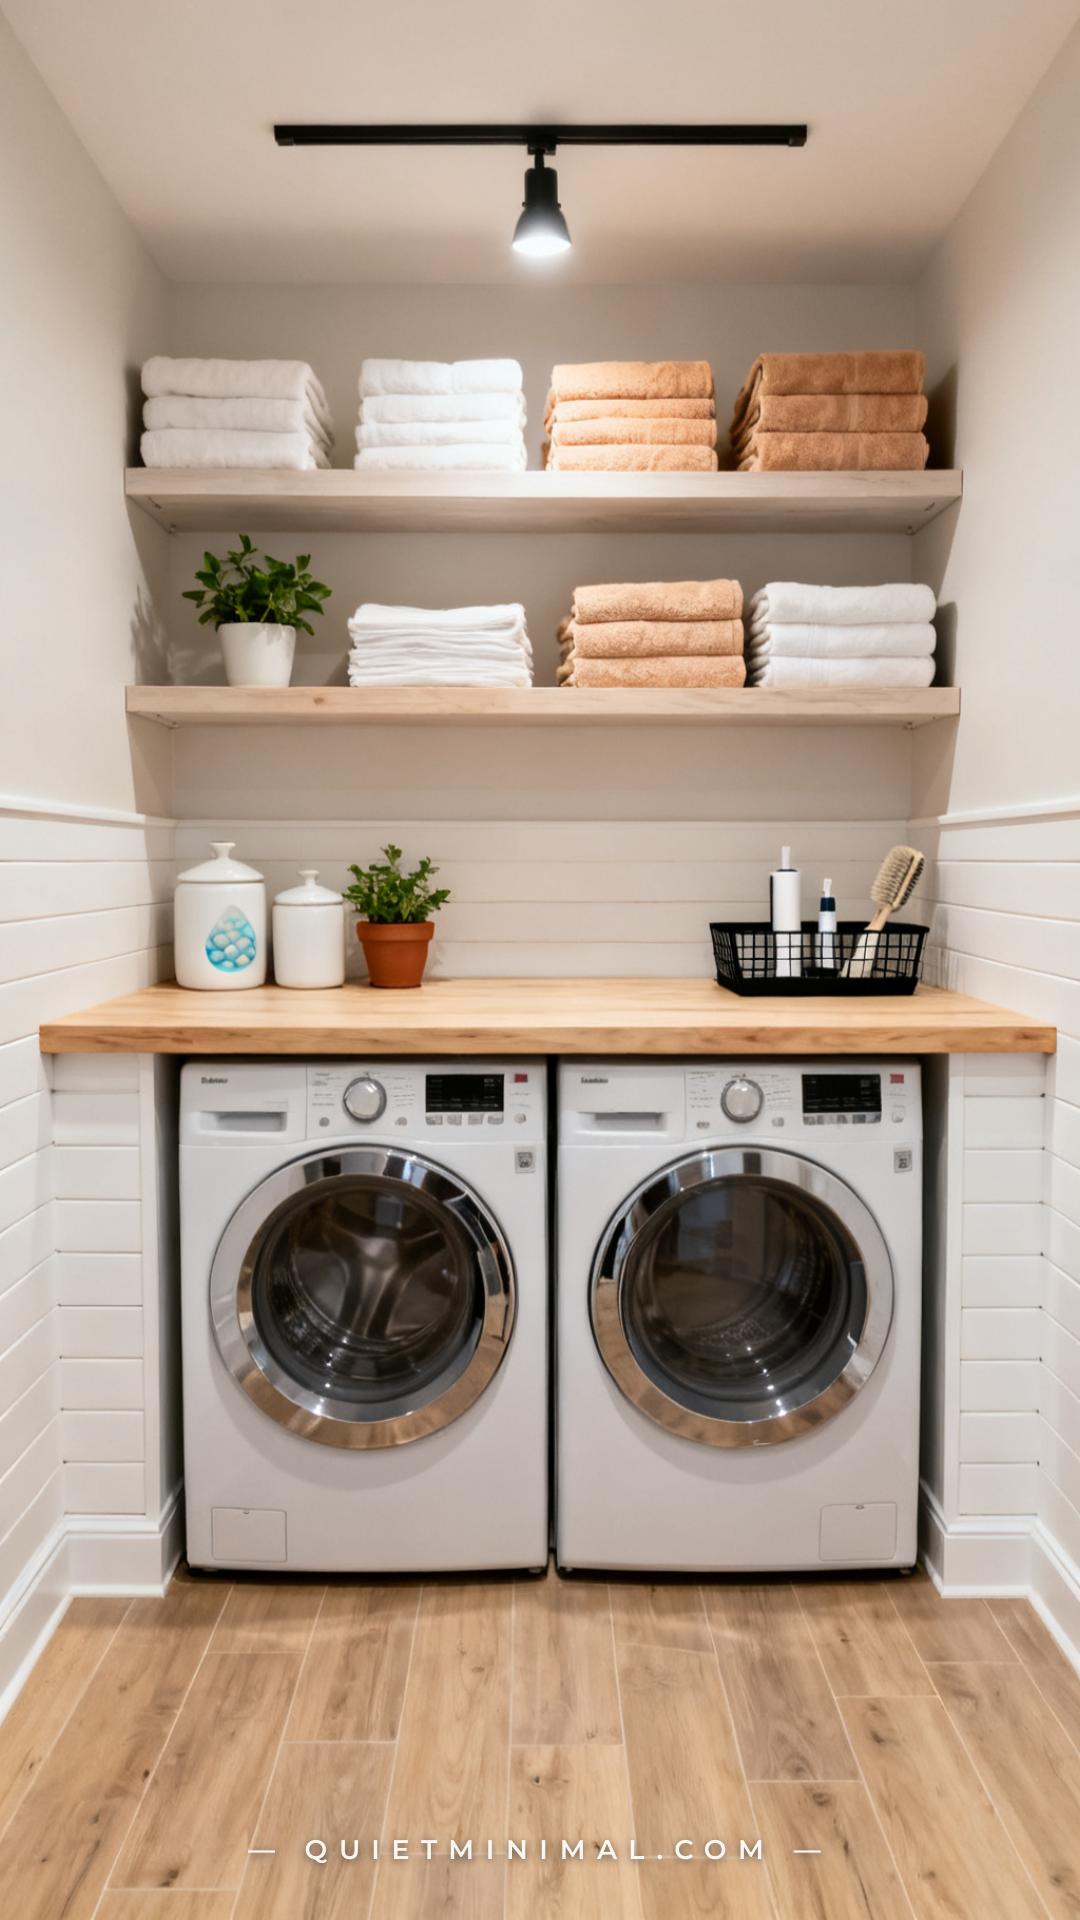
The wall above the washer and dryer is the highest-value real estate in most laundry rooms and the most consistently underused. The standard move is one shelf, too high to reach comfortably, loaded with rarely used items. A better approach is a three-tier system: a working surface shelf (12–15 inches above the machines, low enough to use as a countertop for folding small items), a frequently accessed shelf (24–30 inches above the machines, for detergent and daily supplies), and an archive shelf (at or above eye level, for backup stock, seasonal items, or things you access monthly rather than daily).
The working surface shelf is the piece most people skip — it’s lower, feels less like “storage,” and gets left off because people assume folding happens elsewhere. Install it and you’ll immediately start using it as a staging surface for sorted items, a spot to set the lint roller, and a landing zone for freshly dried small items before they go elsewhere in the house.
Key Takeaway: Adding a working-surface shelf 12–15 inches above the machines creates a functional countertop that changes how the whole room is used — treat it as the most important shelf in the room.

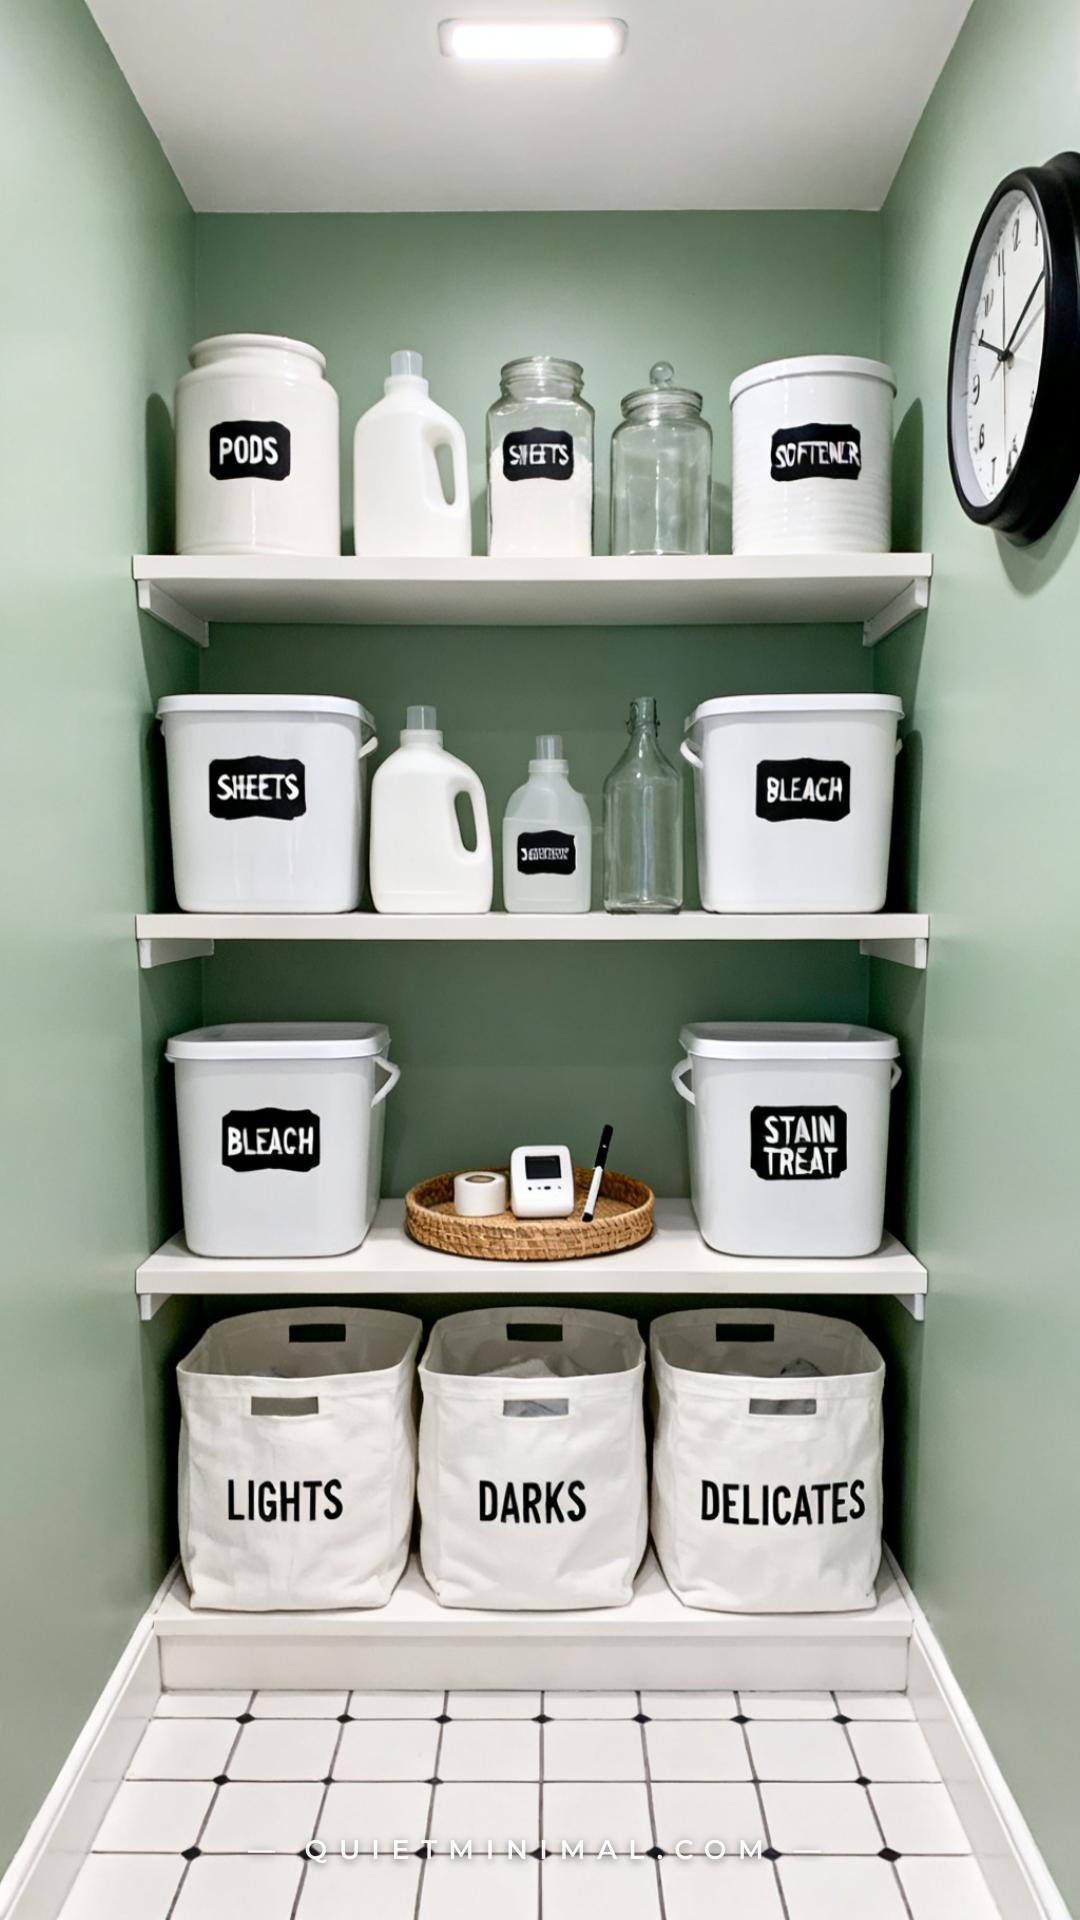
Zone 7: Label Everything — Including the Spots That Are “Obvious”
 Save
A labeled laundry room is not a personality quirk — it’s a communication system. In households with multiple people doing laundry, labels eliminate the questions (“which bin is which?” / “does this go on the high shelf or the low shelf?”). In single-person households, they eliminate the friction of re-deciding every time, which is more real than most people admit.
Label both the containers and the shelf positions (a small label on the shelf edge indicating what belongs there keeps the system intact when everything gets pulled off for a deep clean). For a cohesive look, a label maker with a P-touch or DYMO tape produces a cleaner result than handwritten tags. For renters who want something removable, pre-printed adhesive labels on a white ground work well on most surfaces and peel cleanly. Label at the moment of setup, not “later” — later never comes in a laundry room.
From the guides
You've saved it, wanted it. Here's the how: codes, measurements, order. Your choices make it yours.
The Japandi Honest PlaybookThe honest version of the style: what to keep, what to skip, and the order to do it in.See inside →The Room Refresh PlaybookA repeatable four-step method, room by room, in ten minutes, thirty minutes, or one weekend.See inside →Make Any Room Feel Cozy on PurposeWhy some rooms hold people and others empty out, and the moves that change it.See inside →Key Takeaway: Label every container and every shelf position at setup, not later — it’s a five-minute task that eliminates re-decision friction for everyone who uses the room.

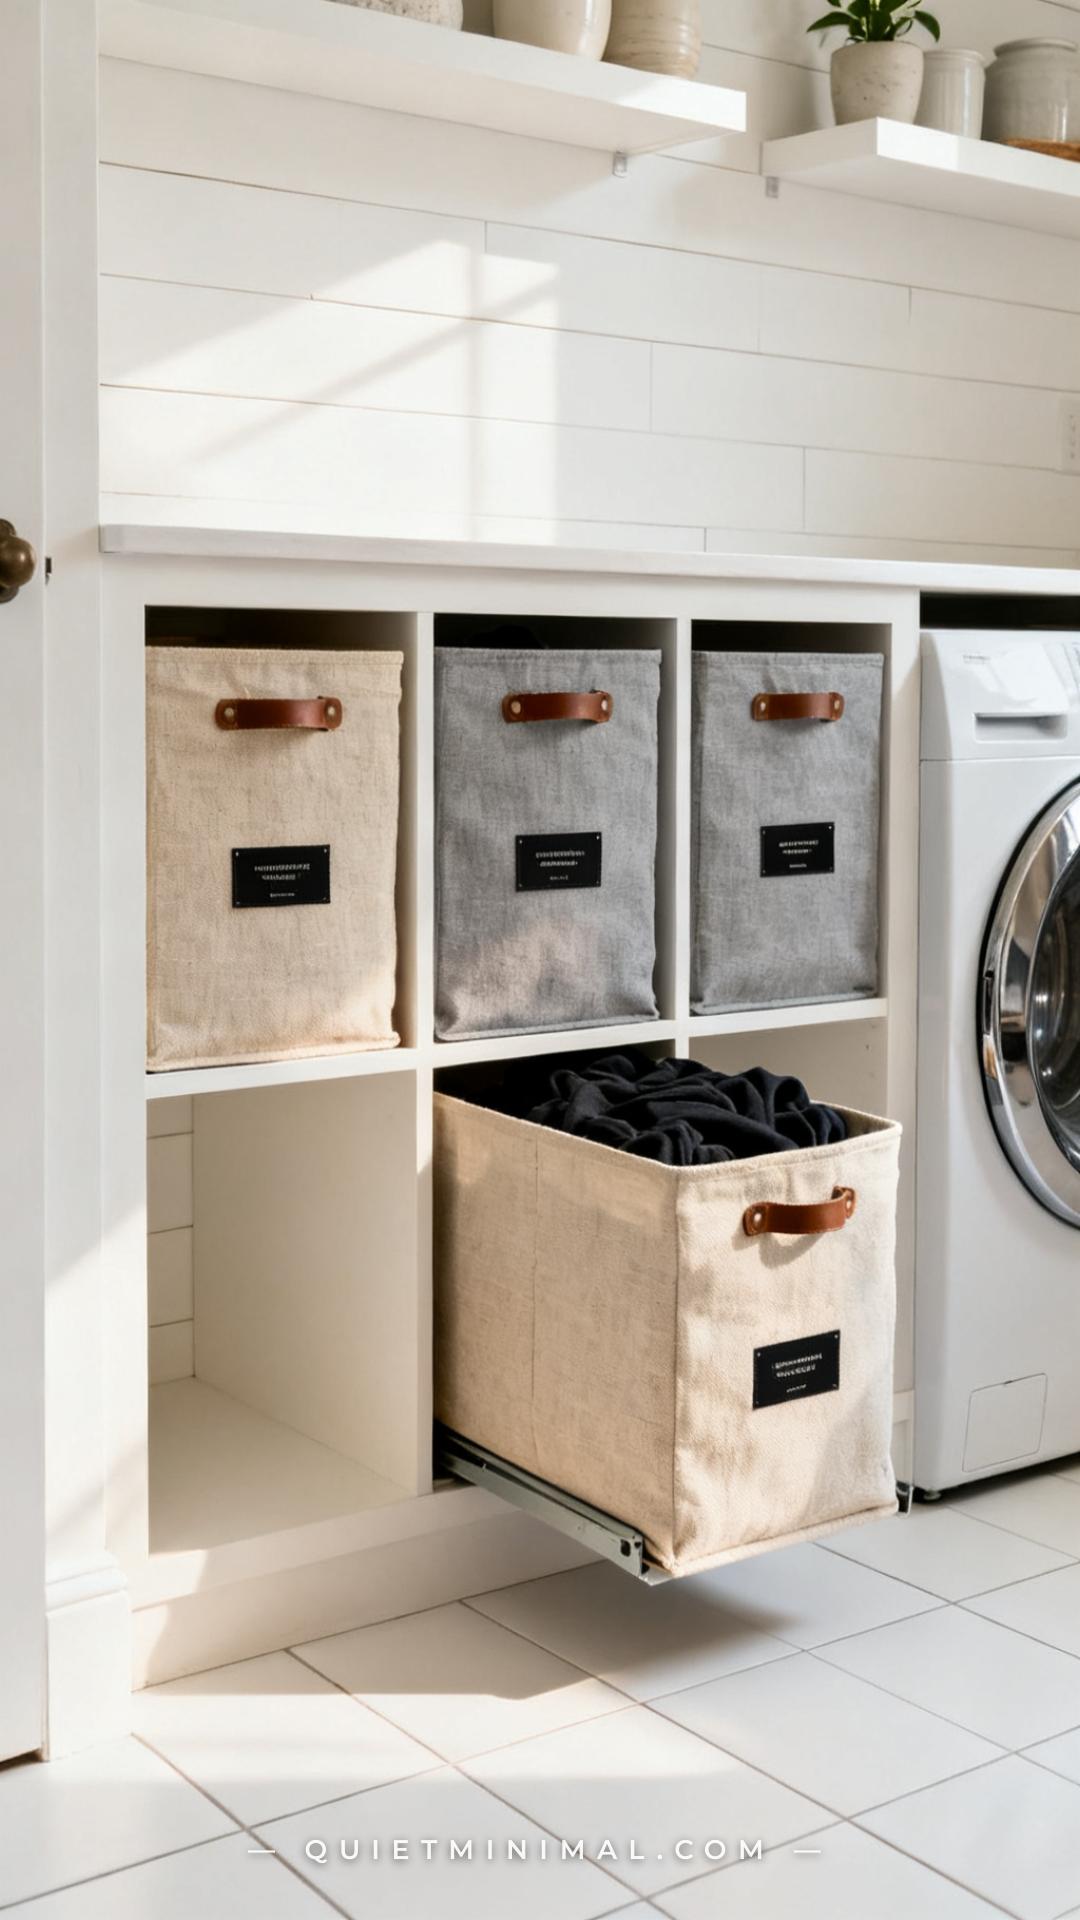
Zone 8: Choose Sorting Bins That Pull Out, Not Just Stack
 Save
Sorting bins placed on open shelves look great in photos and create a genuine problem in real use if they’re not designed to be pulled out easily. When a bin is full of a week’s worth of laundry, lifting it straight up off a shelf to carry to the washer is awkward and heavy. Bins on full-extension drawer slides (built-in solution) or with sturdy leather or cotton rope handles that you can grip from the front allow you to pull the bin forward first, then lift — a much more natural motion.
For freestanding open-shelf systems, look for bins with two reinforced side handles (not flimsy cutouts in the fabric) and a rigid-bottom insert that keeps the bin from collapsing as it empties. Wicker and seagrass bins are durable and breathable but can be heavy empty — for high shelves, lighter canvas or felted wool bins are easier to manage. Size-wise, the internal capacity should be enough to hold 7–10 days of one category of laundry per person using it.
Key Takeaway: Choose bins with sturdy front or side handles before considering aesthetics — a beautiful bin you can’t easily pull out when it’s full won’t get used correctly.

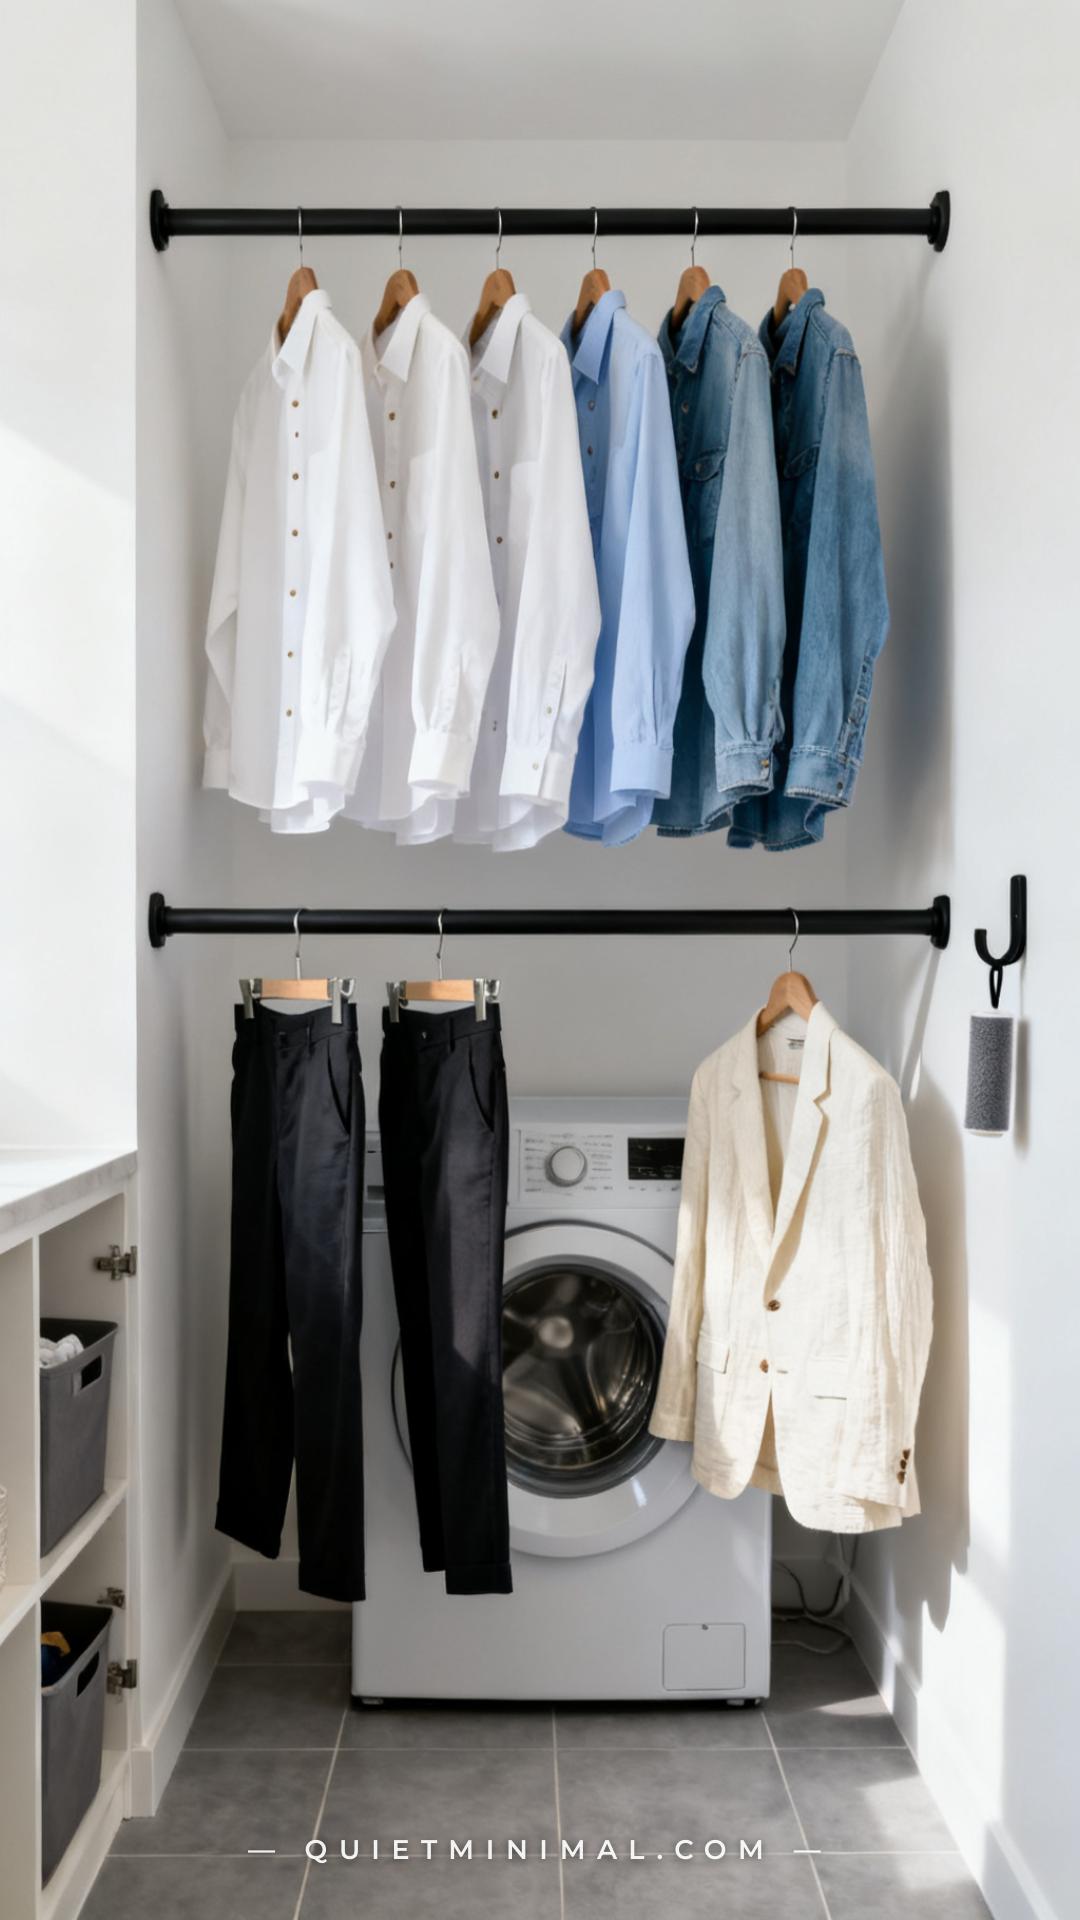
Zone 9: Treat the Hanging Rod as a Staging Zone, Not Just a Closet Overflow
 Save
Most people install a laundry room hanging rod and immediately fill it with clothes that have no other home — the overflow from a crowded closet. This turns the rod from a functional laundry tool into a second closet, and it’s always full when you need to use it for actual laundry.
A better mental model: the hanging rod is a staging zone, not a storage zone. Items go on it immediately after the dryer (or off the drying rack, for delicates) and should leave the rod within 48 hours — either to a bedroom closet or drawer. Keep one side of the rod permanently reserved as “incoming” and the other side as “ready to move.” Limit the rod to one to two items per household member at a time. A few matching slim wooden hangers (not plastic, not wire) keep the zone looking intentional and make items easier to grab.
Key Takeaway: Reserve the hanging rod as a 48-hour staging zone — not a closet overflow — and keep matching slim hangers on it so the discipline sticks visually.

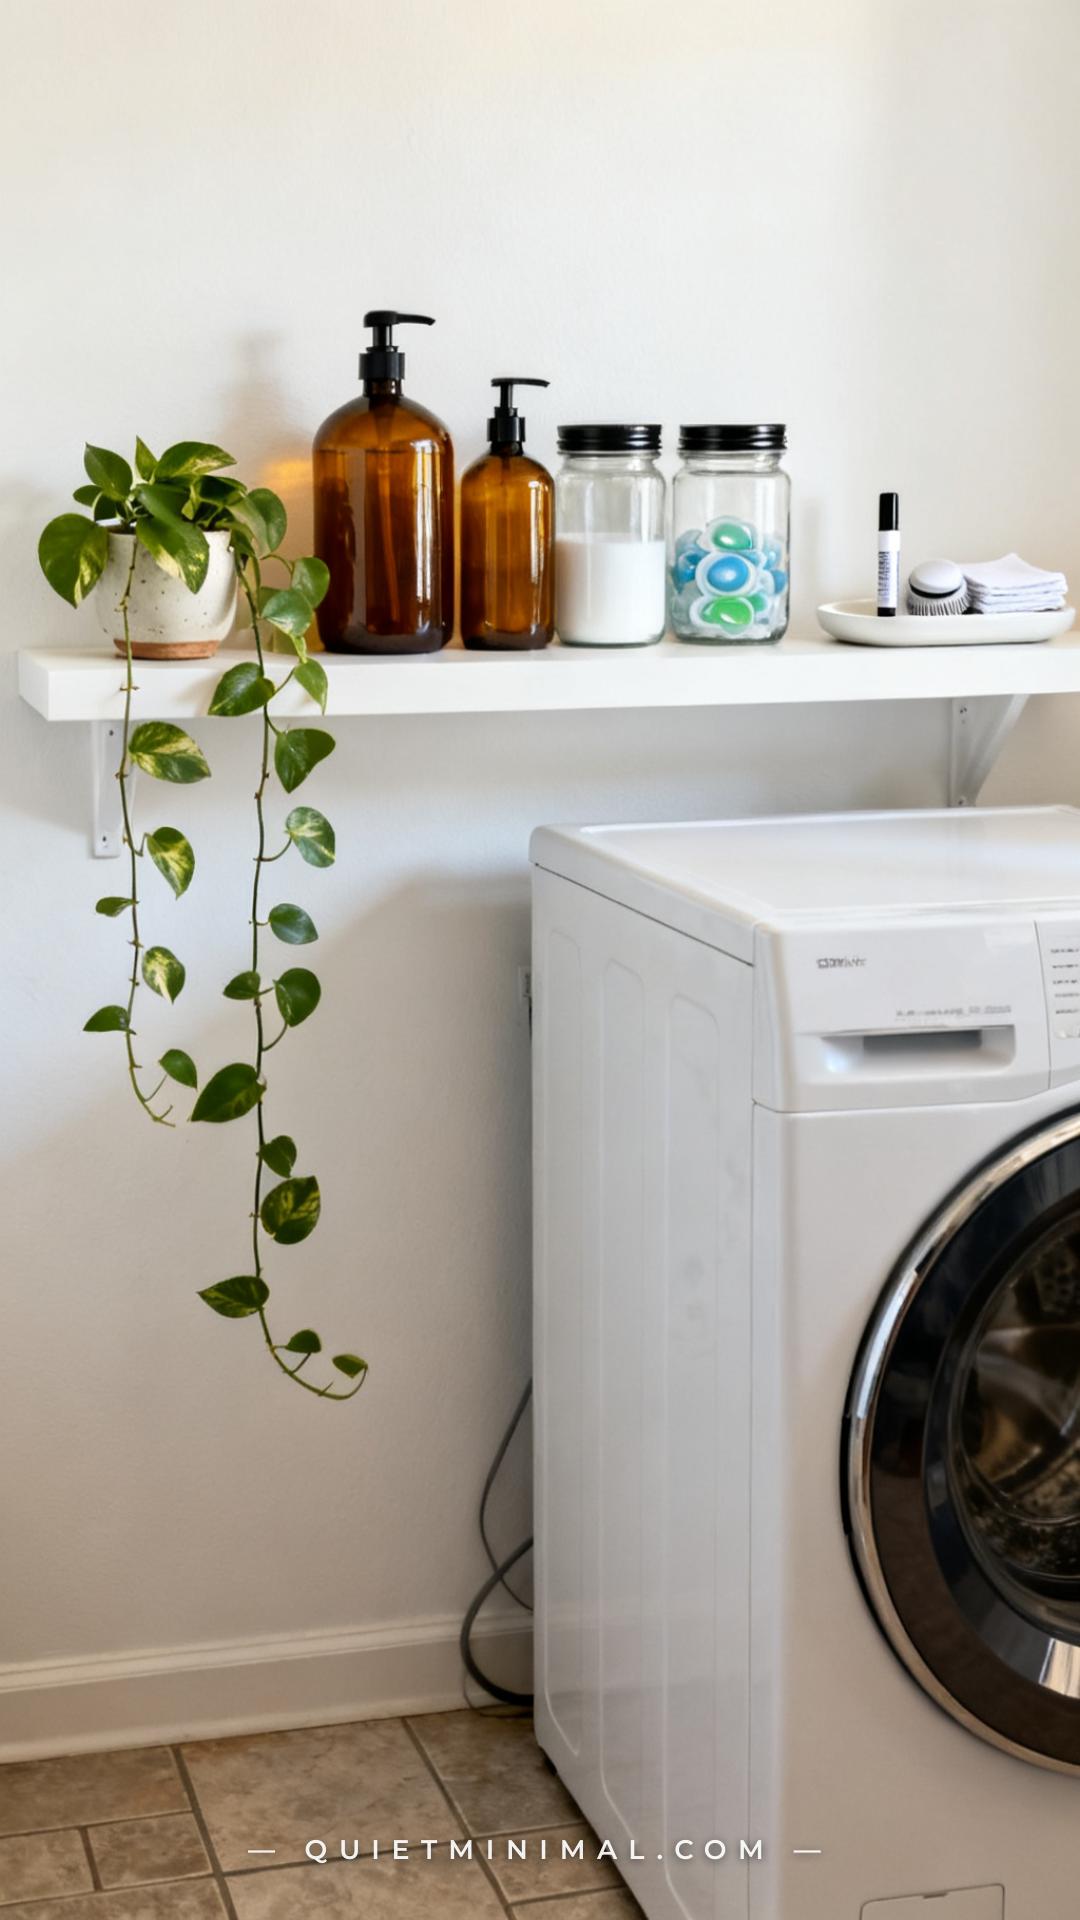
Zone 10: Decant Your Supplies — It Takes 20 Minutes and Changes the Room’s Entire Feel
 Save
There is no faster visual upgrade to a laundry room than decanting supplies. The original packaging of most laundry detergents — large plastic jugs in high-contrast primary colors, industrial fonts, nutrition-label-style usage grids — is designed for retail shelf visibility, not for living in your home. Moving the product into amber glass or clear glass containers with pump dispensers drops the visual noise dramatically and makes the shelf look like a deliberate design choice rather than a storage shelf.
This does not require matching everything perfectly. Three to four containers in the same material (all glass, all ceramic, or all matte plastic) with neutral labels is sufficient for a cohesive look. Keep a small bin or drawer nearby for backup stock in original packaging — you don’t need to decant your entire Costco purchase of laundry pods, just the amount you’ll use in the next two weeks. Refill from the backup stock as needed.
Key Takeaway: Decanting laundry supplies into matching containers is a one-time setup with permanent visual impact — it’s the highest ROI aesthetic move in a utility room.

Zone 11: Connect All Four Zones with One Visual Thread
 Save
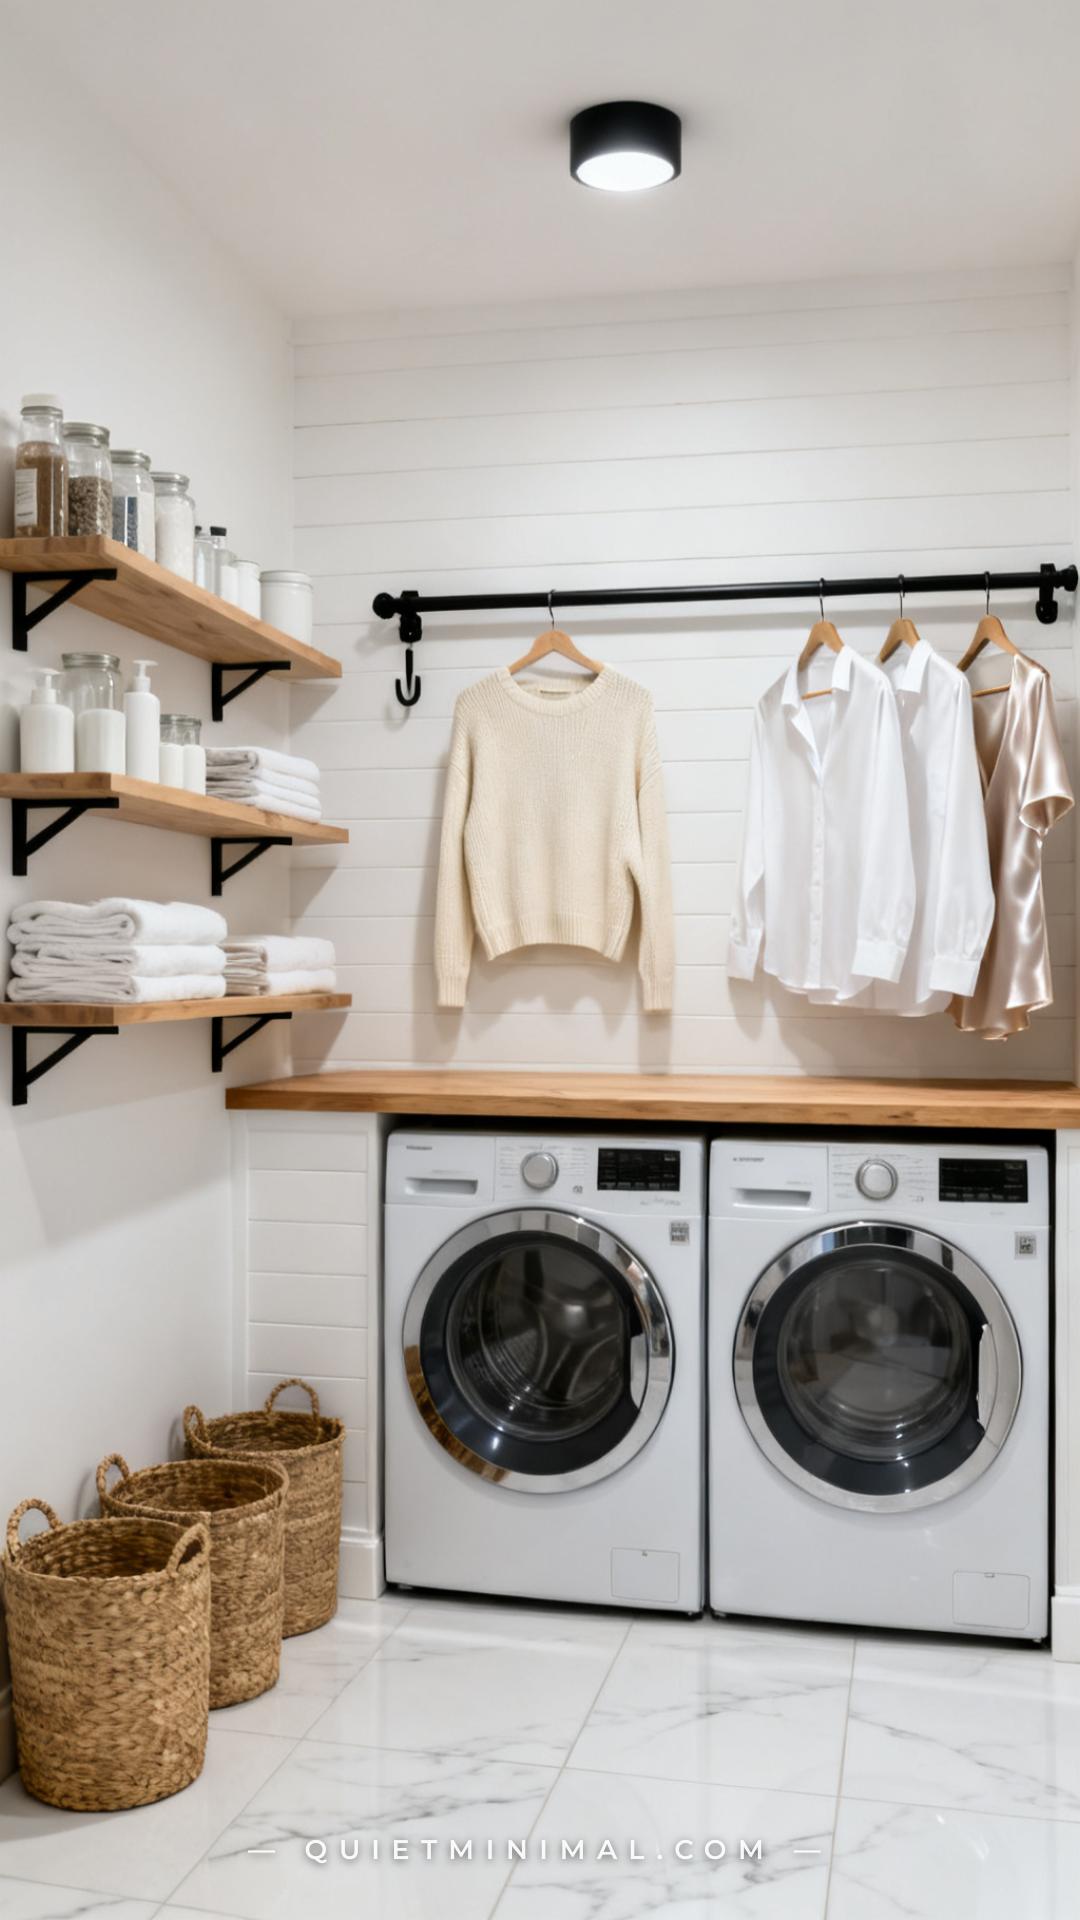
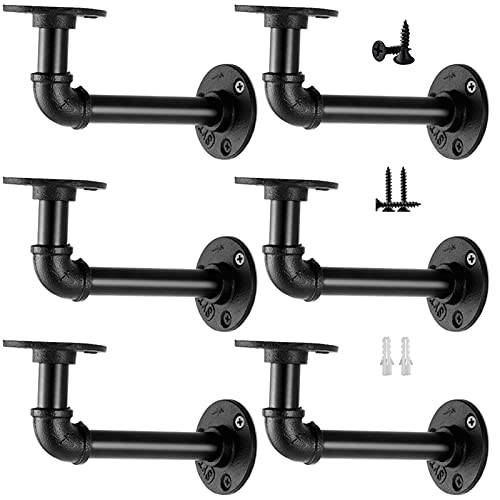
You can execute every zone correctly and still end up with a laundry room that looks assembled rather than designed, if each piece came from a different visual language. The fix is not a strict matching set — it’s a single visual thread that runs through every element. In practical terms, that means picking one metal finish for all hardware (matte black and brushed nickel are the most versatile), one material palette for containers (all glass, or all white ceramic, or all natural woven), and one shelf material (all pale oak, or all white-painted, or all metal grid). That’s it. Three decisions, made once, applied consistently.
This thread doesn’t require buying everything from the same brand. A wall-mounted drying rack from one source, floating shelves from IKEA, bins from Target, and hangers from Amazon can all look intentional together as long as they share the same finish and palette. The thread is the design logic, not the brand tag. Decide on it before you buy the first piece — not after the room is half-assembled and already feels like it needs something.
Key Takeaway: Pick one metal finish, one container material, and one shelf material before purchasing anything — three decisions made once create a room that looks designed, not accumulated.
A laundry room organized as four deliberate zones — hang, dry, sort, store — stops being a room you manage and starts being a room that manages itself. The individual pieces (the shelving, the hanging rod, the drying rack, the sorting bins) only work as well as the planning that placed them. Start with the zone sketch. Choose the visual thread before the first purchase. Install the sort station at the entry point, the hanging rod above the dryer, the drying rack on the wall rather than the floor. The products are easy to find once you know exactly what you need them to do — and that’s where most laundry room projects actually go wrong, long before a single screw goes into the wall. Sketch the system first. Buy second. The room will show the difference immediately.
From the guides
You've saved it, wanted it. Here's the how: codes, measurements, order. Your choices make it yours.
The Japandi Honest PlaybookThe honest version of the style: what to keep, what to skip, and the order to do it in.See inside →The Room Refresh PlaybookA repeatable four-step method, room by room, in ten minutes, thirty minutes, or one weekend.See inside →Make Any Room Feel Cozy on PurposeWhy some rooms hold people and others empty out, and the moves that change it.See inside → Save