 Georgia
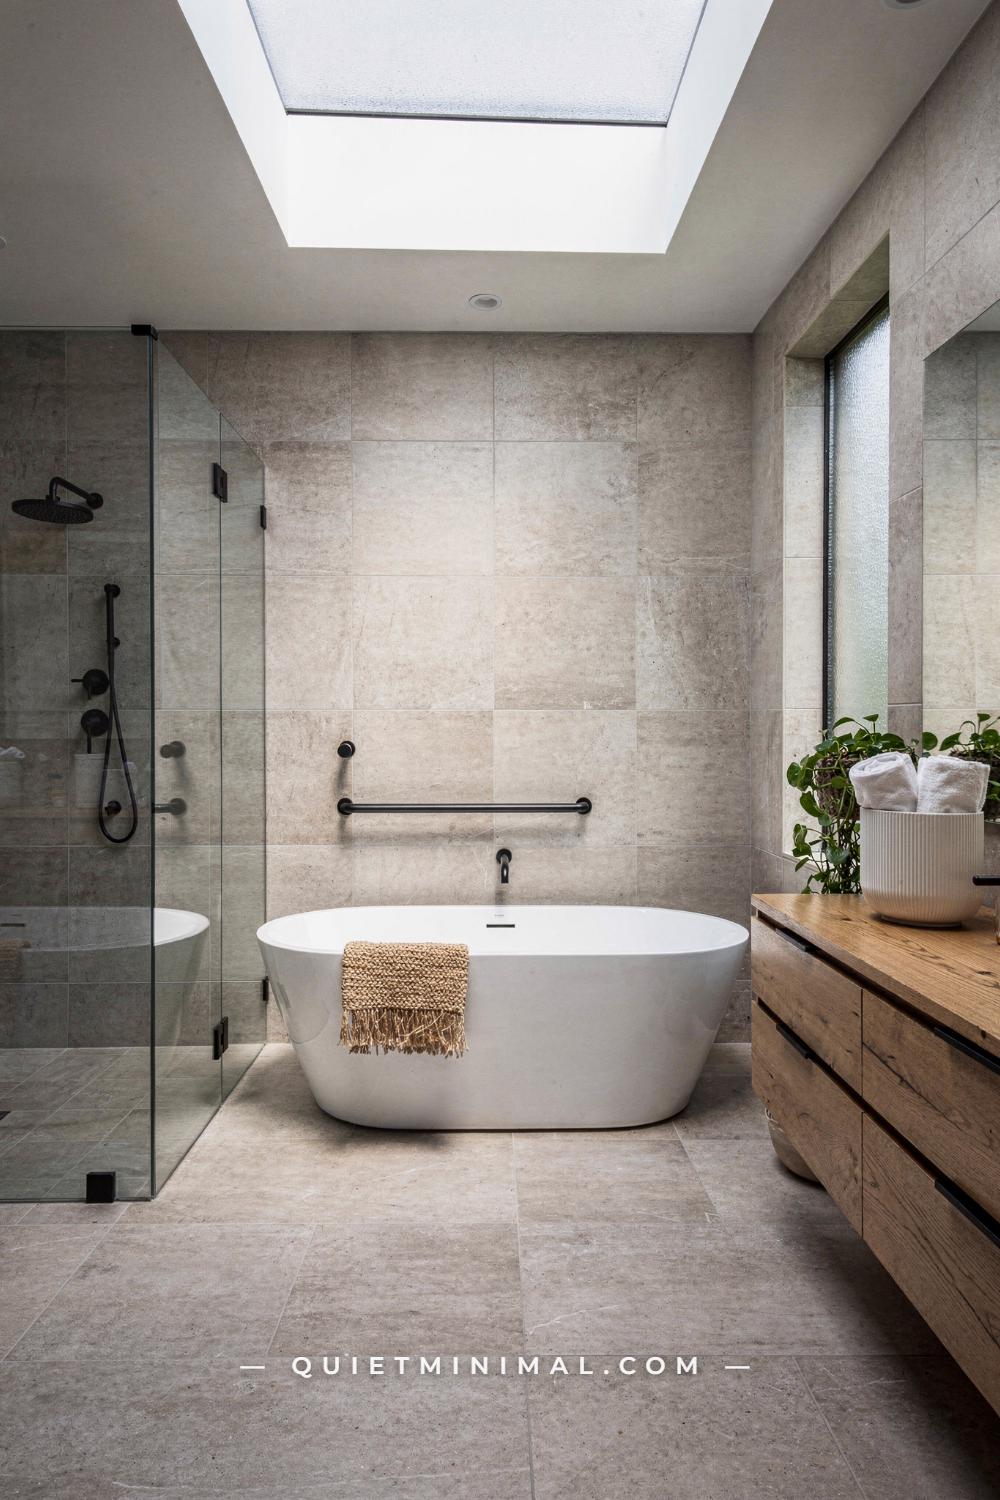
A grab bar has an image problem that has nothing to do with what it actually is. Strip away the association with hospital corridors and it is just a piece of hardware rated to hold real weight, mounted at a height a hand reaches without thinking, in a finish that can match anything else in the room. The bathrooms that get this right do not treat the bar as an afterthought bolted on at the end of a remodel. They plan it the way they plan a towel bar or a light fixture, as part of the room’s design from the first decision, which is exactly why a well-placed modern grab bar photographs like hardware and a badly placed one photographs like a hazard sign. This is the sequence that gets you from a bare wall to a bar that is both load-tested and unnoticed, in the order the decisions actually have to happen: where it goes, what is behind the wall, how it is anchored, what it is finished in, which format it takes, how long it is, what angle it sits at, how high it is mounted, how much clearance it needs, how it goes in, how you confirm it will hold, and how the wall around it gets styled so the bar reads as one more considered choice instead of the only utilitarian object in the room.
Start by Mapping How You Actually Use the Room
 Save
Skip the diagram that shows a bar next to every toilet and tub in a house and start with something more specific: where do you actually reach for something solid in this exact bathroom. That is different for a walk-in shower with a curbless entry than it is for a tub-shower combo with a step-over lip, and it is different again for a powder room where the only real risk is a wet tile floor near the sink. Walk the room the way you use it on an ordinary morning and note every point where a hand naturally lands on a towel bar, a shower door frame, or the edge of the vanity for balance. Those existing habits are the actual placement brief, not a generic checklist.
The three zones that come up in nearly every bathroom are the shower entry and exit, the space directly beside the toilet, and the transition in and out of a tub. Beyond those, look for the specific pinch points in your own layout: a shower control that sits at an awkward reach, a step down between a wet room and a dry hallway, a narrow turn near a pedestal sink. A bar placed at one of these real pressure points earns its keep every day, while one placed by a generic rule and never touched just becomes hardware nobody asked for. Mark each candidate spot with painter’s tape at the height and angle you’re considering before anything gets drilled, and live with it for a few days if you can. Tape is free to move. A patched hole in finished tile is not.
Skipping this walk-through is the single most common reason a technically correct installation still feels wrong day to day: a bar mounted at the right height, on solid blocking, in a finish that matches the room, but three feet from where a hand ever actually reaches. That kind of miss usually shows up only after the tile is finished and the bar is already caulked in place, which is exactly why the mapping step comes first in this sequence rather than last. If more than one person uses the bathroom regularly, walk the room with each of them separately. A reach point that works for one person’s height and habits does not automatically work for another’s, and reconciling that difference before drilling costs nothing.
Key Takeaway: Map placement from how you actually move through the bathroom, not from a generic diagram, and confirm each spot with painter’s tape before committing to a hole.
From the guides
You've saved it, wanted it. Here's the how: codes, measurements, order. Your choices make it yours.
 The Japandi Honest PlaybookThe honest version of the style: what to keep, what to skip, and the order to do it in.See inside →
 The Room Refresh PlaybookA repeatable four-step method, room by room, in ten minutes, thirty minutes, or one weekend.See inside →
 Make Any Room Feel Cozy on PurposeWhy some rooms hold people and others empty out, and the moves that change it.See inside →

Find the Studs Behind the Wall
 Save
Drywall alone was never built to carry the load a grab bar is asked to hold, so the first structural question is simple: where are the studs. Most residential framing runs on 16 inch (40.6 cm) centers, occasionally 24 inch (61 cm) in older construction, and a basic stud finder will locate the edges reliably through drywall. Tile complicates the reading, since the ceramic and thinset add mass that can confuse a cheaper sensor, so budget extra passes and confirm any reading with a small pilot hole in an inconspicuous spot before you trust it, or look for a magnetic stud finder that catches the drywall screws instead of guessing at density.
A single stud rarely lines up exactly where you want the bar to end, which is normal and not a sign you picked the wrong spot. Most quality bars use a flange at each end wide enough to shift a few inches off the load point, so find the stud first, then adjust the bar’s exact position within a couple of inches so at least one, ideally both, mounting points land on solid framing. If your bathroom is mid-renovation and the wall is still open, this is also the moment to think one step ahead: photograph the stud layout before the drywall goes back up, so you have a permanent record of exactly where the framing sits behind the finished wall.
Older homes complicate this further. Balloon-frame construction, fire blocking installed at odd heights, and plumbing or wiring runs squeezed into a stud bay can all throw off a straightforward reading, so where the wall’s age or construction type is uncertain, a small inspection hole with a flexible camera is worth the extra ten minutes before committing to a mounting plan built on a guess. It is also worth checking for pipes before drilling any pilot hole near a stud edge, since a stud finder locates wood, not what may be running just behind it.
Key Takeaway: Locate studs before you plan exact bar placement, and shift the bar a few inches rather than the framing to land both ends on solid wood.

Add Blocking If You Are Working With an Open Wall
 Save
If you are gutting a bathroom or already have the wall open for another reason, this is the cheapest and strongest fix available: install horizontal blocking, typically a 2×6 or 2×8 (nominal, actual 1.5 by 5.5 or 7.25 inch / 3.8 by 14 or 18.4 cm) screwed flush between the studs at the exact height range you plan to mount bars, before the drywall or backer board goes back up. Blocking turns the entire span between studs into solid anchoring surface, which removes the problem of a bar’s mounting flanges not lining up with framing later, and it means you can add or move a bar in the future without opening the wall again.
Plan blocking for every wet-area wall where you might ever want a bar, even if you are not installing one today: beside the toilet, along the full length of a shower wall, and at the tub’s entry point. Set the blocking to span the ADA mounting band of roughly 33 to 36 inches (84 to 91 cm) plus a few inches of margin above and below, so a future bar has room to be repositioned without missing the wood entirely. Mark the blocking’s location on the outside of the wall cavity with a note or photo before it disappears behind tile, since a future contractor, or a future you, will have no other way to know it is there.
Use pressure-treated or moisture-resistant lumber for blocking installed inside a wet wall cavity, even though it sits behind a vapor barrier, since bathroom walls see more humidity over their lifespan than almost any other wall in the house. Route the blocking around any plumbing or electrical already run through that bay rather than through it, and confirm with whoever is doing the rough plumbing that your blocking height will not conflict with a supply line or drain vent planned for the same wall. Blocking installed without that coordination is one of the more common reasons a renovation crew has to reopen a wall they just closed.
Key Takeaway: If the wall is already open, install horizontal 2×6 blocking across the full mounting band now, even for walls you are not bar-mounting yet.

Choose an Anchor System for Finished Walls Without Blocking
 Save
Most bathrooms getting a grab bar today are not mid-gutting, they are finished rooms where opening the wall to add blocking is not realistic. That is where heavy-duty hollow-wall and tile-rated anchors do the job blocking would otherwise do. Toggle-style anchors, sold under names like SnapToggle, thread a strap through a half-inch hole and lock a metal wing against the back of the drywall or tile backer, spreading the load across a wide area instead of relying on the wall material alone to hold a screw. Independent load testing on this style of anchor runs well past code minimums, with figures near 500 lb (227 kg) in half-inch drywall and considerably more into solid backer, tile-set mortar bed, or concrete block.
Tile adds one more variable: drilling through a glazed surface without cracking it. Use a carbide-tipped or diamond bit, start the hole at a low speed with painter’s tape over the mark to keep the bit from wandering, and let the bit do the cutting rather than pushing hard. Once through the glaze and into the substrate behind it, the toggle anchor installs the same way it would in drywall. This is not a downgrade from stud mounting; it is a different, equally rated path to the same 250 lb (113 kg) code minimum, and in many finished-wall situations it is the only realistic one.
Skip suction-cup or adhesive-mounted bars entirely for anything meant to bear real weight. They hold small bathroom organizers reliably and fail without warning under a sudden pull, which is the opposite of what a support bar is for. Before buying any toggle-style anchor, check that the manufacturer publishes an actual tested load rating for drywall, tile backer, and concrete separately, since a single vague number covering all three substrates usually means the rating was never independently verified for the one you are drilling into.
Key Takeaway: In a finished wall without blocking, a toggle-style anchor rated for tile and drywall reaches the same load rating a stud would, without opening the wall.

Match the Finish to the Hardware Already in the Room
 Save
The single change that does the most to make a bar disappear into a room is finish matching, and it costs nothing extra beyond picking the right box off the shelf. A chrome bar against brushed nickel fixtures reads like two different eras in the same room; a matte black bar against matte black shower hardware and cabinet pulls reads like one coherent decision. Before ordering anything, take stock of what is already fixed in the room: the faucet finish, the shower system, the mirror frame, the cabinet hardware. Whichever finish shows up most often is the one to match.
Current hardware coverage lists matte black, brushed brass and warm gold, brushed nickel, and living or unlacquered brass as the finishes currently carried across designer grab bar lines from manufacturers like Moen’s Home Care collection and CSI Bathware. Unlacquered brass is worth calling out specifically: unlike a sealed or lacquered finish, it is designed to develop a soft patina from handling over years, the same way a well-used brass door handle ages, which is part of why it reads as intentional hardware rather than a shiny add-on. If your existing fixtures are an older or mixed finish, a bar in the closest matte or brushed metal will still read more coherent than chrome, which is the finish most associated with the clinical, catalog look this whole project is trying to avoid.
Mixed-metal bathrooms are common and not automatically wrong, but they do change the matching logic: if your fixtures already combine two finishes deliberately, say a brushed nickel faucet with matte black cabinet hardware, match the bar to whichever finish carries more visual weight in the room, usually the larger or more frequently touched fixture. Pay attention to undertone as well as color. A warm brushed brass reads differently next to a cool-toned gray tile than it does against warm oak, so hold a finish sample against the actual wall in the room’s own light before ordering, not under a showroom’s very different bulbs.
Key Takeaway: Match the bar’s finish to whatever metal already dominates the room, matte black or brushed brass over chrome, and a mismatched finish is the fastest way to make hardware look institutional.

Decide Between a Straight Bar, a Towel Bar Hybrid, and an Integrated Niche Rail
 Save
Once placement, structure, and finish are settled, the actual product falls into three real categories, and each one solves a slightly different problem. A straight bar, usually 1.25 to 1.5 inch (3.2 to 3.8 cm) in diameter, is the most flexible option and the one to default to for a single, specific reach point like a shower entry or a spot beside the toilet. A towel bar hybrid combines a load-rated grab bar with a towel-holding rail on the same mounting plate, which is worth considering anywhere a towel bar would already make sense, since it does double duty instead of adding a second piece of hardware to the same wall.
The third option, an integrated rail across a shower niche, is newer and specific to walk-in showers with a built-in recessed shelf: instead of a separate bar mounted nearby, the niche’s opening itself carries a horizontal rail, so the support and the storage share one clean line rather than competing for wall space. This only works if you are already building or renovating a shower with a niche, but where it applies, it is the option that reads least like added hardware, since a rail across a niche looks like a design detail even to someone who has no idea it is load-rated. Choose the straight bar for a single clear reach point, the hybrid where a towel bar was already planned, and the niche rail only inside a shower being built from scratch.
Weight rating differs slightly across the three formats, and it is worth checking before you buy on looks alone: a straight bar built specifically for grab-bar use typically carries the highest independently tested rating, a hybrid towel bar combination usually matches it if the listing explicitly states a load rating rather than just describing it as decorative, and a niche rail’s rating depends entirely on how the niche itself was framed and tiled. Confirm any hybrid or integrated option states a specific pound rating in its own listing, not just the word “sturdy,” before treating it as load-bearing hardware rather than a towel holder that happens to be nearby.
Key Takeaway: Pick a straight bar for one specific reach point, a towel bar hybrid anywhere a towel rail was already planned, and an integrated niche rail only in a shower being newly built.

Size the Bar to the Wall and the Task
 Save
Bar length is a function of the wall it is going on and what the reach needs to cover, not a single universal size. Standard lengths run 12, 18, 24, 32, 36, 42, and 48 inch (30, 46, 61, 81, 91, 107, and 122 cm), and the two most common choices for residential bathrooms are 24 and 36 inch. A 24 inch bar suits a tight reach point, positioned close to the wall with the shower or tub controls so a hand can find it while adjusting water temperature. A 36 inch bar covers more of a tub’s tiled apron or a longer stretch of shower wall, giving a hand somewhere to land across a wider range of motion rather than one fixed point.
For a tub-shower combo specifically, a 36 to 42 inch (91 to 107 cm) bar mounted along the back or side wall covers both the step-over point at the tub’s edge and a standing position inside the shower with one continuous run, which is often a cleaner design outcome than two shorter bars mounted separately. In a walk-in shower with a curbless entry, a shorter 18 to 24 inch (46 to 61 cm) bar at the entry threshold is usually enough, since the fall risk concentrates at that single transition rather than across the whole floor. Measure the actual wall run before ordering. A bar that is too long for its wall crowds the tile joint pattern and looks like it was sized by guess rather than to the room.
Measure with a tape rather than estimating by eye, and measure the actual usable wall run, not the full wall length, since tile trim, a shower valve, or a corner niche can eat into the space a bar needs on either side of its flanges. In a bathroom used by people of noticeably different heights or reach, a slightly longer bar gives more flexibility than a short one sized to a single person’s exact reach point, since a longer bar still works fine for a shorter reach but a too-short bar cannot be stretched later without replacing it.
Key Takeaway: Size the bar to the specific wall and reach: 24 inch for a tight single point, 36 to 42 inch to span a tub apron or full shower wall.

Set the Angle: Horizontal or Diagonal
 Save
Most bars default to horizontal, and for a straightforward reach point along a wall, horizontal is correct: mount it level, at a consistent height, running parallel to the floor. A diagonal bar, typically set at roughly 45 degrees, solves a different problem: it supports the specific motion of pushing up from a lower, seated, or bent position toward standing, angled so the hand travels naturally from a lower grip near a bench or tub edge up toward the higher end near the shower controls.
The clearest case for a diagonal bar is a shower with a built-in bench or seat, where the motion from sitting to standing benefits from a bar that follows that path rather than staying level the whole way. Mount the lower end near the seat height, roughly 17 to 19 inch (43 to 48 cm) from the floor, and let the bar rise to meet the horizontal ADA band of 33 to 36 inch (84 to 91 cm) at its upper end, so the same bar supports both the seated push-up and a standing reach at its top. Outside of a bench or a tub with a genuinely low entry point, horizontal remains the simpler, equally effective default, and mixing both angles in the same shower, one horizontal bar for standing balance and one diagonal for a bench, covers more of the room’s actual use than either alone.
The most common mistake with a diagonal bar is over-angling it closer to vertical, which looks more dramatic but actually reduces its usefulness, since a hand pushing up from a seated position naturally travels along a shallower path than a 60 or 70 degree angle allows for. Keep the angle close to 45 degrees unless the specific geometry of your bench or seat genuinely calls for something steeper, and mock up the angle with painter’s tape and a level before drilling, the same way you tested placement in the very first step of this sequence.
From the guides
You've saved it, wanted it. Here's the how: codes, measurements, order. Your choices make it yours.
The Japandi Honest PlaybookThe honest version of the style: what to keep, what to skip, and the order to do it in.See inside →The Room Refresh PlaybookA repeatable four-step method, room by room, in ten minutes, thirty minutes, or one weekend.See inside →Make Any Room Feel Cozy on PurposeWhy some rooms hold people and others empty out, and the moves that change it.See inside →Key Takeaway: Default to horizontal for a level reach point, and reserve the 45 degree diagonal angle for the specific motion of pushing up from a bench or low seat.

Set the Mounting Height
 Save
The residential standard for grab bar height sits in a band of 33 to 36 inch (84 to 91 cm), measured from the finished floor to the top of the bar, the same range building codes and manufacturers converge on because it lines up with the natural wrist height of most standing adults with their arm relaxed at their side. Inside that three inch (7.6 cm) range, adjust for who actually uses the bathroom most: mount toward 33 inch (84 cm) for a shorter household, toward 36 inch (91 cm) for a taller one, and split the difference at 34 to 35 inch (86 to 89 cm) for a bathroom used by a range of people.
Measure from the actual finished floor, not the subfloor, since tile and any leveling underlayment can add half an inch or more that throws off a height set before the floor goes in. For a bar beside a toilet, measure the height relative to the toilet seat rather than the floor alone, since the useful reach point is the transition between sitting and standing, not an arbitrary distance up the wall. Use a level for the final mark regardless of which reference point you started from; a bar that reads even slightly tilted is one of the fastest ways for hardware that is otherwise well chosen to look like it was installed in a hurry.
For a bathroom that will serve a wide range of users over the years, rather than compromise on a single fixed height, consider planning for two shorter bars at slightly different heights on a long enough wall, which gives more than one comfortable reach point without either one being wrong for anyone. This only works where the wall run is long enough to support two bars without crowding, generally 48 inch (122 cm) or more, so weigh it against the sizing decisions made earlier in this sequence rather than adding it as an afterthought.
Key Takeaway: Mount within the 33 to 36 inch (84 to 91 cm) band, adjusted toward the shorter or taller end for who uses the room, and always measure from the finished floor.

Set the Wall Clearance
 Save
Clearance is the dimension that gets skipped most often, and it is also the one that determines whether a bar is actually usable in an emergency. A bar mounted flush or nearly flush against the wall leaves no room for fingers to wrap around it, and worse, if a hand slips while reaching, a wrist can get caught in that narrow gap rather than sliding free. The standard clearance is exactly 1.5 inch (3.8 cm) of open space between the back of the bar and the wall surface, which is wide enough for a full hand grip and still narrow enough that an arm cannot slip all the way through and get trapped.
Most quality bars come with a fixed clearance built into the mounting flange, so this is less something you set manually and more something to check before buying: measure the bar’s own standoff distance against the 1.5 inch (3.8 cm) reference before it goes on the wall, since decorative or towel-bar-style hardware not actually rated for grab bar use sometimes mounts flatter than that for a sleeker look, which quietly defeats the purpose. If you are mounting into a tiled wall with thick tile and a mortar bed, account for that added thickness in your total reach from the wall’s structural surface, so the finished clearance still measures 1.5 inch (3.8 cm) from the final tile face, not from the substrate underneath it.
After mounting, check the clearance with a simple finger test rather than trusting the spec sheet alone: slide four fingers flat between the bar and the wall along its full length, confirming the gap holds evenly from one end to the other rather than narrowing anywhere due to a warped flange or an uneven tile surface. A clearance that measures correctly at the center but pinches near one bracket is a common installation error, and it is one worth catching before the caulk goes in and the flange becomes difficult to adjust.
Key Takeaway: Confirm exactly 1.5 inch (3.8 cm) of clearance between the bar and the finished wall surface before installing, measured from the final tile face.

Mark, Drill, and Mount
 Save
With placement, structure, finish, format, size, angle, height, and clearance all decided, the physical mounting is the fastest step in the sequence. Hold the bar or its template against the marked position, confirm level with a spirit or digital level, and mark each screw point precisely rather than eyeballing it, since even a small offset at one end throws the whole bar out of level once both flanges are secured. Drill pilot holes sized to the anchor or screw manufacturer’s spec exactly. A hole drilled oversized for convenience weakens the anchor’s grip no matter how solid the wall material is behind it.
Mount into stud or blocking with the manufacturer’s screws, typically stainless steel to resist bathroom moisture, driven to snug but not overtightened, since stripping the pilot hole defeats the point of hitting solid wood in the first place. For a toggle-anchor installation on a finished wall, follow the anchor’s specific sequence exactly, since these anchors typically need to be seated and locked in a precise order before the final screw goes in, and skipping a step is the most common reason a toggle-mounted bar fails later. Once both ends are secured, run a bead of clear waterproof silicone caulk around the base of each flange where it meets the tile, sealing the screw points against water intrusion that could otherwise corrode the anchor over time from behind the wall.
Work through the mounting points in a specific order rather than tightening each one fully before moving to the next: seat every screw snug first, confirm the bar is still level once all points are engaged, then go back and finish tightening each one fully. Tightening one end completely before starting the other risks pulling the bar slightly out of level as the final screws draw the flange tight against the wall, a small misalignment that is far easier to correct before every screw is fully seated than after.
Key Takeaway: Mark and drill precisely to spec, mount with the manufacturer’s hardware exactly as directed, and seal every flange with waterproof caulk once it is secured.

Test the Load Before You Trust It
 Save
A bar that looks mounted is not the same as a bar that is confirmed secure, and the test is straightforward enough to do the same day you finish installing it. Apply firm, steady downward and outward pressure with both hands, simulating the actual motion of pulling yourself up or catching your balance, rather than a light tap or wiggle test that would miss a partially seated anchor. Check for any give at the wall surface itself, not just at the bar, since a bar can feel solid in your grip while the tile or drywall around the flange is quietly flexing.
Recheck the installation at roughly one week and again at one month, since anchors in a hollow wall or tile can settle slightly as the material around them adjusts to the new load, and any developing play is far easier to catch and re-anchor early than after months of daily use. If you mounted into a toggle anchor rather than a stud, this recheck matters more, not less: stud-mounted bars have wood on their side from day one, while a toggle anchor’s grip depends entirely on correct seating during that one installation. A bar that passes a firm two-handed test at install, at one week, and at one month has earned the trust to actually rely on.
Keep a short written note, even just a phone photo with a date, of when each bar was installed and tested, since that record becomes useful if you ever sell the home or bring in a contractor for other work and need to confirm which bars were properly anchored versus which might have been added quickly by a previous owner. If any bar shows movement at the wall during testing, stop using it immediately and re-anchor or relocate it rather than continuing to rely on a connection that has already shown it cannot hold the load.
Key Takeaway: Load-test with firm two-handed pressure at install, then recheck at one week and one month, since a toggle-anchored bar depends entirely on correct initial seating.
Style the Wall Around It So It Disappears Into the Room
 Save
The last step is the one that actually determines whether the bar reads as intentional hardware or as an obvious addition, and it has nothing to do with the bar itself: it is what surrounds it. A bar mounted alone on an otherwise bare wall will always look like a single utilitarian object, regardless of finish or quality, simply because it has nothing else on the wall to belong with. Add a floating shelf, a hook, or a small piece of art nearby in the same or a complementary finish, and the bar becomes one element in a considered group instead of the only thing on the wall.
Repeat the bar’s finish somewhere else in the room deliberately, not just on the faucet and mirror already noted earlier, but in a smaller detail too: a matching hook, a towel ring, a cabinet pull. This kind of repetition is what makes a metal finish read as a design choice rather than a coincidence, and it is the same principle stylists use to make any single fixture feel planned rather than added. Keep the surrounding objects genuinely useful, a shelf that holds what you actually reach for, a hook that holds the robe you actually wear, so the styling reads as a functional wall rather than a staged one. A bar surrounded by real, well-finished objects stops being the exception on the wall and becomes simply part of how the room works.
Key Takeaway: Surround the bar with a shelf, hook, or small object in a matching finish so it reads as one considered piece of hardware among several, not the sole utilitarian object in the room.

Working through placement, structure, finish, format, sizing, angle, height, clearance, mounting, and load testing in that order is what separates a grab bar that looks bolted on from one that looks like it was part of the room’s design from the start. The mechanics matter as much as the style choices: a bar in the right finish still needs real blocking or a properly rated anchor behind it, the correct 33 to 36 inch (84 to 91 cm) height, and 1.5 inch (3.8 cm) of true clearance to actually do its job. None of that shows up in a photo, which is exactly why so many bars get chosen on finish alone and installed wrong. Start with the wall you actually need support on, work through blocking or anchoring before finish, and let the styling around it come last, once the hardware underneath is something you would actually trust your full weight to.
From the guides
You've saved it, wanted it. Here's the how: codes, measurements, order. Your choices make it yours.
The Japandi Honest PlaybookThe honest version of the style: what to keep, what to skip, and the order to do it in.See inside →The Room Refresh PlaybookA repeatable four-step method, room by room, in ten minutes, thirty minutes, or one weekend.See inside →Make Any Room Feel Cozy on PurposeWhy some rooms hold people and others empty out, and the moves that change it.See inside → Save


