 Georgia
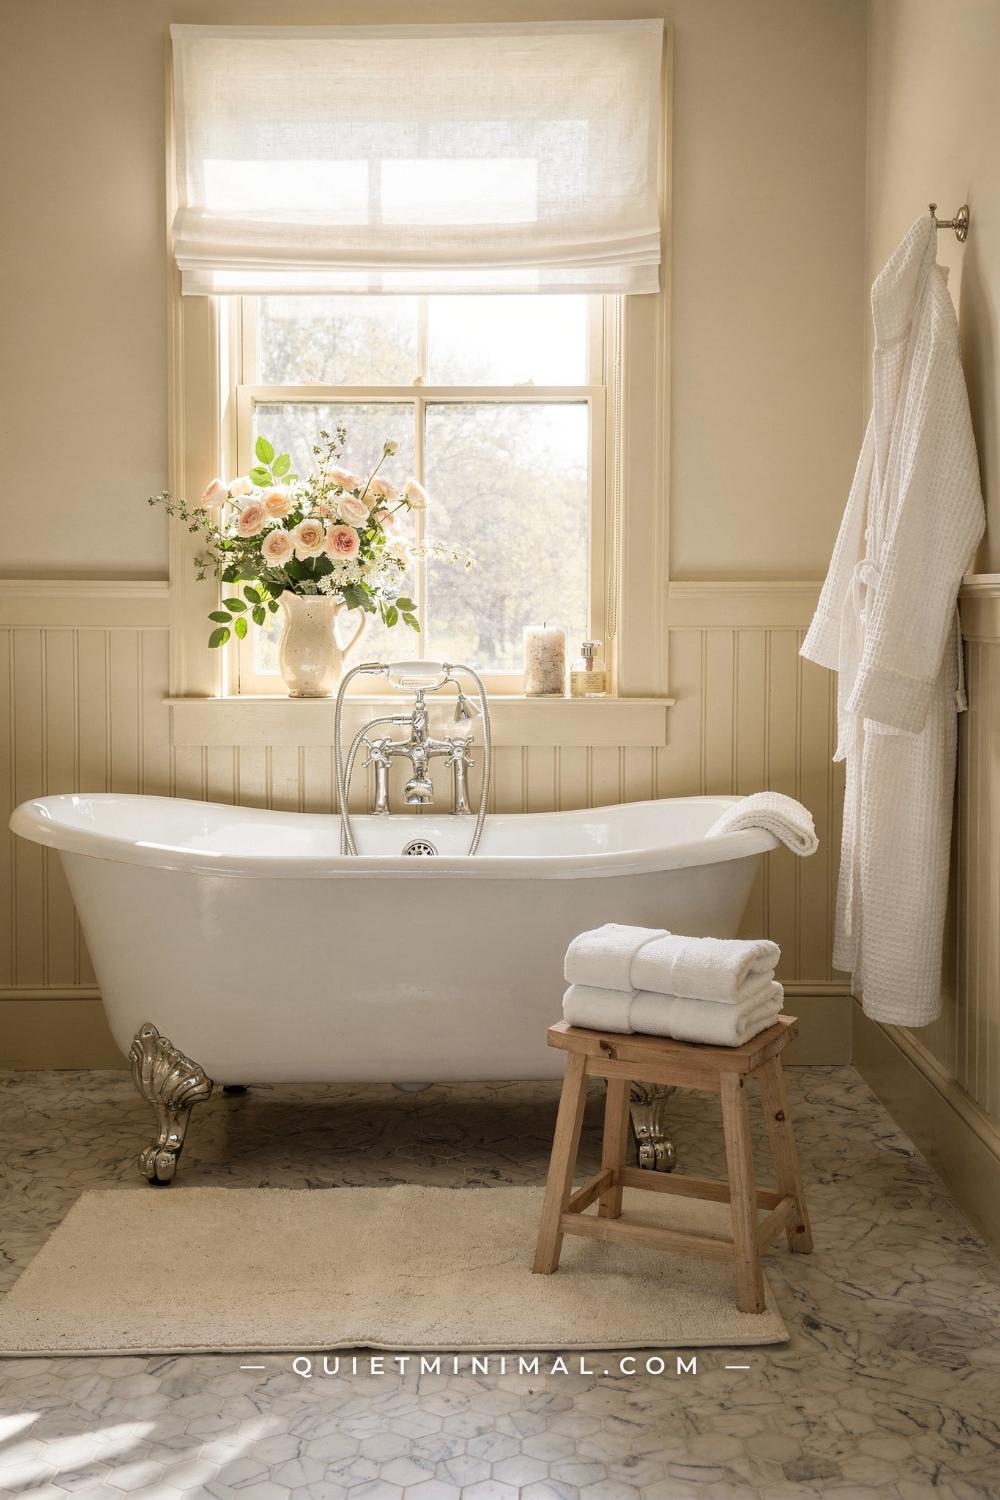
You know this bathroom even if you have never named it. Creamy white walls, a marble counter, a polished nickel faucet with cross handles, a little lamp glowing on the vanity, white towels stacked like they belong in a good hotel that also happens to be someone’s home. It is the bathroom from every Nancy Meyers film, and the reason a whole generation keeps searching for Nancy Meyers bathroom ideas is that the rooms feel both aspirational and completely livable at the same time.
Here is what most of those saved photos never tell you: the look is not a shopping list. It is a sequence. The lamp only works because the paint under it is warm. The towels only read as abundant because the counter around them is edited. Buy the accessories first and set them in a cool-white builder bathroom, and the whole thing falls flat within a week. This guide builds the room the way a set gets built, in order, layer by layer, with the measurements and the reasoning at every stage. Start at the top and do not skip ahead.
Learn the Formula Before You Change a Single Thing
 Save
The fastest way to waste money on this project is to start it without understanding what actually makes the look work. The Nancy Meyers bathroom rests on four layers, and every still you have ever saved contains all four. First, a warm white envelope: walls, ceiling, and trim in creamy whites with yellow or beige undertones, never the blue-leaning whites that builders default to. Second, traditional millwork: wainscoting, a paneled or furniture-style vanity, a framed mirror, real trim around the window. Third, one warm metal, usually polished nickel, repeated on every single thing that carries water or towels. Fourth, soft abundance: layered light from a lamp and sconces, thick white towels in generous stacks, fresh flowers, a real rug.
Notice what is not on that list. There is no single hero purchase. No tub, no chandelier, no marble slab single-handedly produces the effect. That matters because the standard failure mode is buying layer four first. A pleated-shade lamp and a marble tray dropped into a gray-white bathroom with an unframed mirror and chrome fixtures read as clutter, not charm, because the envelope behind them is still speaking a different language.
From the guides
You've saved it, wanted it. Here's the how: codes, measurements, order. Your choices make it yours.
 The Japandi Honest PlaybookThe honest version of the style: what to keep, what to skip, and the order to do it in.See inside →
 The Room Refresh PlaybookA repeatable four-step method, room by room, in ten minutes, thirty minutes, or one weekend.See inside →
 Make Any Room Feel Cozy on PurposeWhy some rooms hold people and others empty out, and the moves that change it.See inside →
The layers also have a fixed order, and it is the order of this article: paint, then millwork, then floor, then vanity and stone, then metal, then mirror and light, then textiles, then styling. Each layer physically sits on top of the one before it. Paint before paneling means repainting; flooring after the vanity means cutting tile around cabinet legs; styling before editing means restyling. Read the whole sequence once before you buy anything, then work it top to bottom.
You are done with this stage when you can look at any photo of the look and name which of the four layers is doing the work in it.
Key Takeaway: The look is four layers built in a fixed order, envelope, millwork, metal, and soft abundance, and no single purchase can substitute for the sequence.
Audit Your Bathroom and Set the Order of Work
 Save
Before the first sample pot, stand in your bathroom with a notepad and sort everything you can see into three columns: keeps, changes, and removals. Be honest and be specific. A white tub in decent shape is a keep even if it is a basic alcove model; the curtain stage will handle it. White or near-white wall tile is usually a keep. A cool gray floor tile is a judgment call: it can stay if the rest of the room warms up around it, though it will always pull slightly against the palette. Chrome fixtures, an unframed sheet-glass mirror, a boxy builder vanity with a flat door front, and any glossy plastic storage go in the changes column.
Now write your sequence. For a full pass, the order is: palette decision, paint, wainscoting, floor, vanity, counter and sink, faucet and fixtures, hardware, mirror, sconces, lamp and bulbs, tub and curtain, window, towels, rug, storage, seat, styling, flowers, art, final edit. For a rental or a light refresh, strike the floor, vanity, and plumbing lines and the sequence still holds; the paint, mirror, textiles, and styling layers carry a surprising share of the effect on their own.
Tape the list inside the vanity door and date each line as you finish it. That sounds fussy, and it is the thing that keeps this from becoming a two-year drift of unrelated purchases. Every item you are tempted to buy gets checked against the list: if its stage has not arrived, it waits. The set decorators who built these film bathrooms worked from exactly this kind of sequence, envelope first, props last, and the props are the reward for finishing the envelope.
You are done when every visible item in the room is assigned a column and your sequence is written down where you will see it.
Key Takeaway: Sort the room into keeps, changes, and removals, write the build order down, and let the list veto every out-of-sequence purchase.
Lock the Palette: One Warm White From Ceiling to Trim
 Save
The single decision that most determines whether your bathroom reads as Nancy Meyers or as builder-standard is the undertone of your white. The film rooms glow because their whites carry warmth, a drop of yellow, a drop of beige, and that warmth is what makes marble, nickel, and lamplight cohere. Cool whites with blue or gray undertones read clean but clinical, and no amount of styling on top of them fixes the chill.
Work from real, established colors. Benjamin Moore White Dove OC-17 is the safest single answer: a soft warm white that stays creamy without ever tipping yellow. Swiss Coffee OC-45, also Benjamin Moore, is one step creamier and suits rooms with strong cool daylight. Sherwin-Williams Alabaster SW 7008 sits in the same family, and Farrow and Ball Pointing No. 2003 is the choice if you want the most candlelit version of the look. Pick two of these, buy sample pots, and paint a 2 by 3 foot (61 by 91 cm) patch on two different walls, one that gets window light and one that does not. Look at them at 8 a.m., at noon, and at night under your actual bulbs. Warm whites shift more than any other color family, and the bathroom is the room where you will see them in every light of the day.
For sheen, run matte or eggshell on the walls, a moisture-rated formula, and satin on the trim, ceiling in flat ceiling white from the same warm family. Using one color for walls and trim in two sheens is the quiet trick of these rooms: it makes wainscoting and casing feel like architecture rather than decoration.
You are done when one wall color and one trim treatment are chosen and you have seen both survive morning and night light on your own walls.
Key Takeaway: Choose one warm white with a creamy undertone, test it in your own light at three times of day, and run it in two sheens rather than two colors.

Paint It in the Right Order: Ceiling, Walls, Then Trim
 Save
Painting a bathroom is a half-day of work and a full day of patience, and the order is not negotiable: ceiling first, walls second, trim last. The ceiling drips on everything below it, the walls overlap onto trim edges, and the trim coat is the crisp line that covers both sins. Reverse any part of that order and you repaint something.
Prep is most of the outcome. Wash the walls first with a mild degreasing cleaner, because bathroom walls carry an invisible film of soap and product residue that keeps paint from bonding; this is the step people skip and the reason bathroom paint jobs peel at year two. Fill old anchor holes, sand the patches, and caulk the gap where trim meets wall with paintable caulk in a thin bead smoothed with a wet finger. Tape the floor line and the fixed fixtures with a quality painter’s tape, and pull the tape while the final coat is still slightly soft so it releases a clean edge instead of tearing dried paint.
Use a moisture and mildew-resistant paint formula for every surface; standard wall paint in a bathroom is a false economy. Cut in the edges with a 2.5 inch (6 cm) angled brush, then roll the fields with a 3/8 inch (10 mm) nap roller, keeping a wet edge so lap marks do not flash in the low-angle window light that bathrooms get. Two coats on everything, with the full recoat time on the can honored between them, and run the exhaust fan while you work and for a day after.
The finished state is easy to check: stand in the doorway at night with only the overhead light on. The walls should read as one continuous soft field with no flashing, no roller lines, and a clean unbroken line where wall meets trim.
Key Takeaway: Wash before you paint, work ceiling to walls to trim in that order, and use a moisture-rated formula so the finish survives the room.
Install the Wainscoting That Carries the Whole Look
 Save
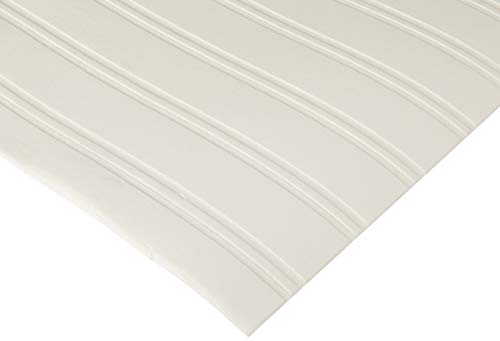
Millwork is the layer that separates this look from every other white bathroom, and wainscoting is where you get the most millwork per dollar of effort. Beadboard, the vertical-grooved paneling you see behind half the tubs in these films, is the classic choice, and it comes in primed 4 by 8 foot (122 by 244 cm) sheets or narrower plank kits that suit small rooms and tight cars.
Height decides everything. The traditional rule is one third of the wall: on a standard 8 foot (244 cm) ceiling that is 36 inches (91 cm), and anywhere from 36 to 42 inches (91 to 107 cm) reads correctly. Resist the modern impulse to run it to 54 inches (137 cm) or higher; the tall version reads farmhouse-modern, not Meyers. Cap it with a chair rail or, better, a small ledge rail about 1.5 inches (4 cm) deep, which gives you a continuous shelf line for a leaning frame or a sprig of greenery later.
Installation is a weekend job with a level, a saw, construction adhesive, and a brad nailer. Mark a level line around the room at your chosen height, because floors are never level and the paneling must be. Adhere and nail the sheets, cap with the rail, add a base shoe at the floor if your baseboard is slight, and caulk every seam and nail hole. Then paint it in your trim satin, the same warm white as the casing, so it reads as original architecture. In splash zones behind a toilet or beside a tub, run a bead of silicone-based caulk at the floor joint so cleaning water never wicks into the panel edge.
Done looks like this: a level, seamless band of paneling around the room that appears to have been there since the house was built.
Key Takeaway: Run beadboard to 36 to 42 inches (91 to 107 cm), cap it with a ledge rail, and paint it the trim white so it reads as architecture rather than an addition.
Get the Floor Right: Marble Hex, Real or Faithful
 Save
The floor in these bathrooms is almost always one of three classics: small marble hexagon, marble basketweave with a gray dot, or plain white penny tile. All three do the same job, a fine-grained, slightly imperfect texture underfoot that reads as prewar even in a 2005 house. If you are choosing one, the 2 inch (5 cm) honed marble hexagon is the signature, and honed matters: a polished floor is slick when wet and shines in a way the look never does.
Real marble mosaic is a realistic weekend-plus project over a sound subfloor: it comes on 12 inch (30 cm) mesh sheets, sets in thinset, and takes a warm gray grout, never bright white, which shows every footprint, and never dark charcoal, which turns the floor into a grid. Seal it after grouting and once a year after; marble is soft and etches under acidic cleaners, so it earns a pH-neutral cleaner and nothing else for life.
If tearing out tile is off the table, or you rent, the faithful fake has gotten genuinely good. Marble-look porcelain hexagon gives you the pattern with none of the maintenance, and peel-and-stick vinyl in a marble hex print can go directly over clean existing tile, cuts with a utility knife, and lifts out at move-out. The tell of a bad fake is repetition, the same veining tile after tile, so buy from a line with multiple print variants and shuffle sheets as you lay them.
The stage is complete when the floor reads as a quiet, even, matte field that hands the eye upward to the room instead of demanding attention itself.
Key Takeaway: A honed 2 inch (5 cm) marble hexagon with warm gray grout is the signature floor, and a good porcelain or peel-and-stick version of the same pattern is a legitimate stand-in.

Rework the Vanity Into a Furniture Piece
 Save
The vanity in a Nancy Meyers bathroom never looks like a cabinet from a warehouse aisle. It looks like a piece of furniture that was drafted into sink duty: a paneled front, a real toe detail or visible legs, and paint with some depth to it. If your current vanity is a flat-front builder box, you have two honest paths, and both work.
Path one is replacement with a furniture-style vanity: shaker or recessed-panel doors, a standard height of 34 to 36 inches (86 to 91 cm), in warm white or cream. If your room can take a little color, the film rooms occasionally run the vanity in a soft gray-green or muted blue-gray against the white envelope, and that single piece of color is safe because everything around it stays warm white. Measure twice: keep at least 21 inches (53 cm) of clear floor in front of the vanity, and 30 inches (76 cm) feels generous.
Path two is upgrading what you own, and it goes further than people expect. Empty the cabinet, degrease it, sand it to dull the factory finish, and paint it with a cabinet enamel, which levels out brush strokes and cures hard, in your trim white or that gray-green. Add applied molding to flat doors to fake a shaker profile, a strip of decorative wood trim mitered into a rectangle 2.5 inches (6 cm) in from each door edge, glued and pinned before painting. Swap the factory plastic feet reveal or flat kick for a small piece of scribed trim. A weekend of this reads eighty percent as good as a new piece.
Done means a vanity with a paneled face, a hard cured finish, and no visible factory plastic anywhere, ready to receive stone.
Key Takeaway: A paneled, furniture-style vanity at 34 to 36 inches (86 to 91 cm), bought or built up from your builder box with molding and cabinet enamel, is the anchor of the room.
Top It With Marble and an Undermount Sink
 Save
Stone is where the room starts to feel expensive, and the good news is that a bathroom vanity top is one of the cheapest places to buy real marble, because the slab is small. White carrara, the gray-veined workhorse, is the film standard; it costs less than most quartz at vanity scale and ages into the soft, lightly marked surface these rooms are built on. Order it honed rather than polished for the same reason as the floor, and ask for an eased or small ogee edge; a chunky waterfall or heavy bullnose belongs to other looks.
Pair the stone with a white porcelain undermount sink, not a vessel bowl and not a drop-in with a visible rim. The undermount’s clean stone-to-basin line is a quiet signature of the style, and it makes the counter wipe down in one pass. A standard oval or rectangular undermount around 17 to 20 inches (43 to 51 cm) wide suits nearly every vanity; confirm your cabinet’s interior clears the basin depth plus the drain assembly.
Have the fabricator drill for a widespread faucet, three holes on 8 inch (20 cm) centers, before installation; this decision locks in the next stage, so make it now. If real marble is out of reach, a carrara-look quartz gets you ninety percent of the appearance with zero sealing, and at thumbnail distance nobody can tell. What betrays the look is not quartz, it is beveled laminate and rimmed sinks.
Live with marble honestly: seal it on install and yearly, wipe up anything acidic promptly, and accept that faint etches and marks are the patina the style is actually about. This stage is done when the stone is set, the sink line is clean, and three faucet holes are waiting.
Key Takeaway: A honed carrara top with an eased edge and a white undermount sink, drilled for an 8 inch (20 cm) widespread faucet, is the surface the whole room reflects.

Commit to One Metal Everywhere Water Runs
 Save
Metal is the stage where discipline pays more than money. The film bathrooms run one warm metal on essentially everything: faucet, shower trim, towel bars, hooks, mirror clips, even the tissue holder. That repetition is invisible when it is right and glaring when it is mixed, and the metal of record is polished nickel.
Polished nickel looks like chrome’s warmer sibling: same shine, but with a faint golden cast that picks up lamplight and flatters warm whites. Chrome against a cream wall goes cold and slightly blue; nickel glows. The second acceptable answer is unlacquered brass, which starts bright gold and dulls into a soft, spotty patina over the years, more English country than classic Meyers, but within the family. Pick one. If you must run two, keep the second metal away from water: brass on a mirror frame and cabinet knobs over an all-nickel plumbing set can work, but nickel faucet plus brass shower trim reads as an accident.
For the faucet itself, choose a widespread with cross handles or classic levers and a traditional curved spout, mounted on those 8 inch (20 cm) centers you drilled. Cross handles are the detail people remember from the films without knowing they remember it. Match the shower with a cross-handle trim kit on the existing valve where possible, a trim swap is a far smaller job than a valve replacement, and carry the finish to the tub filler if you have a freestanding tub.
Before buying anything, list every metal object in the room, there will be more than you think, and price the full matched set at once. This stage is done when a slow look around the room finds one finish, repeated, everywhere.
Key Takeaway: Pick polished nickel, put it on every water-adjacent piece in the room, and let cross handles on the faucet carry the period detail.

Swap Every Knob, Pull, and Bar to Match
 Save
Hardware is the ten-dollar-parts stage that quietly finishes the metal story, and it is almost entirely a screwdriver job. Start at the vanity: the builder bar pulls or plastic knobs come off, and in their place go round knobs about 1.25 inches (3 cm) across on doors and either matching knobs or classic cup pulls on drawers, all in your chosen nickel. Cup pulls, the half-moon shells you grab from underneath, are the traditional drawer answer and they read instantly as furniture rather than cabinetry. Measure the existing drawer holes first: most bar pulls sit on 3 or 3.75 inch (76 or 96 mm) centers, and buying cup pulls with the same centers means no filling and redrilling.
Then walk the walls. A towel bar of 24 inches (61 cm) goes on the wall nearest the sink at about 48 inches (122 cm) off the floor, where a hand towel can hang folded in thirds. Robe hooks mount at 65 to 70 inches (165 to 178 cm), one per person who uses the room plus one for a guest, and hooks beat a second bar in every real household because things actually get hung on them. The tissue holder sits about 26 inches (66 cm) off the floor and 8 to 10 inches (20 to 25 cm) forward of the toilet bowl. If the ring is your preference at the sink, hang it so the towel’s bottom edge clears the counter.
Use wall anchors rated for the load on every piece that does not hit a stud; a towel bar that gets pulled daily will work a bare drywall screw loose in a season. The finished state is simple to verify: open every drawer, hang every towel, and see one metal, one style, at every touch point in the room.
Key Takeaway: Matched nickel knobs, cup pulls, a 24 inch (61 cm) bar, and hooks at 65 to 70 inches (165 to 178 cm) finish the metal layer for the price of a nice dinner.
Hang a Mirror With a Real Frame
 Save
Nothing marks a bathroom as builder-standard faster than a frameless sheet of mirror clipped to the wall, and nothing moves it toward this look faster than replacing that sheet with a framed mirror that could hang in a hallway. The film rooms treat the mirror as furniture: a painted or natural wood frame, sometimes gently beveled glass, hung like a picture with wall visible on all four sides.
Size it to the vanity, not the wall. The mirror should be 2 to 4 inches (5 to 10 cm) narrower than the vanity on each side, so a 36 inch (91 cm) vanity takes a mirror roughly 28 to 32 inches (71 to 81 cm) wide. Height-wise, set the bottom edge 6 to 10 inches (15 to 25 cm) above the counter, above the faucet’s splash line, and let the top land around 72 inches (183 cm) so the tallest regular user has headroom in the reflection. A rectangle is the classic; an arch reads more current and still works; anything frameless, pivoting, or LED-ringed belongs to a different article.
Frame material follows the room. A white or cream painted wood frame disappears into the envelope and lets the stone and metal speak; a warm natural wood adds a note the all-white room can use; a thin nickel frame doubles down on the metal story. What you are avoiding is heavy ornate gilt, which tips the room toward glam.
Hang it on two anchors, not one, so it never drifts off level, and check it with a level before you step back. If you have a double vanity, hang two matching mirrors, one over each sink, rather than one wide sheet; the rhythm of two frames is very much part of the look. Done is a framed mirror, level, breathing wall on every side.
Key Takeaway: Replace the clipped builder sheet with a framed mirror 2 to 4 inches (5 to 10 cm) narrower than the vanity per side, hung with air around all four edges.

Flank the Mirror With Sconces at Eye Level
 Save
The bathrooms in these films never light a face from the ceiling alone, and neither should yours. Overhead light lands from above, shadows the eyes, and makes every morning face look tired; light that arrives from beside the mirror, at face height, is what makes these rooms so flattering that audiences noticed. The fix is a pair of sconces flanking the mirror.
The numbers: center each sconce 60 to 66 inches (152 to 168 cm) off the floor, which puts the light source at eye level for most adults, and space the pair 36 to 40 inches (91 to 102 cm) apart, or as close to that as your mirror width allows with a few inches of clearance to the frame. Two sources crossing at the face erase the shadows a single source throws. If wiring two new boxes is not in the cards, a single sconce or small two-arm fixture mounted above the mirror at about 75 to 80 inches (191 to 203 cm) is the honorable fallback, softer than a downlight though not as good as a flanking pair.
Style-wise, look for simple traditional forms in your nickel: a curved arm with a frosted glass shade, a small cylinder of ribbed glass, or a classic single-arm with a white fabric shade if the fixture sits well clear of splash zones. Frosted or fabric diffusion matters more than the silhouette, because a bare visible bulb at eye level is glare, not glow.
Bulbs finish the job: 2700K warm white, around 450 to 800 lumens each, and dimmable, because these sconces will end up being the room’s evening setting. For anyone renting or avoiding an electrician entirely, battery-powered sconces with remote dimmers have become a real option and mount with adhesive strips or two screws.
Key Takeaway: A pair of shaded nickel sconces centered at 60 to 66 inches (152 to 168 cm) and flanking the mirror is the single biggest lighting upgrade this room can get.
Add the Table Lamp: The Move That Sells the Room
 Save
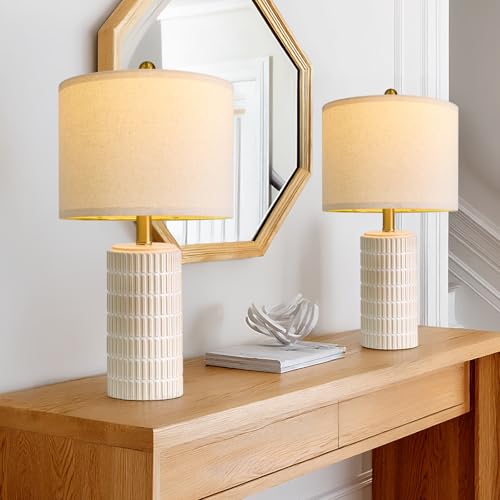
If one styling move defines the Nancy Meyers bathroom, it is this: a small table lamp, glowing on the vanity counter, in a room where nobody expects furniture lighting. It is the detail viewers rewind for, and it works because it reclassifies the bathroom from utility space to room. Lamps live in rooms people linger in; putting one beside the sink tells the brain this is that kind of room.
Choose small and soft. A lamp 12 to 18 inches (30 to 46 cm) tall, with a ceramic, glass, or gilded-wood base and a fabric shade, pleated linen or plain cotton, is the register. Place it on the counter’s far corner, the one farthest from the sink basin and the tub, so daily splash never reaches it, and route the cord cleanly to the nearest outlet. In any bathroom the outlet should be GFCI protected, the kind with the test and reset buttons, which is standard in bathrooms built or updated in recent decades; if yours is an older ungrounded two-prong, have that corrected before plugging anything in permanently. If the counter is genuinely too small, the wainscoting ledge, a shelf, or the top of a small cabinet does the same job.
Bulb choice is the whole point of the exercise: 2700K, low output, 250 to 450 lumens, the equivalent of an old 25 to 40 watt bulb. This lamp is not task lighting. It is the light you switch on instead of the overhead for an evening bath, the one that stays on while guests are over, the glow that makes the marble and nickel do their best work. A smart plug that brings it on automatically at sunset costs little and means the room simply always looks this way after dark.
From the guides
You've saved it, wanted it. Here's the how: codes, measurements, order. Your choices make it yours.
The Japandi Honest PlaybookThe honest version of the style: what to keep, what to skip, and the order to do it in.See inside →The Room Refresh PlaybookA repeatable four-step method, room by room, in ten minutes, thirty minutes, or one weekend.See inside →Make Any Room Feel Cozy on PurposeWhy some rooms hold people and others empty out, and the moves that change it.See inside →Key Takeaway: A small fabric-shaded lamp on the driest corner of the counter, running a warm 2700K bulb at low output, is the signature move of the entire look.
Put the Overhead Light on a Dimmer and Warm the Bulbs
 Save
With sconces flanking the mirror and a lamp on the counter, the ceiling fixture gets demoted from only light to background light, and two cheap changes make it behave. First, the dimmer. Swapping a toggle switch for a dimmer is a fifteen-minute job with the breaker off, or an electrician’s minimum call if you would rather not, and it changes how the room gets used more than any fixture purchase. Full brightness becomes the cleaning setting; sixty percent becomes the morning setting; the overhead simply stays off at night because the lamp and sconces are better. Buy a dimmer rated for LED loads and bulbs marked dimmable, or you will get flicker at the low end.
Second, unify the color temperature. Every bulb in the room, ceiling, sconces, lamp, runs 2700K, the warm end of white. This is the cheapest rule in this entire build and the most commonly broken one: a single 4000K or daylight 5000K bulb anywhere in the room drags the walls gray and makes your warm white paint look like a mistake you paid to test. Check the printed temperature on every bulb you own; mixed batches accumulate in every household. While you are choosing, look for a color rendering index of 90 or above, listed as CRI on the packaging, so skin, marble veining, and the cream in your paint read true instead of flat.
If the ceiling fixture itself is a bare builder dome, replace it with a small flush mount in your nickel with a frosted or white glass shade; it is a like-for-like swap on the existing box. The test for this stage runs at night: overhead off, lamp and sconces on, and the room should hold a warm, even, shadow-soft glow with nothing glaring.
Key Takeaway: One dimmer, one flush mount worth looking at, and 2700K high-CRI bulbs in every socket make the light in the room agree with the paint.
Build the Bathing Moment: Tub First, Curtain High
 Save
Every version of this bathroom has a bathing moment, a corner of the room that looks like someone actually draws a bath on a Tuesday, and you can build it with whichever tub you already have. If you are renovating deeply and have the space, the film answer is a white freestanding roll-top or slipper tub, which needs a footprint of roughly 60 by 30 inches (152 by 76 cm) plus at least 4 inches (10 cm) of clear air on all sides to read as freestanding rather than wedged. That clearance line is the honest test; a freestanding tub jammed against two walls loses the entire point.
Most bathrooms have an alcove tub, and the good news is that the look was practically invented to flatter one. The move is the curtain, hung high and generous. Mount the rod 78 to 84 inches (198 to 213 cm) off the floor, just below the ceiling line, not at the standard 65-inch builder height, and hang an extra-long fabric curtain, 72 by 84 inches (183 by 213 cm) or 72 by 96 inches (183 by 244 cm), so the fabric falls in long unbroken folds to just above the floor. White cotton waffle weave is the canonical fabric: it hangs with weight, washes like a towel, and looks like hotel linen rather than a plastic sheet. Behind it goes a plain white fabric-backed liner on its own hooks, replaced or washed seasonally.
Finish the moment with landing surfaces: a small wood stool or teak bench beside the tub holding a folded towel and a soap dish, and a low tray only if you actually bathe. The stage is done when the tub corner would photograph well on an ordinary weekday without staging.
Key Takeaway: Hang the rod at 78 to 84 inches (198 to 213 cm) with an extra-long white waffle weave curtain, and any ordinary alcove tub becomes the room’s bathing moment.

Dress the Window With a Cafe Curtain
 Save
A bare bathroom window, or worse, a vinyl mini blind, undoes an astonishing amount of the work above it. The film rooms nearly always solve the window the same way: a cafe curtain, a short panel covering only the lower half of the glass, hung from a slim rod mounted across the window’s midpoint. It gives complete privacy where a neighbor’s sightline actually falls while leaving the top half of the window pouring daylight onto your warm white walls, which is the exact combination a bathroom needs.
The build is simple. Mount a slim 0.5 inch (13 mm) nickel or white rod inside or just across the frame at the window’s vertical midpoint, and hang a white or cream panel in linen, cotton, or a linen blend, gathered to about one and a half to two times the window’s width so it ripples rather than stretches flat. Clip rings make any flat panel a cafe curtain and let it slide with one finger; a rod-pocket panel works too and looks a touch more cottage. Hem height matters: the panel should kiss the sill or stop just above it, never float halfway.
If the window sits inside the shower zone, fabric is the wrong material; use a white waterproof roller shade or apply frosted privacy film to the lower sash, and save the fabric for the rest of the room. If you want the fuller treatment, a relaxed white linen roman shade mounted at the top of the frame is the other approved answer, drawn to half-mast most of the time, and it suits windows too tall or too formal for the cafe solution.
Skip heavy drapery, valances, and anything patterned or dark. The window’s job in this room is to be a soft white light source with a modest half-slip of privacy. Done is privacy at eye level, daylight above, and fabric that moves.
Key Takeaway: A white linen cafe curtain on a slim rod at the window’s midpoint delivers privacy below, daylight above, and the softness the room’s light depends on.
Restock the Towels: White, Ribbed, and Abundant
 Save
Towels are where this look gets democratic: the exact register of the film bathrooms is achievable by anyone willing to commit to white and buy in sets. The commitment is the whole trick. Mixed colors, novelty stripes, and the faded burgundy set from two apartments ago all leave; what replaces them is one uniform fleet of white cotton, and suddenly every stack in the room looks intentional.
Buy structure, not just softness. Ribbed or textured white towels hold their shape when folded and read as tailored on a shelf, while plain hotel-style terry works if the weight is there; look for 100 percent cotton at roughly 550 to 700 GSM, the grams-per-square-meter weight printed on most listings, which is the range where a towel drapes heavily instead of flapping. A working fleet for a shared bathroom is about four bath towels, four hand towels, and six washcloths per two people, enough that the display never gets raided to nothing on laundry day.
Then display like the set decorator: bath towels folded in thirds lengthwise, then in half, stacked three high on a shelf, ladder, or bench with folded edges facing out. Hand towels fold in thirds over the bar. Extra hand towels roll into a basket beside the sink or toilet. Abundance is the point; a single towel on a bar reads as scarcity, three stacked read as hospitality.
Keep the fleet white in practice, not just at purchase: wash in warm water, skip fabric softener, which coats the loops and kills absorbency, and run an occasional oxygen-bleach load to hold the brightness. Replace the fleet as a fleet every few years rather than one straggler at a time.
Key Takeaway: One all-white fleet of heavy ribbed cotton, folded in thirds and stacked in threes, produces the hotel-at-home abundance the look runs on.

Trade the Bath Mat for a Vintage-Style Runner
 Save
Here is the floor-level detail that separates people who saved the photos from people who studied them: the rug in these bathrooms is almost never a bath mat. It is a small vintage-style rug, a faded Persian or Turkish pattern in soft rust, rose, and blue tones, lying on the marble like it wandered in from the hallway. Against an all-white envelope, that single note of worn color and pattern is what keeps the room from tipping into showroom sterility, and it is doing more work than almost any other object in the frame.
Size and placement first. In front of a single vanity, a rug around 2 by 3 feet (61 by 91 cm) fits; along a double vanity or across the room’s main run, a runner around 2 by 6 feet (61 by 183 cm) or 2.5 by 7 feet (76 by 213 cm) is the move. Leave 4 to 6 inches (10 to 15 cm) of visible tile between rug edge and vanity toe-kick so the rug reads placed rather than fitted.
Material decides survival. A bathroom rug wants low pile or flat weave, wool or a washable synthetic; true machine-washable vintage-print rugs have become excellent and shrug off the splash-and-stomp life. Under it goes a thin nonslip rug pad cut 1 inch (2.5 cm) smaller than the rug on each side, which is not optional on stone or tile.
Keep a plain white cotton bath mat for its actual job, catching drips at the tub or shower exit, but treat it as equipment: hang it over the tub edge to dry after use and store it out of sight otherwise. The pretty rug lies where feet pause; the working mat appears when the water runs. That division is exactly how the film rooms are dressed.
Key Takeaway: A faded low-pile vintage-style runner with a nonslip pad replaces the bath mat as the room’s visible rug, and the white mat becomes backstage equipment.
Move Storage Into Baskets and Glass
 Save
Every bathroom holds the same unlovely inventory, backup shampoo, a hair dryer, cleaning spray, a value pack of tissue, and the difference between this look and real life is not owning less of it. It is containing all of it in exactly two materials: woven fiber and glass. Once every loose object lives inside seagrass or behind glass, the room reads curated no matter what is actually stored.
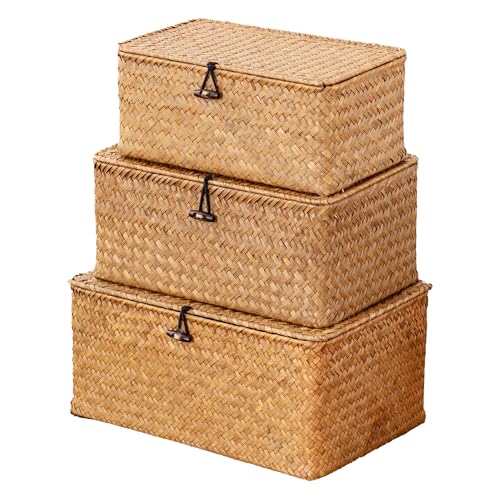
Start with the baskets. Seagrass, water hyacinth, or rattan baskets with handles do the heavy lifting: one on the floor beside the tub or toilet for rolled towels, one or two inside the vanity cabinet sorting hair tools and backstock, a lidded one for anything you want fully hidden. A basket around 12 by 12 inches (30 by 30 cm) fits most vanity interiors; measure your cabinet’s interior height under the sink trap before buying, because the trap steals more room than people remember.
Then the glass. Clear apothecary jars with lids, three in a row, holding cotton rounds, cotton swabs, and bath salts, turn daily consumables into the counter’s quietest decoration. The same principle covers soap: a refillable glass or ceramic pump dispenser replaces the printed plastic bottle at the sink, and in the shower, backstock bottles live in a basket or a corner caddy in your nickel rather than lined up on the tub edge.
The rule that makes it stick is one-touch retrieval: anything used daily gets a home you can reach without moving something else. Storage systems fail when they require rearranging, and a failed system dumps its contents back onto the counter within a month. Done is a room where opening any cabinet looks nearly as calm as the counter above it.
Key Takeaway: Contain everything in two materials, woven baskets for bulk and lidded glass for consumables, and the room stays curated at real-life inventory levels.
Bring In a Seat, Even a Small One
 Save
Walk through the film bathrooms in your head and notice that nearly every one contains somewhere to sit that is not the toilet lid: a small upholstered chair in the corner, a bench at the foot of the tub, a stool tucked beside the vanity. A seat does two jobs at once. Practically, it is where a robe lands, where you sit to do skincare or dry your hair, where the towel waits during a bath. Psychologically, it completes the reclassification the lamp started: rooms with seating are rooms for staying, and a bathroom with a chair reads as a private retreat rather than a service space.
Scale it to the floor you actually have. In most bathrooms the answer is a stool or small bench, 12 to 16 inches (30 to 41 cm) wide and 17 to 19 inches (43 to 48 cm) tall, in pale wood, teak, cane, or with a small linen-upholstered top. It should tuck beside the tub or under a counter overhang and pull out in one motion. If you have a genuinely large bathroom, the fuller move is a small skirted or slipcovered chair in white or natural linen set in a corner with a tiny side table; that pairing is practically a signature shot of the style. Keep at least 21 inches (53 cm) of clear walkway around fixtures after the seat is placed, the same clearance rule the vanity followed.
Materials need to survive humidity: solid wood, teak especially, cane, rattan, and washable slipcovers all do; particleboard and delicate silks do not. Style the seat lightly, a folded towel, a robe over the back, at most a book, because a seat buried under permanent staging stops being a seat. Done is a place to sit that you actually use by the end of the first week.
Key Takeaway: A small teak or cane seat, 17 to 19 inches (43 to 48 cm) tall and placed with clear walkway around it, finishes the room’s shift from utility space to retreat.
Style the Counter With a Tray and the Rule of Three
 Save
Everything before this stage was construction; this is the stage the camera would shoot. Counter styling in the Meyers register follows one device and one rule. The device is the tray: a small marble, ceramic, or nickel tray, roughly 6 by 10 inches (15 by 25 cm), set beside the faucet or in the counter’s least-splashed zone. A tray turns whatever stands on it into a composition; the identical objects loose on the stone read as things someone forgot to put away.
The rule is three. On the tray live exactly three things: the soap dispenser, one small vessel of flowers or greenery, and one more object, a soap dish, a tiny lidded jar, a glass of cotton rounds if it did not go to the shelf. Off the tray, the counter carries the lamp on its far corner, possibly the folded hand towel, and stone. That is the entire show. Every additional object costs more calm than it adds interest, and the counter is where the whole room’s restraint is won or lost, because it is the surface daily life recolonizes first.
Heights make the trio work: one tall element, the dispenser or stems, one medium, one low, so the group reads as a small landscape instead of a lineup. Keep the palette inside the room’s own, white, cream, glass, stone, one green or floral note, and let texture carry the variety: ribbed ceramic, honed stone, clear glass.
The daily protocol that preserves it takes ten seconds: everything used in the morning goes back in a drawer or basket, and the tray trio is all that remains. Done is a counter you would not rearrange before taking a photo.
Key Takeaway: One small tray holding exactly three objects, plus the lamp on the far corner, is the complete formula for a counter that stays composed.

Add the Flowers That Made the Look Famous
 Save
If the lamp is the signature move, flowers are the signature ingredient, and one bloom above all: the white hydrangea. Those full, rounded heads in a simple vase appear so consistently across the films that they function as a credit line, and they translate to real life for the cost of a grocery-store bunch. Two or three stems in a clear glass vase or a white ceramic pitcher, cut short so the heads sit just above the rim, is the entire arrangement; hydrangeas are self-composing, which is exactly why set decorators love them.
Make them last the week: recut the stems at a sharp angle under running water, strip every leaf that would sit below the waterline, and change the water every two days. Hydrangeas drink through their heads as well as their stems, so a wilting bunch often revives after a full dunk of the blooms in cool water for an hour, a trick worth knowing before you throw one out. Expect five to seven good days per bunch in a cool bathroom, which is conveniently one of the better rooms in the house for cut flowers.
Rotate with the seasons and the budget: white tulips in spring, garden roses when you find them, a few stems of eucalyptus alone in winter, which also releases scent in shower steam if you hang a small bundle from the shower head with twine. When fresh is not realistic every week, one good faux is legitimate: a single high-quality real-touch hydrangea or a faux eucalyptus stem passes at bathroom viewing distances, and the honest rule is one faux arrangement maximum, dusted monthly, because a shelf of dusty silk flowers is the opposite of this look.
Place the vase where the styling stage left room for it: on the tray, the wainscoting ledge, the windowsill, or the tub stool on bath nights.
Key Takeaway: Two or three white hydrangea stems cut short in a clear vase, refreshed weekly or replaced by one excellent faux, supply the living note the whole room is arranged around.
Hang Art Like It Is a Real Room
 Save
Art is the layer that makes a bathroom feel like part of a home instead of an amenity, and it is the layer people skip out of an outdated fear that bathrooms ruin artwork. The truth is more manageable: a ventilated bathroom with a working exhaust fan is safe for framed prints behind glass; what you keep out of the room is anything irreplaceable, unglazed, or hung inside the splash-and-steam zone directly beside the shower.
Subject and frame carry the register. Framed botanical prints, soft landscapes, gentle figurative sketches, and old garden or seaside prints are the family; slim frames in warm wood, painted white, or thin aged gold keep them quiet. A pair of matching botanicals hung side by side is the most reliable single move in the style, and it suits the wall above the toilet, the wall above a bench, or the run above the wainscoting ledge. Black-and-white photography and hard-edged abstracts read as a different, cooler article.
The numbers: hang single pieces so their center sits about 57 inches (145 cm) off the floor, the gallery standard, and drop that a few inches in a room where people mostly sit or soak. Over wainscoting, leave 6 to 10 inches (15 to 25 cm) between the ledge and the frame’s bottom edge. Pairs hang 2 to 3 inches (5 to 8 cm) apart so they read as one composition. Use two hooks or anchors per frame to keep pieces level in a room where doors swing and fans hum, and choose wood or metal frames over raw paper edges, with the print fully behind glass or acrylic.
One or two well-placed pieces are the target; a bathroom gallery wall tips into clutter fast. Done is a wall that would make sense in the hallway outside.
Key Takeaway: One or two glazed botanical or landscape prints in slim warm frames, centered at about 57 inches (145 cm) and clear of the shower zone, finish the walls like a real room.

Do the Final Edit and Keep It That Way
 Save
The last stage of the build is subtraction, and it is the one that decides whether the room holds. Stand in the doorway, the same view a camera would take, and remove everything that has not earned its place: the printed plastic bottle that crept back to the tub edge, the third tube on the counter, the novelty cup, the tangle of cords by the outlet. The film bathrooms feel abundant, but their abundance is entirely made of the approved materials, cotton, stone, glass, wood, ceramic, greenery, and the discipline is that nothing outside those materials is visible at rest. Loud packaging is the single most common thing standing between a nearly finished room and the finished one.
Then do the sweep that photos never show: the toilet brush and plunger move into a closed ceramic or matched canister set in a corner or the cabinet; the scale slides under the vanity or leaves the room; the laundry gets a lidded basket in the approved weave; the last robe goes on its hook, and one white waffle robe on a nickel hook is styling as much as storage.
Finally, install the habit that keeps a built room built: a weekly ten-minute reset. Towels refolded in thirds and restacked, tray trio reassembled, counter cleared to lamp and tray, flowers refreshed or retired, one basket emptied of whatever drifted in. Ten minutes, once a week, is genuinely all the maintenance the look requires once the envelope exists, because every object now has one home and one material story to return to.
Done, this time, means done: the room in the doorway matches the room you saved fifty photos of, except this one has your toothbrush in it.
Key Takeaway: Subtract every visible thing outside the room’s material family, hide the utility items in matched containers, and hold the result with a ten-minute weekly reset.

The whole build comes down to a sequence you can now see at a glance: a warm white envelope, real millwork, one repeated metal, and then the soft layers, lamp light, white cotton, worn pattern, and flowers, arranged with restraint on top. Every measurement in this guide exists so that each layer sits correctly on the one before it, which is the actual difference between a room that reads like the films and a pile of pretty purchases that never quite gels. Start where the sequence starts: buy two sample pots of warm white this weekend, paint your test patches, and watch them through a full day of light. The lamp, the hydrangeas, and the stacked towels will still be there when the envelope is ready for them, and they will finally have a room that deserves them.
From the guides
You've saved it, wanted it. Here's the how: codes, measurements, order. Your choices make it yours.
The Japandi Honest PlaybookThe honest version of the style: what to keep, what to skip, and the order to do it in.See inside →The Room Refresh PlaybookA repeatable four-step method, room by room, in ten minutes, thirty minutes, or one weekend.See inside →Make Any Room Feel Cozy on PurposeWhy some rooms hold people and others empty out, and the moves that change it.See inside → Save


