Georgia
You want the courtyard, not the strand: an amber ceiling over a stone floor, warm bulbs on black cord between whitewashed walls, an olive tree in a terracotta urn catching the glow. Outdoor patio string light ideas are easy to save and easy to get wrong at the hardware stage, where a Mediterranean evening turns into a drooping line of bulbs and a hook pulled out of a gutter. The ideas further down this page settle the bulb, the drape, the cord and the dimmer. This block settles the plan: a pattern for the footprint, a sag and post height for each span, a bulb count, a safe run length, the anchor order, the guide-wire assembly, and the lanterns and path lights that carry the glow into full dark. Measure first. Everything else follows from three numbers.
Measure the Courtyard Before You Buy a Single Strand
 Save
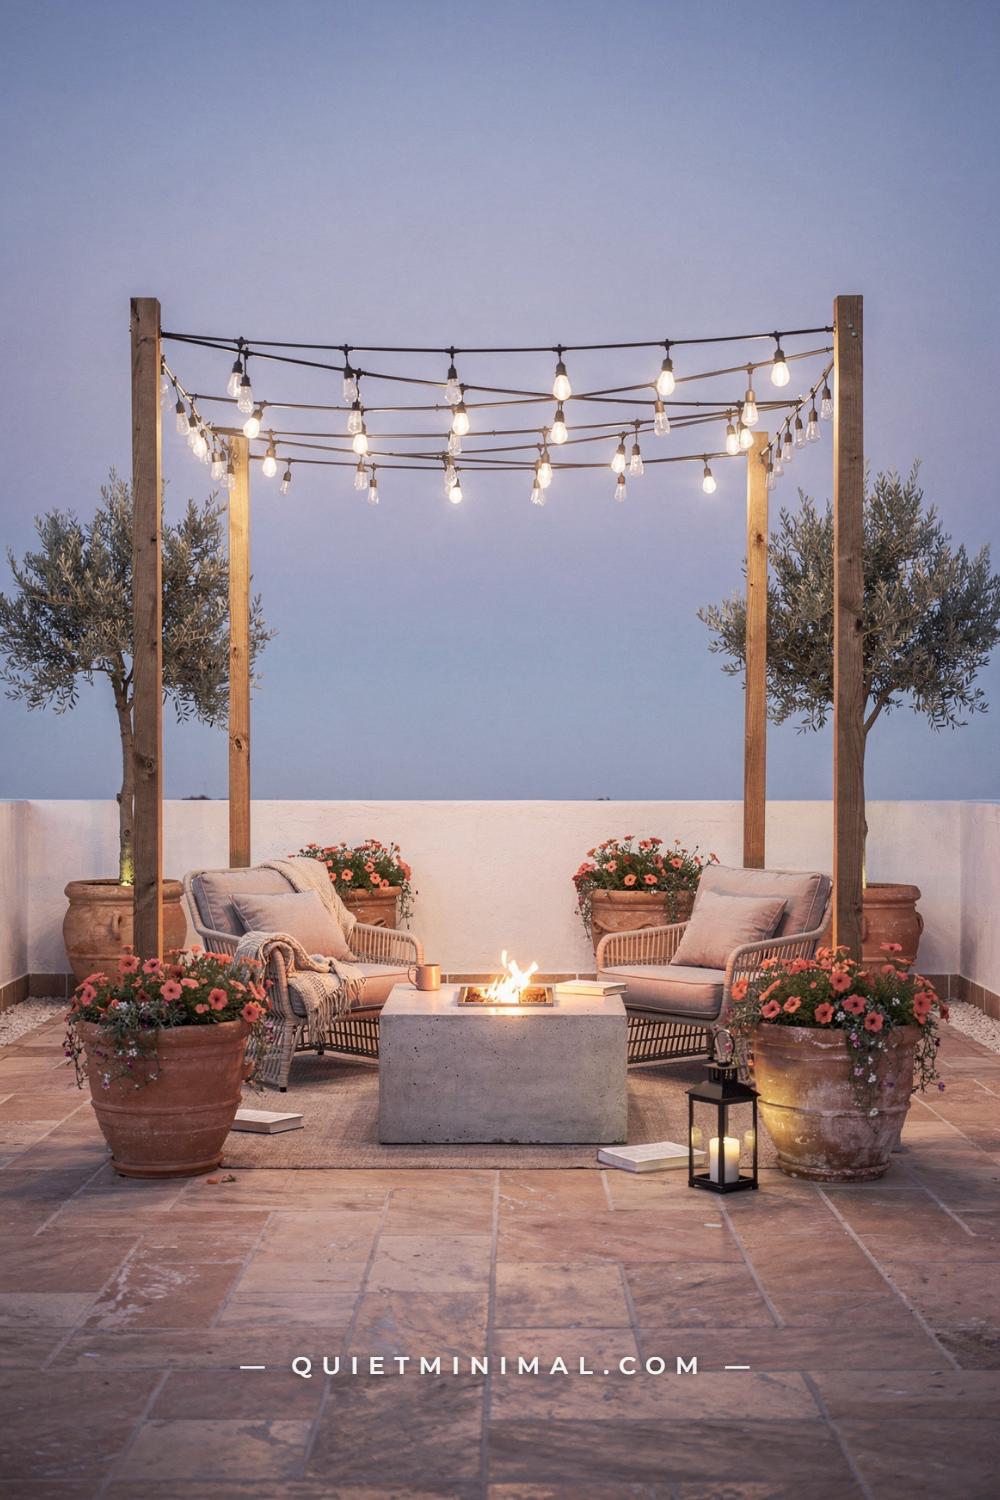
Three numbers decide every choice that follows: the long side, the short side and the height of each anchor point. A rooftop terrace with four wood posts standing 9 ft (274 cm) tall in a square is the clearest case: the square tells you the pattern, and the 9 ft tells you the sag you can afford, since 12 in (30 cm) of drop still leaves the 8 ft (244 cm) of clearance a structural engineer asks for under the lowest bulb.
Add a fourth number, the distance from the first anchor to the nearest outdoor outlet, because it fixes where the plug end must finish. Then mark what cannot move: potted olive trees at the far edge, terracotta urns 20 in (51 cm) across, a 24 in (61 cm) concrete fire table between the lounge chairs. Posts go in the outer corners, never where a planter wants to stand.
Key Takeaway: Write down the long side, the short side, every anchor height and the distance to the outlet before buying, and put posts in the outer corners.
From the guides
You've saved it, wanted it. Here's the how: codes, measurements, order. Your choices make it yours.
 The Japandi Honest PlaybookThe honest version of the style: what to keep, what to skip, and the order to do it in.See inside →
 The Room Refresh PlaybookA repeatable four-step method, room by room, in ten minutes, thirty minutes, or one weekend.See inside →
 Make Any Room Feel Cozy on PurposeWhy some rooms hold people and others empty out, and the moves that change it.See inside →
Match the Hanging Pattern to the Patio’s Footprint
 Save
The footprint chooses the pattern, and only four footprints are worth drawing. A square courtyard takes the crossover X or a four-post grid of two crossing strands; the crossing carries two strands, so it hangs from a wire, never from the cord alone. A long rectangle, one side about one and a half times the other, takes parallel runs across the short side, 18 to 24 in (46 to 61 cm) apart for a full ceiling or 4 ft (122 cm) apart for a lighter courtyard look.
A narrow strip under 8 ft (244 cm) wide takes one wall-hug line along the house or one run down the center, nothing crossing it. An L-shape is two zones with their own patterns sharing the corner post. The V pattern’s point carries the whole weight of the run, so that anchor goes into framing or a post, never a fence board.
Key Takeaway: Square patios take the X or a four-post grid, rectangles take parallel runs across the short side, narrow strips take one line, and every crossing or V point hangs from a wire in framing.
Run the Strands Across the Short Side to Roof a Long Table
 Save
Seven parallel strands of filament bulbs between rough-sawn beams look like the most ambitious version of this idea, and it is the easiest to hang, because every strand runs across the short side. Short spans mean less sag, less pull on each anchor, and no guide wire at all under 20 ft (610 cm). Space the runs 24 in (61 cm) apart on cord with 24 in socket spacing and the bulbs land on a true grid, which is what gives the ceiling an even, luminous plane rather than a scatter of bright points.
Center the middle strand on the table’s centerline. A 96 in (244 cm) oak trestle table with cross-back chairs, eight to ten a side, is covered by five runs at 24 in spacing; the sixth and seventh runs beyond each end stop the ceiling from finishing exactly where the table does.
Key Takeaway: Run parallel strands across the short side at 24 in (61 cm) spacing, center one on the table and add one run past each end so the lit ceiling outlasts the seating.
The Spacing and Sag Table: Post Height Follows the Span
 Save
The engineers who design catenary poles size sag at five percent of the span. A 10 ft (305 cm) run drops 6 in (15 cm) at center; 15 ft (457 cm) drops 9 in (23 cm); 20 ft (610 cm) drops 12 in (30 cm); 25 ft (762 cm) drops 15 in (38 cm); 30 ft (914 cm) drops 18 in (46 cm).
Post height follows from the sag, because the lowest bulb must stay at 8 ft (244 cm). Add the sag to that floor: anchors at 8 ft 6 in (259 cm) for a 10 ft span, 8 ft 9 in (267 cm) for 15 ft, 9 ft (274 cm) for 20 ft, 9 ft 3 in (282 cm) for 25 ft and 9 ft 6 in (290 cm) for 30 ft. Past 20 ft on 14-gauge cord or 25 ft on 16-gauge, the strand hangs from a steel guide wire and the sag belongs to the wire.
Key Takeaway: Size the sag at five percent of the span, add it to an 8 ft (244 cm) clearance to get the anchor height, and move to a guide wire past 20 ft (610 cm).
Set the Posts at the Lawn’s Edge and Buy Them Taller Than You Think
 Save
Posts standing 10 ft (305 cm) above the lawn, four to six of them at the edge of the grass rather than beside the table, turn a garden into an open-air dining room. The ring matters more than the count: a 120 in (305 cm) oak table sits inside the perimeter, so strands pass over it from every side instead of running down one line above it. Keep each post-to-post span at 12 to 15 ft (366 to 457 cm) and the ring stays under the 20 ft (610 cm) guide-wire line, with 7 to 9 in (18 to 23 cm) of sag.
Buy the wood taller than the standing height. A post that stands 10 ft needs 24 to 30 in (61 to 76 cm) in the ground, so the order is a 12 ft (366 cm) 4×4, set in concrete and left 24 to 48 hours before any strand is tensioned on it.
Key Takeaway: Ring the table with posts at 12 to 15 ft (366 to 457 cm) spans and order 12 ft (366 cm) timbers so 10 ft (305 cm) still stands after the hole takes its share.
Bulb Spacing Decides the Count on Every Run
 Save
The commercial standard is 24 in (61 cm), which gives 24 bulbs on a 48 ft (14.6 m) strand; 12 in (30 cm) spacing carries 48, 18 in (46 cm) carries 32, and the 15-socket 48 ft strands common online sit at roughly 36 in (91 cm). A Mediterranean courtyard reads best at 24 in with a 2 in (5 cm) G50 or ST64 bulb, because the dark cord between bulbs makes each one read as a point of light against the sky.
Count per run is the span plus its drape, divided by the spacing. A 12 ft (366 cm) run with a gentle 15 percent drape is about 14 ft (427 cm) of cord, which holds seven bulbs at 24 in. Four such runs across a 12 x 16 ft (366 x 488 cm) patio need 55 ft (16.8 m) of cord: two 48 ft strands, 48 bulbs.
Key Takeaway: Choose 24 in (61 cm) socket spacing, count seven bulbs per 12 ft (366 cm) run with a gentle drape, and size the order from the runs plus 15 percent.
Under a Roof, Follow the Rafters and Skip the Sag
 Save
A covered garden room changes the whole method, because the anchors are already overhead. Exposed cedar rafters take a screw-in cup hook every 24 to 36 in (61 to 91 cm) along their underside, and the strand runs straight along each rafter with no catenary, no tension and no guide wire. Three strands on three rafters cover a 90 in (229 cm) modular sofa and a 30 in (76 cm) concrete fire table with room to spare. Match the hook spacing to the socket spacing so each bulb hangs from a hook rather than mid-cord, and the line stays straight instead of scalloping.
Choose 2 in (5 cm) globes at 24 in (61 cm) here rather than the bigger ST64 shapes, because under a roof the bulbs sit closer to the eye and a large filament bulb at 8 ft (244 cm) glares. Hang the strand from the rafter’s side face so the glass clears the wood.
Key Takeaway: On a covered patio, run each strand straight along a rafter on cup hooks matched to the socket spacing, and use 2 in (5 cm) globes so nothing glares at 8 ft (244 cm).
The Watts and Run-Length Ladder
 Save
A commercial LED S14 bulb draws 0.8 W and manufacturers plan it at 2 W, so a 48 ft (14.6 m) strand of 24 bulbs is a 48 W planning load. The cord is rated at 960 W on 16- or 18-gauge and 1,200 W on 14-gauge, and a 15 A household circuit gives 1,440 usable watts under the 80 percent rule.
The ladder is generous with LED. One strand: 48 ft, 24 bulbs, 48 W. Two end to end: 96 ft (29 m), 48 bulbs, 96 W. Four: 192 ft (59 m), 96 bulbs, 192 W, still far under the cord’s 960 W cap. Incandescent flattens the ladder fast: 265 ft (81 m) of LED string draws about 38 W and the same length in incandescent about 1,925 W, which is why incandescent cafe lights stop at two or three strands per outlet while LED runs three to eight or more. Only 48 ft strands connect end to end; 100 ft (30.5 m) reels usually finish in a capped end.
Key Takeaway: Plan LED at 2 W per bulb, keep a run under 960 W and the circuit under 1,440 W, and build from 48 ft (14.6 m) connectable strands, not reels.
A Post in a Planter Anchors the Strand Where You Cannot Dig
 Save
Where you cannot dig, the planter post is the answer. A 9 ft (274 cm) black steel pole stands in a 15 in (38 cm) planter with a plain smooth side, set in two 50 lb (23 kg) bags of fast-setting concrete mixed around the pole rather than poured first. The mix holds the pole upright in 20 to 40 minutes and cures in 24 hours. Budget $50 to $100 per post, and place the planter in its final spot before the water goes in, because a cured planter post is effectively permanent.
A planter post is a lighter anchor than a buried one, so treat it that way: one strand, not a bundle, hung as a gentle drape rather than a taut line, since tension is what tips a planter. Run the span to the house, where an eye screw goes into framing, and keep it inside 20 ft (610 cm) so no guide wire pulls on the pot.
Key Takeaway: Set a 9 ft (274 cm) pole in a 15 in (38 cm) planter with two bags of fast-setting concrete, give it one gently draped strand under 20 ft (610 cm), and never plan to move it.
The Anchor Order: House Framing First, Plug Last
 Save
The order that works starts at the house, because the strand must never become the structure. First, find the rafter tail behind the fascia by the line of trim nails, drill a pilot hole a size smaller than the eye screw’s shank, and drive the eye screw through the fascia into that framing; a gutter or a siding board alone is never an anchor. Second, set the far post, buried or in a planter, and give the concrete its 24 hours.
Third, run the guide wire from the house eye to the post eye, turnbuckle at the post end where it is easy to reach. Fourth, take up the turnbuckle until the wire holds five percent of the span in sag and no tighter, because a flatter wire pulls harder on both anchors. Fifth, hang the strand on the wire with a zip tie either side of each socket. Sixth, and only now, plug into a weather-rated GFCI outlet through an LED-rated dimmer.
Key Takeaway: Anchor into house framing first, set and cure the post second, tension the wire third, hang the strand fourth, and plug in through a dimmer last.
From the House Wall to One Corner Post: The Simplest Deck Anchor
 Save
An attached deck needs only one post, because the house is already half the structure. Three strands fan from the house wall to a single post at the deck’s far corner: three eye screws spread about 4 ft (122 cm) apart along the fascia, all three strands meeting at the one post eye. Each span is a different length, so each sag is different and the table above sets each one; the longest diagonal governs the post height. That post must be through-bolted to the rim joist or set in concrete beside the deck, because it carries the far end of all three runs.
Keep the lowest bulb at 8 ft (244 cm) above the boards so French doors swing clear. The strands should converge over the conversation group, an 84 in (213 cm) gray wood-frame sofa facing a 36 x 20 in (91 x 51 cm) slatted coffee table.
Key Takeaway: On an attached deck, spread three eye screws 4 ft (122 cm) apart on the fascia, gather the strands at one bolted corner post, and let the longest span set the height.
The Guide-Wire Method, Step by Step
 Save
The guide wire is what lets a strand cross 20 ft (610 cm) or more and still hold the sag you chose. Use 7×7 stainless aircraft cable at 1/16 in (1.6 mm) for spans to 20 ft and 3/32 in (2.4 mm) beyond. The kit for one span is two eye screws, one turnbuckle, two thimbles, four wire-rope clips and black zip ties; ready-made kits with 150 to 200 ft (46 to 61 m) of coated cable and the hardware run $20 to $35.
Cut the cable to the span plus 12 in (30 cm) for the two loops. Pass one end through a thimble at the house eye, fold it back and set two clips with the saddle on the live side; hook the turnbuckle to the post eye and finish that end the same way. Take up the turnbuckle until the center drops five percent of the span. Lay the strand along the wire and zip-tie both sides of every socket.
Key Takeaway: Use 1/16 in (1.6 mm) stainless cable to 20 ft (610 cm) and 3/32 in (2.4 mm) beyond, tension to a five percent sag and zip-tie every socket.
A Dense Canopy Needs a Second Plane and a Center Cluster
 Save
One plane of parallel strands is a ceiling; two planes crossing are a tent. Hang the first plane as parallel runs between wood posts, then a second set at right angles a hand’s width lower, so bulbs from the two planes never touch and the eye reads depth rather than a flat grid. G40 globes at 24 in (61 cm) suit the crossing better than large filament bulbs, because small globes keep the doubled bulb count from glaring.
Where the two central guide wires cross, hang the cluster: four glass lanterns about 10 in (25 cm) tall on cords of different lengths, dropped over the middle of a 96 in (244 cm) table and a dozen white metal cafe chairs, LED candles inside. The cluster hangs from the wire crossing, never from the strand, because a strand is rated to carry nothing but its own bulbs.
Key Takeaway: Cross a second plane of G40 globes below the first and hang a lantern cluster from the wire crossing, not the cord, so the canopy reads as a tent with a center.
Dusk to Dark: Four Layers, Four Heights, One Order
 Save
A Mediterranean courtyard is lit in four layers at four heights, and the patio guides agree: one layer is never enough, and every layer sits in a warm 2,700 to 3,000 K register. The overhead layer is the canopy at 8 to 10 ft (244 to 305 cm). The wall layer is a pair of wrought-iron or bronze lanterns on the stucco at 5 to 6 ft (152 to 183 cm). The table layer is glass hurricanes or LED candles at 12 to 36 in (30 to 91 cm). The ground layer is floor lanterns and path lights, 0 to 18 in (0 to 46 cm).
The order is the reverse of the height. Path lights come on first, on their solar sensor. The canopy comes on next, dimmed to about half. The wall lanterns follow, and the candles last, and the canopy dims again so the lowest layer leads.
Key Takeaway: Stack four layers at 8 to 10 ft (244 to 305 cm), 5 to 6 ft (152 to 183 cm), 12 to 36 in (30 to 91 cm) and ground level, all warm, and bring them on from the ground up.
Carry the Glow Past the Edge With Post Lanterns and Stepping Stones
 Save
The courtyard ends where the string lights end, unless something carries the glow out along the path. Post-and-bracket lanterns on cedar posts about 7 ft (213 cm) tall do that with a rhythm: one every 6 to 8 ft (183 to 244 cm), alternating sides of the walk, tightened to 5 to 6 ft (152 to 183 cm) where the path turns or steps. Flat stepping stones about 18 in (46 cm) across set in pale pea gravel give the lanterns something to light, and a dark glazed urn about 14 in (36 cm) wide at each post base ties the vertical to the ground.
Cage lanterns with warm LED candles match the canopy; cool white solar stakes do not, and one cool stake at the path’s end undoes the whole register. A solar path set runs about $57 for four, an IKEA candle lantern $9.99, and an iron lantern at The Home Depot $25 to $49.
Key Takeaway: Extend the glow with post lanterns every 6 to 8 ft (183 to 244 cm) on alternating sides of a stepping-stone path, in the same warm amber as the canopy.
How Many Feet to Buy: The Count for Three Courtyard Sizes
 Save
The last number is the order itself, and it comes from one formula: add up every span, multiply by 1.15 for a gentle drape or 1.30 for a deep swag, and round up to whole 48 ft (14.6 m) strands.
A 10 x 12 ft (305 x 366 cm) courtyard with an X has two diagonals of about 15.6 ft (476 cm), so 31 ft (9.4 m) of span becomes 36 ft (11 m) of cord: one strand, 24 bulbs. A 12 x 16 ft (366 x 488 cm) patio with four runs across the 12 ft side is 48 ft (14.6 m) of span and 55 ft (16.8 m) of cord: two strands, 48 bulbs, no guide wire. A 16 x 24 ft (488 x 732 cm) terrace with six runs across the 16 ft side is 96 ft (29 m) of span and 110 ft (34 m) of cord: three strands, 72 bulbs, and still no wire because every span stays under 20 ft.
Key Takeaway: Sum the spans, add 15 percent for a gentle drape, round up to 48 ft (14.6 m) strands, and add guide cable the moment any span reaches 20 ft (610 cm).
The original ideas from this article continue below.
There is a specific feeling you get from a Mediterranean courtyard at dusk — the kind where string lights hang in loose, unhurried drapes above a stone table, jasmine climbs the wall, and everything glows amber. It looks effortless, and that is exactly why it is so hard to replicate. Most patios end up with lights that feel like a backyard birthday party rather than a hillside village in the south of France. The difference is almost never the lights themselves. It is every decision around them — the drape pattern, the bulb shape, the surfaces they illuminate, the plants beside them, and the secondary light sources beneath. This article breaks down 14 specific ideas that work together to build that mood, from the first strand you hang to the terracotta pot you place in the corner.
From the guides
You've saved it, wanted it. Here's the how: codes, measurements, order. Your choices make it yours.
The Japandi Honest PlaybookThe honest version of the style: what to keep, what to skip, and the order to do it in.See inside →The Room Refresh PlaybookA repeatable four-step method, room by room, in ten minutes, thirty minutes, or one weekend.See inside →Make Any Room Feel Cozy on PurposeWhy some rooms hold people and others empty out, and the moves that change it.See inside →Choose Warm Edison Bulbs Over Cool LEDs for the Right Glow
 Save
The bulb temperature you choose determines whether your patio reads “Mediterranean evening” or “apartment rooftop party.” Bulbs in the 2,200K–2,700K range produce the amber glow you see in reference photos — warm, slightly orange, close to candlelight. Anything cooler than 3,000K starts to feel clinical and modern, which reads wrong against the natural stone, clay, and linen textures of a Mediterranean-style space. G40 globe bulbs and ST64 Edison-style bulbs are the two shapes that photograph and read as intentional — the exposed filament inside the globe creates visual warmth even when the lights are off. Avoid small fairy lights or net lights for this aesthetic; they read as Christmas-adjacent and lack the visual weight to anchor the space.
Key Takeaway: For the Mediterranean mood, choose G40 globe or ST64 Edison bulbs in the 2,200K–2,700K range — warm amber is the only color temperature that works.
Hang Lights in a Loose Catenary Drape, Not a Flat Grid
 Save
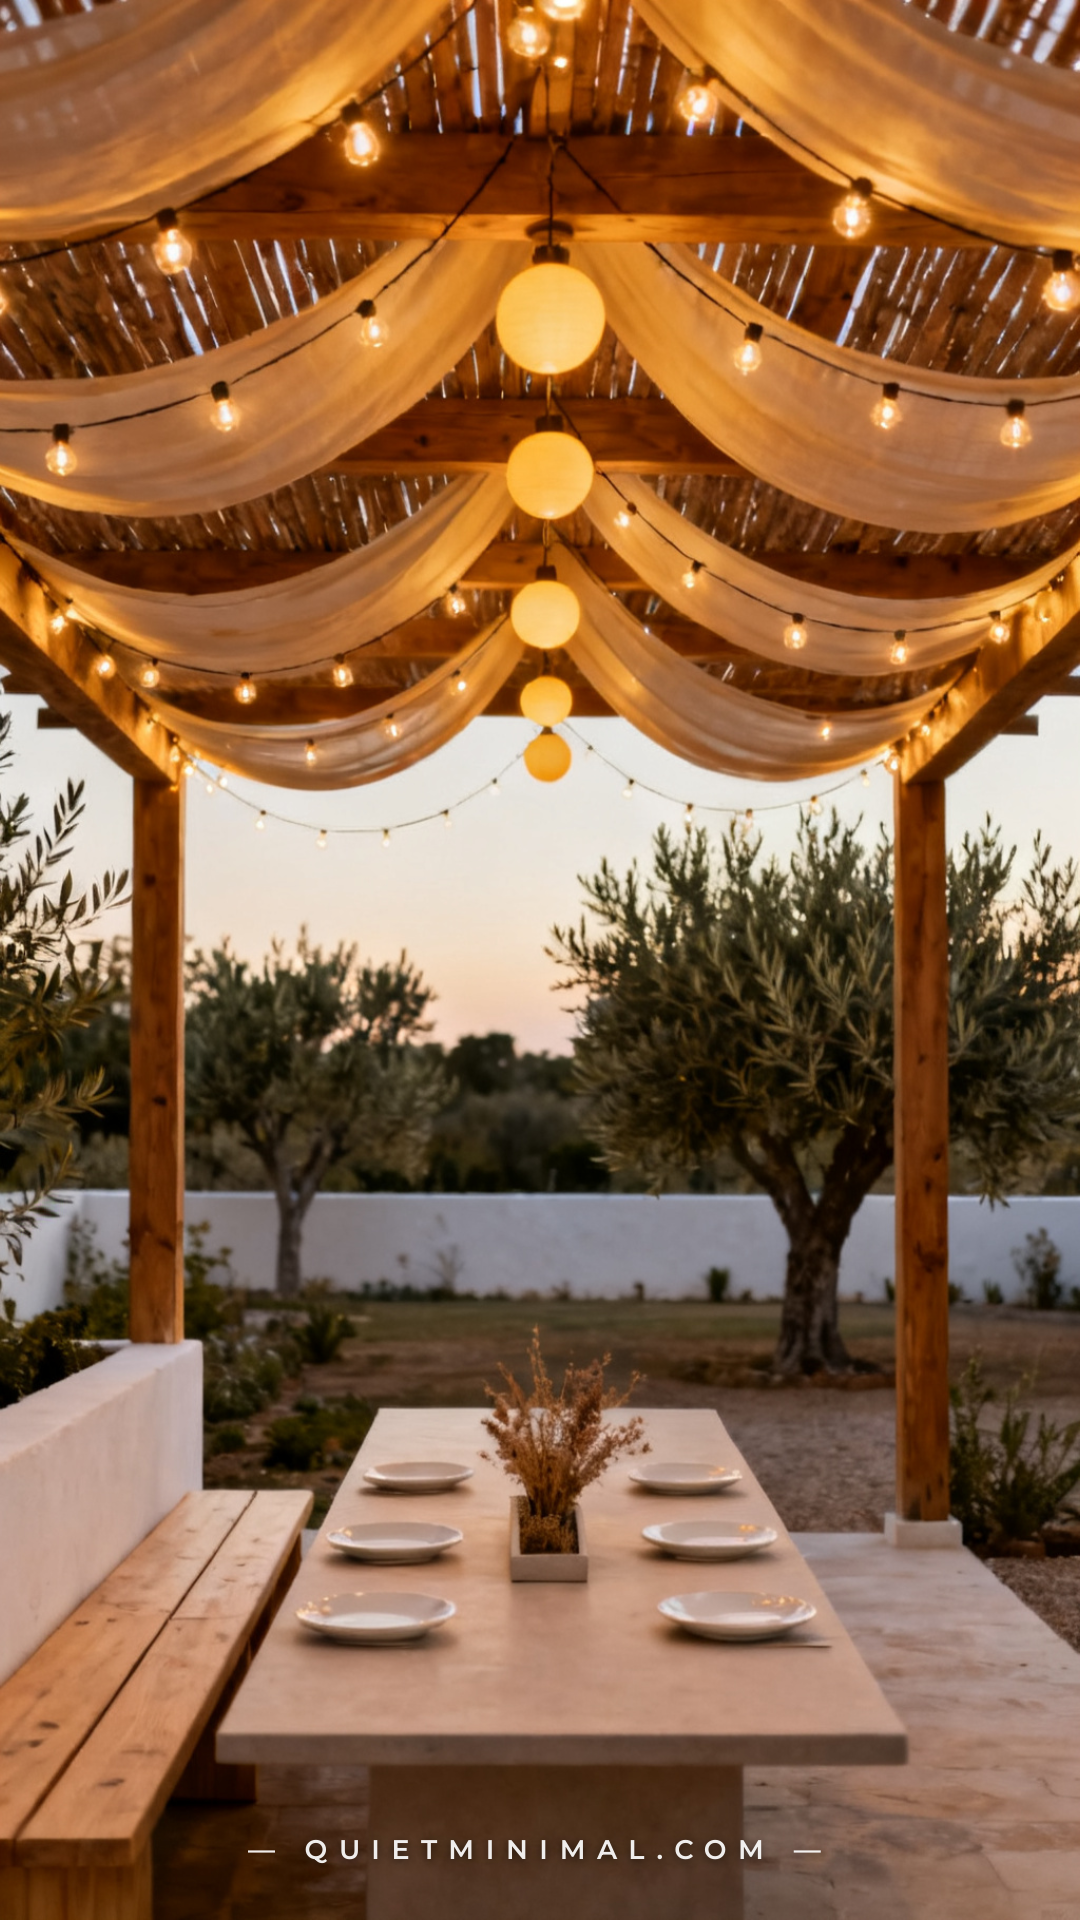
The most common mistake is pulling string lights taut from point to point, creating a flat geometric grid. Mediterranean courtyards — in Greece, Spain, Portugal, and southern Italy — use lights that hang in natural curves, called catenary drapes, where the weight of the cord pulls it into a gentle arc. This curve is structural and visual: it mimics the way fabric drapes, gives the overhead plane a relaxed quality, and prevents the light from looking like wiring rather than atmosphere. When installing, give yourself at least 12–18 inches of sag in the center of each run. If your strands are weighted with heavy globes, the drape will form naturally. If using lighter café-style lights, add a small S-hook at the midpoint and let it hang freely.
Key Takeaway: Let your string lights sag — a 12–18 inch catenary curve is what separates a Mediterranean-feeling overhead canopy from a hardware installation.
Layer String Lights With Low Candlelight on Every Surface
 Save
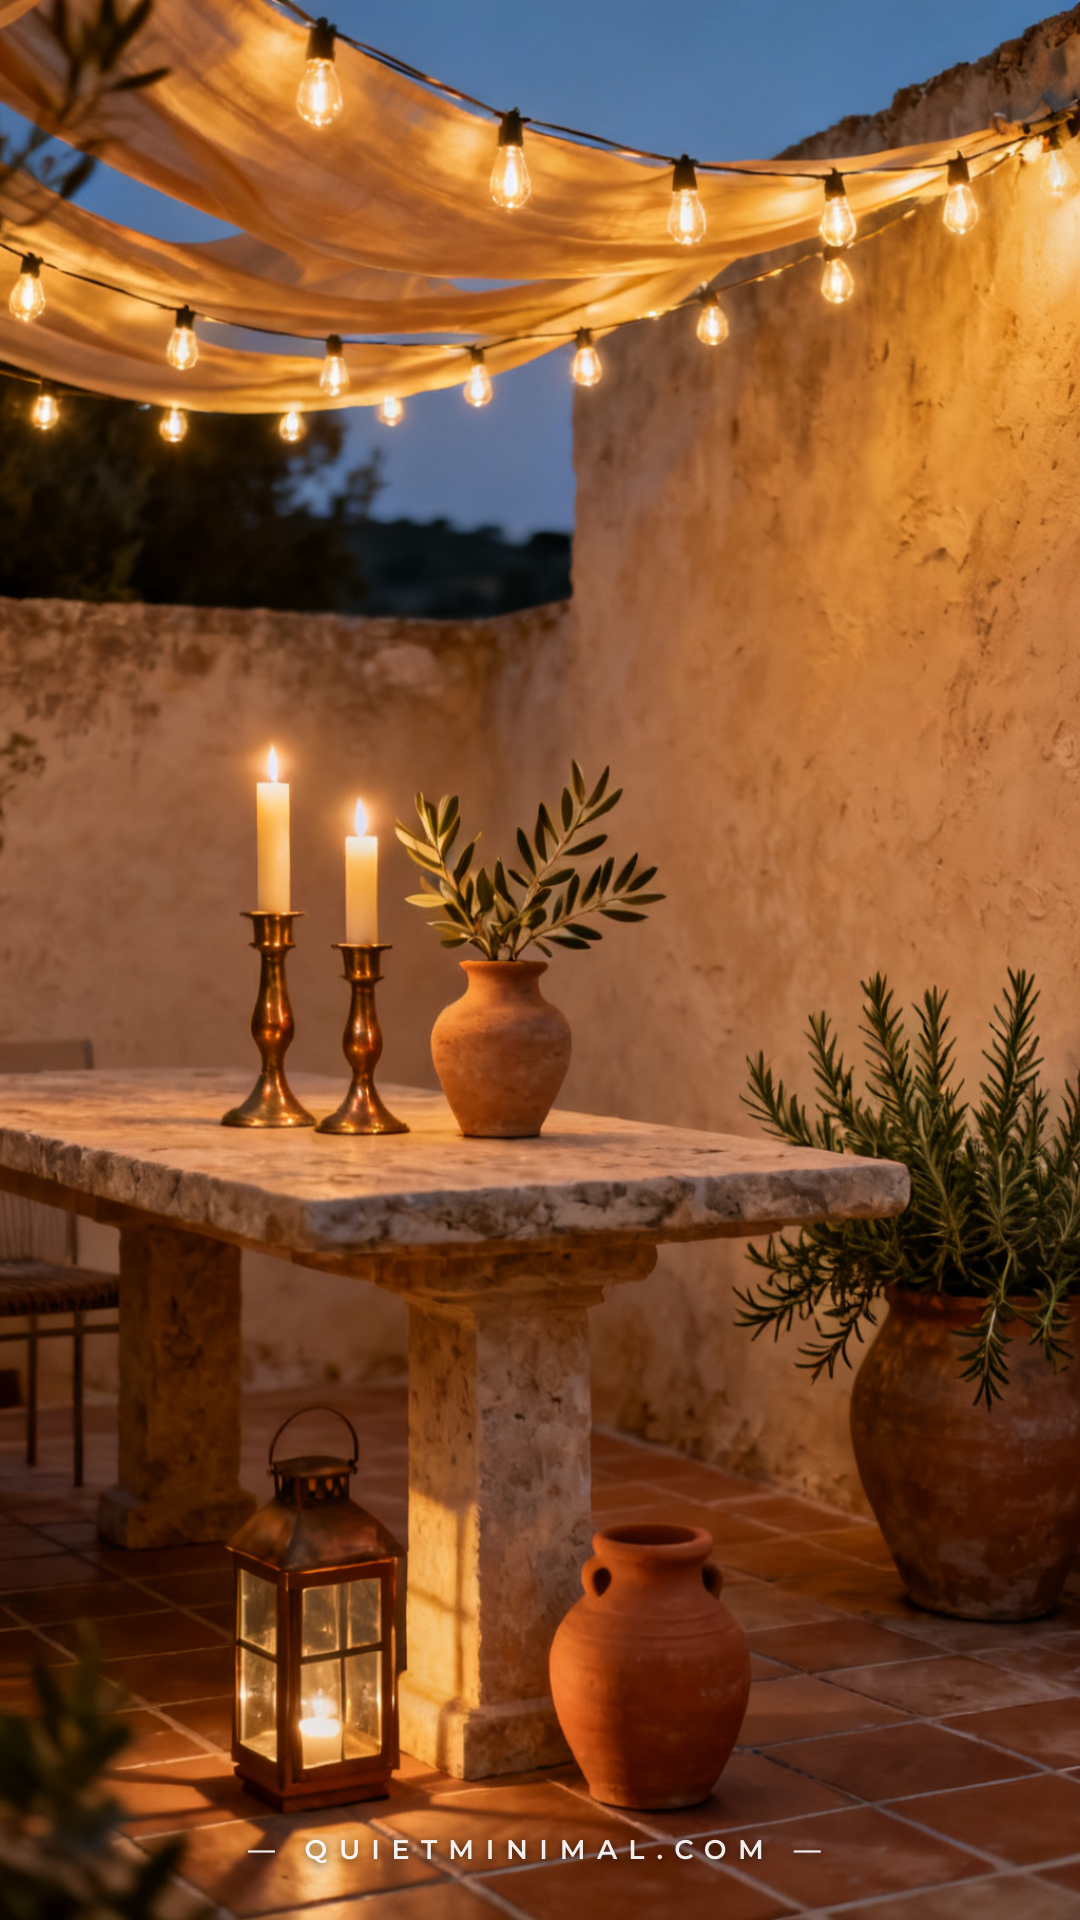
String lights alone create a ceiling of light but leave everything below in relative darkness. The Mediterranean courtyard look depends on three lighting levels working simultaneously: overhead string lights for the ambient canopy, candles or lanterns at table height for task and intimacy, and low ground-level lanterns for grounding the space. The overhead lights set the mood, but it is the candlelight closest to the face that makes a dinner feel like a scene from a travel film. Use pillar candles in hurricane glass to protect the flame from outdoor breezes, place them in groupings of two or three rather than a single centerpiece, and match the brass or black iron of any lantern hardware to your string light end caps for a cohesive material story.
Key Takeaway: Pair your string lights with at least two additional light sources — one at table height and one at ground level — to build the layered glow that defines Mediterranean outdoor spaces.
Use Rope or Linen-Wrapped Cord Instead of Black Plastic
 Save
The cord itself is part of the aesthetic. Most affordable string lights come with black or dark green plastic-coated wire, which stands out visually against the warm, natural materials of a Mediterranean courtyard. Look for lights with a twisted cotton or linen-wrapped cord — often listed as “café lights” or “bistro lights” — in black cotton twist, natural burlap, or warm brown rope finish. These cord finishes visually recede against wood beams and stone walls and contribute to the handmade, artisanal quality of the space. If you already own lights with plastic cord, wrapping the fixed anchor lines (not the lit sections) in natural rope is a simple DIY that shifts the visual tone significantly.
Key Takeaway: Choose string lights with cotton-twisted or rope-wrapped cord — the wire finish contributes to or undermines the Mediterranean aesthetic as much as the bulb shape does.
Anchor Strands to a Pergola or DIY Wooden Post System
 Save
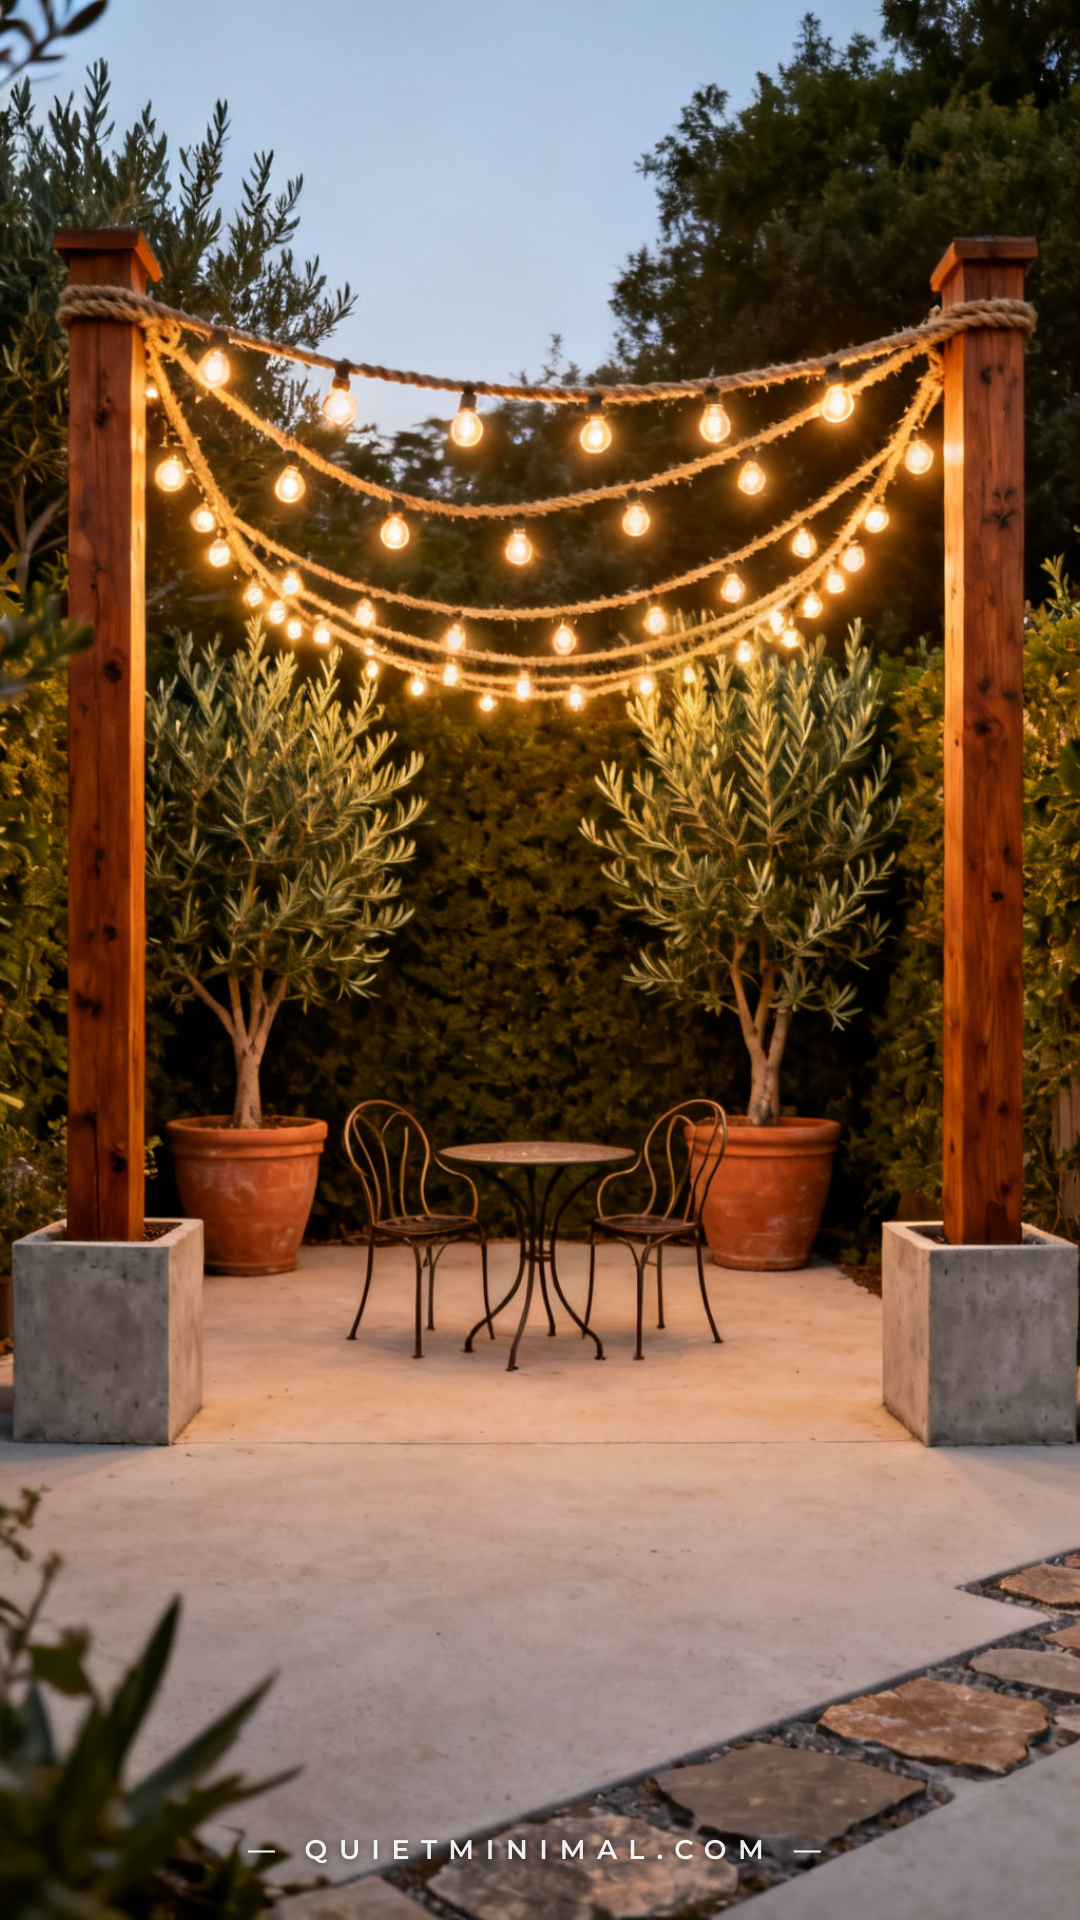
Renters and homeowners without pergolas often give up on the Mediterranean string light look because they assume it requires permanent structures. It does not. A DIY wooden post system — two or four cedar 4×4 posts set in weighted concrete planter bases — creates all the anchor points you need without drilling into a wall or setting posts in the ground. Set the posts 10–14 feet apart depending on patio width, and use a tensioning rope between them as the top anchor for your strands. The planters at the base of each post become functional: plant them with tall olive trees, lavender, or rosemary to reinforce the Mediterranean plant palette and visually justify the structure as a design element rather than a utility pole. This approach works on any patio, balcony, or terrace without permanent modification.
Key Takeaway: Two weighted cedar posts in planter bases give you all the anchor infrastructure for a full Mediterranean string light canopy without drilling or renting permissions.
Frame the Space With Mediterranean Plant Walls
 Save
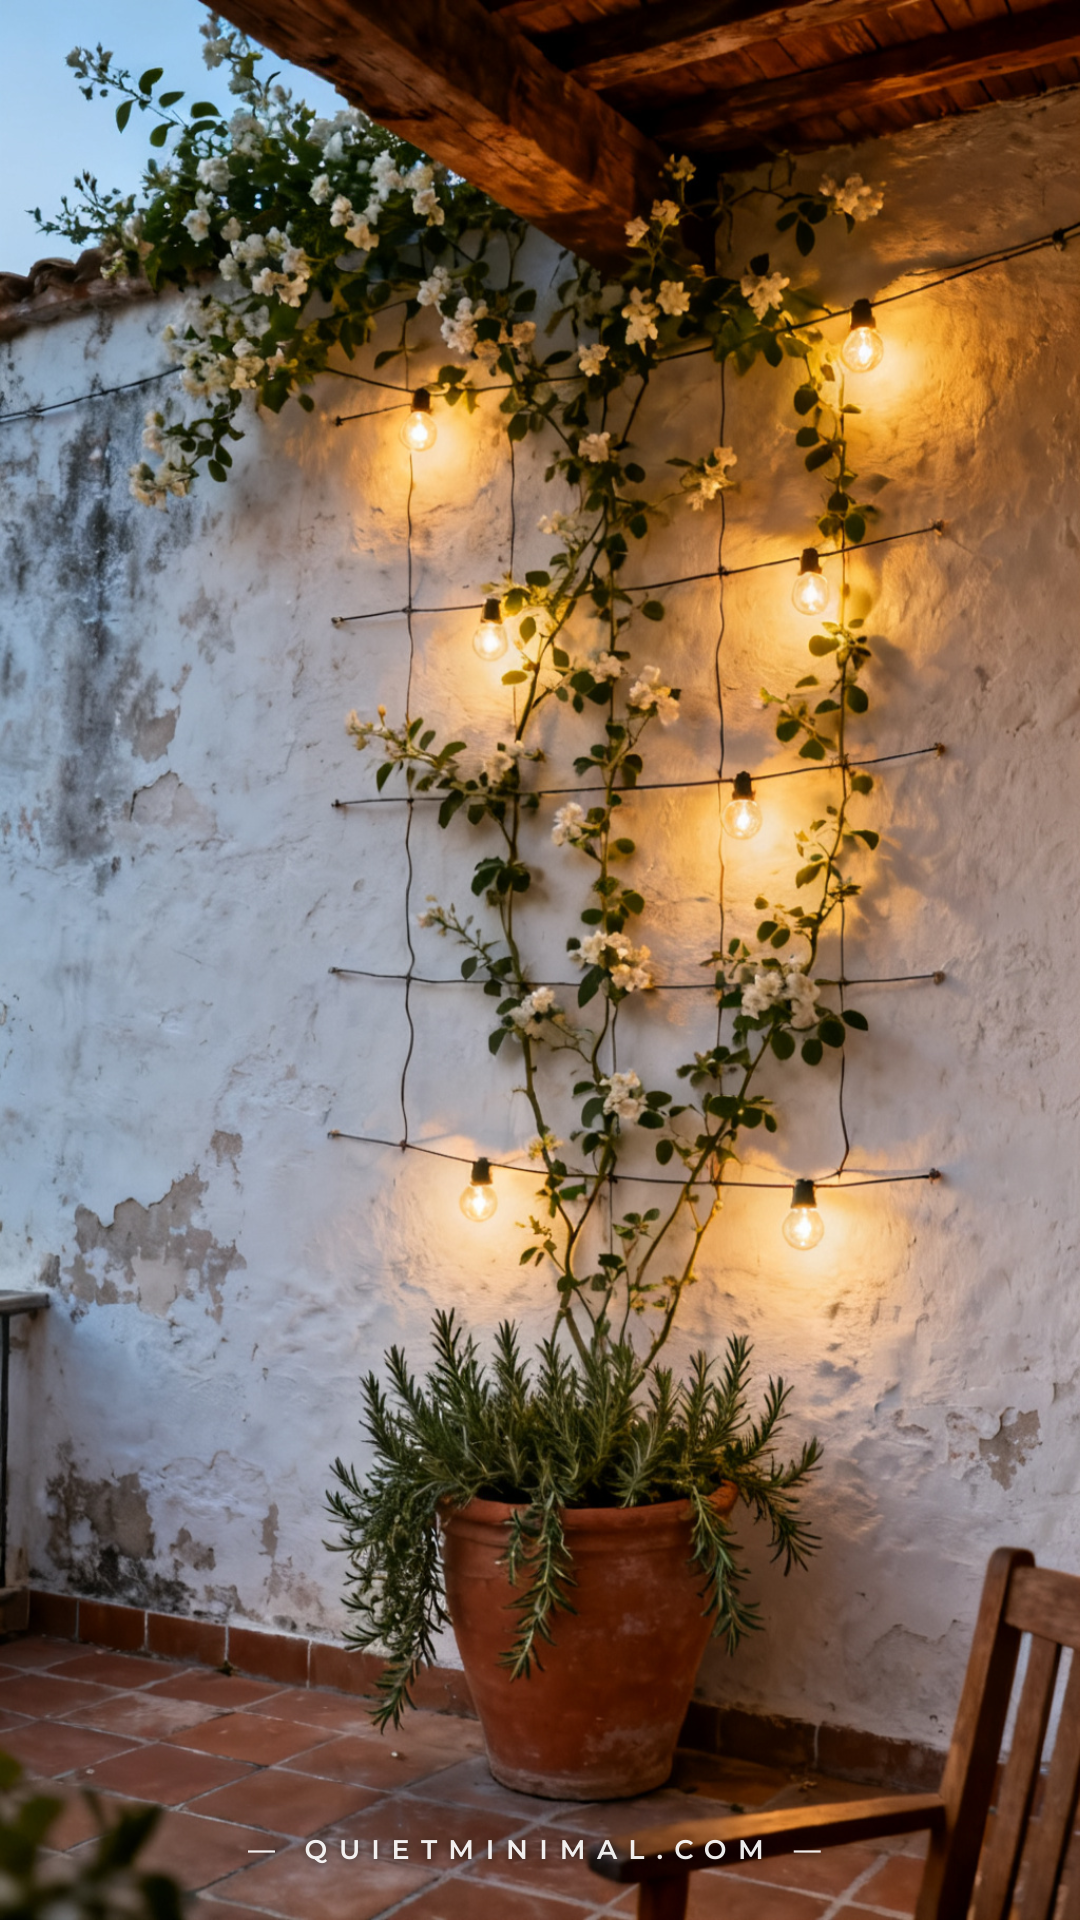
The plants you choose signal the aesthetic as much as the lights themselves. Mediterranean courtyards are defined by a specific plant vocabulary: jasmine climbing a wall, lavender in stone urns, rosemary spilling from terracotta, bougainvillea arching overhead, olive trees as anchor specimens. When string lights run through or adjacent to this plant material, the light catches the leaves and creates dappled, organic shadow patterns on the floor and walls — the specific effect you see in every saved Mediterranean patio pin. Position your light strands to run through or just above climbing plants on walls, and place potted specimens at the base of every structural post or column. The plant life and the light should feel intertwined, not arranged separately on opposite sides of the patio.
Key Takeaway: Train jasmine, bougainvillea, or climbing rosemary alongside your string light runs so the light filters through leaf material — that dappled effect is central to the Mediterranean look.
Use a Stucco or Whitewashed Wall as a Reflective Backdrop
 Save
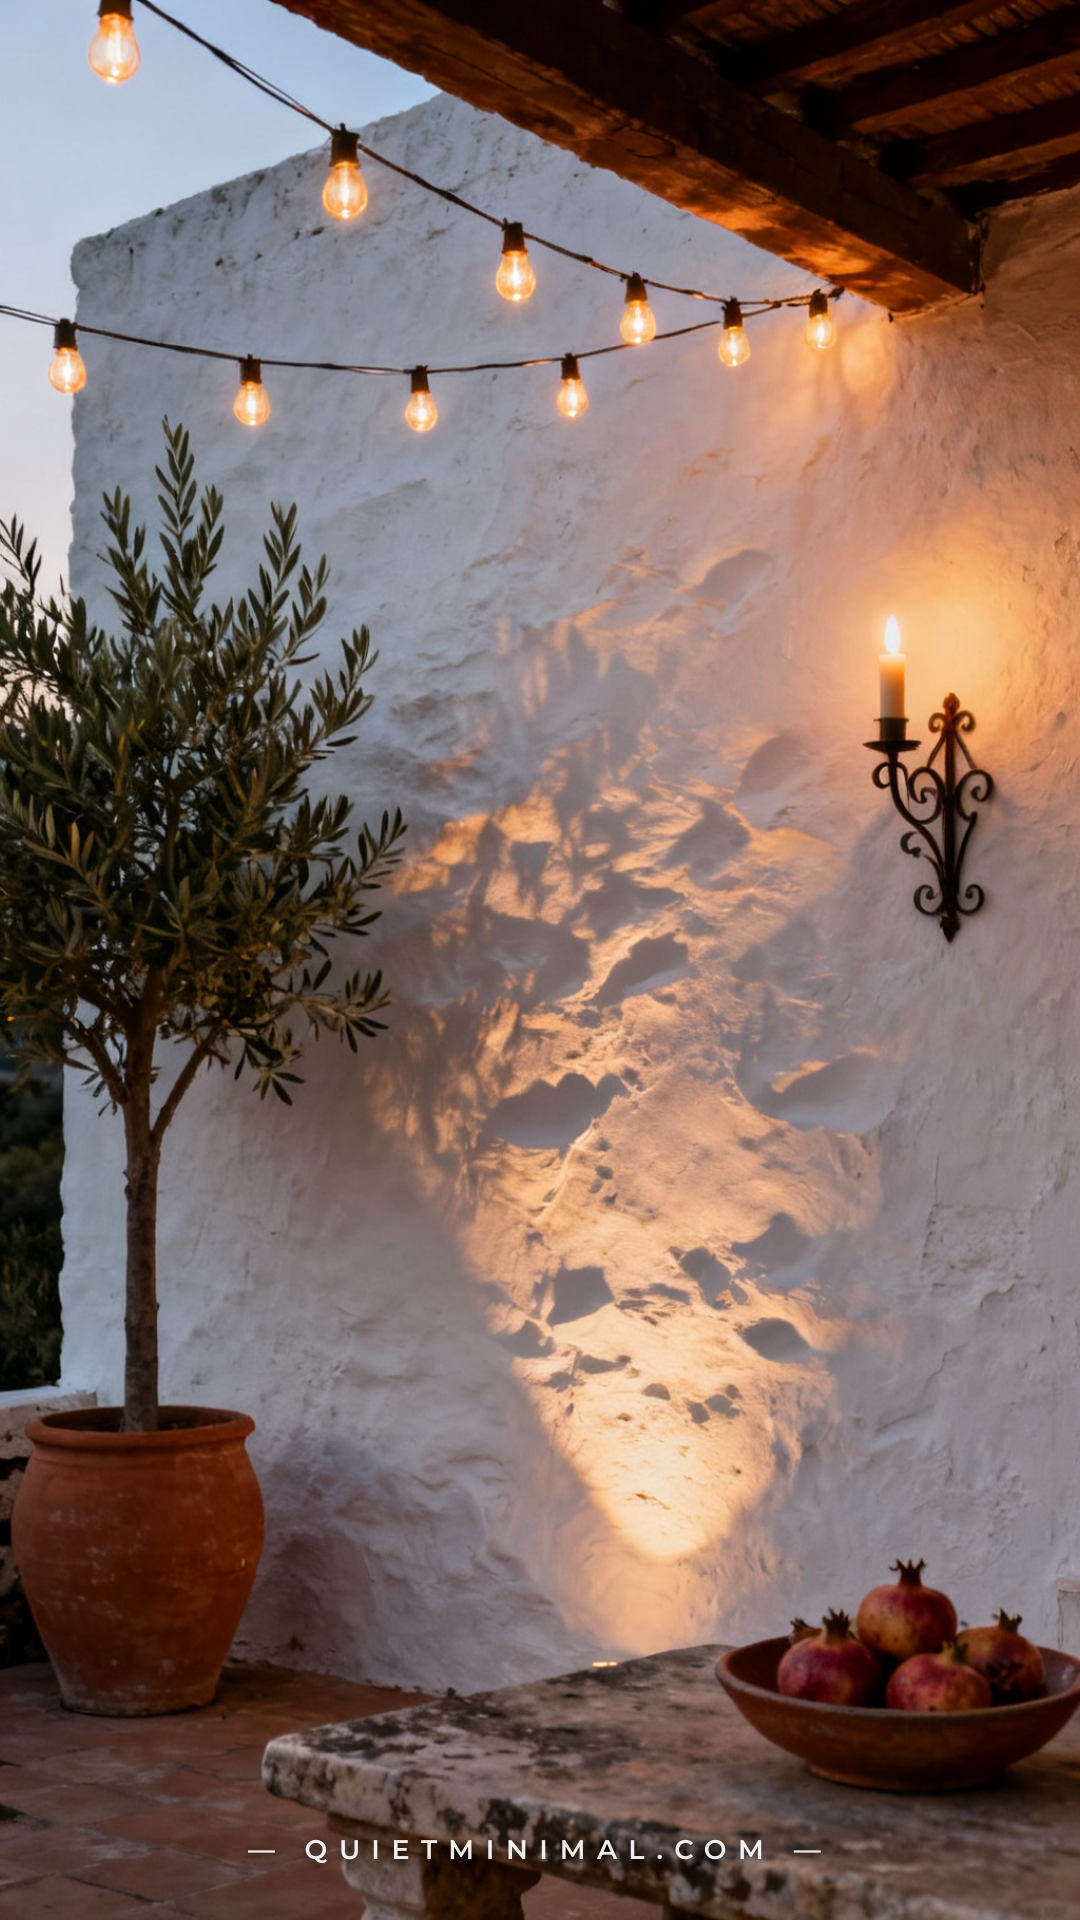
The surface your string lights hang in front of is doing as much visual work as the lights themselves. White and near-white surfaces — stucco, whitewash, aged lime plaster, pale limestone — act as natural light reflectors, bouncing amber glow back into the space and creating the soft, glowing perimeter you see in Mediterranean courtyards. Dark wooden fences and green hedges absorb light and make the same bulbs appear dimmer and more isolated. If your patio backdrop is a dark wood fence, painting it a warm white or applying a limewash finish is one of the highest-impact changes you can make before installing a single strand of light. The light has to have somewhere to land.
Key Takeaway: Hang string lights in front of white or light-toned walls whenever possible — the reflected glow is what creates the warm perimeter ambiance, not just the bulbs themselves.
Create Overhead Coverage With a Full Canopy, Not Perimeter Strands
 Save
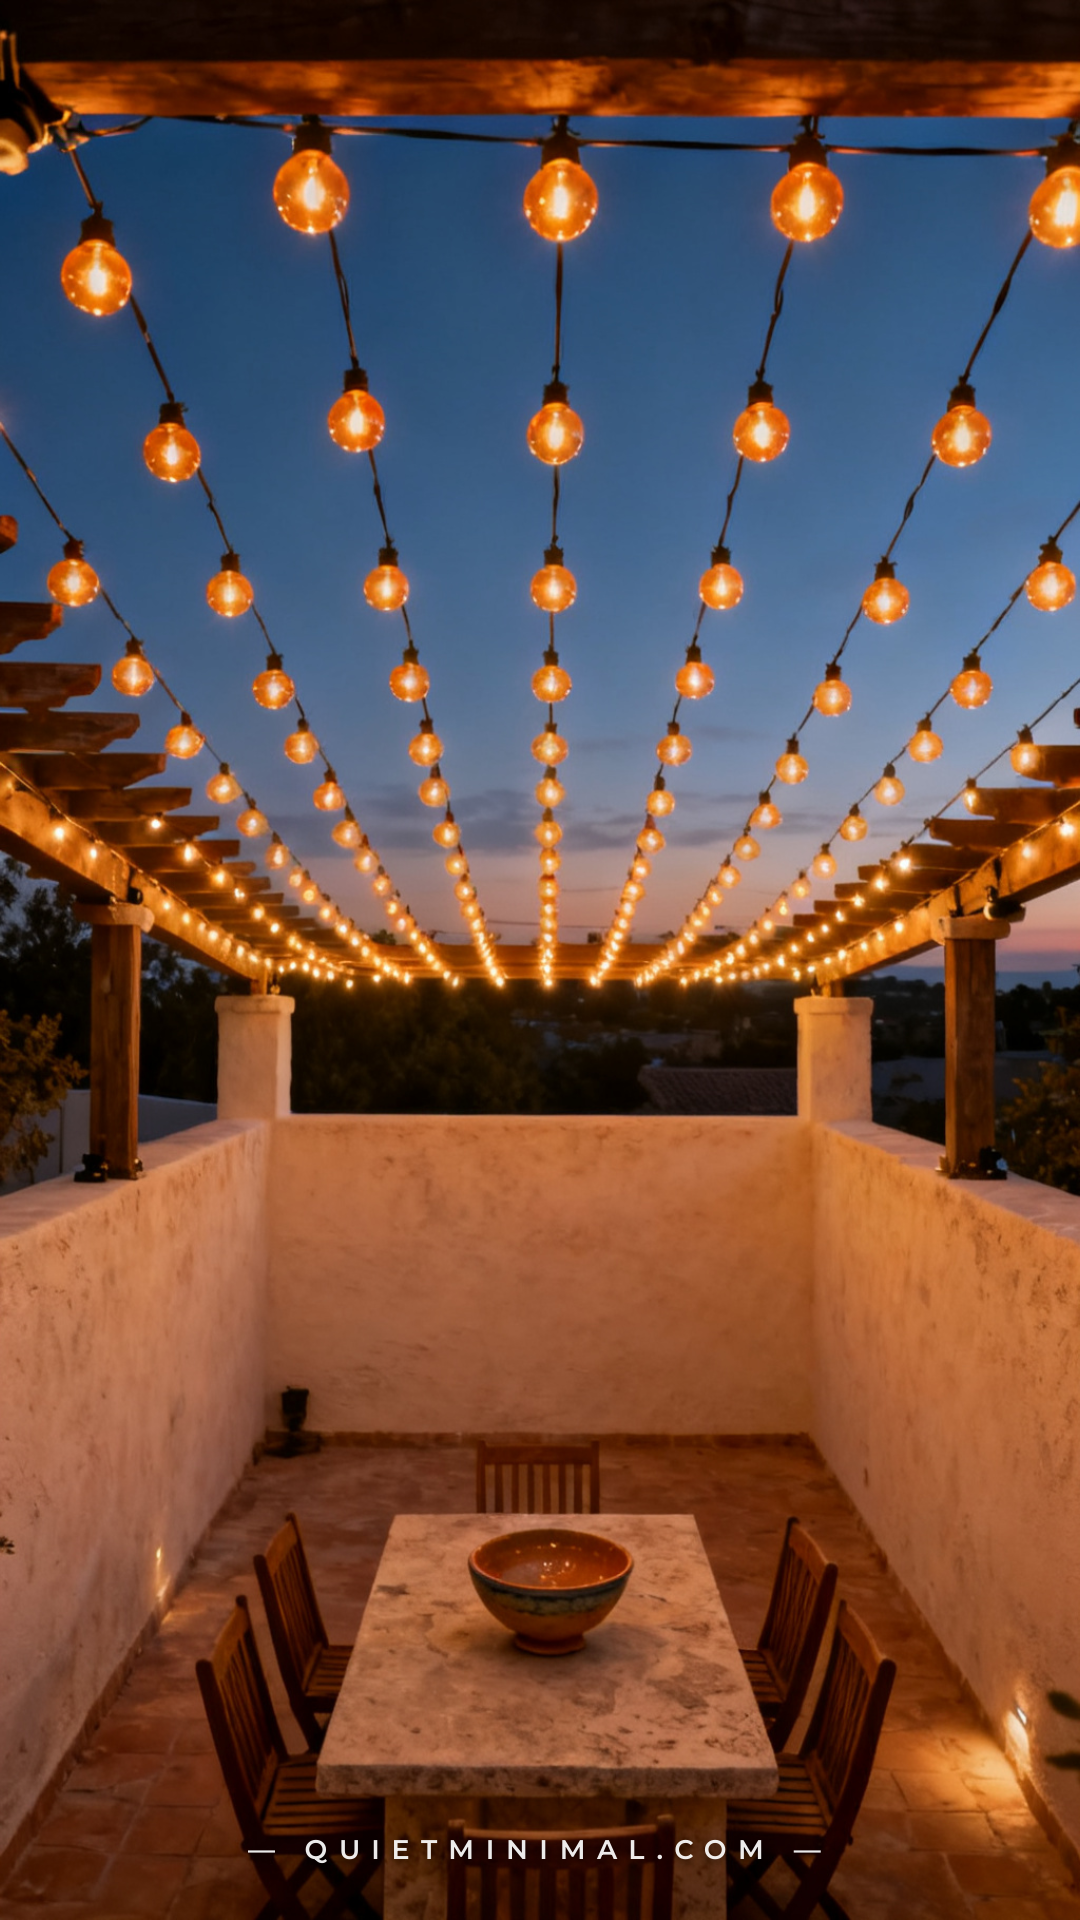
A common installation mistake is running string lights only around the perimeter of a patio — along the roofline or fence edge — creating a frame of light rather than an immersive overhead plane. Mediterranean courtyards feel like rooms because the light overhead covers the full horizontal area, not just the edges. Install strands in parallel runs spaced 18–24 inches apart, crossing the full width or length of the patio, so that the complete overhead area is covered. When you sit beneath a full overhead canopy, the enclosure effect creates the “room within the outdoors” feeling that is central to the Mediterranean courtyard experience. Perimeter-only lighting creates the opposite — it highlights the boundary while leaving the interior of the space feeling exposed and incomplete.
Key Takeaway: Cover the full overhead area with parallel string light runs spaced 18–24 inches apart — partial perimeter installations lack the immersive enclosure that defines the Mediterranean courtyard look.
Incorporate a Dimmer Switch for Mood Control
 Save
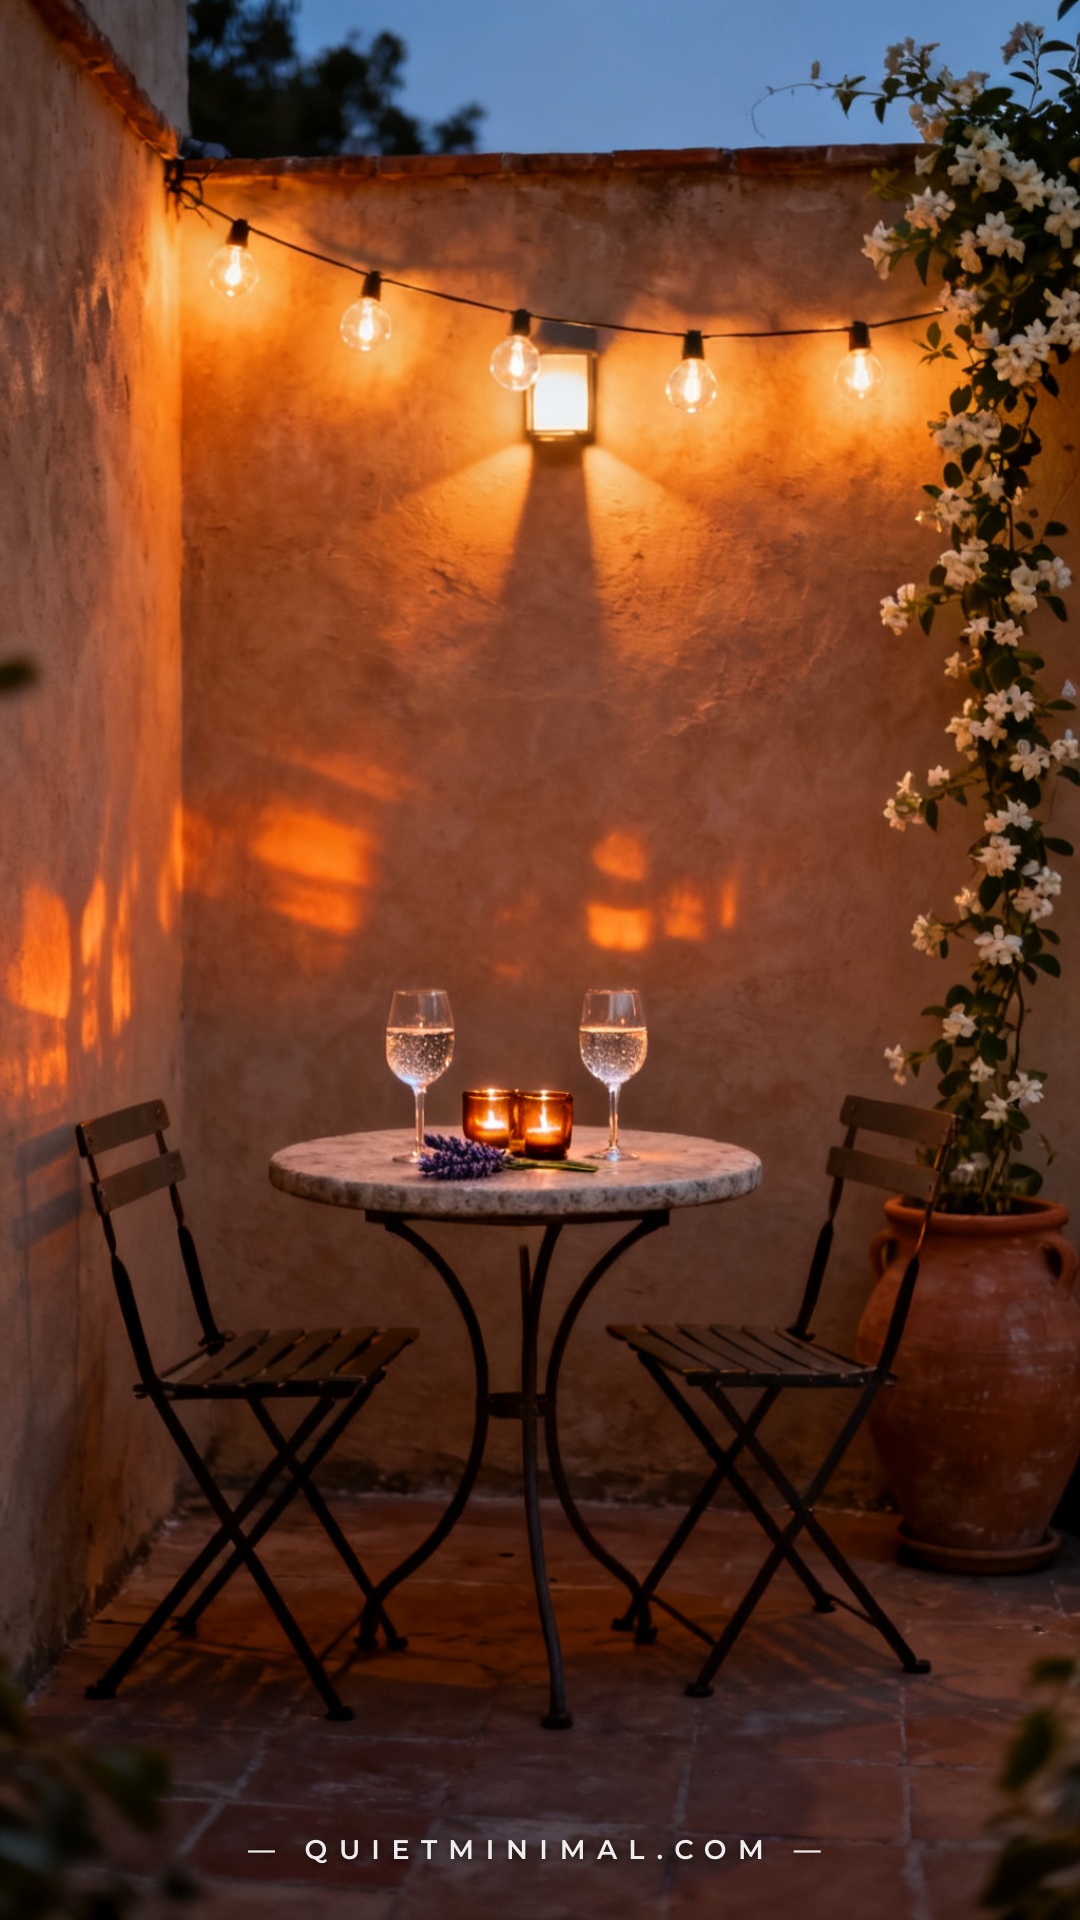
The same G40 Edison bulbs at full brightness read as functional task lighting. Dimmed to 50–70%, they become atmospheric and cinematic. A simple plug-in dimmer — compatible with your specific bulb type — transforms what your lights do without changing a single bulb. For LED Edison-style bulbs, confirm the dimmer is rated for LED loads, as standard dimmer switches designed for incandescent bulbs will cause LED flicker. Set the lights to roughly 60% intensity as your default evening setting and lower further for dining. The ability to control brightness is what allows the same string light installation to serve as ambient background lighting while cooking and transition to intimate candlelight-adjacent atmosphere for dinner — without buying two separate lighting systems.
Key Takeaway: A plug-in LED-compatible dimmer switch is one of the least expensive and highest-impact upgrades to any string light installation — full brightness defeats the Mediterranean mood entirely.
Add Iron or Brass Lanterns at Ground Level
 Save
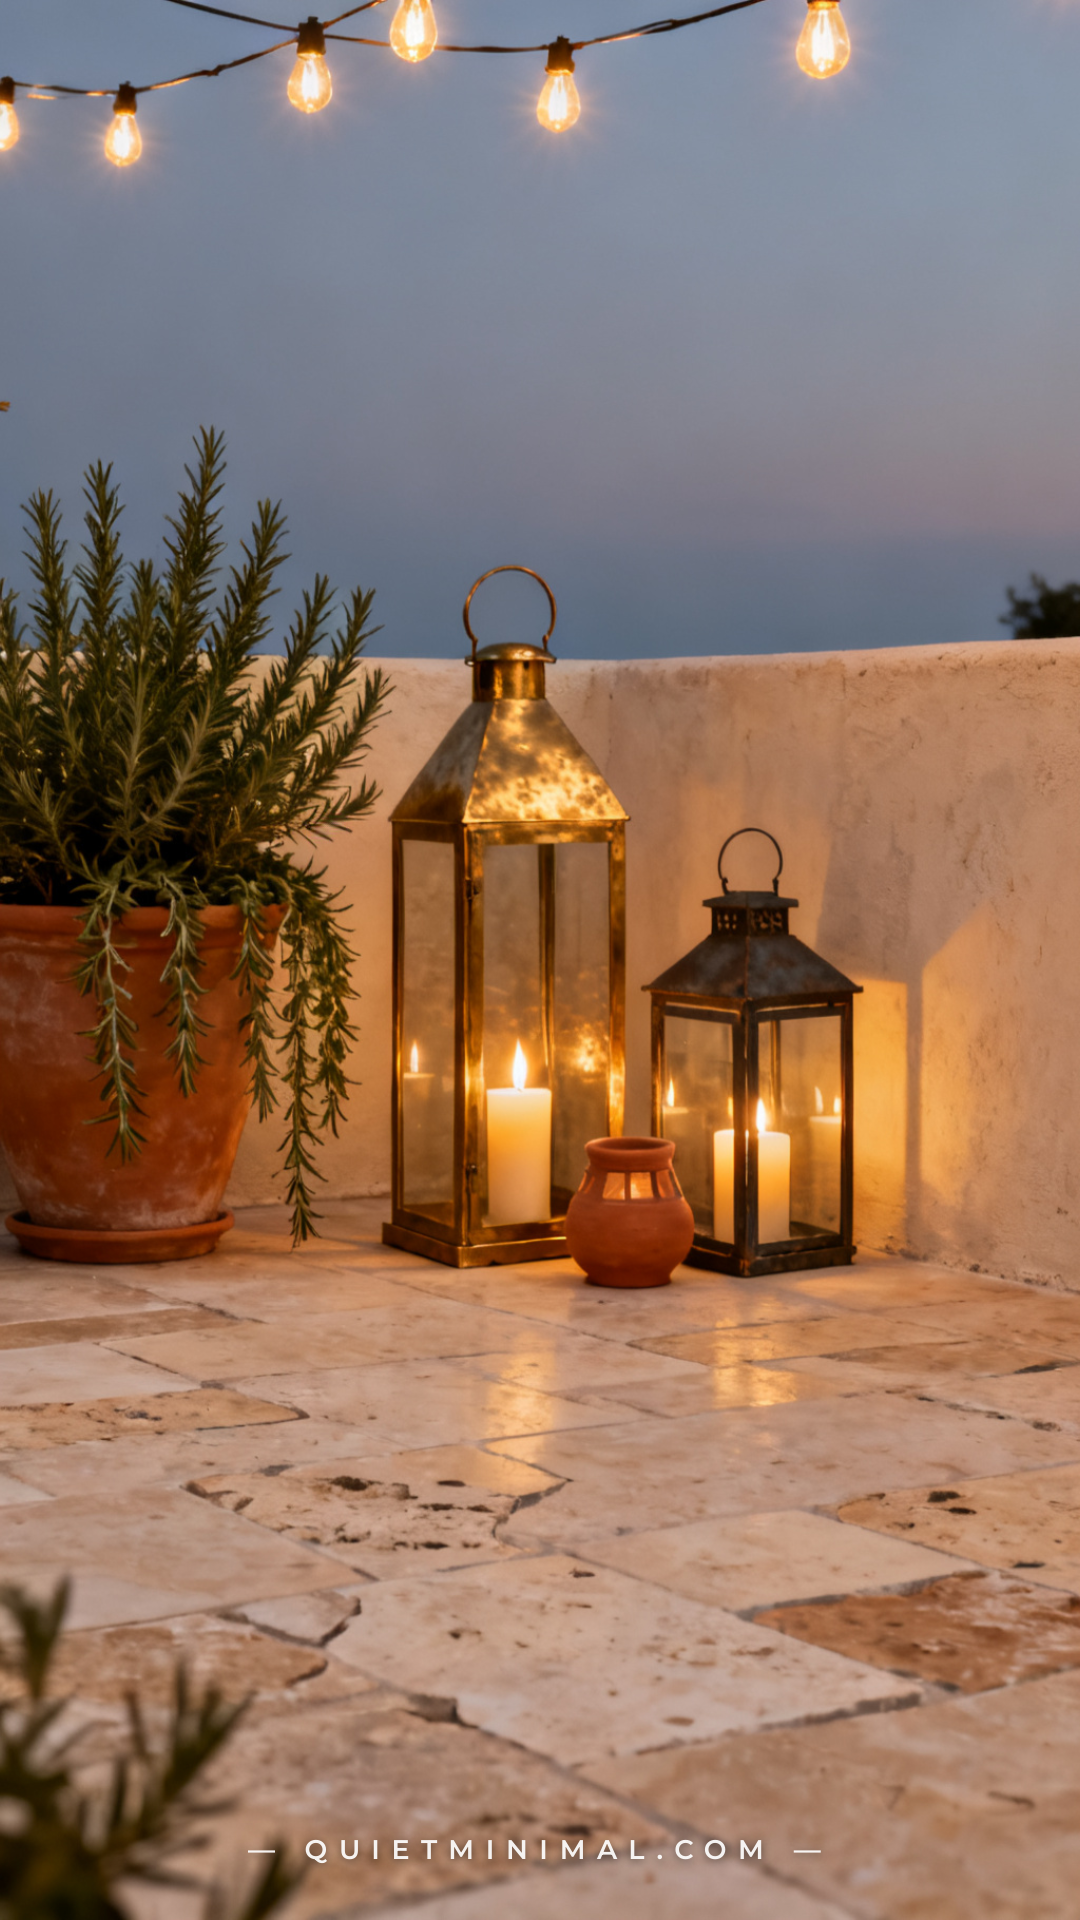
Floor-level lanterns are the element that most Pinterest Mediterranean patio photos include and most DIY recreations forget. Lanterns placed directly on the floor — against a wall, beside a planter, or flanking steps — add the lowest layer of the lighting system and dramatically change how the patio reads after dark. Use brass, hammered iron, or raw terracotta lantern bodies, and place them in odd-numbered groupings of three or five rather than symmetrical pairs. A single large floor lantern beside an olive tree planter reads as a garden sculpture. Three lanterns at varying heights grouped against a wall read as a vignette. Use real pillar candles in hurricane inserts for the most authentic glow, or LED flame-effect candles in high-traffic areas where wax management is impractical.
Key Takeaway: Add floor lanterns in groupings of three or five at the base of walls and planters — the ground-level light layer is the detail that makes a string light installation look curated rather than installed.
Choose Natural Material Furniture — Stone, Iron, and Raw Wood
 Save
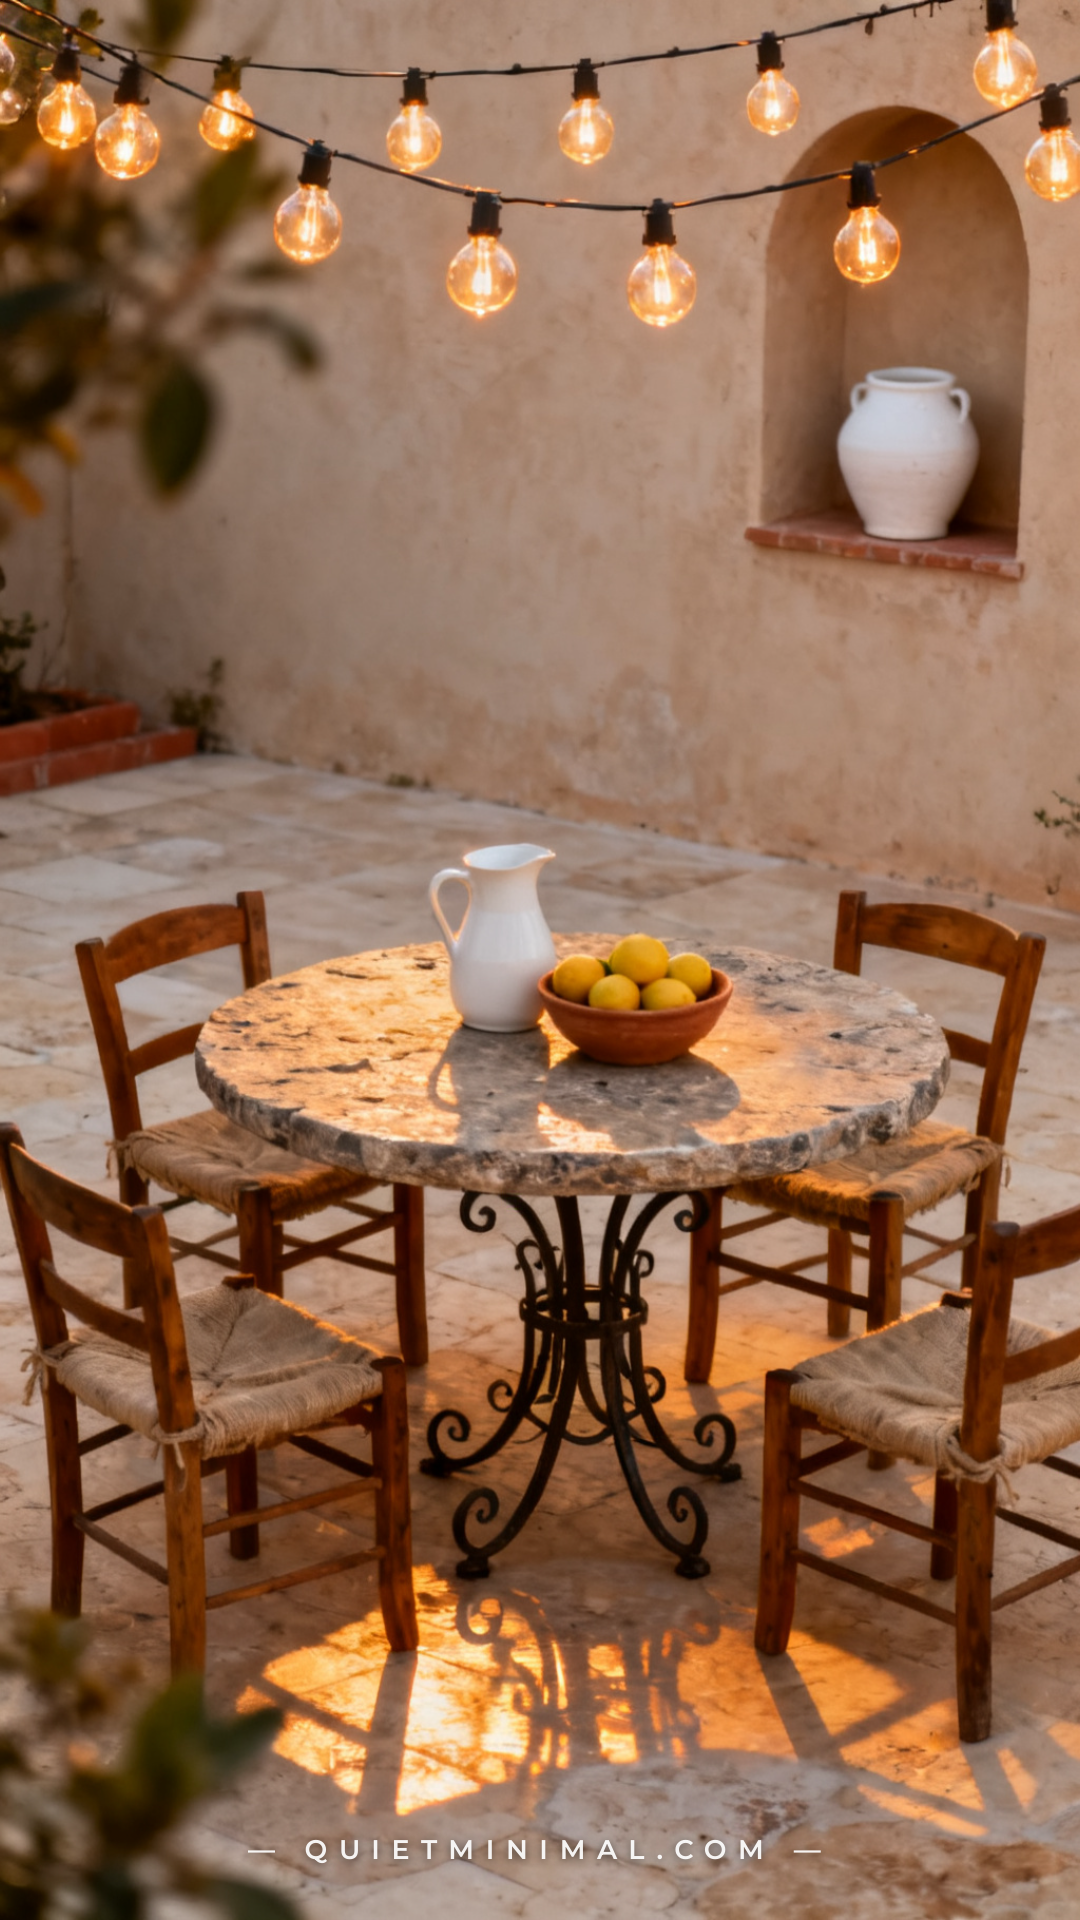
The furniture you place beneath your string lights either reinforces or undermines the Mediterranean courtyard mood. Plastic resin furniture, aluminum tube frames, and teak-colored synthetic wicker all signal “suburban patio,” regardless of how good the lighting is above. Mediterranean-feeling furniture uses stone, wrought iron, raw teak or eucalyptus, concrete, or rattan in heavy, substantial forms. A round stone-top bistro table with an iron base reads as a Roman café. A lightweight plastic folding table reads as a campsite. You do not need to replace all your furniture at once — prioritize the dining table surface, since it is the visual center of the lit space, and add natural material elements (a linen tablecloth, a raw clay centerpiece, a woven seat cushion) to transition what you have toward the aesthetic while you invest over time.
Key Takeaway: The table surface beneath your string lights does the most visual work — a stone, concrete, or solid wood top signals Mediterranean intentionality in a way that no patio furniture from a big box store aisle can.
String Lights Through an Overhead Pergola Grid
 Save
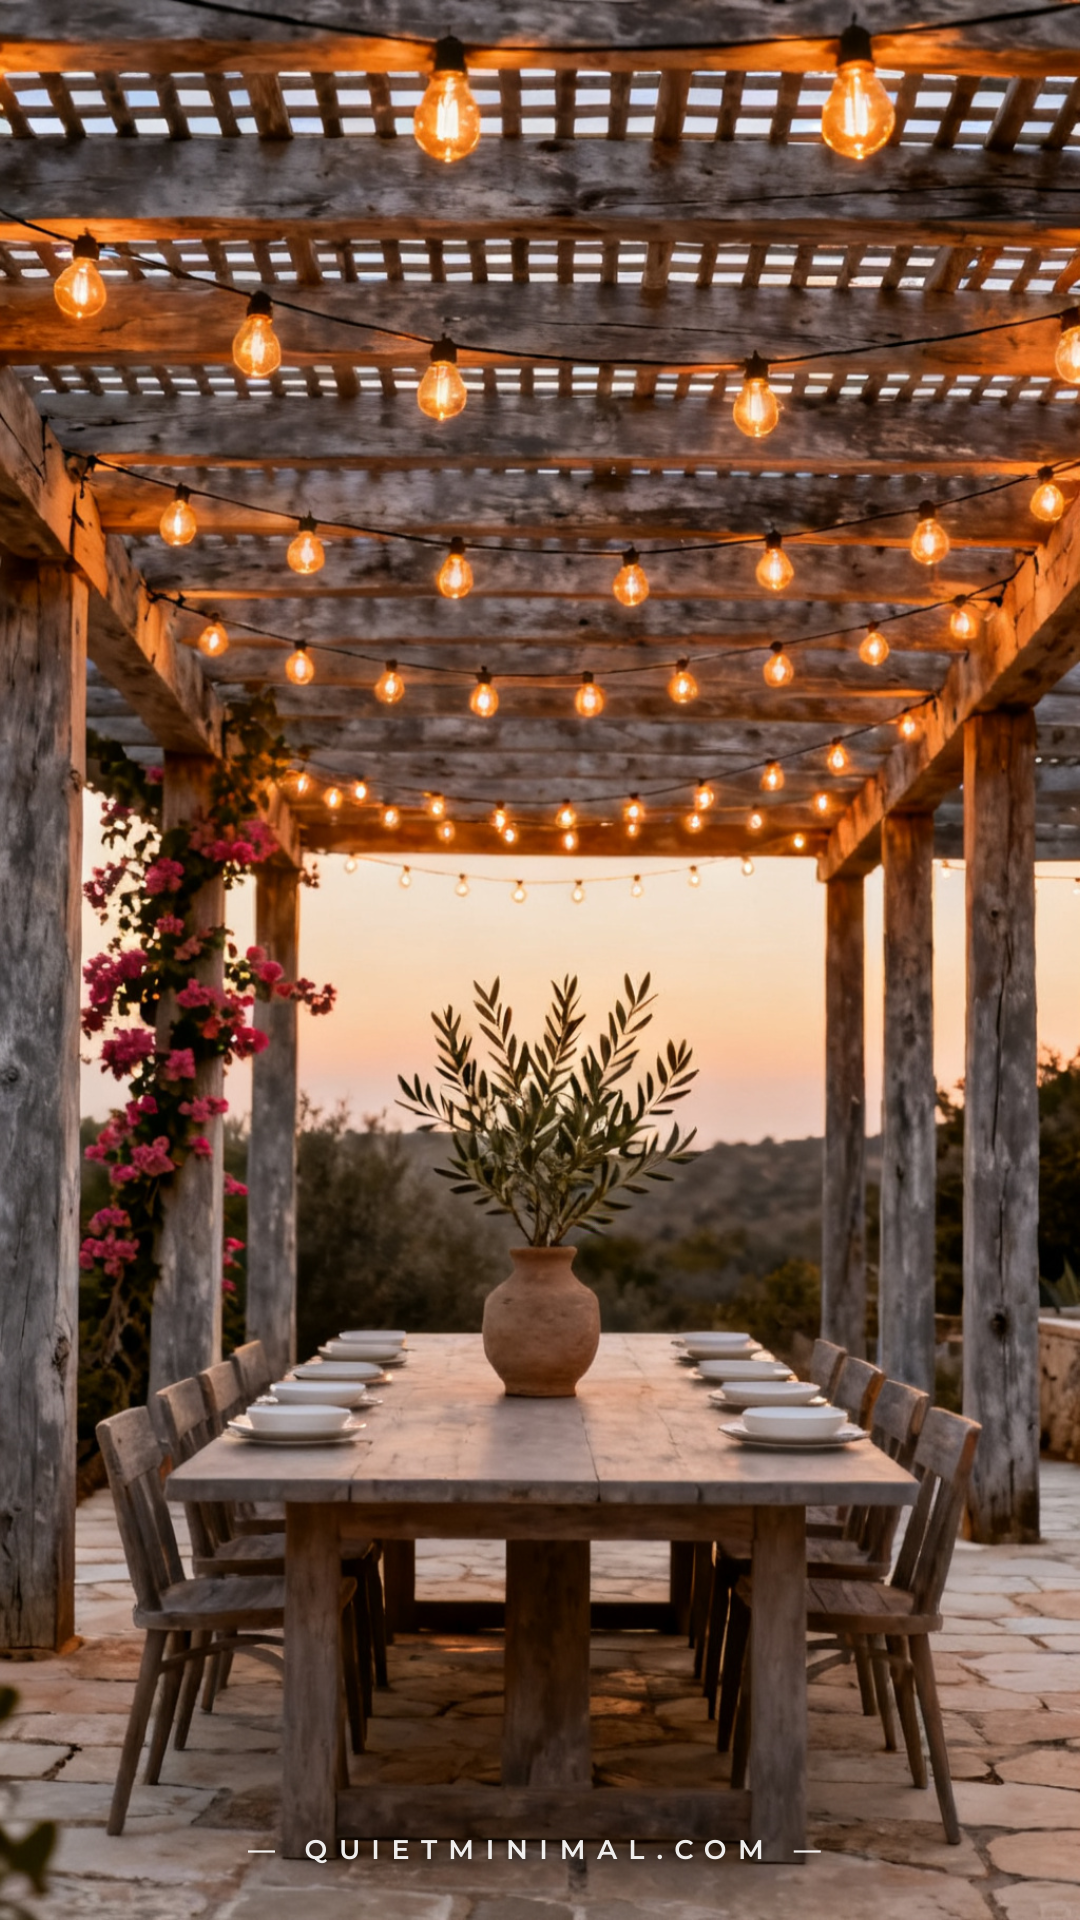
A pergola with string lights woven directly through the rafter grid in both directions creates the most enclosed, room-like overhead atmosphere of any installation method — and it naturally limits the sag of each strand, so the lights hang at a controlled, consistent height. Run your primary strands parallel to the short axis of the pergola at 18-inch spacing, then weave a second layer perpendicular for the crosshatch grid look. This doubles the ambient light output without requiring twice as many strands, since the two layers reinforce each other. If your pergola has a solid or lattice roof rather than open rafters, attach screw-in cup hooks to the underside of the roof structure at regular intervals and run strands between them — the hooks become invisible once the lights are on.
Key Takeaway: A woven crosshatch installation through pergola rafters creates the most immersive overhead canopy and naturally controls sag — it is the easiest way to make the overhead plane feel like a ceiling rather than a decoration.
Use Solar String Lights for Ambient Zones Away From Outlets
 Save
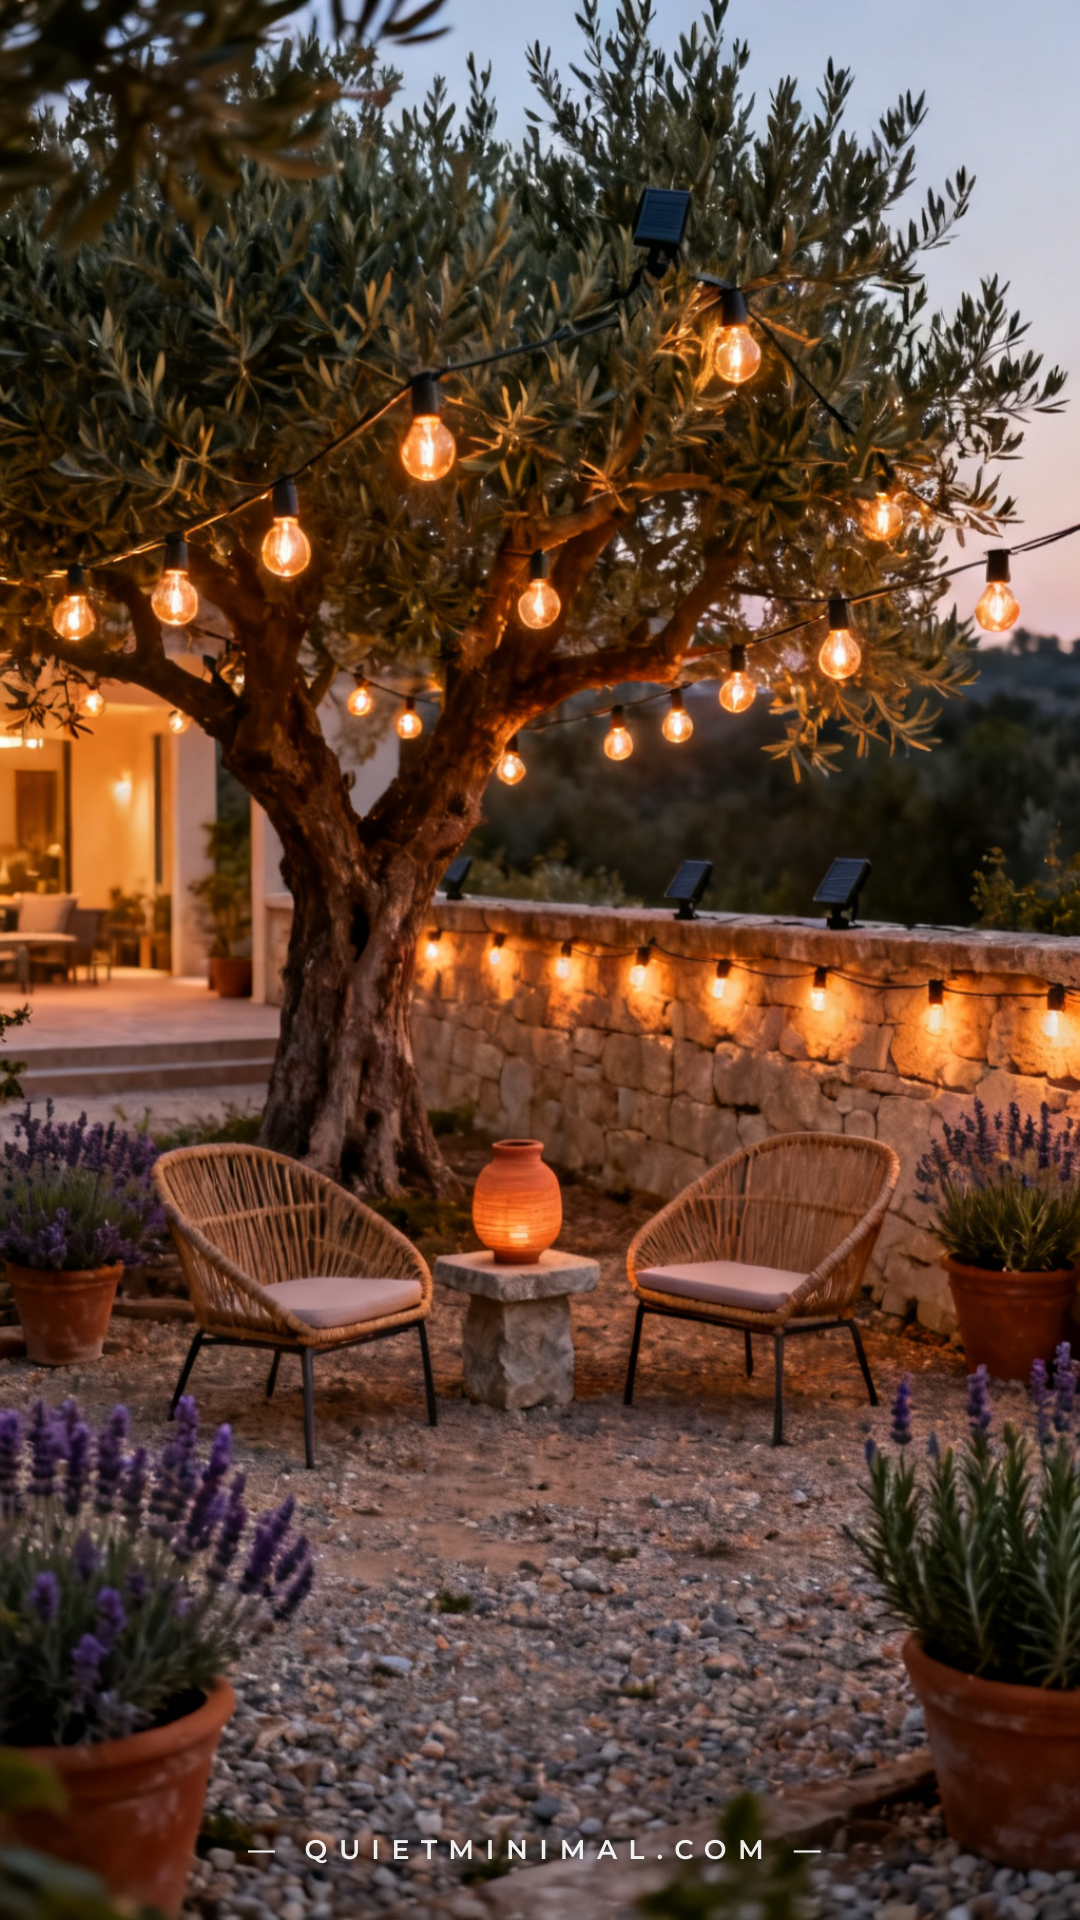
Not every Mediterranean courtyard lighting moment needs to be hardwired. Solar string lights with G40 or S14 globe-style bulbs have improved significantly — current-generation solar globes using warm 2,700K LED technology are visually indistinguishable from wired alternatives in evening photography and real-life ambiance. Use solar strings to extend the lit zone into garden areas, along boundary walls, through tree branches, or into pergola side panels where running a cord is impractical. The IKEA SOLVINDEN solar string is a reliable entry point; for higher output and longer burn time, Feit Electric and Brightown both make solar globe versions currently available through major retailers. Place the solar panel in the zone of highest daytime sun — often separate from the shaded courtyard area — and run the cord to the lighting zone.
Key Takeaway: Solar globe string lights in the 2,700K warm range let you extend Mediterranean lighting into garden zones and tree canopies without running cords — current-generation solar performs well enough that the ambient quality is nearly identical to wired.
End Every Evening With Lights Down and Candles Up
 Save
The most deliberate thing you can do with a Mediterranean-styled patio is have a closing ritual for the evening: string lights dimmed to their lowest setting or off entirely, candles lit on every surface at floor level and table level, and the patio transitioned from ambient dining atmosphere to quiet, still presence. This is how Mediterranean evenings actually operate — the big ambient light recedes and the intimate, flame-based light takes over. Keep a collection of pillar candles and tea lights in one weather-resistant outdoor storage basket near the patio, so the transition from dinner to evening takes thirty seconds. The discipline of having two modes — lit and active, then dim and candlelit — is what makes a patio feel designed rather than simply decorated.
Key Takeaway: Program a closing ritual into your evening — string lights dimmed or off, all floor and table candles lit — and your patio will consistently feel like a Mediterranean courtyard rather than a backyard with nice lights.
The string lights are not the hardest part of creating a Mediterranean courtyard patio — they never were. The hardest part is every decision around them: the surface they bounce off, the plants they filter through, the candles that sit below them, and the natural materials that surround them. Get those elements aligned and the lights do exactly what you want them to do. Start with one change — the bulb temperature, the drape pattern, or a single floor lantern beside a terracotta planter — and build from there. The mood accumulates with each layer. Add one element at a time, step back at dusk, and let the space tell you what it needs next.
From the guides
You've saved it, wanted it. Here's the how: codes, measurements, order. Your choices make it yours.
The Japandi Honest PlaybookThe honest version of the style: what to keep, what to skip, and the order to do it in.See inside →The Room Refresh PlaybookA repeatable four-step method, room by room, in ten minutes, thirty minutes, or one weekend.See inside →Make Any Room Feel Cozy on PurposeWhy some rooms hold people and others empty out, and the moves that change it.See inside → Save