Georgia
The standard advice about plants on stairs comes in a tidy list. Keep them on the floor, because a stair is no place for pots. If you want height, hang something from the ceiling. Do not mix plants with art, because the two compete. And whatever you do, never put a plant on a step. The rules sound sensible and they keep people safe, which is why they are repeated. They also leave a lot of stairwells with a single sad plant at the bottom.
Stairs are, in fact, one of the best places in a house for greenery. They are tall, they often have a window at the top, and the wall beside them is the longest uninterrupted surface you own. The reasons plants fail there are specific: the light is wrong, the pot is too heavy for its fixing, or the walking width has been taken. Plants on stairs styling ideas that work start from those three limits.
Each section below overturns one rule with the reasoning behind what holds up.
“Keep Plants on the Floor” Wastes the Railing
 Save
The first rule is to keep plants on the floor. On a stair, floor space is exactly what you do not have, and the rule leaves the railing, the best planting surface in the house, bare. A wrought-iron baluster railing is a trellis in waiting.
Ring-mounted planters clamp or hang from the balusters, and they hold plants at about waist height, where trailing pothos spills toward the treads without ever touching them. Choose planters sized for a 4 to 6 in (10 to 15 cm) nursery pot, and check the clamp against the baluster width, which is often about 5/8 to 1 in (16 to 25 mm). Keep them on the outside face of the railing, away from the walking line.
Weight matters. A 6 in (15 cm) pot of wet potting mix weighs roughly 3 to 5 lb (1.4 to 2.3 kg), and a row of eight adds up. Fix the planters to the balusters, not the handrail, and give each a saucer or a liner so water does not drip onto the treads. Water over a sink and let the pot drain before it goes back.
On the landing, a large fiddle-leaf fig in a green ceramic urn gives the arrangement its anchor. A fiddle-leaf fig wants bright, indirect light and does not like to be moved, so it belongs next to the landing window. Choose an urn about 16 to 20 in (41 to 51 cm) wide, heavy enough that a passing bag will not tip it, and keep it against the wall.
The natural sisal runner on the wood treads keeps the palette earthy. Soft gray paneled walls, an oak handrail and black iron balusters give the greens a calm frame.
One caution: pothos is commonly listed as toxic to cats and dogs. If animals use the stairs, choose pet-safe plants.
Think about the order of operations, because a railing planting is built from the bottom up. Start with the clamps, tighten each one until the planter cannot rotate on the baluster, and only then add the pot. Give the arrangement a week to settle, then press a hand gently against each planter. Any movement means the clamp needs a rubber shim, a thin strip of rubber or felt wrapped around the baluster where the clamp bites.
Spacing matters as much as hardware. Leave at least one empty baluster between planters on a straight run, so each plant has room to trail without tangling its neighbor, and keep the heaviest plants nearest the newel post, where the railing is strongest. Watch the handrail itself, too. The top rail is for hands, and a planter that crowds it will be knocked within a week.
Trim as you would a hedge, only gentler. Pothos grows several inches a month in good light, so snip any vine that reaches within 6 in (15 cm) of a tread, and root the cuttings in a glass of water on a kitchen windowsill to fill gaps later.
Key Takeaway: Put trailing plants on the railing in ring planters and the large plant by the landing window, and the floor stays clear.

“Hang Plants From the Ceiling” Ignores the Angled Wall
 Save
For height, the received answer is to hang plants from the ceiling. A stairwell ceiling is often high, sloped or unreachable, so that advice means a ladder every time you water. The better surface is the wall beside the stair, which already rises at the same angle as the steps.
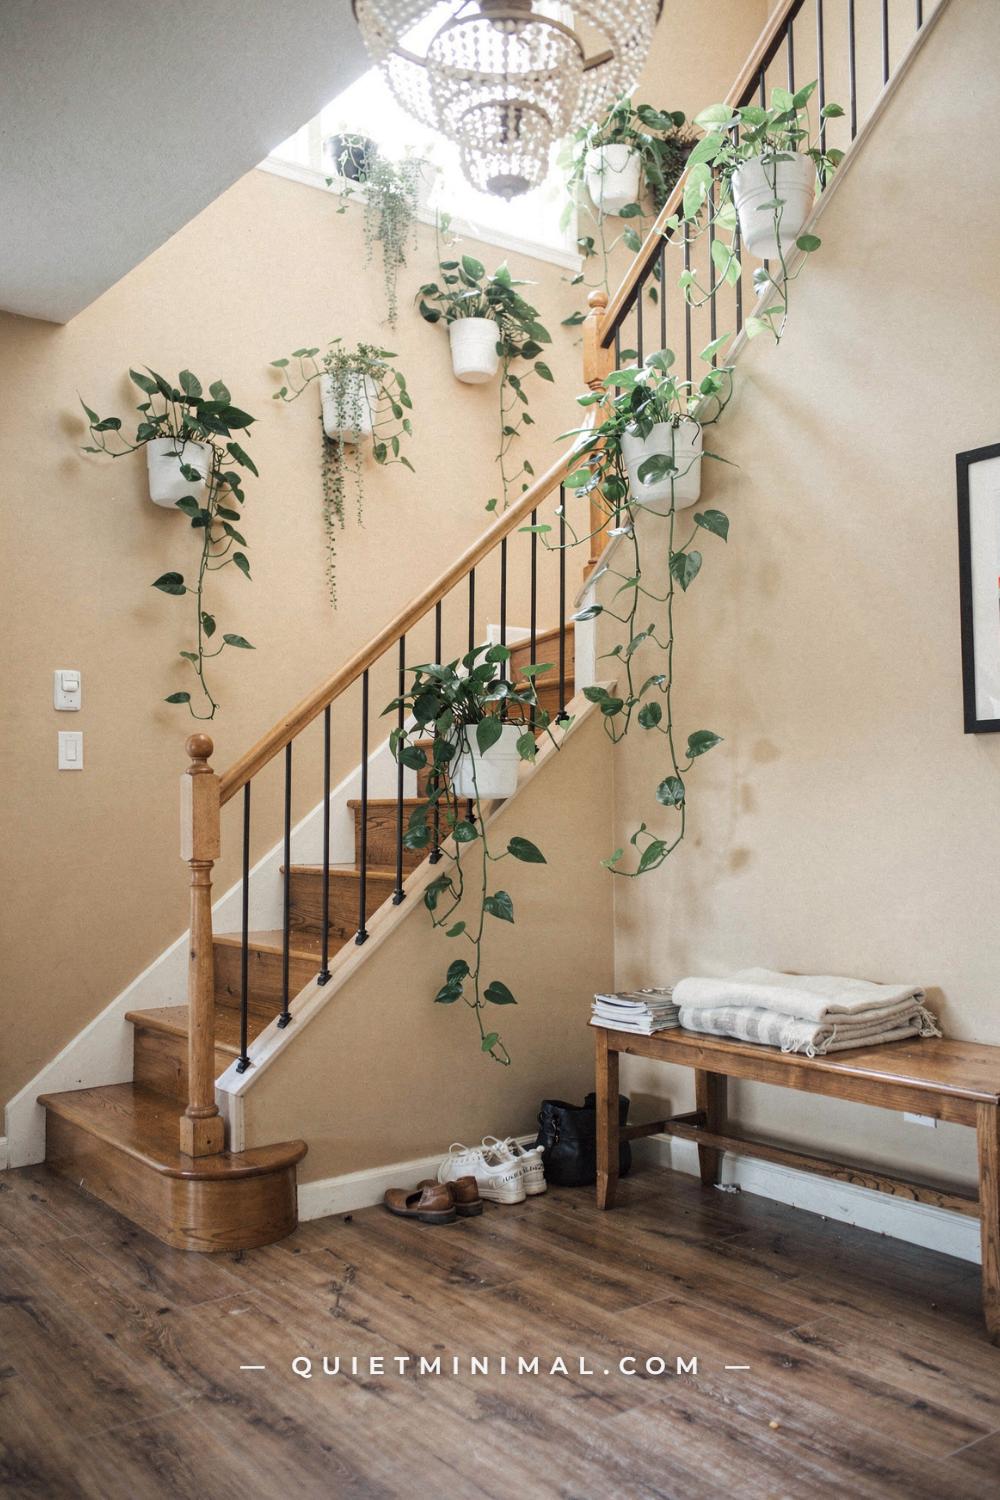
White wall-mounted pots along the angled wall let pothos and philodendron trail down in long lines. Space them 18 to 24 in (46 to 61 cm) apart measured along the stair line, and keep them above the shoulder, at 54 in (137 cm) or higher above the nosing line, so a passing arm never meets them. Wall pots project only 4 to 6 in (10 to 15 cm), well within the limits of a stair wall.
Mount them to studs, or use a rated anchor for the full weight of wet soil, about 5 lb (2.3 kg) per pot. Choose pots with a built-in saucer or a drip tray, and water from a small can with a long spout. A wet wall under a pot is the main failure of this idea, and a saucer prevents it.
The wall in this stair is warm beige, and the white pots stand out clearly against it. A wood handrail with black rods keeps the stair itself quiet, and a wood-look floor at the base grounds the scene. More plants hang at the landing, and a beaded chandelier overhead adds a warm point of light.
Choose plants with similar water needs. Pothos and philodendron both like their soil to dry slightly between waterings, so a single watering schedule works for the whole wall. Rotate the pots a quarter turn each month so the foliage grows evenly toward the light.
Before drilling, lay a strip of painter’s tape along the stair line at the height you want the pots, and walk up and down twice. Your eye will tell you immediately whether the line feels too high or too low, and tape costs nothing to move. Mark each pot position on the tape, then check the marks against studs with a stud finder. Where a stud does not fall under a mark, shift the pot along the line by an inch or two rather than relying on a plastic anchor in drywall.
Think about the water path as well. Every pot on a sloped wall drips at the lowest point of its rim, so choose pots whose saucer is part of the pot itself, and give the lowest pot on the run a slightly larger tray, since it will catch the spillover from the one above. A thin strip of clear wall protector under the lowest pot is cheap insurance for a painted surface.
If the wall is a deep color, white pots read crisply against it. If the wall is already white or pale, a matte black or a soft clay tone gives the same contrast without looking stark.
Key Takeaway: Mount wall pots along the angled wall above shoulder height instead of hanging from the ceiling, and group plants that share a watering rhythm.

“Plants and Art Compete” Is Answered by Alternation
 Save
The usual caution is that plants and art fight for attention, so a wall should have one or the other. On a tall stair wall, that choice leaves you with either a bare frame set or a green wall with no structure. A gallery that alternates the two does better than either.
Here large black-framed botanical line drawings march up the angled wall beside an oak staircase, with terracotta wall planters of trailing string-of-pearls, staghorn ferns and pothos mounted between the frames. The rhythm is frame, plant, frame, plant, and each plant sits beside a drawing that echoes its shape. The black frames give the wall structure and the plants give it life.
Keep the frames consistent in color and the planters consistent in material. Black frames and terracotta are a strong, simple pair against white walls. Space everything about 3 to 4 in (8 to 10 cm) apart, and set the center of the group about 57 in (145 cm) above the nosing line so it climbs with the stair.
The plants have to suit the light. Crisp daylight from the landing is bright enough for string-of-pearls, which wants strong light, and staghorn ferns, which like bright, indirect light and humidity. Pothos is the forgiving filler between them. If the stair is dim, swap the string-of-pearls for a second pothos or a faux trailing plant.
A glass balustrade with a black handrail keeps the stair open so the light reaches the plants. Mount staghorn ferns on a wooden plaque with a hook, and keep watering to a light soak every week or two.
Plan the alternation on paper before you hang anything. Cut brown paper into the size of each frame and each planter, tape the shapes to the wall, and step back to the foot of the stairs. From there, check that no two frames or two planters sit side by side, and that the line of the group follows the stair, not the floor. Adjust the paper until the rhythm looks effortless, then trace each hole position onto the wall.
Planters that hold soil add weight to a wall that frames never do, so give them the stronger fixings and let the frames take the lighter ones. A frame with glass is happiest on a pair of picture hooks rated for twice its weight, while a terracotta pot with wet soil wants a screw into a stud.
Choose art that rests the eye. Large simple compositions in one or two tones next to a mass of leaves feel calm, while many small busy pieces beside the plants feel noisy. If the stair gets very little light, replace living plants on the darkest third of the wall with a faux trailing vine and keep the live ones where the daylight lands.
Key Takeaway: Alternate framed art and wall planters up the stair, keep one frame color and one planter material, and match each plant to the light it will get.

“Never Put a Plant on a Step” Has One Safe Exception
 Save
The strictest rule is to keep treads clear, and for a busy main stair it is right. But on a wide stair with a quiet side, a stepped arrangement of potted plants in the corner of each tread can be a safe, striking feature, as it is in this calm stairwell. A zz plant in a white urn, a schefflera in terracotta, a calathea and smaller trailing plants in mixed ceramic pots step down the corner of each tread.
The limits are exact. Keep at least 36 in (91 cm) of clear walking width, so the pots live only in the outer 6 to 8 in (15 to 20 cm) of the tread. Choose heavy, wide-based pots that will not tip, and use a plant that does not trail over the edge. If the stair is narrow, or children or pets use it, skip the treads and move the same plants to a wall shelf.
The plants themselves are a smart mix for a light stair. A zz plant tolerates low light and irregular watering, a schefflera likes bright, indirect light, and a calathea wants steady moisture and indirect light. Keep the thirstier calathea nearest the window and the zz plant farthest from it.
Above, a gold-framed mirror with brass details on the wall reflects the soft daylight and makes the stair brighter. Hang it about 57 in (145 cm) above the nosing line, anchored to studs.
Light oak treads, cream walls and a glazed ceramic palette keep the display quiet. Water the pots over a sink and use a saucer, since a wet tread is a slipping risk.
Consider the alternatives before committing to treads. A narrow stair, or a stair used heavily by children, is better served by a plant ledge fixed to the wall, which gives the same stepped look with none of the risk. A shelf 4 to 5 in (10 to 13 cm) deep, mounted into studs, holds three or four small pots comfortably and stays out of the walking line.
If you do use treads, choose the sides that stay out of the traffic: the wall side of a straight stair, or the outer edge of a winder where the tread is widest. Keep pots to every second or third step, not all of them, because a rhythm of plant, gap, plant is easier to walk past than a solid row. Put the tallest plant on the lowest step, so the eye climbs as the leaves get smaller.
Never place a plant on a tread of a stair that is lit only by an overhead bulb at night, and keep a night light at the foot. Anything that can be stepped on in the dark will eventually be stepped on.
Key Takeaway: Plants on treads are safe only at the outer edge of a wide, low-traffic stair with 36 inches clear, in heavy pots that cannot tip.

“Keep the Display Small” Underestimates What a Shelf Wall Can Hold
 Save
A small display is the cautious recommendation for a stair. A wall of plant-filled shelves is more generous, and it can work in a stairwell when the shelves are shallow and well lit. This cottage stair has dark wood shelves of plants climbing the wall beside the stairs, with potted ferns, pothos and spider plants in ceramic and metal pots, trailing vines spilling downward, warm glass sconces and fairy lights glowing, and a framed botanical print above.
Light is what makes it work. A stairwell shelf wall gets very little daylight, so warm glass sconces and fairy lights are doing real work. For plants, pair the sconces with full-spectrum LED bulbs, and run the fairy lights on a timer for 8 to 10 hours a day. Put the shelves within 3 ft (91 cm) of a light source.
Choose the species for the conditions. Spider plants and pothos are tolerant and quick to recover from a missed watering. Ferns want more humidity and steady moisture, so group them together at the lower end of the wall, where a shallow tray of pebbles and water can sit under them. Keep the shelves 5 to 6 in (13 to 15 cm) deep and no more than 4 in (10 cm) off the wall at shoulder height if the shelf is near the walking line.
A patterned vintage runner on dark wood treads and warm cream walls keep the palette soft, and the dark wood shelves give the greens strong contrast. Leave a third of each shelf empty so the vines have room to trail.
Trim the trailing vines to about 12 in (30 cm) so none reach the treads, and wipe the shelves monthly. Ceramic and metal pots in mixed finishes work if the glazes stay in one family.
Plan the shelf run from the top down. Put the lightest, most trailing plants on the highest shelf, where the vines have a long fall, and the heaviest pots on the lowest shelf, where a shelf bracket carries less leverage. Keep a small notebook, or a note on your phone, of which plant sits on which shelf and when it was last watered, because a wall of twelve pots is easy to neglect at the far end.
Wipe the shelves as you water, since potting mix and leaf debris collect fast in a narrow stairwell and look worse than a bare wall. A small handheld vacuum or a soft brush clears them in under five minutes. If any shelf shows a water ring, move the pot to a deeper saucer and the problem ends there.
The cottage look depends on abundance, but abundance on a stair is a matter of layers, not of crowding. Keep the front 3 in (8 cm) of every shelf free of pots, so the shelves read as shelves and the vines have a clean edge to trail over.
Key Takeaway: A plant shelf wall succeeds in a stairwell when each shelf is within 3 feet of a warm, full-spectrum light and the species share the same care.

“Real Plants Are Always Better Than Faux” Forgets the Dark Stairwell
 Save
The honest rule of thumb is that real plants beat faux ones, and in a bright room it holds. But a stairwell is often the darkest corner of a house, and a living plant in the wrong light does not look better than a good faux one. It looks leggy, drops leaves and leans toward whatever bulb is nearest. A plant that is dying slowly in plain view is the least stylish thing on a staircase.
Faux works when it is chosen like a real purchase. Look for stems with varied leaf sizes, a matte rather than glossy finish, and slightly uneven color from stem to stem. Buy the biggest you can afford, because a small faux plant reads as a prop and a large one reads as a tree. Anchor it in a heavy pot with a layer of stones or sand in the base so it feels as weighty as a real one.
A faux plant needs care too, though far less. Dust collects on leaves in a stairwell, so rinse stems in the tub or wipe them with a damp cloth a few times a year. Fluff the foliage by hand after cleaning, bending a few stems out of line so nothing looks pressed.
The best answer in a dim stair is a mix. Put faux plants in the darkest stretches, such as the middle of a long wall or the underside of a landing, and keep living plants near the window, where they can earn their place. A visitor will not guess the split, and you will not be watering anything on a ladder.
Garlands are a clever use of faux greenery on a stair. A faux eucalyptus or ivy garland draped along a black iron handrail adds a living line to the whole climb. Secure it with soft wire or removable cable clips every 12 to 16 in (30 to 41 cm) so it stays above the walking line, and tuck the ends behind a baluster so they do not hang loose.
Finally, light the plant, real or faux. A small wall sconce beside it, in a warm bulb of about 2700K, makes the foliage glow at dusk. A plant with its own light reads as a feature, and the stairwell stops looking like a place where a plant was left.
Key Takeaway: Use faux plants in the darkest stretches of a stair, real plants near the window, and light all of them with a warm bulb.

“Terracotta Is Only for Gardens” Overlooks Its Quiet Advantage Indoors
 Save
Terracotta is thought of as a garden material, a pot you leave on a patio, and the received wisdom is that it looks wrong in a house. In a stairwell it is one of the most forgiving choices you can make. Unglazed clay is porous, so it breathes, and it dries the soil from the sides as well as the top. That means a wet root is less likely, which suits anyone who forgets a watering and anyone who tends to overwater.
The porosity has a cost, which is that it sweats. A terracotta pot sitting on a bare stair tread or painted sill will leave a ring of moisture and sometimes a pale mineral mark. Always set it in a saucer, and use a cork or felt mat under the saucer to protect wood. If the pot has a drainage hole, which most do, never skip the saucer.
Terracotta suits plants that like a dry spell. Jade plants, snake plants, aloes, and string of hearts are all comfortable in clay, and a sunny landing window is exactly the light they enjoy. A herb such as rosemary can sit there too, though it wants a very bright sill and will sulk in a dim stair, so move it if it looks thin.
The graduated sizes in this scene matter as much as the plants. A row of five pots in steps from 3 in (8 cm) to 8 in (20 cm) reads as a collection, while five pots of the same size reads as a nursery. Keep the saucers matching, and let the plants differ in shape, one upright, one trailing, one rosette, one tall and spiky.
Terracotta ages beautifully, and that is the second advantage. A white mineral bloom or a green patina of algae on the clay is not a flaw to fix but a sign of life. If you want it clean, scrub it with a stiff brush and warm water. If you want it aged, leave it alone and the pots will look better in a year than they did on the day you bought them.
One practical caution: clay is heavier than plastic and chips if knocked. On a stair, choose pots with a wide base, set them back from the edge of the sill, and keep them away from the walking line.
Group by thirst when you arrange the row. Put the jade plant and the aloe, which store water in their leaves, at one end, and the thirstier herb at the other, so you can water one side of the sill more often than the other. Check the soil with a finger or a wooden skewer, and water deeply when it is dry, letting the saucer empty after ten minutes so the roots never sit in a puddle.
Key Takeaway: Use unglazed terracotta for dry-loving plants on a bright sill, with a saucer and a cork mat under each pot.

“Stairs Are Too Dark for Plants” Is Answered by a Light Reading
 Save
Dark is a feeling, not a measurement, and many stairwells that feel dark have more light than the plants need. Before you give up, take an honest reading. Stand where you want the plant at midday on a bright day and hold your hand about 12 in (30 cm) above the spot. A sharp, clear shadow with defined edges means bright light. A soft, blurred shadow means medium light. A shadow that barely shows means low light.
Match the plant to the reading. Bright light under a landing window suits a bird of paradise, a fiddle-leaf fig or a rubber plant. Medium light suits pothos, philodendron and spider plants. Low light suits a snake plant, a zz plant and a cast iron plant, which tolerate shade better than most. No plant, though, grows in true darkness, so a stair with no window and no light at all needs a grow bulb or faux plants.
This is where a grow light earns its keep. A full-spectrum LED bulb in a regular fixture is inexpensive, works in a sconce or a clip lamp, and turns a dim corner into a viable growing spot. Aim for 8 to 12 hours a day on a plug-in timer, with the bulb within about 2 to 3 ft (61 to 91 cm) of the foliage.
Remember that light changes with the seasons. A landing window that pours sun in July may offer a pale smear in January, so move the plants closer to the glass in winter and back in summer. A plant that loses lower leaves in winter is usually telling you it wants more light, not more water.
Rotate each plant a quarter turn when you water, because stair light comes from one direction and a plant that is never turned grows into a lopsided shape. Wipe dusty leaves with a damp cloth every month, since dust blocks light as surely as a curtain does.
A simple three-zone plan keeps this tidy. Put thirsty, bright-light plants under the window, tough medium-light plants in the middle, and the toughest at the foot. Group them by need, and each zone can share a watering day.
Write the reading on a small tag in each pot, with a simple word such as bright, medium or low, so anyone who waters the stair knows where each plant belongs. When you replace a plant, the tag tells you what to buy. Re-check the readings when the seasons change, or whenever you repaint, since a pale wall reflects far more light than a dark one and can lift a dim stair by a full step.
Key Takeaway: Read the light with your hand shadow at midday, match each plant to its zone, and add a timed grow bulb where daylight runs out.

“A Stair Plant Should Be Small” Misses the Big Plant at the Newel
 Save
Small is the cautious instinct, because a stair is a narrow place. But the base of a staircase is one of the few spots in a house with both floor space and height, and a single large plant there can do the work of ten small ones. A rubber plant, a fiddle-leaf fig, a large dracaena or a tall olive tree beside the newel post gives the whole climb a strong beginning.
Scale is the reason it works. A plant 4 to 6 ft (122 to 183 cm) tall at the foot of the stair echoes the height of the wall above it, so the room feels proportional. A cluster of small pots at the same spot looks like clutter and carries none of that vertical pull.
The placement rules are straightforward. Keep the pot against the wall or tucked beside the newel, not in the path, with at least 36 in (91 cm) of clear passage. Choose a pot with a wide, heavy base, and set it on a low plinth or a plant caddy so the leaves reach above hand height. A caddy with locking wheels makes it possible to rotate or move a plant that otherwise weighs 40 lb (18 kg).
Light still decides which plant lives there. A foot-of-the-stairs plant usually gets side light from a hall window or from the front door, so pick a species that tolerates a single direction of light and rotate it each week. A rubber plant and a dracaena handle this well. A fiddle-leaf fig is fussier and wants a bright, steady spot, so give it one only if you have it.
Pair the plant with a light. A pendant, a wall sconce or a floor lamp behind the plant draws the eye to it at dusk and keeps the leaves from disappearing into the shadow of the stair.
Finally, pay attention to the pot. Pale concrete, matte stoneware or a deep glazed ceramic will each give a large plant a quiet, grounded look. Glossy plastic nursery pots, even inside a basket, undermine the effect. Slide the nursery pot into a cache pot with a saucer, and the large plant will look as if it was always meant to stand there.
Give a new tall plant two weeks to settle before judging it. Plants moved from a bright nursery to a hall often drop a few leaves, and that is normal. Keep the watering steady, avoid repotting for the first month, and resist moving it around, because each change costs the plant a little more.
Key Takeaway: One tall plant on a plinth beside the newel, lit from above, beats a cluster of small pots, as long as 36 inches of walking width stays clear.

“The Space Under the Stairs Is for Storage” Has a Greener Option
 Save
The space beneath a staircase is usually claimed by coats, vacuum cleaners and boxes, and it is true that storage is a perfectly good use for it. But a triangular niche under a flight of stairs is also one of the better planting spots in a house, because it is sheltered, out of the traffic, and easy to light.
Begin with the structure. An open niche under a straight flight has a sloped ceiling, so the shelves sit at different heights, and the lowest one holds the tallest plant. Build or buy a slim shelf unit 8 to 10 in (20 to 25 cm) deep, and size the shelf spacing so the plants have at least 8 in (20 cm) of headroom each. Anchor the unit to a wall stud, since a shelf of wet pots is much heavier than it looks.
Lighting is the secret. A niche under a stair has no daylight at all, so each shelf needs its own light. A warm LED strip fixed under the front edge of each shelf lights the plants below and gives the niche a gentle glow. Choose strips labeled full spectrum or with a color temperature around 3000 to 4000K, and run them on a timer.
You've saved it, wanted it. Here's the how: codes, measurements, order. Your choices make it yours.



Humidity-loving plants, such as ferns and prayer plants, thrive here because the air under a stair stays still and a little damp. A pebble tray under each pot raises the moisture further. A fern that was crisp on a sunny sill will often recover in a closed, lit niche in a few weeks.
Check what the structure above is made of before building. Many codes ask for fire-rated drywall on the underside of an enclosed stair, and a plant shelf should never press against it in a way that hides damage or damp. Keep wiring tidy and use low-voltage strips with a plug-in power adapter.
Finish with a small stool or a hook for the watering can, so the tool lives where the work happens. A brushed zinc can looks as good as any object on the shelves, and it makes watering a ten-second habit.
Keep a small hygrometer, a cheap humidity gauge, on the bottom shelf. A reading of 40 to 60 percent suits most of the plants here, and a niche that drops below it in winter will want a pebble tray or a small humidifier outside the niche. If the reading rises above 70 percent for long, open the front of the niche to the hall and let the air move.
Key Takeaway: Turn an open stair niche into a lit plant shelf with slim, stud-anchored shelving and a warm LED strip under each shelf edge.
“Pots Must Match” Is Not How Collected Plant Walls Are Built
 Save
Matching pots give a tidy result and a lifeless one. The designer’s trick is not to match, but to relate. A collected plant wall looks effortless when its pots share two or three qualities and differ in the rest.
Choose your shared qualities first. They can be a finish, such as matte; a tone, such as warm neutral; or a form, such as a simple cylinder or bowl. In this scene every pot is matte and warm-toned, so cream stoneware, sage glaze, seagrass and unglazed clay can sit side by side without a clash. The one matte black cylinder acts as a punctuation mark that keeps the whole row from drifting into softness.
Keep the sizes varied but in a range. Pots from 4 to 10 in (10 to 25 cm) across read as a family. Anything wider will dominate a shelf, and anything smaller will vanish. Arrange them as you would a set of dishes, with the largest toward the stair foot and the smaller ones up the wall, so the display eases upward.
Repeat things. Two cream pots at different points, two baskets, two black pieces. Repetition is what makes a mixed set look decided. A single odd pot is a mistake, and a pair is a choice.
Plant choice completes the pairing. Put a trailing plant in a tall pot, an upright plant in a wide bowl, and a rosette in a low pot, so shapes alternate. If you want a calm look, stay inside two shades of green. If you want variety, add one plant with variegated or purple-toned leaves, and let it show up once or twice.
Practical details keep the display easy to live with. Place a saucer under every pot with a drainage hole, and a plastic liner inside every basket, so water never reaches the shelf. A basket without a liner will rot within a season. Slip nursery pots in and out of the decorative containers when you water, and the pots stay clean for years.
Key Takeaway: Pick two shared qualities, such as matte finish and warm tone, vary the sizes within a range, and repeat each piece so the mix looks chosen.

“Watering Stair Plants Is a Chore” Until You Build the Routine Into the Climb
 Save
Everyone who has tried to keep plants alive on a staircase knows the real problem is not the plant, it is the walk. A pot on the fourth step of a stairwell with a long drop below is a pot nobody wants to water, and a neglected plant is a dead plant.
The fix is a system that makes watering shorter. Start by moving the work to the sink. Lift each pot out of its decorative container once a week, water it there until it drains from the bottom, let it stop dripping, and put it back. It takes about 10 seconds per plant and keeps the stair dry. Plants in wall pots with built-in trays suit this method well because they lift out with one hand.
Self-watering planters are the second fix. A reservoir at the base feeds the roots through a wick or a porous layer, so a plant can go two to three weeks without help. They are especially useful for thirsty plants like pothos, ferns and calatheas in bright landings. Fill the reservoir with a small watering can that has a long spout, and check the gauge each time you pass.
Use a moisture meter if you are unsure. A cheap probe tells you in seconds whether the soil is dry at root depth, and it ends the guessing that kills more plants than any other habit. As a rule, most common houseplants want the top inch or two (3 to 5 cm) of soil to dry between waterings, but check the specific plant before relying on a rule.
Build the routine into the climb. Pick a day, such as Sunday morning, and walk the stair from the bottom to the top with the can in hand. Water by zone, bright plants first, and finish with the toughest ones at the foot. Keep a cloth on the stool for drips, and glance at every leaf as you go, because pests and brown tips show up first on a close look.
Think about where the water goes when something spills. Keep the landing floor protected with a washable mat or a tray, and never water a plant over a carpeted stair. A drip on a runner can stain, and a drip on a bare wood tread can leave a ring.
Key Takeaway: Water at the sink, use self-watering pots for thirsty plants, and tie the job to one weekly walk up the stair.

“A Window Sill Is Too Narrow to Style” Ignores the Deep Stair Window
 Save
Landing windows are the best light in a stairwell, and the usual advice is to leave them alone. A narrow sill, the thinking goes, is too shallow for anything but a candle. That is true only when the sill is a few inches deep, and a surprising number of stair windows are set into a thick wall with a deep reveal.
Measure the sill before dismissing it. A depth of 5 in (13 cm) holds a row of small pots comfortably. A depth of 8 in (20 cm) or more holds a full group. If the sill is too shallow, a wood board cut to the reveal width and set on the sill extends it by a few inches, and a coat of paint or a clear finish makes it look original.
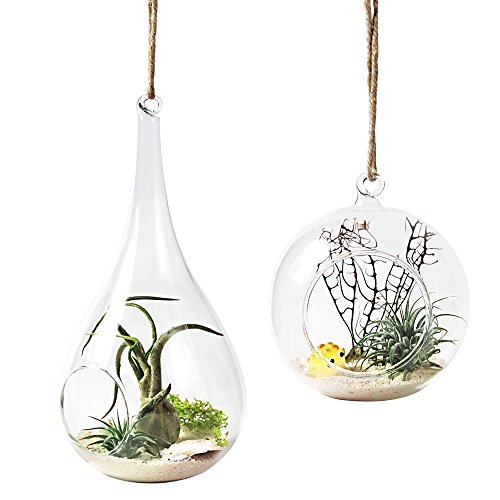
Group the plants in odd numbers, three or five. A shallow bowl of echeveria, a hanging globe holding string of pearls, a small cactus and a single stem in a ceramic bud vase make a layered, interesting display with varied heights. Hang the globe from a small hook in the window frame, not the ceiling, and keep it out of the walking line.
Strong light favors succulents, which is why this scene suits them. A south or west window can be intense in summer, so move the most delicate pieces back a few inches in the hottest months, and watch for pale or scorched leaves. In winter, bring them forward again. A cold window can chill roots, so keep the pots off the glass.
A sill display must be stable. Anything that can be knocked off by a curtain or a sleeve will eventually be. Use heavy pots, keep the pieces set back, and place a sticky putty dot under the lightest ones. Glass globes should hang from a hook rated well above their weight and sit clear of the stair rail.
A final point about sightlines. The sill is at eye level on the landing and below it on the stair, so the display reads from below as a silhouette against the glass. Pick plants with clear shapes, such as spiky, round or trailing, and avoid a jumble of leafy shapes that blur into one mass.
Key Takeaway: Measure the sill, extend it with a painted board if it is shallow, and group three to five plants in strong light with clear silhouettes.
“Dried Stems Are Not Real Decor” Forgets How Well They Cope With Shade
 Save
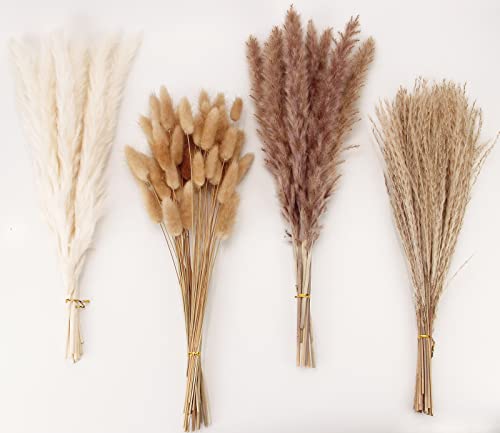
A cutting of dried grass or a bundle of branches is often dismissed as a stand-in for real greenery. On a dark staircase it is something better, a plant that needs neither light nor water and still brings the outdoors in.
Dried and preserved stems suit a stairwell for three reasons. They tolerate shade, because there is nothing left to photosynthesize. They are light, so a tall vase of stems adds no real load. And they keep their shape for months, which gives a landing or a stair foot a steady, quiet presence in a season when living plants struggle.
Choose a vase that suits the height. A floor vase 24 to 36 in (61 to 91 cm) tall, filled with stems about twice that height, gives a graceful line. Fill the base of the vase with a layer of pebbles or sand to keep it from tipping, since tall stems have a high center of gravity and a stair is no place for a falling vase.
Pampas grass, dried reeds, bleached ruscus, wheat stems and bare branches all suit this look. Keep the palette within one family, such as ivory, straw and pale gray, and use one type of stem per vase for a restrained effect. Mixing too many dried flowers reads as a craft project.
Handle dried stems with some care. They shed, so brush them gently once a month with a soft dry brush, and shake the plumes outdoors if they are dusty. Keep them away from lamps, candles and heating vents, since dried materials are flammable and a warm bulb too close to the plumes is a bad idea. Replace them every 6 to 12 months when they begin to fade or collect dust.
A woven wall basket above the console echoes the texture and keeps the corner coherent. Set a trailing faux vine inside it, or leave it empty as a piece of wall sculpture.
Key Takeaway: Use a tall, weighted vase of dried grasses or branches where daylight fails, keep stems away from heat, and replace them yearly.
“Pets and Plants Don’t Mix on Stairs” Is Solved by the Right Shopping List
 Save
Many people with cats or dogs give up on plants altogether, because a long list of popular houseplants are mildly or seriously toxic to animals. The rule is understandable, but it overlooks how many beautiful plants are considered safe.
Always verify before you buy. The ASPCA publishes a searchable list of plants that are toxic or non-toxic to dogs, cats and horses, and the entries are worth checking for each species on your list. Do not rely on memory, including the examples here, because common names overlap and two plants with the same nickname can be unrelated.
With that caution, several plants are widely listed as non-toxic to cats and dogs. Boston ferns, parlor palms, spider plants, many calatheas and prayer plants, and some peperomias are commonly cited as pet-safe choices. Each of them also suits a stairwell, since they enjoy medium light and a steady, even moisture.
Placement matters as much as species. Even a safe plant can cause an upset stomach if a cat treats it as a snack. Put trailing plants out of a cat’s reach, on a wall bracket above shoulder height, and put heavy pots on the floor where a dog cannot knock them. A dog on a stair moves fast, so keep tall, top-heavy plants out of the stair path.
Soil is another quiet hazard. Fertilizer pellets, moss and bark chips can tempt a curious pet, so choose a plain potting mix, top it with a layer of smooth stones, and skip pellets. Keep any plant food on a high shelf.
If you already own toxic plants such as pothos or philodendron, you do not have to throw them out. Move them to a room that pets cannot enter, or hang them out of reach in a spot where a pet cannot jump. Replace them gradually with safe species as they age.
Finally, give animals their own corner. A rattan dog bed or a cat perch on the landing is a bright, safe alternative to a pot, and a pet with its own place is less likely to bother yours.
Key Takeaway: Check every plant against the ASPCA list, choose pet-safe species, and keep trailing plants out of reach on wall brackets.

“The Stair Foot Is Just Where Shoes Go” Wastes the Best Planting Spot
 Save
The foot of a staircase is a working place. Shoes pile up, bags drop and a coat hangs from the newel. That is why it feels like leftover space, and why a decorative plant seems out of place there. But the stair foot is also the first part of the stair that anyone sees, and a small, well-planned vignette changes the way the whole climb feels.
The foundation is a narrow console. A table 10 to 12 in (25 to 30 cm) deep and 30 to 34 in (76 to 86 cm) high fits against the stair wall without blocking the walkway. A lamp on the console gives light in the evening, a bowl of trailing ivy or philodendron adds a living line, and an open tray holds keys. Everything on it is chosen, and nothing is parked.
A tall plant beside the newel balances the console. A fiddle-leaf fig or rubber plant in a woven basket sits at the same height as the console lamp and gives the corner a vertical anchor. If the hall gets little light, replace it with a faux plant or a hardy snake plant.
Add a place for shoes. A slim bench with a shelf below holds the family’s shoes behind the plant, and a basket beside it holds the wool throws. A neat arrangement tells the household that the place has a use, and the shoes stay where the shoe place is.
Keep the floor clear. A jute runner or a low-pile rug protects the wood and gives a place to stand, but it should lie flat, with a non-slip pad under it. A rug on a hall floor next to a stair is a trip hazard if it curls, so pick a style that does not.
Look at the vignette from the front door. The first impression of a house is the sight line from the entrance, and a tidy console, a lamp and a plant make the hall look planned. The stair itself then reads as an invitation, not an obstacle.
Key Takeaway: Treat the stair foot as a vignette, with a slim console, a lamp, a tall plant and a place for shoes, and keep the floor clear.

“Once It Is Planted, It Is Done” Skips What Seasons Do to a Stair
 Save
The last piece of received wisdom is that a stair planting, once done, can be left alone. In practice, a stairwell is a living room, and it changes with the light, the heat and the growth of every plant in it.
Spring is the season for a stair check. As days lengthen, plants wake and start to grow, so this is the time to repot anything that is root-bound, trim long vines and move plants a little further from the window as the sun strengthens. Choose a pot only 1 to 2 in (3 to 5 cm) wider than the old one, since a much larger pot holds wet soil that can rot the roots.
Summer is for watching. Hot afternoon sun through a landing window can scorch leaves, so draw a sheer curtain or move plants back a few inches. Watering usually increases in warm weather, so check the soil more often, and rotate each plant weekly.
Fall is the time to bring the display back. As light fades, move plants closer to the window and add a grow bulb to the dim parts. Feed lightly in early fall and stop in late fall, because most plants slow down. Clean the leaves so they take in whatever light is left.
Winter is for restraint. Most houseplants want less water in winter, and cold drafts and dry heat both stress them. Keep plants away from heating vents and the front door, and water only when the soil is dry a little deeper than usual. A humidifier in the hall helps ferns and calatheas, and a pebble tray helps everything else.
Use the seasons as a chance to restyle. Swap a pot for one in a seasonal color, add a bowl of branches in early spring, or move a plant to a new spot. Small changes keep the stair looking cared for and let you adjust to what is thriving. Keep a basic kit near the stair, with snips, a trowel, a bag of mix and a cloth, so a five-minute fix does not turn into a project.
Key Takeaway: Treat the stair planting as a living display, repotting in spring, shading in summer, adding light in fall and cutting water in winter.

“Stair Plants Should All Be Green” Misses the Quiet Power of Leaf Color and Texture
 Save
Green is the obvious color for a plant, and an all-green stair is a perfectly good one. But a stairwell is a monochrome place of white walls, wood treads and a dark rail, and a plant with a different leaf color or texture acts like a piece of art. The trick is to vary the foliage without losing the calm.
Think in three layers. The first is color: a burgundy rubber plant, a purple-backed calathea or a silver-leaved snake plant give you tones outside the usual green. The second is texture: glossy leaves, velvety leaves, feathery fronds and spiky blades each catch light differently. The third is shape: upright, trailing and rosette forms break up a row.
The best combinations pair opposites. A glossy burgundy leaf looks richer next to a matte silver one, and a velvety dark philodendron looks softer beside a crisp variegated pothos. Keep a rule of thumb of three or four varieties along one stretch of wall, so the eye can read each one without feeling lost.
Leaf color responds to light, so check the label. Variegated plants, with cream or white patches, need brighter light to keep their markings, and in a dim stair they often revert to plain green. Burgundy and purple plants also want bright, indirect light to stay dark. If your stair is dim, favor silver and deep green types, which hold their color in shade.
Choose the pot to flatter the leaf. A dark leaf looks best in a pale pot, which gives it an edge. A pale or variegated leaf looks best in a darker pot, and a plain pale pot disappears and lets the leaf take over. Keep pots in two tones at most, so the foliage does the talking.
Finally, step back and read the wall as a single picture. Squint, and the leaf colors should blur into a balanced mix with no single patch pulling the eye. If one plant dominates, move it, or add a second of the same color further along to carry the rhythm up the stair.
Key Takeaway: Mix leaf color, texture and shape across three or four varieties, match each to its light, and pair dark leaves with pale pots.

“Plants on Stairs Need a Big Budget and a Big House” Is Easy to Disprove in a Rental
 Save
A planted stair has a reputation for belonging to a big house with a bright landing and a generous budget. In truth, the best version of it fits a rented apartment, because the key materials are light, removable and inexpensive.
Start with what you cannot do. Many leases forbid drilling into walls, and many stair walls are plaster or thin drywall that holds little weight. So the plan has to hang from things that are already there or can be removed without a scar.
A tension pole is the most useful tool. A spring-loaded pole fits between the floor and the ceiling, holds without a screw, and carries three or four small pots on adjustable clips. Check the weight rating on the box, keep each pot under 3 lb (1.4 kg), and choose plants such as pothos or spider plants, which grow lightly and trail well. Place the pole against a wall or at the end of the stair, out of the walking line.
Removable adhesive hooks are the second tool. Look for hooks rated for a specific weight, apply them to a clean, smooth, painted wall, and press for the time listed on the pack. They suit small pots with a light plant, such as a 4 in (10 cm) pot of trailing ivy. Do not use them on textured, damp or newly painted walls, which may not hold, and never use them for anything that could fall onto a stair.
Over-the-rail hangers are the third. A bracket that hooks over a handrail or a baluster carries a small pot without a screw. Choose a model with a wide, rubber-lined grip so it does not scratch, and use only the weight rating the maker allows.
Keep the budget low with cuttings. A single pothos can be cut into six pieces, each rooted in water for a few weeks, then potted. A friend’s spider plant sends out babies that become new plants for the price of a pot. Buy pots at a thrift shop and paint them to match.
A mirror finishes the story. A round wall mirror in a thin wood frame bounces the window light back down the stair, which brightens the plants and the whole space. Hang it on a rated adhesive hanger if it is light, or with a pair of hooks into a stud if the lease allows.
Key Takeaway: In a rental, use a tension pole, rated adhesive hooks and over-the-rail hangers, keep each pot light, and grow your own cuttings.

Before you buy a single plant, stand on your stairs at midday and note where the light falls. Write down the clear width, find the studs on the wall, and decide which of the three surfaces you will use: the railing, the wall or one wide tread. Match each plant to the light that spot gets, hang or place the heaviest piece first, and add the trailing plants last. A stair full of plants looks alive when the plants are chosen for the place, not the picture.
You've saved it, wanted it. Here's the how: codes, measurements, order. Your choices make it yours.
 Save