 Georgia
The advice on stair risers is easy to recite. Hire a painter, because freehand work on a stair is hard. Go dark, because dark hides scuffs. Use real tile, because stick-on tile peels. Keep patterns plain, because busy risers are dangerous. Each rule has some truth in it, and each one has kept good staircases plain for years.
A riser is a surprisingly small canvas: usually 7 to 7.75 in (18 to 20 cm) tall and as wide as the stair, often 36 in (91 cm). It sits at eye level for anyone climbing, it takes every scuff from a shoe, and it is the first thing seen from the hall. Stair riser decorating ideas have to be judged on how they survive that life, not on how they look in a photograph the day they are finished.
Each section below overturns one of the common rules, with the measurement, the prep and the failure mode that decide whether the idea lasts.
“Hire an Artist” Is Not Required for Painted Risers
 Save
Painted risers look like a job for a professional, and a fully freehand mural might be. A folk-art flower border is different. Tulips and daisies in red, yellow, pink and blue are drawn from simple repeated shapes, and anyone with a stencil, a few small brushes and patience can paint them.
Preparation is what decides the result. Sand the riser lightly, wipe it clean, apply a bonding primer, and finish the base coat in a durable satin or semi-gloss paint made for trim or floors. Let it cure for several days before you decorate. A wet base coat will smear under a brush, and a soft one will chip the first time a shoe catches it.
Use a stencil or a pencil template at each step, and vary the colors in a repeating order so the stair reads as a pattern: red, then yellow, then pink, then blue. Draw the template for a 36 in (91 cm) wide riser on paper first, with a 2 in (5 cm) margin at each end. Seal the finished risers with two coats of a clear water-based finish, since a riser is kicked far more than a wall.
Keep the treads and balusters plain, as here, with warm wood treads and white balusters. The painted risers are the whole show, so everything else stays quiet. A small floral-painted stool at the base repeats the motif once and signals that the stair is a designed space, and it should stay clear of the first step.
Sunlight from a landing window helps, but it also fades cheap paint. Use a lightfast paint and avoid pure fast-fading reds on a stair that gets a lot of sun.
Practice before you commit. Paint a spare piece of plywood or the back of a cabinet door with the same colors and test your tape, your brush and your pattern there first. A practice board costs an hour and saves a weekend of regret. Work on one riser at a time, finish it, and judge it from the foot of the stairs before painting the next. If the first one is good, repeat it exactly. If it is not, the stair is still mostly untouched and the fix is a coat of the base color.
Key Takeaway: Painted risers are a stencil-and-prep job, not an artist’s job, as long as the base coat is cured and the finish is sealed.

“Go Dark to Hide Scuffs” Works Only With a Light Tread
 Save
Black risers are often recommended because black does not show shoe marks. The trouble is that black paint is also the finish that shows every dust line, every chip and every pale scuff, and an all-dark stair can look like a hole in the dark.
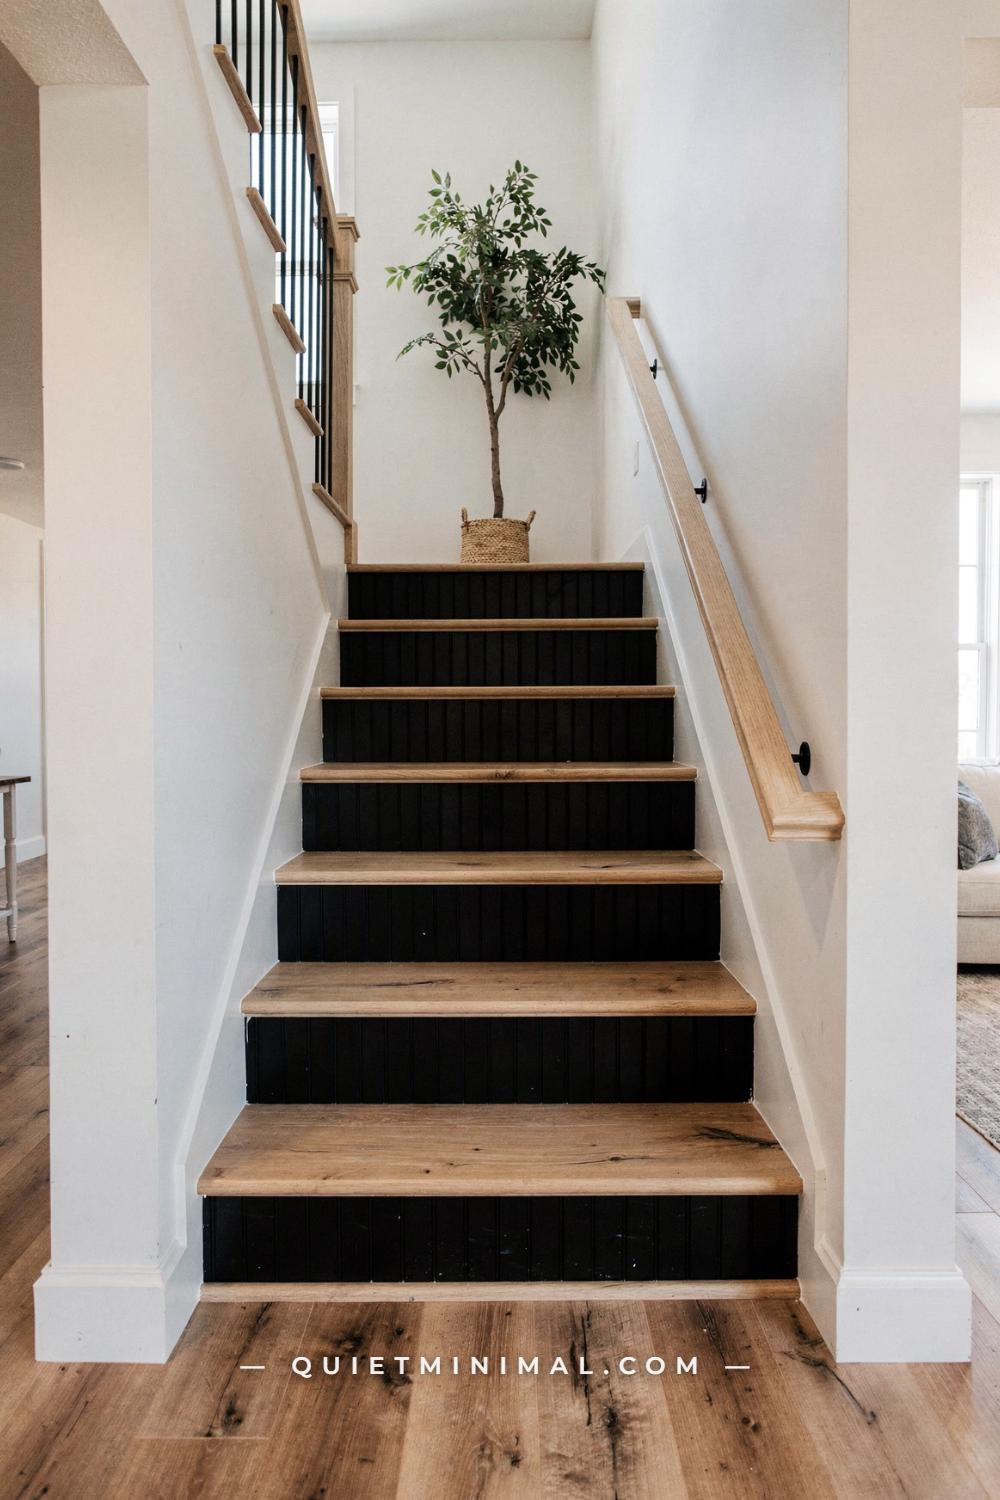
What holds up is pairing the dark riser with a light tread. Black beadboard-paneled risers beneath light oak treads, with white walls and a light wood handrail, give crisp horizontal stripes that make a stair look clean and modern. The contrast also makes each step edge clear to the eye, which is a real safety benefit. The light oak tread tells you exactly where your foot goes.
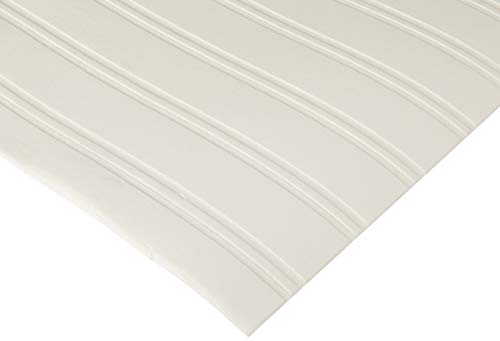
Beadboard adds texture that paint alone cannot. Thin panels, about 1/4 in (6 mm) thick, can be cut to fit each riser and glued on, and the vertical grooves hold the light in a way that plain paint does not. Because the panel adds thickness, every riser in the flight needs the same panel, or the heights vary and the stair becomes uneven. That includes the first and last riser. If the thickness changes any step height by more than 3/8 in (10 mm), the stair is no longer to code.
Choose a satin or semi-gloss black finish. Flat black marks easily; gloss shows every fingerprint. Satin sits between them. Prime first, and use a caulk gun to seal the top and bottom edge of the panel so there is no shadow line.
Black metal balusters repeat the black of the risers and keep the stair quiet. A potted tree visible in the hall above gives the eye a green place to land at the end of the climb.
Keep a small jar of the exact paint for touch-ups, labeled with the date and the room. Scuffs on a dark riser can be lifted with a barely damp cloth, but test any cleaner on the back of a riser first, since some abrasive sponges burnish a matte finish and leave a shiny patch. A semi-gloss or satin enamel wipes clean more easily than flat paint, which is why riser paint is rarely the same sheen as the wall.
Match the sheen to the traffic as well as the color. A satin enamel on a dark riser wipes clean and hides dust, while a flat finish shows every scuff. If the stair is used by a busy household, give the dark risers an extra coat of clear water-based sealer, and keep the tread paint or stain pale and slightly lighter so that each step edge can be seen at once.
Key Takeaway: Dark risers are a strong choice when the treads stay light and every riser gets the same thin panel.
“Only Real Tile Lasts” Overlooks What a Riser Actually Needs
 Save
Patterned encaustic-look tile is the most popular way to decorate a riser, and the received wisdom is that only real ceramic or cement tile is worth doing. Real tile is wonderful, but it is thick and heavy, and a riser takes only a few millimeters of it before the stair is out of code.
Peel-and-stick tiles or printed vinyl covers do the same job at a fraction of the thickness, about 1/16 in (2 mm) or less. A riser surface does not carry weight, so it does not need the strength that a floor tile does. What it needs is adhesion at the edges and a clean surface. Clean and degrease the riser, prime it if it is glossy, and press the tile on from the center outward.
This narrow stair uses muted blue, terracotta and cream in a repeating pattern on the risers, with warm wood treads and a white painted brick wall at the top. The palette is the secret: all three colors are low in saturation, so the pattern reads as decoration, not noise. Choose a pattern that repeats every 8 in (20 cm) or less so the rhythm is visible on a 36 in (91 cm) riser.
Start in the center of each riser and work outward, so the cut edges are symmetrical at each end. Seal the top and bottom edge with a thin line of clear caulk. A dark metal handrail on the white side wall and small wall lights dotted along the way add the finishing detail.
The gray door at the base picks up the neutral in the tile, which keeps the bottom of the stair coordinated with the top.
Think about thickness before you buy. Any tile or vinyl you add to a riser changes its height by a small amount, and the rule is that risers in a flight stay within 3/8 in (10 mm) of each other. Add the same product to every riser, including the first and the last, and measure the finished heights with a tape. Press each piece firmly from the center outward, seal the edges where the riser meets the tread, and give adhesives the full curing time on the label before the stair sees heavy use.
If you prefer the look of real tile, consider a thin, lightweight option made for walls. Ceramic tile has real advantages, such as durability and a hard surface, but it adds thickness, so it needs a skilled installer who can adjust the riser height with care. Never mix real tile on some risers with a thinner material on others, and have the stair checked against the local rules for riser height before the grout is dry.
Key Takeaway: Patterned riser tile works best in a thin peel-and-stick version at about 2 millimeters, so every step stays the same height.

“Keep Painted Designs Perfect” Misses the Beauty of a Winding Line
 Save
Freehand designs on risers are often avoided because of perfectionism. A winding branch motif solves that problem, because a branch is supposed to wobble. Delicate black branches that wind upward from step to step on white risers look intentional even when the line is not straight.
The design works because it is continuous. Rather than repeating the same motif on each riser, one branch grows across the whole flight, with leaves and twigs on each riser connecting to the next. Plan it first with chalk on the risers, starting at the bottom and letting the branch climb at a gentle angle. Step back to the foot of the stair after every two or three risers to check the flow.
Use a fine artist’s brush or a paint marker in a matte black. A paint marker gives you more control than a brush, and a clean-up with a damp cloth removes errors while the paint is wet. Keep leaves to about 1 to 2 in (3 to 5 cm) long, and vary their direction so the branch does not look stamped.
Finish with a clear sealer in a satin sheen, since the black detail is thin and will wear first. The white riser must be a durable, fully cured finish before painting.
Warm oak treads, white balusters and a polished oak handrail keep the stairs classic, and soft gray walls let the black branch show clearly. The wood floor at the base continues the oak tone.
Because the branch is delicate, resist adding a second pattern nearby. One quiet motif per stair is plenty.
Draw the line first and paint second. A soft chalk pencil or a washable pencil lets you sketch the curve on every riser before any paint goes on, and you can wipe away what you do not like. Keep the line moving from one riser to the next so the eye reads it as a single ribbon rising up the stair, and let the line vary in width a little, since a wobble reads as hand-made and a perfectly even line reads as a decal.
Key Takeaway: A single winding branch across the whole flight forgives wobbly hands and looks more intentional than the same motif stamped on each riser.

“Patterned Risers Are a Trip Hazard” Depends on the Tread
 Save
A common warning is that patterned risers confuse depth perception and make people miss a step. It is a fair concern, and the answer is not to avoid pattern but to protect the edge of the tread. When the tread is clearly distinct from the riser, pattern on the riser is safe.
This warm hallway stair has beige and charcoal patterned tile risers beneath rich dark wood treads. The two are different enough in tone and material that the tread edge is clear. The pattern is also small and low-contrast, mostly beige with charcoal accents, so it reads as a texture rather than a series of shapes that might move.
For your own stair, check three things. The pattern should repeat in a unit under 8 in (20 cm), the tread should contrast with the riser, and the stair must be well lit. Small square wall lights dotted along the stair wall are exactly right. Place them at about 24 in (61 cm) above the nosing line and keep them under 4 in (10 cm) deep.
A lit display niche above holds a vase of branches. Recess it 3 to 4 in (8 to 10 cm) into the wall and add a warm LED strip, and it becomes a second light source as well as a decorative focus.
Chunky dark wood newel posts and horizontal metal rail rods give the stair a modern-rustic feel. At the base, a potted olive tree in a basket and a jute rug signal the end of the climb. Keep the rug anchored with a non-slip pad, because a loose rug at the foot of a stair is a hazard in its own right.
Put the contrast where it matters most, on the front edge of each tread. A visible nosing, whether a painted strip or a slim contrasting edge, tells the foot where each step ends, and that is more protective than any restriction on pattern. Add a rail you can grip, keep the stair well lit, and keep the pattern on the riser alone. A busy riser under a clear, well-lit tread is a pleasure, and the same pattern under a dim, shiny one is a hazard.
A quick walk-through test helps. After you finish, ask someone to walk the stair slowly in ordinary lighting and then in dim light, up and down, and tell you whether the edge of every tread is clear. If anyone hesitates, add a stripe of contrast on the tread nosing or increase the light. A pattern that looks wonderful from the hall is only worth keeping if it is safe underfoot.
Key Takeaway: Patterned risers are safe when the pattern is small and low in contrast, the tread edge is distinct, and the stair is well lit.

“Pattern Needs a Dark Palette” Is Wrong in a White Stairwell
 Save
People often assume vintage-style tile only works in a moody, dark space. In a white stairwell it can be the best thing in the house. Vintage-look patterned tile risers in soft gray and cream, beneath light wood treads, stand out because everything around them is quiet: crisp white walls, a white balustrade with dark vertical bars and bright daylight.
The key is value. Soft gray and cream are close in tone, so the pattern reads as a delicate texture rather than a bold stripe. Against white walls the pattern is the only decoration on the stair, which means it carries the whole stairwell and does not need help from anything else. Keep the walls simple and the balustrade plain.
Light wood treads continue the soft palette. Choose a tread that is no darker than a mid-oak, so the pattern on the riser does not feel heavy above it. In a bright stairwell the light does the work, and the pattern gives the eye something to follow as it climbs.
If the stair is in a white box, think about how the pattern ends at the top. Finish the last riser exactly the same as the others, and let the landing floor take over. The first and last risers are where the thickness rule matters most, because a mismatch there is the one people stumble over.
A dark vertical bar balustrade is a good companion, since its thin lines echo the pattern’s linework. Avoid adding wall art on the stair wall, and let the tile be the single statement.
Repeat one color from the riser pattern somewhere else in the stairwell, such as a rug at the foot, a ceramic in the window or the frame of a mirror. That small echo is what makes a patterned stair look decided in a quiet white room. Without it, the pattern can look like a decal that someone forgot to take off.
Key Takeaway: In a bright white stairwell, soft gray and cream tile risers carry the whole design, so keep the walls and balustrade plain.

“One Motif Repeated Is the Only Way” Skips the Storytelling Riser
 Save
Repeating one motif across every riser is the standard advice for a coherent look. A stair with a story is more characterful. Here, deep green painted risers carry a hand-painted songbird and scattered falling leaves in ocher and sage, with warm wood treads that have fine inlay lines.
The trick is deciding where the story happens. Paint the bird on one riser at about the height of the eye as you climb, and scatter leaves across the neighboring risers so the bird appears to be among them. Leaves can drift from step to step, and a few can appear on the treads’ edge if your finish allows. Plan the scene on paper at the actual riser size of about 7 by 36 in (18 by 91 cm).
Deep green is a strong ground. It makes ocher and sage glow without being loud. Use an eggshell or satin finish, and keep the white walls soft so the green is the only strong color. A deep green riser will show chips more readily than a pale one, so prime and cure carefully, and keep touch-up paint in the same batch for repairs.
The fine inlay lines on the treads give the stair a crafted quality that fits the painted detail. If your treads are plain, a thin line of paint along the tread edge is not recommended, because the edge must stay visible for safety. Keep the treads natural.
Quiet artistic stairs are not for everyone. They work best in a hall that is otherwise plain, where nothing competes with the bird. Keep the hall floor wood and the walls soft white.
Measure the center of each riser and mark it with a small pencil dot before you start, then line the motif up on each mark. Even a simple shape looks wrong if it drifts a quarter inch from step to step, and the eye reads the stair as a column of repeats. A paper template, cut once and traced on every riser, keeps the shapes the same size and in the same place.
Pick the motif for how it will read at stair distance. A simple shape, such as an arch, a leaf or a dot, reads clearly from the foot of the stairs, while a detailed picture turns to noise. Draw the motif at full size on paper first and tape it to a riser to judge the scale. If it fills about two thirds of the riser height, it will look balanced when repeated.
Key Takeaway: A single painted scene that drifts across several risers, on a deep green ground, gives a stair a story without a repeated stamp.

“Terrazzo Is a Floor Material” Until You Try It on a Riser
 Save
Terrazzo belongs on floors, the thinking goes, because that is where it is poured. On a riser it is a surface effect, and a terrazzo-look riser is one of the most playful and durable ways to decorate a stair. This hallway stair has risers scattered with green, black and sand chips beneath pale wood treads, with textured white plaster walls wrapping the stairwell.
There are two practical routes. A printed vinyl or peel-and-stick terrazzo-look film gives the result in a few hours and is thin enough to keep the riser height within code. A hand-painted version uses a cream base coat and small irregular chips in green, black and sand, applied with a sponge or a fine brush. Keep the chips between 1/4 and 1 in (6 and 25 mm) and vary the sizes so it looks natural.
Terrazzo works because it is random. Avoid placing chips in a visible repeat, and avoid heavy clusters at the edges, where the eye is most likely to notice. Space the chips with about the same density on each riser, so the flight reads as one surface.
Textured plaster walls give the stair a matte, handmade backdrop that suits the pattern. Pale wood treads keep the palette light and contemporary. Keep the balusters simple, since terrazzo already has plenty of detail.
Seal painted risers with two coats of a clear satin finish and wipe vinyl with a damp cloth. Because terrazzo-look surfaces hide scuffs, they are a practical choice for a busy family stair.
Choose the chip size to suit the stair. Large chips, about 1 in (25 mm) or more, give a bold terrazzo look from a distance, while small chips look like a speckled texture. Whatever you choose, finish with two coats of a clear, water-based sealer so the surface can be wiped clean, and check the sealer’s label for suitability on a surface that gets kicked.
Key Takeaway: A terrazzo-look riser works as thin film or hand-painted chips between a quarter inch and an inch, and its randomness hides daily scuffs.

“Busy Risers Need a Quiet Wall” Is Not the Only Way to Balance a Stair
 Save
The usual advice is to choose one: either a bold stair or a busy gallery wall, but not both. A personal gallery wall does well beside bold risers when the two share a short palette. This bright hallway stair has black, white and yellow geometric star-patterned tile risers beneath warm wood treads, with a gallery wall of framed photos, certificates and a decorative plate climbing the stair wall.
The shared palette is the connection. Black, white and yellow in the tile appear again in the frames, mats and the plate, so the wall looks like part of the stair. Use black or white frames only, and keep the mats white. Then let the content of the frames, photos, certificates and keepsakes, supply the variety. A decorative plate on a hook breaks up the rectangles.
Hang the group with its center about 57 in (145 cm) above the stair nosing line, and leave 2 to 3 in (5 to 8 cm) between frames. Because the risers are bold, give the wall a clear zone near the stair, about 6 in (15 cm), where no frame comes close to the bottom edge.
A white newel post, white balusters and an oak handrail keep the structure calm. A woven roman shade at the window adds natural texture, and a wood floor at the base grounds the stair.
The yellow in the tile is the accent to repeat. One yellow frame mat or a small yellow object on the landing is enough; more than that and the stair looks themed.
Pull the wall color from the riser pattern, not the other way around. If the risers carry a warm clay and a soft green, a wall in a quiet warm white with a faint hint of the same clay looks calm beside them. Hold a paint chip against a riser in daylight to compare, and check at dusk too, since colors shift under a warm bulb.
Key Takeaway: Bold tile risers and a personal gallery wall can share a stair when frames and mats repeat the tile’s three colors.

“Paint Is Paint” Ignores the Prep That Decides Whether a Riser Survives
 Save
Everyone knows a riser can be painted. What they overlook is that a riser is struck by a toe all day, and a paint job that would last for years on a wall will chip off a riser within a few weeks if the prep was skipped. The secret to a painted riser is invisible: it is everything that happens before the color goes on.
Start by cleaning. Hands, shoes and dust leave a film on a riser, and paint will not stick to a film. Wash the surface with a degreasing household cleaner, rinse it with a damp cloth, and let it dry fully. Fill any nail holes or dents with wood filler, let it cure, and sand it flush.
Sand next. A light sanding with 120 to 150 grit paper dulls any gloss and gives the primer a surface to grip. Sand with the grain, and wipe the dust away with a tack cloth or a slightly damp rag. If the riser has an old varnish or a glossy enamel, a liquid deglosser can help, though it requires ventilation and care.
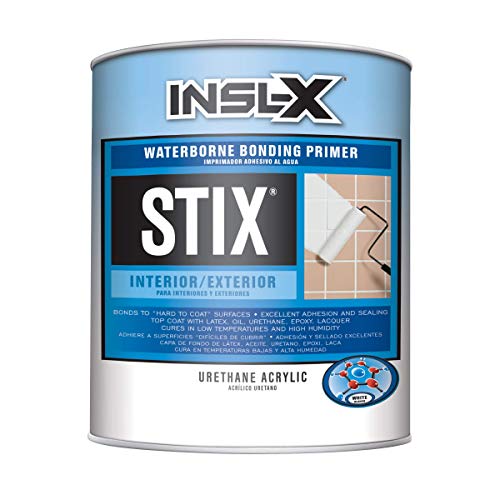
Prime with a bonding primer. A bonding primer is made to stick to slick or previously finished surfaces, and it makes a difference on a riser that has been painted before. Apply one thin coat, let it dry as the label directs, and sand lightly before the next step.
Paint with a durable enamel. A satin or semi-gloss enamel, either water-based or oil-modified, forms a harder film than wall paint, and it wipes clean. Apply two thin coats rather than one thick one, since thick coats stay soft and chip. Allow each coat the full dry time on the label, and then allow extra time before the stair is used.
Protect the tread. Painter’s tape along the tread edge keeps the line crisp, but press it down firmly and remove it while the last coat is slightly tacky, pulling it at a low angle. Keep the treads off limits until the paint has fully cured, which for many enamels takes several days to a week. Plan the work so the stair can be avoided or use a second staircase for a few days.
Finish with a protective clear coat if the color is a light one. A water-based polyurethane in a matte or satin sheen can protect a pale riser from scuffs, though some clear coats can amber slightly over time on white. Test it on a hidden spot first.
Key Takeaway: Clean, fill, sand, prime with a bonding primer, then apply two thin coats of durable enamel and give the stair days to cure.
“Peel-and-Stick Always Peels” Is Mostly a Problem of Surface and Heat
 Save
The complaint about peel-and-stick tile is that it peels. It does, when it is applied badly, and the causes are almost always the same: a dirty surface, a cold room and a wet or heavily textured riser. Fix those and the tiles stay down far longer than people expect.
Pick the surface. Peel-and-stick sticks best to a clean, smooth, dry, painted or bare wood riser. On a riser with an old gloss paint, scuff the surface lightly and wipe it down, and on bare wood prime it first so the wood does not absorb the adhesive. If the riser has a rough texture, fill and sand it. Check the manufacturer’s note on surface suitability.
Control the temperature. Most adhesives want a room between about 65 and 85 degrees F (18 to 29 degrees C) at the time of application and for a day after. A cold stairwell in winter is a poor place to start, and a hot afternoon sun on a landing window is not much better. Let the tiles sit in the room for a day before you start so they reach the same temperature.
Measure and test. Dry-fit a full row on one riser without peeling anything, and decide where the pattern starts and where the cut tiles fall. Center the pattern on the riser and put the cut tiles at the two ends, so they are the same width. Mark the center with a pencil, and work outward from it.
Press hard. Remove the backing from one tile at a time, align it from the center, and press it down with a clean squeegee or a rolled towel, from the middle out to the edges. Pay attention to the corners, because they are the first part to lift. Use a hairdryer on a low setting to warm a stubborn corner, then press it again.
Seal the edges. A thin bead of clear, paintable caulk along the line where the riser meets the tread and the line where it meets the side wall keeps water and grit from getting under the tile. Wipe away the excess before it dries.
Remember the rule on thickness. All of the risers in a flight should end up within 3/8 in (10 mm) of one another, so use the same product on every riser, including the first and the last.
Key Takeaway: Clean and prime the riser, apply tile in a warm room from the center outward, press firmly, and seal the edges with caulk.

“Wallpaper Doesn’t Belong on a Riser” Works When You Choose the Right Paper
 Save
A riser is a strip of flat wall, 7 in (18 cm) tall and as wide as the stair, and wallpaper was made for flat walls. The reason it is rarely used is that people assume it will tear or fade under a shoe. With the right paper and a sealer, it will do neither.
You've saved it, wanted it. Here's the how: codes, measurements, order. Your choices make it yours.



Choose the paper first. A vinyl-coated or a washable paper stands up to rubs and cleans with a damp cloth. A heavy, non-woven paper handles the stretch of a long riser and goes on dry, which is easier than pasting. Avoid delicate, fabric-backed or metallic papers, which can mark. A small-scale geometric pattern in sage and cream hides seams and suits the stair, whereas a large motif gets cut off by the riser’s height.
Plan the pattern. A riser is a strip, so a pattern that repeats across its width reads best. Measure the riser, cut a strip of paper about 1 in (25 mm) larger on each end, and trim after it is in place. Match each strip to the next, so the pattern lines up from one riser to the next. Buy more paper than you think, since waste is high on narrow strips.
Prepare the surface. A painted riser should be clean, dry and primed, as for a paint job. A smooth surface gives the best result. Run a thin line of paste or use a self-adhesive paper, press from the center out and smooth with a plastic smoother. Trim the edges with a sharp blade and a metal straightedge, changing the blade often.
Seal it. Brush on two thin coats of a clear, water-based sealer, such as a matte polyurethane, over the paper, letting each dry fully. This protects the surface from scuffs and lets you wipe it clean. Test the sealer on a scrap first, since some sealers darken or yellow lighter papers.
Think about the rental. Self-adhesive paper can be removed with gentle heat in many cases, but may take paint with it from some surfaces. Test a small patch in an inconspicuous place and wait a few days, then peel it to see how it behaves.
Keep the rest calm. A narrow wool runner stripe down the center of oak treads, white balusters and an oak handrail let the papered risers be the star.
Key Takeaway: Choose a washable vinyl-coated paper in a small-scale pattern, match strips from riser to riser, and seal with clear water-based finish.

“Stencils Are for Beginners” Forgets How Clean a Good Stencil Can Look
 Save
Stencils have a reputation as a craft for beginners, and the results are often blurred or uneven. Done well, a stencil gives you something no freehand brush can: a perfectly repeated shape on every riser, which is what makes a patterned stair look professionally made.
Choose the right stencil. A reusable, thin plastic stencil with a repeating pattern, sized to the riser, is the right tool. A pattern about 6 in (15 cm) tall fits inside a 7 in (18 cm) riser with a margin, and a pattern with an interlocking motif can be extended across the stair width by sliding the stencil along. Avoid patterns with fine, delicate bridges, which break.
Start with a base coat. Paint the risers in a soft white or a pale color, and let it dry for at least 24 hours, since stenciling over tacky paint smears the pattern. Mark the center of each riser with a pencil, and mark a level line along the top and bottom of the stencil area.
Load the roller lightly. The most common mistake is too much paint, which bleeds under the stencil edge. Use a small foam roller, roll off the excess on a paper towel until the roller feels almost dry, and apply paint in thin passes. A second light pass is better than a single heavy one.
Hold the stencil flat. Use a repositionable spray adhesive or low-tack tape to hold the stencil against the riser, and press the edges down firmly. Peel the stencil straight off, wipe it clean with a damp cloth, and let each section dry before moving on, so you do not smudge the previous work.
Line up each repeat. Mark registration points, small holes or lines on the stencil, and align them with the last repeat. Check the pattern against a level as you go, since a pattern that creeps off horizontal looks wrong on a staircase.
Seal the result. A thin coat of clear water-based sealer on top of the stenciled riser makes the paint harder, and wipes clean. Test it on a hidden spot first.
Stencil on the first riser as a trial. If you do not like it, a coat of the base color restores the surface.
Key Takeaway: Use a sturdy stencil sized to the riser, roll on a nearly dry coat, hold the stencil flat, align each repeat, and seal the result.

“Ombre Is Too Hard to Get Right” Depends on a Simple Mixing Ladder
 Save
An ombre staircase, where the risers move from a dark color at the bottom to a light one at the top, looks impressive and complicated. The truth is that it is a mixing problem, and the solution is a ladder of small, measured batches.
Pick two colors, the deepest and the palest. The deepest sits at the bottom, and the palest at the top, or the reverse if you prefer a lighter start. A dusty blue and a mist blue are close in hue and make a calm pair, and the gradient between them looks natural. Choose colors from the same family, since a jump between hues can look garish.
Count the risers. A typical flight has 12 to 15 risers, so you need that many steps of color between the two ends. You do not have to make fifteen different mixes. Make a handful of in-between shades, such as five, and use each for two or three risers. The eye reads the sequence as smooth from a distance.
Mix with a ratio. Pour the dark color into a cup, the light color into another, and build a series of cups with a measured ratio, such as 3 parts dark to 1 part light, 2 to 2, 1 to 3, and so on. Use a measuring spoon or a marked cup, write the ratio on a piece of tape on each cup, and stir well. Mix enough of each batch to cover all the risers in that group, since matching a batch later is difficult.
Test on a board. Paint a swatch of each shade on a board, let it dry and compare the series in daylight. Paint dries a shade darker or lighter than it looks wet, so judge the dry swatch. Adjust a ratio if any step looks too far from its neighbors.
Paint from one end to the other. Start at the bottom, apply two coats to each riser, and move upward in sequence. Keep notes and labels in case you need to touch up, and store each cup with its tape.
Keep the surroundings neutral. A clear satin finish on the oak treads and warm white walls let the gradient carry the stairway.
Key Takeaway: Choose two colors from one family, mix five measured in-between shades, test dry swatches in daylight, and paint in sequence.

“Wood Risers Must Be Left Natural” Overlooks Stain, Wash and Two-Tone Finishes
 Save
If your staircase has solid wood risers, the received wisdom is to leave them alone, because wood is precious and paint is permanent. But many risers are made of a lower grade of wood than the treads, with knots and mismatched color, and a tasteful finish can make a stair look better than the wood did in its original state.
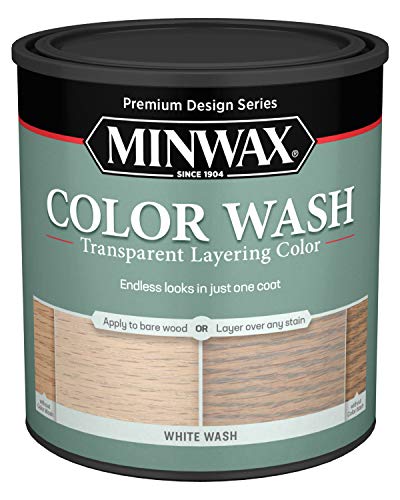
Look at the wood first. If the risers are a nice, even oak, a clear matte finish keeps them honest. If the grain is patchy, a pigmented stain or a thin wash can even it out. A gray wash, made by diluting a pale gray paint with water or by using a white wash stain, lets the grain show through, and the effect is soft and modern.
Try a two-tone effect. Natural oak treads with a gray-washed riser, as in this stair, separate each step visually and make the climb feel lighter. It also hides the scuffs on the riser, and the clear finish on the tread keeps the wood visible where the foot lands. The contrast helps the eye find the edge of each step.
Prepare the wood correctly. Sand with 120 grit, remove dust, and apply a wood conditioner if the species is prone to blotching, such as pine or maple. Apply the stain or wash in a thin coat with a rag or brush, wipe off the excess, and let it dry. Test on the back of a riser or a scrap piece first.
Seal for durability. A water-based polyurethane in a matte or satin sheen protects the finish. Apply two or three thin coats, sanding lightly between coats, and give it several days to cure. A water-based product keeps a pale wash from yellowing.
Know when to leave it. A beautiful, quartersawn oak riser with a lovely grain deserves a clear finish. If you are in doubt, test a hidden riser, such as the first one near the wall, and live with it for a week.
Finally, repeat the finish somewhere else. A matching gray on a bench or a frame near the stair ties the stair into the room.
Key Takeaway: Judge the grain, use a thin gray wash or stain on uneven risers, keep a clear finish on the treads, and seal with water-based polyurethane.
“Lighting Risers Is for Hotels” Is Not True of a Low-Voltage Strip
 Save
Light on the risers is associated with hotels and theaters, where the stair has to be seen in the dark. But a quiet line of warm light under each nosing is one of the safest and most flattering things you can add to a home stair, and it is a project a careful person can do in a weekend.
Understand what it does. A strip of light tucked under the front edge of each tread washes the riser below in a soft glow. It shows the edge of every step, highlights the color or pattern on the risers and lets you walk down at night without turning on a bright ceiling light.
Choose a low-voltage LED strip. A plug-in strip with a power adapter runs on a safe, low voltage and does not need an electrician for a basic installation. Choose a warm color temperature of about 2700 to 3000K, a strip rated for indoor use and a model with an adhesive backing. Look for a version with a dimmer or a motion sensor, which saves power and avoids a constant glow.
Plan the run. Measure each tread, cut the strip at the marked cutting points, and join the pieces with the connectors made for it. Hide the wiring with clips along the underside of the tread and run the cable along the wall edge to the power adapter. Keep wiring neat so it never crosses a walking path.
Prepare the surface. Clean the underside of the tread with a degreasing wipe, and press the strip firmly to the clean surface. Place it close to the front edge, tucked behind the nosing so the diodes are not visible from above. A thin aluminum channel with a diffuser gives a cleaner line and spreads the light evenly.
Check the rules. Some local codes address stair lighting and the use of low-voltage wiring, and permanent hardwired installations should be done by a licensed electrician. A plug-in strip is generally considered a simple product, but follow the manufacturer’s instructions on length and loads.
Think about the look. A warm glow on white risers is gentle, whereas the same light on a bold pattern makes the colors glow. Test the effect at night before gluing everything down, by holding the strip in place with tape.
Key Takeaway: Add a warm low-voltage LED strip under each nosing, hide the wiring, use an aluminum diffuser channel, and have any hardwiring done by a licensed electrician.

“Renters Can’t Decorate Risers” Ignores Reversible Materials
 Save
A rented staircase feels untouchable. The lease says no painting, no drilling and no changes, and a stair is the most visible part of the apartment. Reversible riser decor exists, and with the right material it can come off at the end of the lease without a mark.
Start with the lease. Read it, and if you can, ask the landlord in writing whether removable decals or adhesive vinyl on the risers is acceptable. A short email with a description and a photo of the product often gets a yes. Keep the reply.
Choose a removable material. A thin, removable adhesive vinyl made for rentals is designed to release from a smooth, painted surface without leaving residue, if it is removed within a reasonable time. Look for a product described as removable and suitable for painted walls, and check what surface it was tested on. A matte finish looks more like paint and shows fewer fingerprints.
Test first. Apply a small strip on the underside of the bottom riser, or in a hidden corner, leave it for a week, then peel it slowly to see what happens. If paint lifts, the surface is not suitable, and you will have saved yourself a larger problem.
Measure for the flight. Each riser is a strip about 7 in (18 cm) tall and 36 in (91 cm) wide, so measure every riser, including the first and the last, since they sometimes differ. Cut the vinyl about 1/4 in (6 mm) shorter than the riser at each end so it does not wrap onto the tread. Apply it from the center out, smoothing with a plastic card, and trim with a sharp blade.
Keep the thickness in mind. Thin vinyl adds almost nothing to riser height, which keeps all risers within the allowable variation of 3/8 in (10 mm). Do not stack layers or use thick panels that change the height of just some of the risers.
Remove carefully. At the end of the lease, warm the vinyl gently with a hairdryer, peel at a low angle, and wipe off any residue with a mild soap and water. Keep the leftover roll to patch any damage.
If a lease allows no stick-on material at all, swap the focus to what you can change, such as a runner, a lamp and a mirror.
Key Takeaway: Ask the landlord in writing, choose a removable matte vinyl, test a hidden patch for a week, cut it slightly short, and peel it slowly with warmth.
“A Riser Is the Whole Story” Forgets the Tread, the Rail and the Runner
 Save
A decorated riser is a good start, but it is only one of five surfaces on a staircase, and it can look lonely if the others are ignored. A stair that feels designed treats the riser, the tread, the rail, the wall and the light as one composition.
Think about the tread. The tread is the part that takes the foot, so its finish matters for safety and wear. A natural oak tread with a clear matte finish looks warm beside a painted riser, and a narrow runner down the center softens the climb. Leave a border of bare wood at least 3 in (8 cm) on each side so the edge of the step stays visible.
Choose the runner with care. A flat-woven wool runner, fixed with stair rods or with grippers on each tread, adds comfort and noise reduction. A runner should be firmly attached to every step, so it cannot slip, and the pattern should be quiet when the risers are busy. A cream or sand runner in a solid or subtle stripe works with almost any riser.
Look at the rail and balusters. A slim oak handrail and white balusters keep the vertical lines light, so the painted risers stand out. If the rail is dark and heavy, consider painting or restaining it to match the rest of the stair. Keep the rail height within the required range of 34 to 38 in (86 to 97 cm).
Treat the wall as part of the view. A warm white wall with one round mirror gives the eye a place to rest and reflects light from a window. Keep the wall quiet if the risers are busy, and add a small number of pieces if the risers are plain.
Light the whole thing. A small brass wall light near the top and a night light near the bottom make the stair readable at all hours. Choose warm bulbs, around 2700K, and keep the color consistent.
Step back and judge the stair from the hall. Squint, and see which element draws the eye. If the riser is the star, the rest should be quiet. If the riser is plain, one other element should carry the interest.
Key Takeaway: Treat riser, tread, runner, rail, wall and light as one composition, keep a 3 inch wood border, and let one element lead.

“A Decorated Riser Is a High-Maintenance Riser” Is Answered by a Ten-Minute Routine
 Save
The quiet fear behind most riser projects is upkeep. A pattern that looks wonderful on the day it is finished can look tired in six months, if scuffs, dust and finger marks are left to build up. The fix is not more effort but a short, regular routine.
Begin with dry cleaning. Dust and grit are the first cause of wear, because they act like fine sandpaper under a shoe. Run a soft brush attachment or a microfiber duster along the risers and the tread edges once a week, and the surface stays clear of grit. A quick pass takes two minutes.
Add a damp wipe once a month. Use a soft cloth with a few drops of mild dish soap in warm water, wring it well, and wipe each riser from top to bottom. Dry it with a second cloth. Avoid soaking, harsh solvents, abrasive pads and strong cleaners, which can dull or lift the finish, and test any new product on the back of the lowest riser first.
Deal with scuffs when they are new. A fresh scuff often wipes away with a barely damp cloth. An older mark may need a gentle rub with a soft eraser sponge, tested first on a hidden spot, since some sponges polish a matte surface. If the mark is a chip, dab on a little of the original paint with a fine brush, let it dry and blend the edges.
Keep a repair kit. A small jar of the exact paint, labeled with the color name, the date and the number of coats, a fine brush and a small cloth live in a basket near the stair. When you need them, they are there, and the repair takes minutes. Store the paint in a cool place and seal the lid tightly.
Plan the yearly check. Once a year, look at every riser from the foot of the stairs in daylight. Look for lifted edges on tiles or vinyl, cracks in the sealer, and any area where the pattern has worn. Press down any lifted edge, add a fresh bead of caulk and touch up paint. A small repair now prevents a larger one later.
Limit the damage at the source. A shoe rack or a bench at the foot of the stair, with a mat for wet shoes, cuts the grit and the scuffs that reach the risers in the first place. A mat just inside the front door catches more dirt than any cleaning routine.
If you carry heavy items up the stairs, take care. Furniture legs, vacuum cleaners and suitcases are the main cause of chips on a riser, so lift them over the steps instead of dragging, and wrap the corners of anything bulky.
Plan to repaint eventually. Even the best finish wears, and a coat of fresh paint every few years restores a riser. Because the original paint is in the basket, the job is simple.
Key Takeaway: Dust weekly, wipe monthly with mild soap, touch up chips early from a labeled jar, and stop grit at the front door.

“Family Stairs Can’t Be Decorated” Underestimates What Low-Odor Paint and Patience Can Do
 Save
A staircase in a family home takes more abuse than any other surface in the house. Small feet run up it, backpacks scrape it, a pet’s claws click across it and a toy car is parked on every step. The advice is to leave it plain, because anything decorated will be ruined. A little planning answers each of those worries.
Start with the paint. For a stair used by children, a low-odor, low-VOC, water-based enamel is a sensible choice, since it dries without a strong smell and can be cleaned with soap and water. Check the label for a durable, scrubbable finish, and look for a product described as suitable for trim, doors and cabinets, which is the grade you want for a riser. Ventilate the stair while painting, and keep children and pets away until the surface is dry.
Respect the cure time. Paint can feel dry within hours, but it takes days, sometimes weeks, to harden fully. Avoid heavy use for the first several days, and do not wash the surface for about two weeks, or as the label advises. Plan the work for a weekend when the family can use another route, or paint half the stair at a time.
Design for the scuff. A sunny warm yellow and cream stripe is cheerful and forgiving, since stripes break up marks and the eye reads the rhythm and not the individual scuff. Avoid pure white on a family stair, which shows every mark, and avoid very dark colors where dust and pet hair stand out.
Keep safety first. A pattern on a riser must never disguise the edge of the tread, so keep the nosing clear and visible. Add a second, lower handrail at child height if the household has small children, though check local requirements, as the second rail must be well fixed. Keep toys off the stairs by providing a basket at the foot and a basket at the top.
Think about claws and shoes. Pets slip on bare, smooth treads, so a runner or adhesive grip strips add traction. Choose strips that are clear or in a color that matches the tread, and apply them according to the instructions.
Make the stair part of family life. Let older children choose the stripe colors, and paint a riser together. A stair that has been chosen by the household is looked after better than one that has been decorated by an outsider.
Key Takeaway: Use low-odor water-based enamel, allow the full cure time, choose forgiving stripes, keep nosing edges visible, and add traction for pets.

Before you buy anything, measure the height of the shortest and tallest riser on your stair, and measure the width at the wall. Decide whether you want a surface that is painted, paneled or covered in thin film, and check that whichever you choose adds the same thickness to every riser, including the first and the last. Then choose one idea from this list and finish a single riser as a test. If it still looks right after a week of shoes, you have your answer for the whole flight.
You've saved it, wanted it. Here's the how: codes, measurements, order. Your choices make it yours.
 Save


