 Georgia
Small patio paver ideas tend to arrive as photographs: a herringbone terrace, slabs floating in white gravel. What the photographs leave out is the set of decisions that made them hold still. A patio under 150 sq ft (14 m²) is less forgiving than a large one, because every cut lands in view and a lifted corner sits exactly where the chair goes.
The ideas below this block cover what to put on a small patio. This update makes the decisions underneath it, in build order: footprint, pattern, paver size, base, edge, joints, slope, laying sequence, the threshold, price per square foot, the count for a 10 by 10 ft (3 by 3 m) patio, and the four mistakes that make a patio heave.
Measure the Footprint Before You Choose a Paver
 Save
Start with a tape measure, not a sample board. Under 80 sq ft (7.4 m²) a patio holds a bistro table and two chairs, and the paver that suits it is a brick-size unit, 4 by 8 in (10 by 20 cm). From 80 to 150 sq ft (7.4 to 14 m²), a 36 in (91 cm) round table seats four once you allow 30 in (76 cm) behind each chair, and the paver can grow to 6 by 9 in (15 by 23 cm) or 12 by 12 in (30 by 30 cm). From 150 to 250 sq ft (14 to 23 m²), a loveseat and two chairs fit, and 24 in (60 cm) slabs suit it.
The patio in the photograph is the first size: multi-tone brick pavers laid in herringbone so 70 sq ft (6.5 m²) reads as one surface.
From the guides
You've saved it, wanted it. Here's the how: codes, measurements, order. Your choices make it yours.
 The Japandi Honest PlaybookThe honest version of the style: what to keep, what to skip, and the order to do it in.See inside →
 The Room Refresh PlaybookA repeatable four-step method, room by room, in ten minutes, thirty minutes, or one weekend.See inside →
 Make Any Room Feel Cozy on PurposeWhy some rooms hold people and others empty out, and the moves that change it.See inside →
Key Takeaway: Let the footprint choose the paver: brick-size under 80 sq ft (7.4 m²), 6 by 9 or 12 by 12 in up to 150 sq ft (14 m²), 24 in slabs above that.
The Pattern Follows the Patio Size, Not the Catalog
 Save
At 8 by 10 ft (2.4 by 3 m) and under, pattern is a cutting decision. Running bond cuts at two edges only and carries 5 to 10 percent overage. Basketweave pairs two 4 by 8 in (10 by 20 cm) pavers into an 8 in (20 cm) square module, and an 8 ft (2.4 m) side takes exactly twelve modules with no cuts. Herringbone at 90 degrees interlocks best and cuts only at the ends of each zigzag. Herringbone at 45 degrees belongs on a larger patio: every perimeter paver takes a diagonal cut and the waste runs 10 to 15 percent above running bond.
The rule by size: under 80 sq ft (7.4 m²), basketweave or 90-degree herringbone; 80 to 150 sq ft (7.4 to 14 m²), 90-degree herringbone with a band to catch the cuts; above 150 sq ft (14 m²), the 45-degree version earns its waste. The photograph is the middle case: a charcoal band takes every cut.
Key Takeaway: Basketweave or 90-degree herringbone under 80 sq ft (7.4 m²), a cut-catching band up to 150 sq ft (14 m²), 45-degree herringbone only above that.
Fewer Joints Read Bigger: Large Format on a Small Patio
 Save
The eye measures a floor by counting interruptions. A 4 by 8 in (10 by 20 cm) brick puts about four and a half pavers into every square foot; a 24 by 24 in (60 by 60 cm) slab puts one into four. On 100 sq ft (9.3 m²) that is 450 pieces against 25, and the second reads as a single plane, which is why large format makes a compact patio feel larger. It works when the module divides the footprint: an 8 ft (2.4 m) width takes four 24 in (60 cm) slabs exactly, but a 9 ft (2.7 m) width forces a half-slab cut down one side that the eye finds at once. Choose the slab that divides evenly, or float the slabs in a 2 in (5 cm) gravel gap.
The terrace in the photograph does it with honed charcoal slate, every slab whole.
Key Takeaway: Choose a slab whose side divides evenly into the patio’s width, so fewer joints and no half-cuts let a small floor read as one plane.
Paver Size to Patio Area: The Matching Table
 Save
The size decision is arithmetic. Under 80 sq ft (7.4 m²): a 4 by 8 in (10 by 20 cm) brick at four and a half per square foot, or a 12 by 12 in (30 by 30 cm) square at one. From 80 to 150 sq ft (7.4 to 14 m²): a 6 by 9 in (15 by 23 cm) paver at about two and two-thirds per square foot, a 12 by 24 in (30 by 60 cm) plank at half, or a 16 by 16 in (40 by 40 cm) square at about half. From 150 to 250 sq ft (14 to 23 m²): a 24 by 24 in (60 by 60 cm) slab at a quarter per square foot, or a three-size random coursing set so no cut looks out of place.
One check before ordering: the paver’s long side should divide the patio’s short side without a remainder; a 24 in (60 cm) slab on a 6 ft (1.8 m) strip leaves three slabs and no margin.
Key Takeaway: Match the paver to the area band and check that its long side divides the patio’s short side without a remainder.
Pavers Floating in Gravel for the Smallest Footprints
 Save
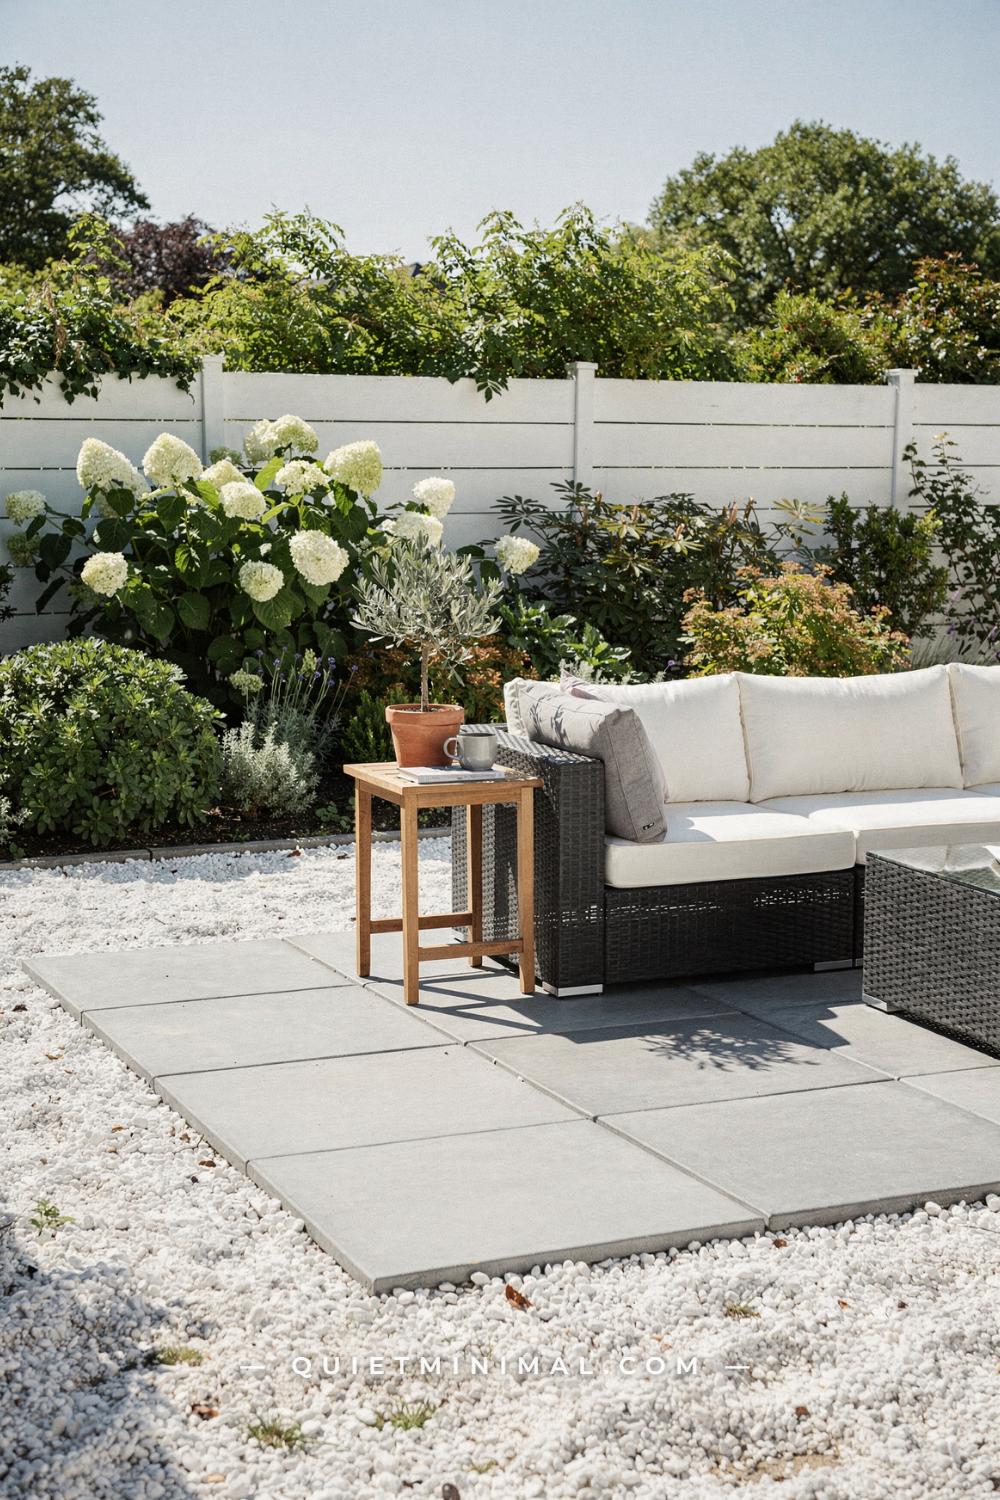
Below 60 sq ft (5.6 m²) a solid field stops being worth the cutting, and the answer is four slabs floated in gravel. A two by two grid of 24 in (60 cm) squares set 3 to 4 in (8 to 10 cm) apart covers just over 4 ft (1.3 m) each way, and the gravel between takes the rain. The corner in the photograph shows it: four brushed concrete stepping stones in white pea gravel, an L-shaped teak bench with 5 ft (150 cm) arms.
The mistake is treating the gravel as the foundation. The slabs still sit on the same compacted base and 1 in (2.5 cm) sand bed a full field would use; the gravel is a finish, 2 to 3 in (5 to 8 cm) of 3/8 in (10 mm) pea gravel poured after the slabs are set. Skip the base and the slabs tilt by the second season.
Key Takeaway: Below 60 sq ft (5.6 m²) float four 24 in (60 cm) slabs 3 to 4 in (8 to 10 cm) apart in pea gravel, on the same base and sand bed as a full field.
Base Depth by Soil and Use
 Save
The base decides whether the patio stays flat. On sandy ground, 4 in (10 cm) of compacted crushed stone is the pedestrian minimum. On ordinary loam, 6 in (15 cm) is the safe residential target. On clay, or anywhere the ground freezes, 6 to 8 in (15 to 20 cm), and on heavy clay that holds water, 8 to 12 in (20 to 30 cm). Add 2 in (5 cm) under a hot tub or a grill station. Over it goes 1 in (2.5 cm) of washed concrete sand, never stone dust.
Excavation depth is base plus 1 in (2.5 cm) of sand plus the paver, so a 6 in (15 cm) base under a 2 3/8 in (60 mm) paver means digging about 9 3/8 in (24 cm). And loose crushed stone compacts 20 to 25 percent, laid in lifts of no more than 4 in (10 cm).
Key Takeaway: 4 in (10 cm) of base on sand, 6 in (15 cm) on loam, 6 to 8 in (15 to 20 cm) on clay or in frost, plus 1 in (2.5 cm) of concrete sand.
The Edge Restraint That Keeps the Field From Spreading
 Save
Every paver on a patio is trying to move outward. Foot traffic and freeze-thaw push sideways, and on a small patio the push reaches the edge within a season. What stops it is a plastic or aluminum edging laid on the compacted base with spikes 8 to 10 in (20 to 25 cm) long driven every 8 to 12 in (20 to 30 cm), closer on a curve. Set it on the base, not the sand, and before the joint sand goes in. A concrete haunch works in warm regions, but in freeze-thaw ground it cracks where plastic would flex.
The visible border is not the restraint. The freshly laid patio in the photograph runs gray granite-effect slabs inside a running-bond band of terracotta brick that is held by a hidden edge on its outer face. Without that, a brick border drifts into the lawn.
Key Takeaway: Fit a plastic or aluminum edge on the compacted base with 8 to 10 in (20 to 25 cm) spikes every 8 to 12 in (20 to 30 cm); a brick border still needs one behind it.
Sand or Polymeric Sand in the Joints
 Save
The joint decision is a maintenance decision. Plain concrete sand swept into the joints costs the least, but it stays loose: rain washes it out and it wants topping up every year or two. Polymeric sand is graded sand with a dry binder that sets when wetted: swept in, compacted, swept clean, misted and left 24 to 48 dry hours. Once set it holds for several years. It needs a dry forecast, joints no wider than about 1 in (2.5 cm) for the standard formula or 2 to 4 in (5 to 10 cm) for a wide-joint one, and 30 days before any sealer.
The mistakes are all on the polymeric side: residue left on the face sets as a haze, so blow the surface clean before the first mist; over-watering floods the binder out. The dark pavers in the photograph show the finished state.
Key Takeaway: Plain sand for the lowest cost and a yearly top-up, or polymeric for a locked joint that needs 24 to 48 dry hours and joints under 1 in (2.5 cm).
Which Way to Run the Courses in a Long, Narrow Patio
 Save
A rectangular paver has a direction. Joint lines running away from you pull the eye down their length and make the patio read longer; joint lines running across the view make it read wider. In a long, narrow patio, the courses want to run with the length, which is what the photograph shows: small rectangular pavers in running bond down a path between deep perennial borders, two mesh lounge chairs mid-path. It reads as a garden walk because the pavers agree with the length.
If the same patio needs to feel wider, turn the pavers 90 degrees so their long sides run across the path. The cuts move with them: whichever way the courses run, the whole pavers start at the edge you see most and the cut pavers land at the far end or against the planting where leaves hide them. Decide before the first paver goes down; a running bond cannot be turned later.
Key Takeaway: Run the courses along the length to read longer, across it to read wider, and start the whole pavers at the edge you see most.
The Slope That Sends Water Away From the House
 Save
A patio that looks level is a patio that holds water. The working range is 1/8 to 1/4 in per ft (1 to 2 percent), and within 10 ft (3 m) of the house the building code fixes it at the top of that range: 1/4 in per ft (2 percent) falling away from the wall. On a patio 10 ft (3 m) deep that is a drop of 2 1/2 in (6.4 cm) from the house edge to the far edge.
The fall goes away from the house toward somewhere water can go: lawn, a gravel strip, a planted bed, never toward a fence with no outlet or across the patio toward a door. Set it with two string lines and a line level, the house string 2 1/2 in (6.4 cm) higher than the far string on a 10 ft (3 m) patio, and screed the sand to the strings.
Key Takeaway: Fall 1/4 in per ft (2 percent) away from the house, 2 1/2 in (6.4 cm) over 10 ft (3 m), toward ground that can take the water.
The Side Yard Strip and Its 5 ft (1.5 m) Minimum
 Save
The strip between the wall and the fence has one number: two chairs facing each other need 5 ft (1.5 m) of clear width, a 28 in (70 cm) chair plus 30 in (76 cm) to get past it. The side yard in the photograph is that width: square gray concrete pavers in a single row set in dark pea gravel along pale gray siding, two low wicker chairs facing across a side table. It works because the pavers are sized to the strip, one 24 in (60 cm) unit per row with gravel either side.
The wall rules the detail. Keep the paver surface below the bottom edge of the siding so water cannot wick into it, slope the gravel band away from the house at 1/4 in per ft (2 percent), and leave gravel, not a paver, against the foundation so the ground there can drain.
Key Takeaway: Give a side yard 5 ft (1.5 m) of clear width before calling it a patio, and run one 24 in (60 cm) paver per row with gravel either side.
The Laying Order, From String Line to Plate Compactor
 Save
A paver patio is built in a fixed order. Mark the outline with stakes and string, then excavate to the full depth, base plus 1 in (2.5 cm) of sand plus the paver. On clay, lay geotextile fabric over the subgrade first. Spread the crushed stone in lifts of 4 in (10 cm) or less and run the plate compactor over each before the next. Set the edge restraint on the compacted base. Lay two 1 in (2.5 cm) pipes on the base, pour concrete sand between them, screed it flat, lift the pipes and fill the grooves.
Lay the pavers from the house edge or a fixed corner outward, placing each straight down rather than sliding it. Leave every cut until the field is down, then cut and fit them all at once. Sweep in the joint sand, compact, sweep in more, and if it is polymeric, mist it and give it 24 to 48 dry hours.
Key Takeaway: String, dig, fabric on clay, base in 4 in (10 cm) lifts, edge, screeded sand, pavers from a fixed edge, cuts last, joint sand, compact, then furniture.
Where the Pavers Meet the Door: The Threshold Drop
 Save
The edge of a small patio that matters most is the one at the door. Set the finished paver surface 1 to 2 in (2.5 to 5 cm) below the door sill. Level with the sill, and a driving rain or a melting drift comes over the threshold; more than 7 3/4 in (20 cm) below, and you have a step taller than code allows, so past that drop you build a proper step or two, each no taller than 7 3/4 in (20 cm).
The courtyard in the photograph makes the door disappear. Seen through a floor-to-ceiling sliding glass door, a jute rug inside, limestone stepping stones outside, the two floors sit a short drop apart in the same warm neutral range and read as one room. Carrying the interior tone onto the pavers is one of the year’s named directions.
Key Takeaway: Set the pavers 1 to 2 in (2.5 to 5 cm) below the sill, build a step for any drop over 7 3/4 in (20 cm), and pick a paver tone that continues the interior floor.
The Cost Per Square Foot Ladder
 Save
Four materials, four rungs, and a small patio makes the top rungs affordable. Concrete pavers run about $2 to $6 per sq ft for material and $8 to $16 installed. Clay brick, fired rather than cast, runs $4 to $8 for material and $10 to $24 installed. Natural stone, bluestone to travertine, runs $7 to $16 for common cuts and up to $25 for premium ones, and $15 to $30 or more installed. Porcelain, the top rung, runs about $12 for material and $17 to $38 installed.
From the guides
You've saved it, wanted it. Here's the how: codes, measurements, order. Your choices make it yours.
The Japandi Honest PlaybookThe honest version of the style: what to keep, what to skip, and the order to do it in.See inside →The Room Refresh PlaybookA repeatable four-step method, room by room, in ten minutes, thirty minutes, or one weekend.See inside →Make Any Room Feel Cozy on PurposeWhy some rooms hold people and others empty out, and the moves that change it.See inside →On 100 sq ft (9.3 m²) those bands become budgets: roughly $800 to $1,600 for concrete installed, $1,000 to $2,400 for clay, $1,500 to $3,000 for stone, $1,700 to $3,800 for porcelain. At this size the gap between rungs is small enough to choose on material rather than money. The courtyard in the photograph, handmade terracotta tile, sits on the second rung.
Key Takeaway: Installed, concrete runs $8 to $16 per sq ft, clay brick $10 to $24, natural stone $15 to $30 or more and porcelain $17 to $38.
The Mistakes That Heave, and the Fix for Each
 Save
A paver patio heaves when water under it freezes, and four mistakes cause nearly all of it. The first is bedding the pavers on limestone screenings or stone dust instead of concrete sand: the dust holds water, the ice lens it forms lifts the pavers, and the fix is to relay on 1 in (2.5 cm) of washed concrete sand. The second is a base too shallow for the soil, 4 in (10 cm) on clay where 6 to 8 in (15 to 20 cm) was needed; the fix is the full depth. The third is no edge restraint, so the joints open; the fix is an edge spiked every 8 to 12 in (20 to 30 cm). The fourth is trapped water, no fall or a downspout emptying onto the patio; the fix is 1/4 in per ft (2 percent) away from the house.
The patio in the photograph is the fifth spring after all four were done right: flat, joints even, nothing rocking.
Key Takeaway: Heave comes from stone dust, a shallow base, a missing edge or trapped water; the fixes are concrete sand, full depth, spiked edging and fall.
How Many Pavers a 10 by 10 ft (3 by 3 m) Patio Needs
 Save
A 10 by 10 ft (3 by 3 m) patio is 100 sq ft (9.3 m²), and the count follows from the paver size. At 4 by 8 in (10 by 20 cm), four and a half per square foot, that is 450 pavers, or about 495 with 10 percent for cuts. At 6 by 9 in (15 by 23 cm), about 267, ordered as 295. At 12 by 12 in (30 by 30 cm), exactly 100, ordered as 110. At 16 by 16 in (40 by 40 cm), 57, ordered as 63. At 24 by 24 in (60 by 60 cm), 25, ordered as 28. For 45-degree herringbone, raise the allowance to 15 percent.
A 6 in (15 cm) base over 100 sq ft (9.3 m²) is 50 cu ft, so order about 2 1/2 cu yd (1.9 m³) loose to allow for compaction. The 1 in (2.5 cm) sand bed is about a third of a cubic yard (0.25 m³).
Key Takeaway: For 10 by 10 ft (3 by 3 m) order about 495 pavers at 4 by 8 in, 110 at 12 by 12 in, 63 at 16 by 16 in or 28 at 24 by 24 in.
The original ideas from this article continue below.
Transforming your small patio into a functional and inviting outdoor space starts with choosing the right pavers. You can enhance durability and aesthetics by selecting materials like concrete, brick, or natural stone. But it’s not just about the materials; how you design the layout is equally crucial. Imagine creating defined dining, lounging, and gardening zones that offer a sense of purpose and spaciousness. So, how do you make the most out of every inch without compromising on style or functionality? Let’s explore the possibilities and see how small changes can make a big impact.
- Use pavers to create distinct zones for dining, lounging, and gardening to maximize space.
- Choose durable concrete pavers in various shapes and colors to add visual interest and functionality.
- Incorporate built-in seating and storage benches to save space and enhance usability.
- Utilize vertical space with trellises, hanging planters, and wall-mounted shelves for added greenery and storage.
- Design a natural flow between patio sections to ensure a spacious and inviting layout.
Choosing the Right Pavers
 Save
When choosing the right pavers for your small patio, consider both the material and the design to maximize space and style. Opt for materials like concrete, brick, or natural stone, each offering unique benefits.
Concrete pavers are durable and come in various colors and shapes, while brick provides a classic look. Natural stone adds a touch of elegance but may be more expensive. Consider the texture: smoother surfaces are easier to clean, while rougher textures provide better grip.
Color is crucial too; lighter shades can make your patio appear larger. Ensure the pavers are proportionate to the patio size, avoiding overly large options that can overwhelm the space. Choose wisely to create a functional and attractive outdoor area.
Designing a Layout
 Save
Designing a layout for your small patio involves strategic planning to utilize every inch efficiently. Start by sketching a rough draft of your patio, noting key areas like seating, dining, and pathways. Use the table below to brainstorm and organize your ideas:
| Area | Purpose | Suggested Paver Style |
|---|---|---|
| Entrance | Welcoming Space | Textured, non-slip |
| Seating | Relaxation Zone | Smooth, comfortable |
| Dining | Eating Space | Easy to clean |
| Pathways | Movement | Durable, distinct pattern |
| Perimeter | Border Definition | Contrasting color |
Consider how each section interacts and ensure there’s a natural flow. Play with different paver styles to add visual interest and functionality. Your small patio can feel spacious and inviting with a well-thought-out layout.
Creating Defined Zones
 Save
Creating defined zones in your small patio will help maximize functionality and aesthetic appeal. Start by identifying the key activities you’d like to accommodate, such as dining, lounging, or gardening.
Use pavers to create distinct areas for each purpose. For example, arrange pavers in a herringbone pattern for a dining area and a simpler grid for a lounging space. This visual separation makes each zone feel intentional and spacious. Adding a border or different colored pavers can further define these areas.
Consider adding outdoor rugs or planters to enhance the boundaries and add a touch of style. Thoughtfully designing these zones will make your small patio more versatile and inviting, ensuring every inch is used effectively.
Utilizing Vertical Space
 Save
Make the most of your small patio by incorporating vertical elements like trellises, hanging planters, and wall-mounted shelves. These features draw the eye upward, creating the illusion of more space.
Trellises can support climbing plants, adding greenery without taking up floor space. Hanging planters allow you to grow flowers or herbs at eye level, making them easy to care for and enjoy. Wall-mounted shelves provide extra storage for garden tools, decorative items, or even small potted plants.
Adding Functional Features
 Save
Incorporating functional features like built-in seating, storage benches, and multi-purpose furniture can significantly enhance the usability of your small patio. By optimizing every inch, you create a versatile and comfortable outdoor space. Built-in seating offers a streamlined look, saving space while providing ample seating. Storage benches serve dual purposes, allowing you to sit and store items like cushions or gardening tools. Multi-purpose furniture, such as tables that convert into benches, maximizes functionality without overcrowding your patio.
Here’s a quick breakdown to help you visualize these ideas:
| Feature | Benefits |
|---|---|
| Built-in Seating | Space-saving, ample seating |
| Storage Benches | Seating and storage combo |
| Multi-purpose Furniture | Versatility, space efficiency |
Implementing these features ensures your patio is both functional and stylish.
Incorporating Greenery
 Save
Your patio will come alive with the addition of lush plants and vibrant flowers. Start by placing potted plants of varying heights around the perimeter to create a cozy, enclosed feel.
Hanging baskets and vertical gardens add greenery without taking up valuable floor space. Don’t forget about herbs; they’re both decorative and functional. Use small, decorative pots on tables or shelves to add a pop of color and fragrance.
Additionally, consider adding a small tree or shrub in a corner to add height and depth. Choose plants that thrive in your local climate to ensure they stay healthy and vibrant.
Your patio can become a lush, inviting retreat with thoughtful plant placement.
Maintaining Your Patio
 Save
Keeping your patio in top shape requires regular maintenance to ensure it remains a beautiful and functional space. You can enjoy a pristine patio year-round by dedicating a bit of time and effort.
Here are three essential maintenance tips:
- Clean Regularly: Sweep away debris and wash the surface with mild soap and water to prevent stains and avoid buildup.
- Weed Control: Pull out weeds between pavers and apply a weed barrier or sealant to prevent new growth, keeping your patio looking neat.
- Inspect and Repair: Check for any loose or damaged pavers and fix them promptly to avoid further issues and potential hazards.
Consistent care will keep your patio inviting and enjoyable for years to come.
 Save
 Save
 Save
 Save
 Save
 Save
 Save
 Save
 Save
 Save
 Save
 Save
 Save
 Save
 Save
 Save
 Save
 Save
 Save
 Save
 Save
 Save
 Save
 Save
 Save
 Save
 Save
 Save
 Save
 Save
 Save
 Save
Follow Quiet Minimal on Pinterest for more home design tips and inspiration.
From the guides
You've saved it, wanted it. Here's the how: codes, measurements, order. Your choices make it yours.
The Japandi Honest PlaybookThe honest version of the style: what to keep, what to skip, and the order to do it in.See inside →The Room Refresh PlaybookA repeatable four-step method, room by room, in ten minutes, thirty minutes, or one weekend.See inside →Make Any Room Feel Cozy on PurposeWhy some rooms hold people and others empty out, and the moves that change it.See inside → Save


